Ongoing issues with LMTD

for all you guys doing mods- has anyone added wired in front/rear lights? that is my only complaint about this bike

i do run bigger better and several lights on everything but like having a wired in set just to add another light for visibility

think it is weird ride1up does not have this since most bikes do now
 
Bike looks great, proof you can kit it out nicely without adding too much extra weight.
Things have changed. Front is now bare, no rack or fender and the new fork has arrived !
I'm thinking an LBS to cut and install, save me buying more tools.
How is your bike running?
 
for all you guys doing mods- has anyone added wired in front/rear lights? that is my only complaint about this bike

i do run bigger better and several lights on everything but like having a wired in set just to add another light for visibility

think it is weird ride1up does not have this since most bikes do now
lighting harness.jpeg
These kits Aliexpress e-bike light cables make it pretty easy. I think they splice in at the power junction and the other plugs into out unused LC port.
Plug in the (white) low current 'switch' port and adapter to splice into the HC power line
Those come with your lights, unless you go high dollar iLights - and like 'options' (like a plug installed) 'upgrades'.
Your display cable has four small #26 wires. These power cables (for front lighting) are larger than the display set's.
I know my controller has an (white) LC port - vacant - which will also work great to charge a phone being used as a GPS and I have all the parts for that project. Just a little chip with USB port.
Pull your controller and look see if you have a spare LC. It should be white.
If you also have a green LC connector (I do and it's unused), you have brakes and turn-signals.
Verify the pins match, and keep in mind these JST connector plugs are the most common failure points, that room in the battery compartment is scant and force is the enemy.
48v lights that wire in appropriately & plug-and-play, so that's no chore.
Run your lines down through the frame, and plug in firmly,
Test, and having verified it works correctly - I hot glue the back part of all such connectors - and reassemble.
Not a difficult project.
I remember🤔 reading members postings who were unhappy there was no power takeoff, for lighting, asking 'how do I do this'
Only recently did I see these kits for under $5 bucks, used by manufacturers, that might not be commonly known, by us laymen.

Fn'F
 
Last edited:
Thank you for this info, will look into this when I have some time

Even a display that had a usb works pretty good- at least for my magnum the new kt controller setup has a usb that keeps charging the light while it is on, you do have to get a light that will run while charging
 
So, a RockShox Judy Gold? I know just enough to be dangerous; do you need the bike shop to cut down the steerer tube or are other mods necessary to fit your LMT’D?

My bike is working great but I'm back to the 0-3 PAS, no problem I just got tired of pushing the damned buttons all the time on 0-7. Anyway I tend to ride either 13 or 31 mph, probably depending on how much coffee I drank that morning.

Today I added a stem riser to my bike, going for a little more upright position. I think I like the extra height but it sure is ugly. The stock setup worked fine for me, so I hope I haven’t opened a can o’ worms. I’ve heard of back and butt aches caused by changes to ones’ riding posture. For $15 I guess I can afford to experiment.
 

Attachments

  • riser.jpg
    riser.jpg
    185.2 KB · Views: 166
So, a RockShox Judy Gold? I know just enough to be dangerous; do you need the bike shop to cut down the steerer tube or are other mods necessary to fit your LMT’D?

My bike is working great but I'm back to the 0-3 PAS, no problem I just got tired of pushing the damned buttons all the time on 0-7. Anyway I tend to ride either 13 or 31 mph, probably depending on how much coffee I drank that morning.

Today I added a stem riser to my bike, going for a little more upright position. I think I like the extra height but it sure is ugly. The stock setup worked fine for me, so I hope I haven’t opened a can o’ worms. I’ve heard of back and butt aches caused by changes to ones’ riding posture. For $15 I guess I can afford to experiment.
Yes, the Judy.
I don't need them to cut, but the tools would cost a bit and installing a new crown race could be a small problem.
I'd have buy a hole-saw and drill a 1-1/4" hole in a 2/4 - then beat it on pretty easy though.
I too use PAS 3.
The stock bars killed my neck and trap muscles. The Jones bars healed them
There are $40.00 imitations, but Jones Sg Loop H-Bar .5" Rise 31.8 710mm Black are $85.00 at my LBS.
It sounds like you have a winner. People are paying $6-7000.00 for Bosch powered machines with an 80nm mid drive.
Mid-drive has real drawbacks, like eating the drivetrain fairly regular/ Chain goes, your stuck and your bike is faster. lol
Is there another 53lb, 100nm bike under $2,000.00 ?
 
Okay, I pulled the trigger and this fork is just beautiful
It has compression and rebound speed adjustments.
The Crown is far smaller than stock, but honeycombed.
There are 'plugs' between the 'comb', I've seen other RockShox forks using as 'stock fender points' for RS's short fenders - but they are undrilled/ untapped.
Adjusters feel solid and firm
Pressure by weight data is clearly listed on the fork, as are the forks spec and serial number on the crown.
Even the upper tubes are fast black. The finish on the rest is really nice.
20220716_181657[1].jpg
20220716_181706[1].jpg
20220716_183032[1].jpg


So today I brought it out (and took those crappy pictures) to check how much has to be lopped off.
I can't believe it. I need some conformation here. That's the same as my stock fork?
No cut needed?
Hmmmmmm? Drop off at LBS to press Race and Star Nut in place. Pick-up next day?
Maybe I will install it myself.

So far so good.

Fn'F
 
Hey, the party never ends! Congrats on buying a great bike. Can't wait for some photos.
A preamble introduction:
I ditched my car and (and after searching long and hard) bought an Ltd for long term (utility) use; overall performance/ price; a machine worth upgrading with quality parts and reliability. A tall order. From the start I said and intended 'no quarter'. I can't be Mary Poppins.
Having had friends buy various 'kits', I was unimpressed - as they were, and they were and tried to sell them - me thinking: "I warned you a front-wheel-drive motorcycle (even electric) was a terrible idea at any speed".
I just spent an hour leisurely pecking this out and changing my front pads. Tektro E10.11 (Green).
Price has gone up, but now $34 for 8 sets here https://www.aliexpress.com/item/1005003445911596.html?
I noticed a screeching noise. Stock pads had meat left, but my experience says that's the alert that "it's time".
I love - and listen to - such features. Same with 'clicking spokes' when your tires are low. "Pump it up, until you can feel it (38lbs) ... even if you think you don't really need it". Thanks Joe Jackson.
We never expected R1U to load up on $600.00+ forks or $100.00+ bars. The basic goodies they use give us the starting point for this high-performance machine and hold up just fine. Closing on 5000 (vigorous) miles, I can tell you what fails on an Ltd - not a 500 or a 700.
-
Regarding (P2) magnets.
MXUS DDC40 has 23 magnets.
The -- XF15C has 10.
The -- XF19C (your motor) has 10
-
The display setting allow for 32, 24, 12, then 9, 8 etc. There is no '10'.
-
I admit to some confusion. Aren't spoke magnets for cadence only/ or speed sensors?
Understanding https://magnetic-sense.com/en/torquesensor/ principle - a bit - I've never ridden cadence, but the MXUS factory (paraphrasing a bit) says, our XF19 series motors have one sensor that can be used for either heat or pulse (torque/ cadence) input signals.
-

The debate re: 'how various motors are sensing overheating and reacting', mixed up with Bafang systems, clouded by information (relative only to specific motors) led me to query for our motor. There's our Gospel.
-
A bit humbled, I was the official 'show me' 🐴 crash dummy.
Couldn't help myself. I'm nosey and asked at the source: MXUS said the XF19 (750 x 1000w version) motor "is not and will not be made for sale" in 'Cassette' configuration. When I asked "why?" (the XF19"C" - our motor - is the 'Cassette' version), I ran into a 'bad attitude' (but it was none of my damn 'business'. that's why).
I just had to have an answer.
You didn't see the old R1U sites info on your motor? lol lol lol. Use Time Machine and look.
It's all true !
-
Ride1Up stepped up, openly gave permission to MXUS to disclose the (proprietary information) verifying this motor is a special and distinct product.
We're lucky to have it. It's the 750w x 1000w XF19, available to you and I - but a "C", cassette version in 1000watts.
-
The 500w (nominal) XF19 motors have 68nm. The 750watt (nominal) has 100nm.
-
With R1U's detailed instructions and photos, I completely disassembled and reassembled my bottom end. A real education.
TS tech is/ was ahead of it's time.
I'll go on a limb with an educated opinion: For the most part 'TS failures' are/ were shops/ bike mechanics and owner ignorance re: correct dis/ and re-assembly procedures, by good intended but illogically thinking folks. Owner malfunction, I call it (but YES shops too).
TS's don't intermittently fail with your display acting weird. That's crushed wiring. LOL
Short version: Symptoms like intermittent power cut-outs; complete failure of torque sensing and or throttle inputs were being attributed to the mysterious TS, so people, often quite knowledgeable in the usual bottom bracket inserts and maintenance took them apart - immediately wrecking them.
Failure being the exception not the rule, multiple bad TS units in a row is incredibly doubtful 🤔.
The hole (where the wire goes from the controller to the TS) into the bottom bracket has sharp edges. Even turning the TS 5 degrees completely shears the wires like a cigar-cutter.
After three failed replacements in a row being aired, an astute member I follow pointed out "it sounds like the shop".
The assumption 'maybe it's the torque sensor, lets check it out' often proving "Yup, that was it. The wires are snipped", I imagine machines on warranty cost R1U a fortune to fix. So they did the smart thing and discontinued the TS.
-
0 - 5 was a bunch I never used; pressing a button more times when I started.
0 - 3 proved best; click. click, click, I'm on level 2 so I stayed.
I tried tried both 20 and 22amps setting. Seems to make no difference. Display shows nearly 1000watts w/ both.
-
An all out 18 miler over 300' elevations, through canyons; up, then back down to SL; then up to the mesa, I did manage to get some thermal cut-out, but the bike came right back, never letting me down.
I assume the hub overheated; sensor software told controller; controller did it's thing, cut back; casing cooled and back to full bore.
So adding a higher wattage controller, the motor's cut-out would do it's job and back off, overheating quickly at 1000watts.
Can't speak for others, but my controller was only fully 'burned in' well after 2000miles. But then I also changed out some damaged wiring around then - the bikes real weak spot.

A shortcut to some stuff you might like.

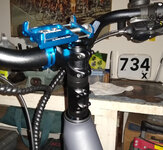
Not so long back I added Jones H bars https://jonesbikes.com/jones-h-bar-butted-loop-aluminum/

Enough straight line space in grip section to accommodate my (R side) twist-grip throttle, shifter and brake lever at good angles -- and by moving the shifter inboard just that additional little bit more than the stock bars allowed, my thumb knuckle no longer bumps into the shifter levers when turning the twist grip throttle.
View attachment 122118
Also, wiring loom is improved with the display; quick release for detachable basket and lights out front - proper - out of the way.
I prefer display close to center. You want a cleaner loom, move right, close to shifter and run both lines together as one.

View attachment 122120

I bought the bars to test for another (size small framed) machine on order and didn't mind the butted type were then only available in silver - as is that bike.
Level with the saddle is 'correct' (for a touring bike) but they feel so perfect up higher on this bike. More upright, less hunched over. Eased my neck/ hand/ wrist pains - but that could be the general geometry not the rise. Control of the bike was enhanced a lot after adjusting the angle.
The flat rise in the less expensive ($90.00) Jones SG Loop H-Bar (the same design, but uses straight-gauge aluminum tubing in place of the custom-butted tubing may be even better.
Jones is such a maniacal purist, he's missing his real market. These are the perfect e-bike bars.
-
5K and my schedule say's it's time to replace the fork.
Doing my own maintenance so far, I can learn the craft, invest the money in quality parts and be sure it's right.
The Ltd has been a great performance platform with a lot of potential.
The initial price got me on the road and the utility is awesome.

View attachment 122304

Thanks for info, best regards and hope the bike suits you as well !

Fn'F
Back online today looking for solutions. Last Thursday my LMTD (with cadence sensor) shuddered to a stop and flashed an Error #24 “Fault with hall motor sensor inside”. Motor was not warm to touch. The throttle will spin the wheel for a couple seconds before it shuts off and the Error24 message comes up again. No signs of crushed or abraded wiring. Rotating the wheel backwards displays the error message on and off, which seems to back up the error message (as opposed to it being due to a short circuit).

I’m in touch with R1U Customer Service, currently waiting for them to evaluate about a dozen photos they requested. I got the bike in February so warranty should be good. My LBS says bad hall sensors require full motor replacement. GRIN video on YouTube shows how to R&R hall sensors so I'm waiting to see what R1U suggests.

In the meantime I’m riding my old ebike which my daughter has outfitted with a big plastic basket that I hate. If anyone out there has had hall sensors fail on their R1U bike, I’d be interested to know how the problem was resolved.
 
Last edited:
Hey,
Bummer. Check the motor cable plug. Inspect pins are not damaged or loose, reassemble and try it again.
If it's where the wires enter the lower frame, the cable wrap disguises it well. Move your fork crown and see if it is abrading. Then remove wrap and see if the wires are crushed at that point.
To test the sensors, apply +5 - 30V (using power supply or battery) between the red wire "+" hall sensor wire and the black "-" hall sensor wire and check the voltage between each of the hall signal wires (white wires) to the red wire (with multimeter).
Rotate the wheels by hand the voltage should change between +5V to 0V, unless the HS failed.
Your LBS should know this.
Hope it works out quickly.

Fn'F
Thanks for the encouragement. I’ve been pretty thorough inspecting wiring, nothing found so far. My cable wrap stops where the wires enter the frame, and although some wires are touching the frame, I can’t find any nicks or signs of physical wear or crushing. The fact that the error message goes on and off when the wheel is rotated, seems to indicate one of the hall sensors is no longer working but I will check with my multimeter to verify. Not having my bike is proving more stressful than I would have expected. Even at only 57 lbs, it’s not a lot of fun to pedal without power!
 
Pedaling it uphill without PAS is like pushing a fat pig through molasses. It's the gearing, of course. Ebikes lack the second, larger crank gear that a non-e bike can shift to.
 
Your logic seems correct to me. Another common fail point for hub motors is where the wires enter the axle.
R1U will handle it. Good people. Although I've never had a warranty claim, I found R1U staff to be knowledgeable, honest and transparent.
That's dealing with my off warranty problems, right where most companies dump you.
You know, we can't even buy that motor? The "C" after XF19 tells the story. It's special made for R1U with the 8sp cassette.
MXUS refused to even sell me one. lol. Denied it existed, but that's not what they meant. They meant 'not existing for sale'.
I asked some questions about the 'non-existent motor' issue; R1U gave them permission and MXUS published the paperwork showing the XF19C motor is only made for R1U.
To this day there are no MXUS XF19C's available, only the XF19R of late.
A had an accident (not bike related) and have been off for several weeks now. Back riding in a couple weeks. Driving me bananas.
Bike idle, I jumped into upgrade mode. A lot of sweet stuff, but won't be completely ready until October.

Keep us abreast.

Fn'F
R1U is sending me a new controller. I have my doubts but they have my photos and description of how the failure went down, so what me worry? Certainly a lot easier to R&R the controller than the motor so I will assume they know what's best.
 
R1U is sending me a new controller. I have my doubts but they have my photos and description of how the failure went down, so what me worry? Certainly a lot easier to R&R the controller than the motor so I will assume they know what's best.
The Controller is where past problems have arisen. That could be. I read the Hall Sensors are pressed in (not glued) and somewhat difficult to even remove.
Motor failure's usually the wires.
Either way you'll get a fresh controller. lol.
Read the section on these forums about removal and which small screws go where.
I've had mine out. Reassembly is a bit difficult. Bottom screw first.
Ebike LBS should have no problem.
Fn'F
I have the ST frame; controller is in the bottom under the battery. Coincidentally, the bottom (back) screw on the lower assy. is also a little finicky and has to be attached before the other 2 screws.
R1U agrees I can do the work myself, a good deal since the soonest appt. w/ my LBS mechanic is Oct 25th.
More to follow.
 
R1U is sending me a new controller. I have my doubts but they have my photos and description of how the failure went down, so what me worry? Certainly a lot easier to R&R the controller than the motor so I will assume they know what's best.

I have the ST frame; controller is in the bottom under the battery. Coincidentally, the bottom (back) screw on the lower assy. is also a little finicky and has to be attached before the other 2 screws.
R1U agrees I can do the work myself, a good deal since the soonest appt. w/ my LBS mechanic is Oct 25th.
More to follow.
You the Man !!!
It's inspirational information that needs to be posted.
Do take some photos that other owners of ST Frames will find instructive !!!
Good stuff.
 
Hey. I got a shot of my new machines bar layout.
Striking resemblance to what I've done on my Lm'td. Here's some quick shots of my Ride1Up Lm'td unleashing 'ongoing solutions'

Domino_ArcherDx1_Magura.JPG
20220929_160119[1].jpg
20220929_160144[1].jpg

The new Bike on the way Current Lm'td (r) cockpit I upgraded the front brakes and rotors a bit

20220929_205619[1].jpg
20220929_214750[1].jpg

I've had my eye on these stems for a while, so that too. Jones H Bars required 35mm longer stem (stock is 45mm).
My grip is now aligned with the steering axis.
Chinese titanium stem was reasonable.
This one, an 80mm with a '+ or -6' degree angle that I'm using facing down (-).
After a thorough inspection and installation, I'm impressed. A little tight on the fork - loosen all bolts completely, use lube - but even the bolts are ti. Worth waiting a month for.
Finishing up electronic shifting over the weekend/ next week.
Domino throttle works great.
Magura MT5e brakes are awesome, now lines need trimming - then bleeding.
 
Mr. Fast n’ Furious,
I have to laugh, you have cost me a lot of money... Our 2 LMTd’s are still not fully assembled as I keep ordering more parts for them. Nuts, washers, racks, brake pads, bars, pedals, etc. And now a Judy Gold RL fork is on its way. Having some fun tricking them out. I will post pics once it all comes together. A pic of some of the adds...

DAE1C4AC-0080-491F-B89A-5D73784042C0.jpeg
 
Last edited:
Mr. Fast n’ Furious,
I have to laugh, you have cost me a lot of money... Our 2 LMTd’s are still not fully assembled as I keep ordering more parts for them. Nuts, washers, racks, brake pads, bars, pedals, etc. And now a Judy Gold RL fork is on its way. Having some fun tricking them out. I will post pics once it all comes together. A pic of some of the adds...

View attachment 138856
Oh Yes !!! Very nice. Starting at the head of the class.
I found a 15mm longer handlebar clamp kept up with the Judy Gold's additional offset sensitivity - using the Moloko bars.
If you feel jumpy or over-steering that's the problem.
Stock is 45mm. I'm using a 60mm Salsa (+) or (-) 6 degree clamp and an 80mm (+) or (-) 3 degree with the Jones H Bars.
Get your grip a tad forward on the fork's exit axis of the bars. Simply tie a string mid-grips or use a rule.
Axis behind the bars increases reactivity and reduces control - esp with the Judy's offset.
That fender looks well made and insane how much weight you'll shed with lighter pedals. Which are those?
One of those cheap 'bike disc brake gapper gauges', 6 bucks - get the rounded end type on Amazon. Make gapping perfect and easy.
A good rule of thumb is ti fasteners should be put in place and removed <1/2 as many times as steel during service life.
Pay close attention to the order of removal - pics w/ phone - to reinstall using Nord's.
The newer style torque arm/ plate works great.
My bike came with the bottom bracket lock-ring un-torqued and it worked loose. My fault as the LBS assembling I guess.
The RockShox Fender's fit well on the JG Fork. Can't believe the prices I'm seeing. I paid 8 bucks.
Good idea to trick one bike out and see if you might want number two different. Sure looks to me you've taken the lead. For sure, that frame's worth putting higher quality parts on. Even the Tektros only need better pads. They wear out a disc, that's easy to replace. Not yet for me though and stopping power doubled and noise went to zero.
I suggest you buy a full or half twist throttle. A huge safety margin when starting out, entering traffic.
Regardless what gear you stopped in, you can shift once and only 'once you are moving'. With a proper throttle, you can ride in erratic traffic without going through the gears and pick up pedaling as traffic speeds up.
You want a throttle with a JST fitting and even if you have to remove and change the prongs, that's easy, but most come with them uninstalled from the plastic housing. Nothing to the installation and plenty of room on the Molokos.
The plug wires pull out of (and stuff back in) your lower frame port.
I've installed the best, a $130 throttle. No real difference from my $20 Wuxing for this application.
If you go for it and want any info, PM me, I'll give the rundown. You have a multimeter, so much the better.
I appreciate that EuroYank brought up the facts. This is a 'sprinter', a City bike that will pull to 22amps and hold 20amps on level ground for a mile or two. Long haul you slow up to <15amps - a lot of watts in your pedal power.
-
Upon receipt and assembly, charge overnight, then always at >44v, but<46v thereafter. If you won't use for a few days, <80% charge will add to lifespan.
Program your Display to show you Volts, not battery %'s.
NEVER let the machine sit with a battery below 44.1v. Immediately charge or you have a one in a thousand chance you battery will not take a charge later. You want a full explanation, I can provide? Short version is BMS can't detect a cell below a certain voltage. One-in-a-thousand cell is a tiny bit defective, say '1/100th less voltage', and will draw down on the other cells to maintain equilibrium, until they're below the BMS threshold. Each energy transaction costs power for the BMS to equal the cell's. So even just sitting, the endless loop would continue until your entire battery died, but (ingeniously) before that can happen, the BMS excludes any cell of lower voltage than (typically) 43v = Broken circuit. Battery will not charge or one dead bank will quickly drag the battery down.
Thank you for encouraging me. That I can pass my efforts on makes up for all the mistakes I've made getting there. LOL. Well that and proving 'you can teach an old dog new tricks' - if that's what he wants to do, of course.
Oh, and you can call me Paul, after all ...
... I am the original Fast and Furious.
Can't wait to see your machines !!!
Onward !!!

Fn'F
 
Last edited:
Back