I finally took my ebike for a test ride.

Ho Lee Crap 💩 !!!.

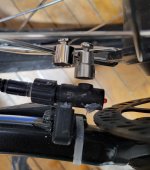
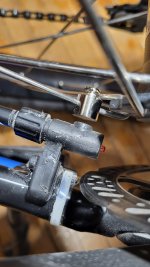
I got into the Vado and came up with this 6 magnet Speed Sensor.
6 magnets stuck to the brake rotor,..
(The rotor alloy has some iron in it, so the magnets stick.)

I used my glue gun to tack the sensor to the underside of the frame at the dropout.


20260808_092325.jpg


It worked !! But,..
It only worked at slow speed and didn't work at 32 kph.

At slow speed, the speedometer was reading correctly, but at 32 kph it was reading half the speed and kept trying to go faster ??
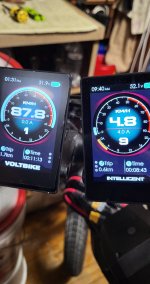
(Luckily I could use my Voltbike speedometer to verify the speed)


Weird??

So I turned my Maximum speed down to 28, and it worked properly, but it went to a half speed reading starting at 29 kph ??

The sensor light was pulsing showing that it was working, but it was too hard to see the flashes, when it was spun up to 42 kph.

The hard part was getting the magnets evenly spaced, because the rotor has six bolts, but has eight rotor arms (or whatever they're called?)


I had a few more mm of room to move the magnets further outbound on the rotor before they hit the brake caliper mount, so I put a magnet on every second rotor arm to give me 4 evenly spaced magnets.
(I only had 6 magnets, so I couldn't try 8)


20260808_110945.jpg


It Worked !!!
But, that's only one magnet more than the 3 that I had intended to put on my spokes.

And I'd have to extend my sensor wires again to get the sensor down under to the axle dropout.


So,..
I reconnected the speed sensor to its original position with the single spoke 🧲 & ordered a bunch of 4 X 2mm and 5 X 3mm round magnets that I should be able to 🤪 glue to the rotor arms, to get my magnet count up to 8 with plenty of spacing.


Screenshot_20260808_145903_AliExpress.jpg


My rotor arms are ~4.5mm wide at their narrowest,..


20260808_144241.jpg


So,..
I can put a single 4X2 magnet on the rotor facing the sensor, and one or maybe two 5X3 magnets on the backside of the rotor to strengthen the magnetic field.

(I've got a Mile of space on the backside of the rotor because of all that Fatbike spacing crap.)


Screenshot_20260808_164303_Gallery.jpg


Three stacked magnets should give a stronger, shorter pulse to keep my controller happy and not have it Flip Out and conjoin half the 🧲's
(or so my Vado enhanced thinking tells me. 🤔)


I figure that the six magnets were too wide, and too close together, so the controller got confused and started to count in pairs?

.
 
My speedometers are working good enough for me.

I verified my speed on straight flat level ground with no sky obstructions at a steady speed of 32 kph, and my GPS app agreed with the speedometer reading from my Voltbike.


This is with four magnets on the rotor.
It was still kinda bouncy, but it wasn't under load,..


.
 

Attachments

  • 20260808_115339.jpg
    20260808_115339.jpg
    207.1 KB · Views: 15
Here's a homework assignment if you haven't seen this yet...


I didn't do no homework, but I played with the settings.

It turns out that 100% speed is 100% of the 32 kph that I chose as my maximum speed, and the speed control was always hovering around 25-26 kph??

I've got my power turned down to 18 amps from 25.
That happens to be ¾ and it appears that that translates into ¾ speed as well ??

So I needed to set my maximum speed to 40 kph so that 80% speed would be 32 kph to keep my controller happy.


I dunno.??
It's the only way that I could get my set speed limit to stay at 32 kph?


Screenshot_20260808_080913_Speeed.jpg


Screenshot_20260808_081036_Speeed.jpg


Screenshot_20260808_081723_Speeed.jpg


It's a good thing that I had the Voltbike speedometer to use as reference.


.
 

Attachments

  • Screenshot_20260808_075526_Speeed.jpg
    Screenshot_20260808_075526_Speeed.jpg
    150 KB · Views: 10
Last edited:
,.. I think my final Stop Decay was 130
I'd give them a try


I was confused about that setting and wanted to turn it to 0 incase my motor fires up by accident again.

I figured that since I don't pedal the Pedal settings don't apply to me.

However,.. the stop decay may also apply to the way the motor maintains a steady set speed (32 kph for me) in the same way it turns the power on and off when someone starts or stops pedaling?

So I guess I'll start messing with those numbers and see if they make any difference?


Post a pic of the Pedal Settings page


These are the standard Pedal Settings,..


Screenshot_20260809_110349_Speeed.jpg


And these are the Pedal Settings that I came up with to neuter my pedal assist as best as could think of. 😁


Screenshot_20260809_110619_Speeed.jpg


It looks like I got all kinds of wrong going on if any of those settings apply to me and my "cruise control" set at 32 kph.
 
Last edited:
I've found that the easiest way to disable pedal assist is to not pedal 🙃

But setting the Start Degree to 20 as you have it is really all you need to do as that's almost a full pedal revolution.
I'd leave the rest as I suggested as they don't disable anything and it just make things more erratic
 
Last edited:
I've found that the easiest way to disable pedal assist is to not pedal 🙃

🤣

But setting the Start Degree to 20 as you have it is really all you need to do as that's almost a full pedal revolution.

Actually, I set it to DH-Sensor-12 so I should get 1⅔ pedal revolutions?


I'd leave the rest as I suggested as they don't disable anything and it just make things more erratic


OK, I'll put it back to the standard setup.

I'm gunna test ride it the way it is and see what it's like.
I've got the power ramping up the same way as the original setup now, with the Max speed set to 32 kph for all power settings.
I wanna see how the throttle responds to being turned down in different PAS settings.


I'm gunna wait for my Y-Connector to arrive so that I can change the settings while riding.
That should make it easier to feel any difference.
 
Just shut off the display.
Don't think anything bad would happen... But while I'm connected to the Y cable, I always leave the display OFF just in case.
 
Just shut off the display.

I would have thought that unplugging my display would kill my ebike, but it didn't.

I had the display disconnected with the programming cable plugged in without my smartphone connected, and the motor fired up when I spun the crank.

I didn't expect that, but I just need to keep that in mind, just like I have to remember Not To try and go into first gear with my 52 tooth chainring.


Don't think anything bad would happen... But while I'm connected to the Y cable, I always leave the display OFF just in case.

I'll keep that in mind.

I could even use my old phone plugged in to the cable and sorta kinda use it as a display on the handlebars, or a long usb cable and the phone in my pocket?


I do kinda like the display that's part of the Speeed App,..


.
 

Attachments

  • Screenshot_20260809_200208_Speeed.jpg
    Screenshot_20260809_200208_Speeed.jpg
    65.8 KB · Views: 6
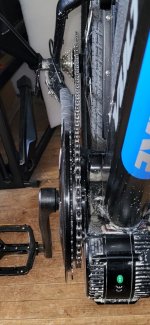
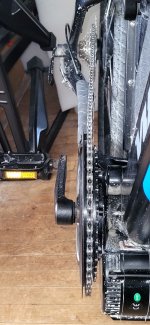
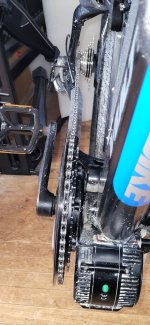
My longer crank bolts, washers, and lock washers arrived, so I got my 42t chainring installed,..

20260809_144715.jpg


I didn't like how I had to remove the crank arm, and the chain guard to check my crank bolts, so I drilled holes through the guard so I can check them easily,..


20260809_144825.jpg


It looks good and It's working fine.
I can even use top gear (7th gear on my freewheel) without the derailleur losing aĺl it's tension.


So,.. all my gears are working except 1st gear on my 52t chainring,..

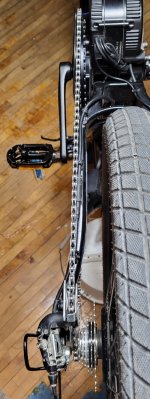
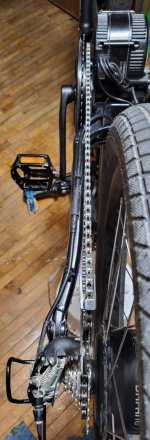
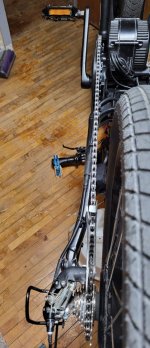
These pictures sorta show my chain line, but my derailleur might be all bent outta shape? 😁


I'll see if I can get some topside pictures showing the chain line more accurately.
 

Attachments

  • 20260809_150644.jpg
    20260809_150644.jpg
    154.2 KB · Views: 8
  • 20260809_150603.jpg
    20260809_150603.jpg
    202.2 KB · Views: 9
  • 20260809_150831.jpg
    20260809_150831.jpg
    274.2 KB · Views: 9
From those pictures, it looks fine to me, but the best way to check rear derailleur and hanger alignment is with the bike upright, with the rear derailleur in the center cog. Look at the derailleur and cassette from behind. These long cage rear derailleurs can have a bit of play in them. Don't be too concerned about the bottom pulley. It's mostly there to take up slack. The top pulley does all the shifting work. If the derailleur hanger is bent, and the top pulley is cocked vertically or twisted side to side, shifting will suffer.

If it looks good in the center cog, check again in the top and bottom cogs.
 
Back