EddieJ
Well-Known Member
I have long had a passion for hardtail mtb’s be them analogue or pedal assist, and have found the eMTB version through ownership of the superb KTM Macina Race, to make the perfect bike for wet weather/winter use.
I decided a long time ago that whatever the next bike was going to be, that it needed to be 27.5” Plus size, and just as the Macina Race, it also needed to have a good component specification. I was also keen to stay with both the KTM marque and Bosch drive unit system.
As things stand the KTM Fogo 271 exceeds my requirements by a significant margin, so I am more than happy with my choice.
The Magura Boltron T-20x110 front forks is an interesting one for me, as I have read so many reports both good and bad, which made me keen to own a bike that had them fitted, just so that I could come to my own conclusion about them. I have also previously been asked privately about the forks and what I knew about them, so at least I finally get to discover for myself, and can offer opinion accordingly, and not just based from hearsay. I shall post more about the front forks as time passes, but from handling them off the bike, and checking them over thoroughly, it is a promising start. Clearly performance in use and durability are key, so time will tell, but from research that I have completed, I have already worked out that poor set up from end users, plays a major role in reported seal failure.
My preferred choice of front mudguard has long been the Rapid Racer Neoguard, (thanks guys) but after discussion, there are currently no plans to introduce a guard for USD front forks. There is no way that I could bring myself to install a guard that utilizes the steerer tube, and with that in mind I already have my own neoprene design waiting to fit to the bike.
The full bike/component specifications are detailed below, but as things stand, there is very little that I intend to change. I shall be replacing Intuvia with Purion, fit a Ragley Tracker saddle, Ritchey Foam grips, a 70mm Easton stem, and change what I believe to be a KS LEV Integra dropper post, in favour of a Rockshox Reverb Stealth. These four listed items are just personal preference and nothing more. The dropper post is simply being changed as I have one that I removed from the Macina Race, so the rebadged KS can be squirreled away.
I have chosen 27.5” Plus for a very specific reason, but just as with the front forks, I shall detail how things work out, as time passes. Briefly though, as many will be aware, I ride throughout the year and in all conditions. I treat my bikes very much as tool to do a job, and to date KTM bikes have filled this role very well, but with slight limitation. I now want to go one stage further and 27.5” plus is going to enable this. The plus size will fulfill the role of providing superb low-pressure grip in respect of riding wooded knarly terrain and also over rocks etc, then come the winter months, I intend to drop the tyre size down to 2.25-2.3 to optimize rear chain stay clearance. Running 2.25 for example, will give me a full 27mm of clearance all round, so close to zero issue of potential mud/leaf build up.
Having received the bike today, I cannot yet add ride specific details and data, but as with any bike that I receive, the first job is to strip the bike down to the component stages, then re assemble studying parts and construction as I go. By doing so I gain a greater insight into the construction of a bike, and can see what if anything in my opinion could or should be changed. Also, if anything fails whilst riding, having already stripped and rebuilt the bike, I have a head start on how to repair things. I get as much pleasure from working on bikes, as I do riding them.
This is where it gets interesting for me, as after having pulled the bike down, I am already very impressed by the frame. The build quality and paint finish is superb, but it is what is behind all that, that I am interested in. The shape and tube sizing has been improved, and just turning the first screw to remove the motor covers, revealed the first thought out design feature. A small banana shaped cover which when removed, gives clear and easy access to main connectors of the Bosch CX drive unit. That in itself was a simple, but welcome change. KTM have also now chosen to use an additional two motor mounting points. This again impressed me, not because the standard three wasn’t enough, but more from the potential that it may prevent any motor creaking, as the loading on the mounts is now more equal.
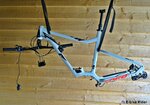
Turning the frame upside down gave the biggest and most pleasant surprise from the point of view of working on a bike. KTM have chosen to redesign the cable routing and internal cast mounts to the frame. Routing cables, wiring, hydraulic brake and dropper post hose, is now effortlessly easy and simple to do. I’m very impressed that such R&D has been put into this side of things, but I guess that it must save valuable seconds during the factory assembly stage. Speaking of cable and hose routing, I was also pleased to note that the frame entry points for routing, are now fractionally larger as well. A lot of thought has gone into the production of this frame.
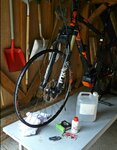
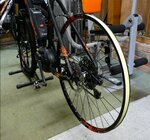
Removal of the two tyres was next on the list, and it was yet another pleasant surprise to see that the rims are tubeless ready, not just compatible. That’ll save a bit of time and money when setting them up to run tubeless. Once the wheel set has been returned from a friend’s bike shop, after giving them to him to check and adjust spoke tension should it be required, it’ll then just be a simple job to install Stans valves and Effetto Mariposa CaffeLatex sealant. A sealant that I have no hesitation in using or recommending.
Whilst in its knock down stage, I decided to take advantage of the situation, and fitted an AMS XL Honeycomb frame guard kit. It seemed silly to pass up the opportunity to test a kit, so time will tell as to how effective that it is. It was certainly easy enough to apply, although the frame colour doesn’t really mask any slight air bubbles very well. I have also added 3M clear film to several areas of the frame as well.
Finally, the lad that purchased the Macina Race hardtail has indicated that he wants to start to ride off road as well, so that being the case, I should be able to format some interesting bike comparisons.
Thanks to KTM Bike Industries, The Little Bike Shop, Bikegoo, Effetto Mariposa, Fork Juice, and Magicshine UK.
2017 KTM Macina Fogo 271 8s EX1Frame
And now 'Electric Mountain Bike Collective' on Facebook.
.
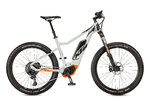
With the Macina Race now sold, it is time to introduce the replacement bike, a KTM Fogo 271
Click to enlarge

Click to enlarge

I decided a long time ago that whatever the next bike was going to be, that it needed to be 27.5” Plus size, and just as the Macina Race, it also needed to have a good component specification. I was also keen to stay with both the KTM marque and Bosch drive unit system.
As things stand the KTM Fogo 271 exceeds my requirements by a significant margin, so I am more than happy with my choice.
The Magura Boltron T-20x110 front forks is an interesting one for me, as I have read so many reports both good and bad, which made me keen to own a bike that had them fitted, just so that I could come to my own conclusion about them. I have also previously been asked privately about the forks and what I knew about them, so at least I finally get to discover for myself, and can offer opinion accordingly, and not just based from hearsay. I shall post more about the front forks as time passes, but from handling them off the bike, and checking them over thoroughly, it is a promising start. Clearly performance in use and durability are key, so time will tell, but from research that I have completed, I have already worked out that poor set up from end users, plays a major role in reported seal failure.
My preferred choice of front mudguard has long been the Rapid Racer Neoguard, (thanks guys) but after discussion, there are currently no plans to introduce a guard for USD front forks. There is no way that I could bring myself to install a guard that utilizes the steerer tube, and with that in mind I already have my own neoprene design waiting to fit to the bike.
The full bike/component specifications are detailed below, but as things stand, there is very little that I intend to change. I shall be replacing Intuvia with Purion, fit a Ragley Tracker saddle, Ritchey Foam grips, a 70mm Easton stem, and change what I believe to be a KS LEV Integra dropper post, in favour of a Rockshox Reverb Stealth. These four listed items are just personal preference and nothing more. The dropper post is simply being changed as I have one that I removed from the Macina Race, so the rebadged KS can be squirreled away.
I have chosen 27.5” Plus for a very specific reason, but just as with the front forks, I shall detail how things work out, as time passes. Briefly though, as many will be aware, I ride throughout the year and in all conditions. I treat my bikes very much as tool to do a job, and to date KTM bikes have filled this role very well, but with slight limitation. I now want to go one stage further and 27.5” plus is going to enable this. The plus size will fulfill the role of providing superb low-pressure grip in respect of riding wooded knarly terrain and also over rocks etc, then come the winter months, I intend to drop the tyre size down to 2.25-2.3 to optimize rear chain stay clearance. Running 2.25 for example, will give me a full 27mm of clearance all round, so close to zero issue of potential mud/leaf build up.
Having received the bike today, I cannot yet add ride specific details and data, but as with any bike that I receive, the first job is to strip the bike down to the component stages, then re assemble studying parts and construction as I go. By doing so I gain a greater insight into the construction of a bike, and can see what if anything in my opinion could or should be changed. Also, if anything fails whilst riding, having already stripped and rebuilt the bike, I have a head start on how to repair things. I get as much pleasure from working on bikes, as I do riding them.
This is where it gets interesting for me, as after having pulled the bike down, I am already very impressed by the frame. The build quality and paint finish is superb, but it is what is behind all that, that I am interested in. The shape and tube sizing has been improved, and just turning the first screw to remove the motor covers, revealed the first thought out design feature. A small banana shaped cover which when removed, gives clear and easy access to main connectors of the Bosch CX drive unit. That in itself was a simple, but welcome change. KTM have also now chosen to use an additional two motor mounting points. This again impressed me, not because the standard three wasn’t enough, but more from the potential that it may prevent any motor creaking, as the loading on the mounts is now more equal.
Turning the frame upside down gave the biggest and most pleasant surprise from the point of view of working on a bike. KTM have chosen to redesign the cable routing and internal cast mounts to the frame. Routing cables, wiring, hydraulic brake and dropper post hose, is now effortlessly easy and simple to do. I’m very impressed that such R&D has been put into this side of things, but I guess that it must save valuable seconds during the factory assembly stage. Speaking of cable and hose routing, I was also pleased to note that the frame entry points for routing, are now fractionally larger as well. A lot of thought has gone into the production of this frame.
Removal of the two tyres was next on the list, and it was yet another pleasant surprise to see that the rims are tubeless ready, not just compatible. That’ll save a bit of time and money when setting them up to run tubeless. Once the wheel set has been returned from a friend’s bike shop, after giving them to him to check and adjust spoke tension should it be required, it’ll then just be a simple job to install Stans valves and Effetto Mariposa CaffeLatex sealant. A sealant that I have no hesitation in using or recommending.
Whilst in its knock down stage, I decided to take advantage of the situation, and fitted an AMS XL Honeycomb frame guard kit. It seemed silly to pass up the opportunity to test a kit, so time will tell as to how effective that it is. It was certainly easy enough to apply, although the frame colour doesn’t really mask any slight air bubbles very well. I have also added 3M clear film to several areas of the frame as well.
Finally, the lad that purchased the Macina Race hardtail has indicated that he wants to start to ride off road as well, so that being the case, I should be able to format some interesting bike comparisons.
As well as regular updates to this forum, further updates and photographs will be posted at the following places.
https://www.facebook.com/groups/313908402329634/permalink/451984891855317/
https://www.facebook.com/edwardpeterjefferies/posts/474559259568509
https://www.instagram.com/eddiejefferies/?hl=en
https://www.facebook.com/groups/313908402329634/permalink/451984891855317/
https://www.facebook.com/edwardpeterjefferies/posts/474559259568509
https://www.instagram.com/eddiejefferies/?hl=en
Thanks to KTM Bike Industries, The Little Bike Shop, Bikegoo, Effetto Mariposa, Fork Juice, and Magicshine UK.
Full component specification
2017 KTM Macina Fogo 271 8s EX1Frame
- :- Macina MTB 27.5"+ BOOST, Alloy for Bosch, with semi-integrated battery
- Frame sizes :- 43cm, 48cm and 53cm.
- Bike colour :- Matt light grey, black + toxic orange.
- Front fork :- MAGURA Boltron inverted, T-20x110 120mm travel, weight 2,200g
- Headset :- KTM Team B303AM drop/in-tapered, +10
- Headset bearing numbers :- MH-P28 and MH-P08M
- Stem :- KTM Team KT-6 7° 95mm Weight 133g
- Handlebar :- KTM Team HB-RB12L riser, rise 15°, Width 720mm
- Handlebar grips :- KTM Team VLG--775-12D2 Diamond fin with end Clamps
- Brake rotors :- Shimano RT86 6-bolt, 180mm front, 180mm rear. 260.4g pr
- Brakes :- Shimano Deore XT M8000 Weight 554g pr including caliper/hose/lever assembly
- Trigger shifter :- SRAM SL EX1 8speed Weight 122g
- Rear derailleur :- SRAM RD EX1 8speed. Weight 289g
- Front sprocket size as supplied 16T
- Cassette :- SRAM XG899 11-48 ( 11, 13, 15, 18, 24, 32, 40, 48) Weight 360g
- Chain :- SRAM EX1 Weight 273g
- Pedal cranks :- SRAM EX1, ISIS for Bosch. Length 170mm. Weight 510g pr
- Pedals :- VP components VP-539 black platform, with replaceable pins. Weight 370g pr
- Wheel set :- KTM Line 27-5" plus B/B Tubeless ready
- Wheel rims :- Ryder edge 35, 32 spoke hole, suitable for 2.3 to ‘plus’ size of 3.0. Weight 580g
- Front hub :- 20mmThrough axle DT Swiss 350 classic-6-bolt 20/110/TA BOOST. Weight 239g
- Rear hub :- 12mm Through axle DT Swiss 350 classic-6-bolt 12/148/TA BOOST. Weight 305g
- Tyres :- Schwalbe Nobby Nic 70-584 TL-easy, Snake skin, Apex. Weight 910g per tyre.
- Saddle :- Fizik Gobi M7 with Manganese rails. Weight 255g
- Seat post :- KTM Comp JD-YSP12L hydraulic adjustable 100-370, diameter 30.9mm Weight 560g
- Display :- Intuvia LCD, with Walk assist
- Drive unit :- Bosch Performance Line CX 36V-250W, 25km/h 75NM of torque, four assist levels,
- Eco giving 50% Tour giving 120% Sport giving 210% Turbo 300% Maximum torque available
- per assist level, Eco 40Nm Tour 50Nm Sport 60Nm Turbo 75Nm
- Battery :- Bosch Powerpack 13.8Ah - 500WH
- Motor weight :- 4kg
- Battery weight :- 2.6kg, dimensions 325mm x 92mm x 90mm
- Overall Bike weight :- 21.4kg
And now 'Electric Mountain Bike Collective' on Facebook.
.
Last edited:


