Jason Knight
Well-Known Member
- Region
- USA
- City
- Keene, NH
I never made a proper intro thread. I'm Jason, web developer / accessibility consultant by trade, pain in the arse by nature. I have a lot of physical issues with a locked / fixed ankle, diabetes, non-24 sleep-wake disorder, and a seizure disorder with agonizing migraines due to an overactive vmPFC. Note that's overactive. People with under-function of that same brain area end up psychopaths and religious terrorists. Those of us with over-function, well... we don't tend to "believe". In anything. You end up with an excess of critical thinking that makes you call "BS" on... well...most BS normal people yum up like soft-serve.
Thanks to the non-24 I live a 26 hour day. That means sleeping an extra hour and being awake an extra hour, so every 6 days I'm 24 hours off from the rest of the world. That's why you might see me posting here all sorts of odd/crazy hours. It also means when I'm awake at 3AM with nothing to do, I get on my bike... as such I try to be lit up like a Christmas tree.
I made a previous thread that listed all my upgrades and parts from back in October '21

 electricbikereview.com
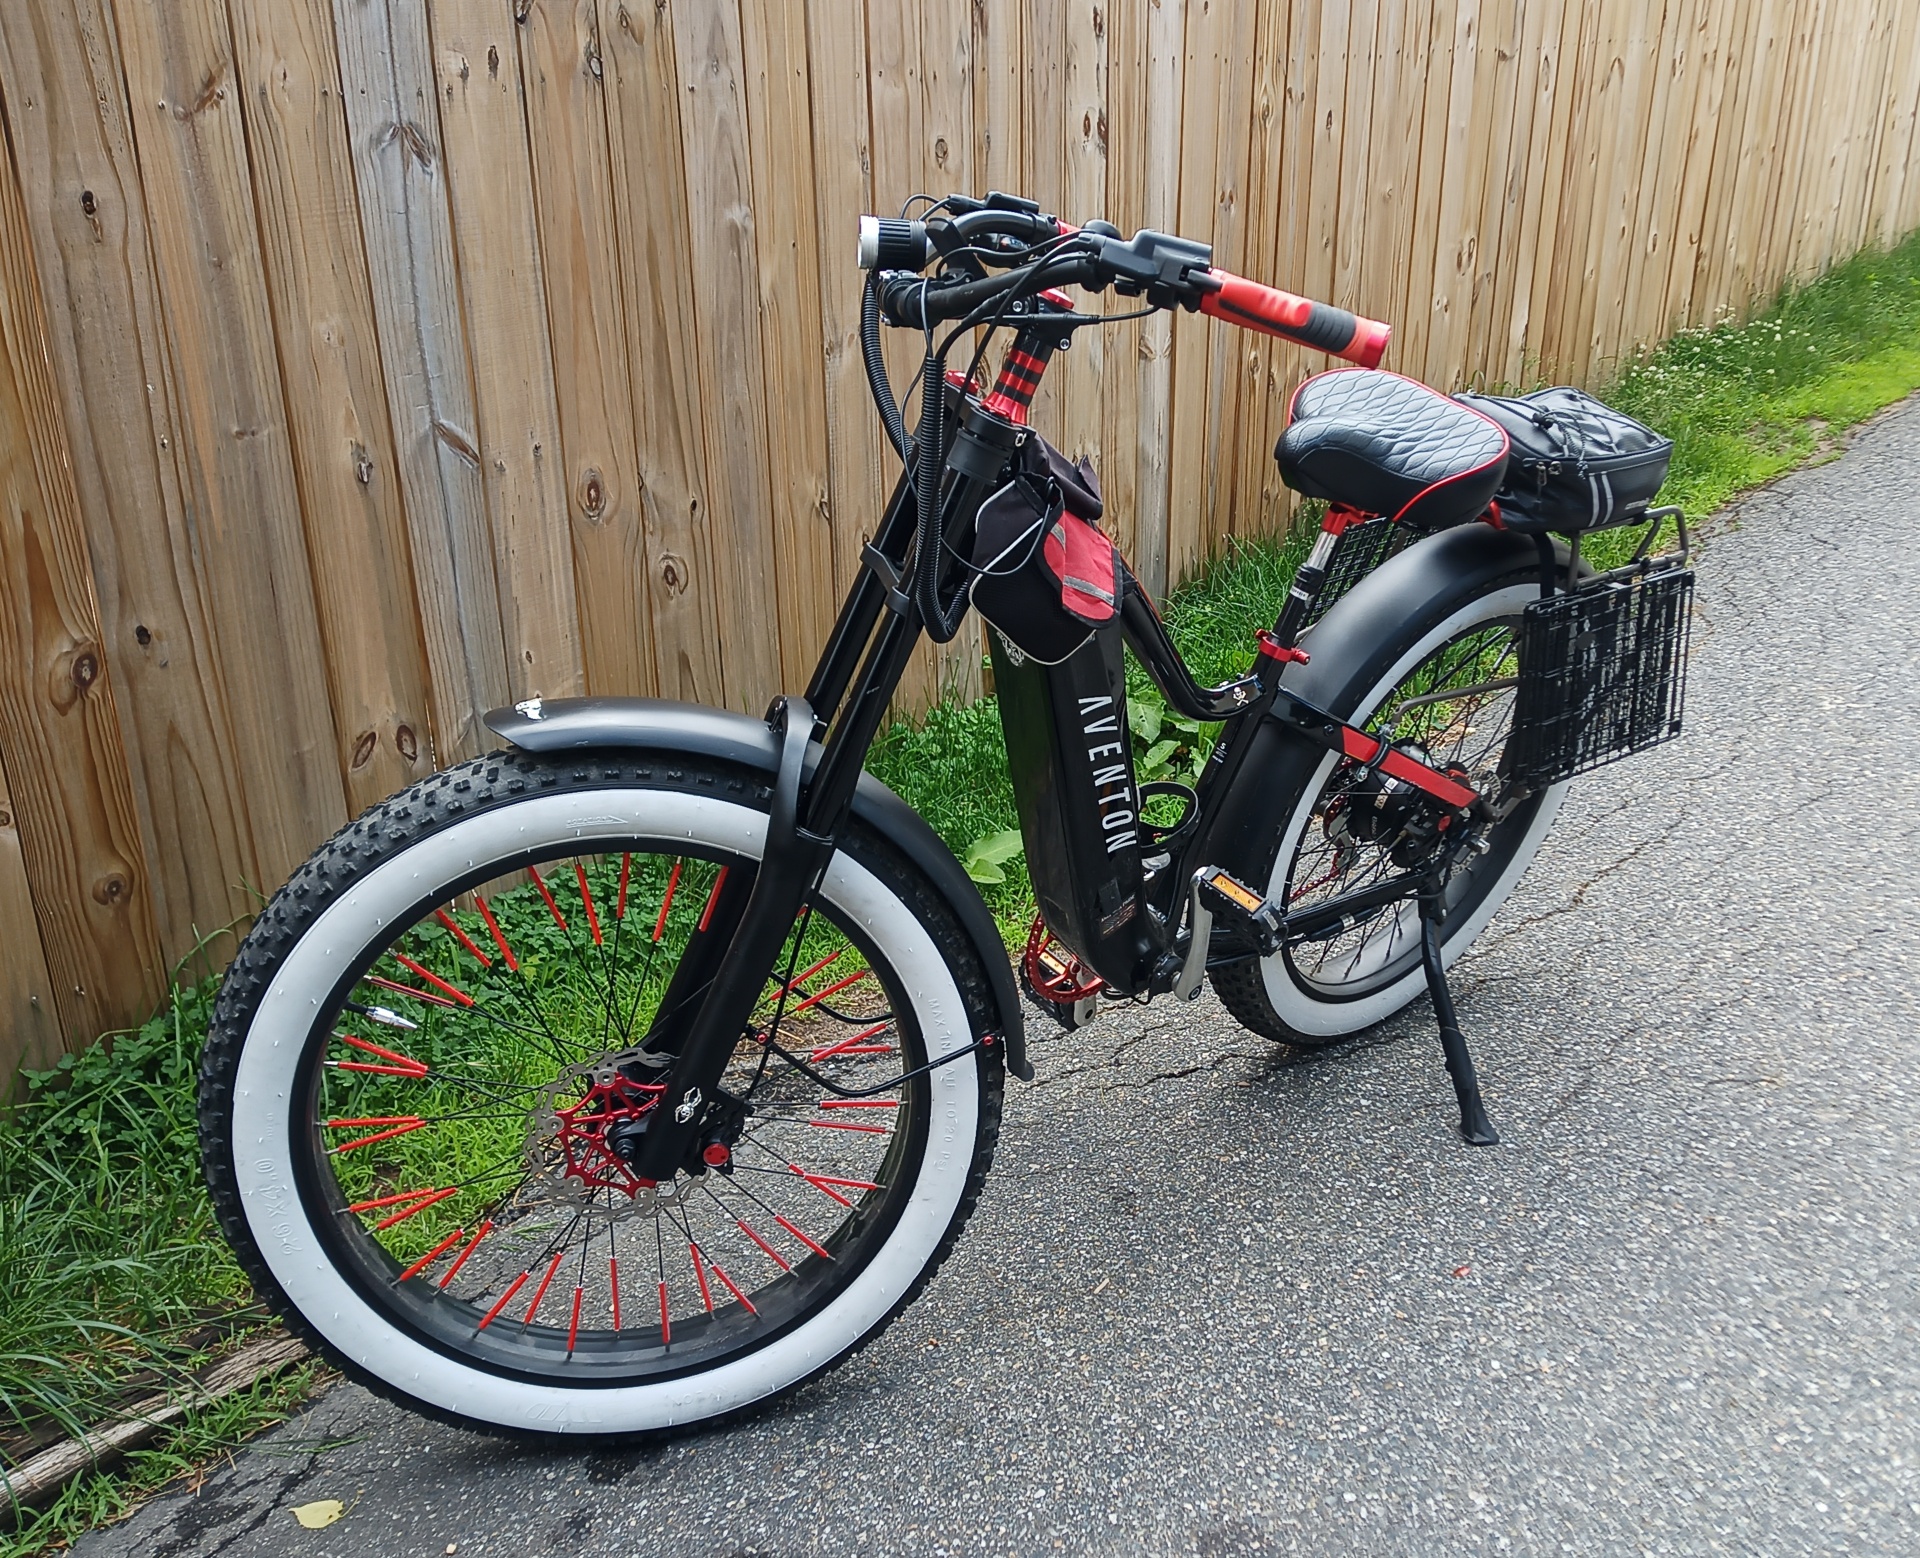
But over the past couple weeks I've made a number of updates. The biggest of which is a new fork.
It's not the greatest or best, but came recommended from a friend and looked typical of what's available in 135mm width in the style I want at that price point. The extra 40mm of travel and that I was able to adjust it an inch and a half taller than the stock one, and being an inch forward makes a huge difference in how it rides. Looks great too.
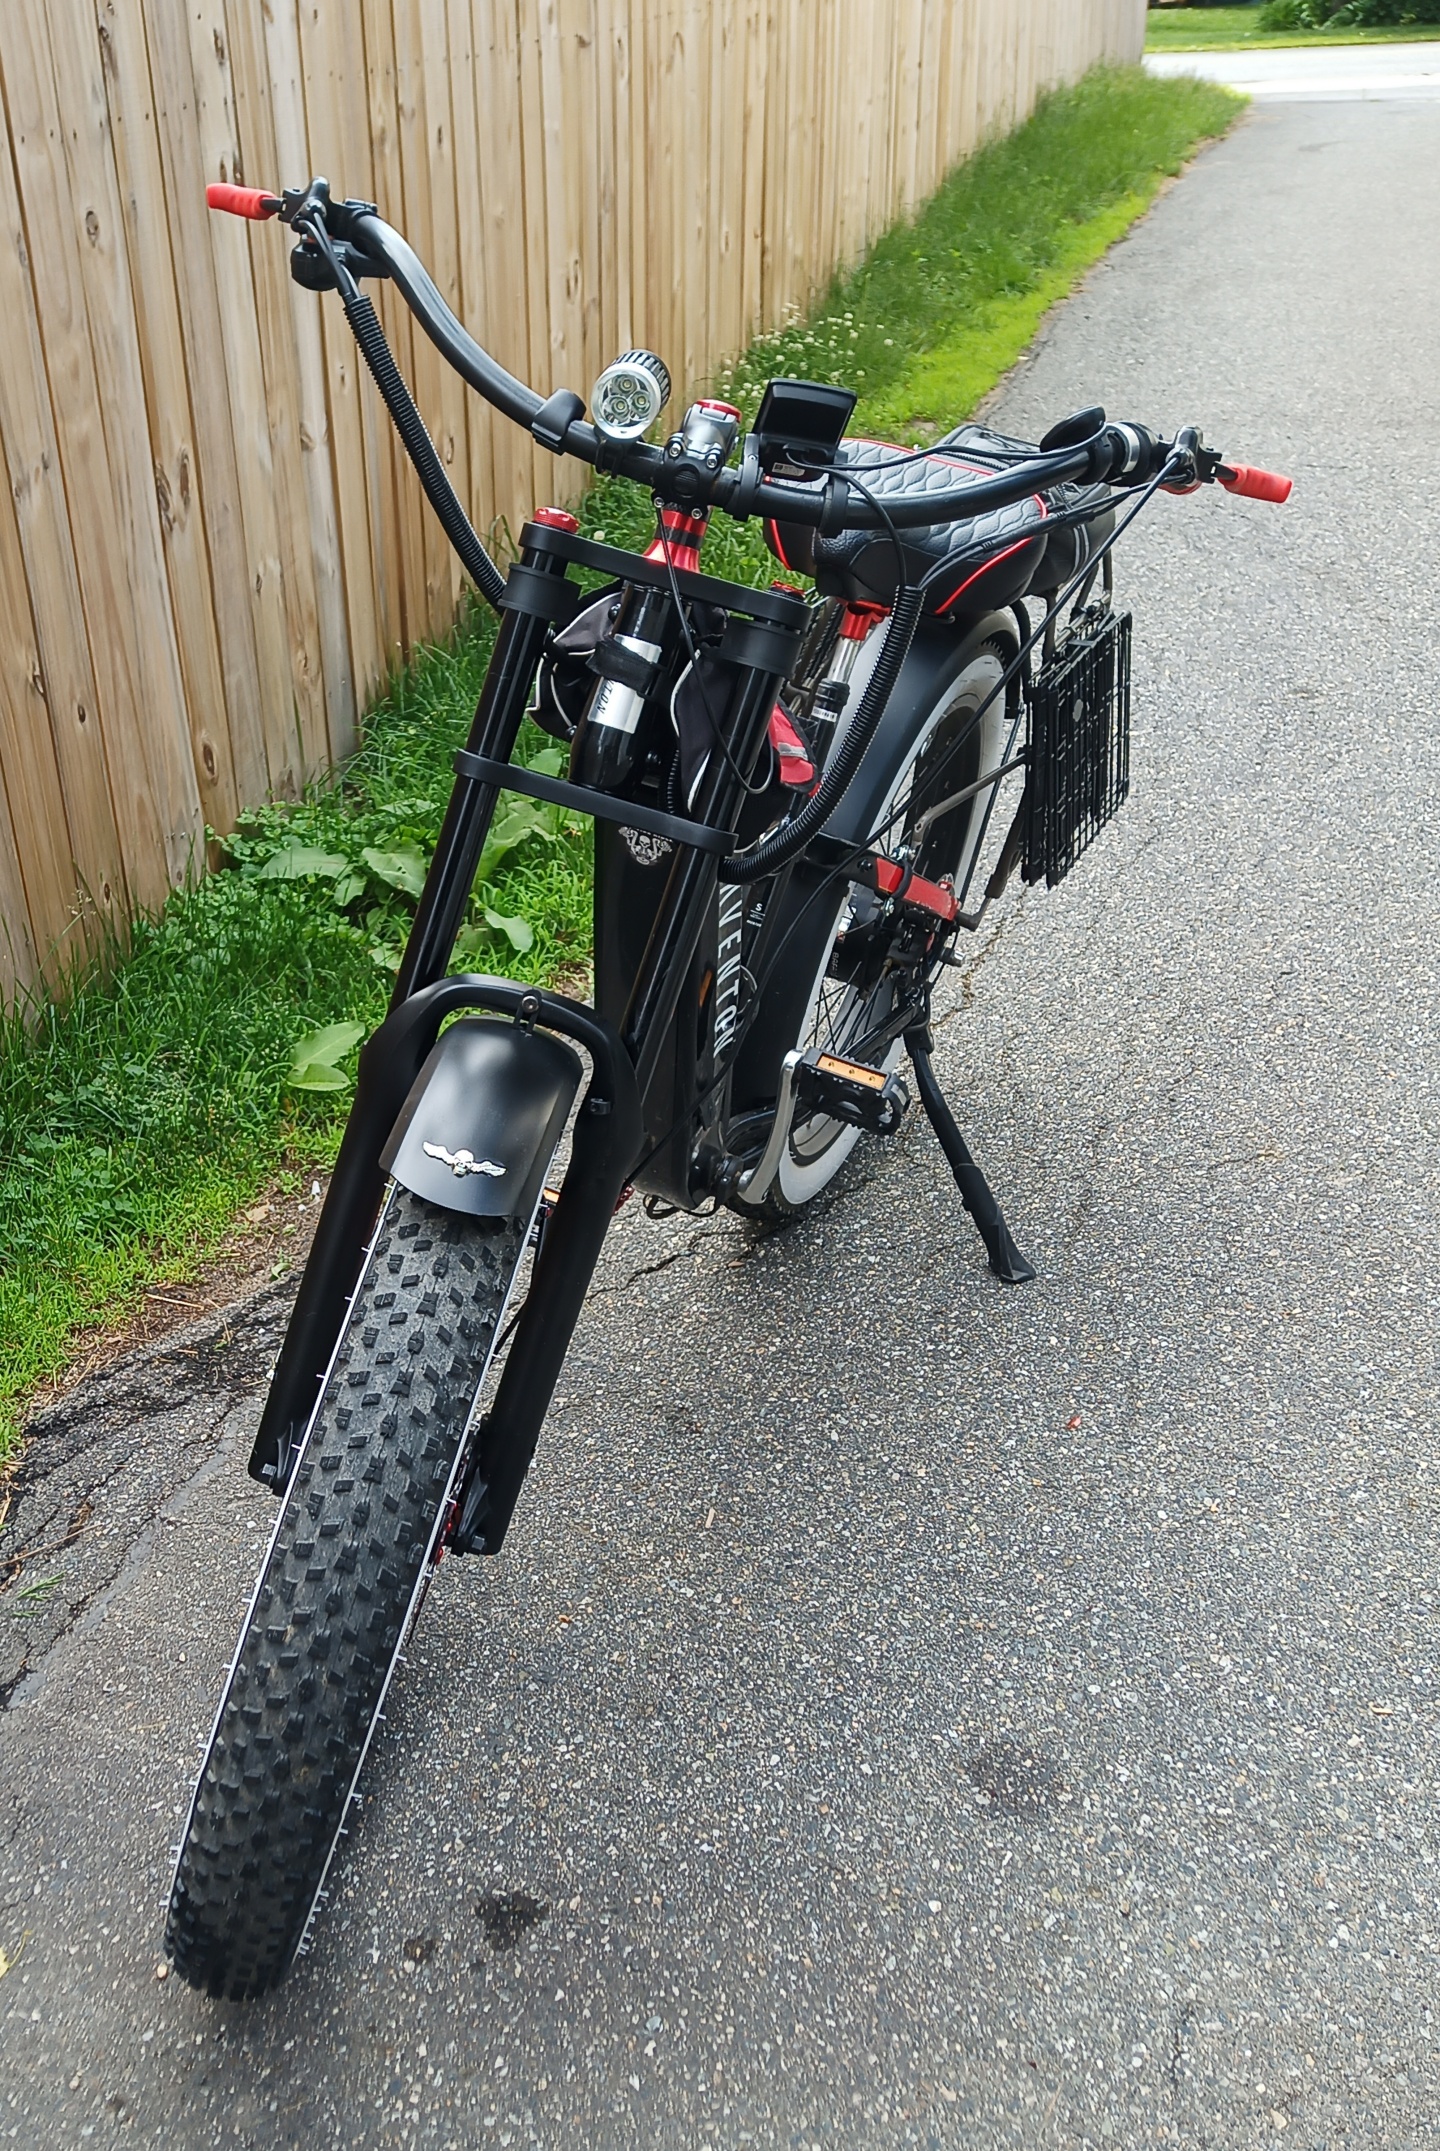
The only real problem is that the taller stance has the front brake hose so taut I can't even run it through the fork guide. I've got a real of hose and some fittings on the way.
I also swapped out the front rotor for something nicer and lighter. Ok, it's only 5 grams lighter, but whatever.
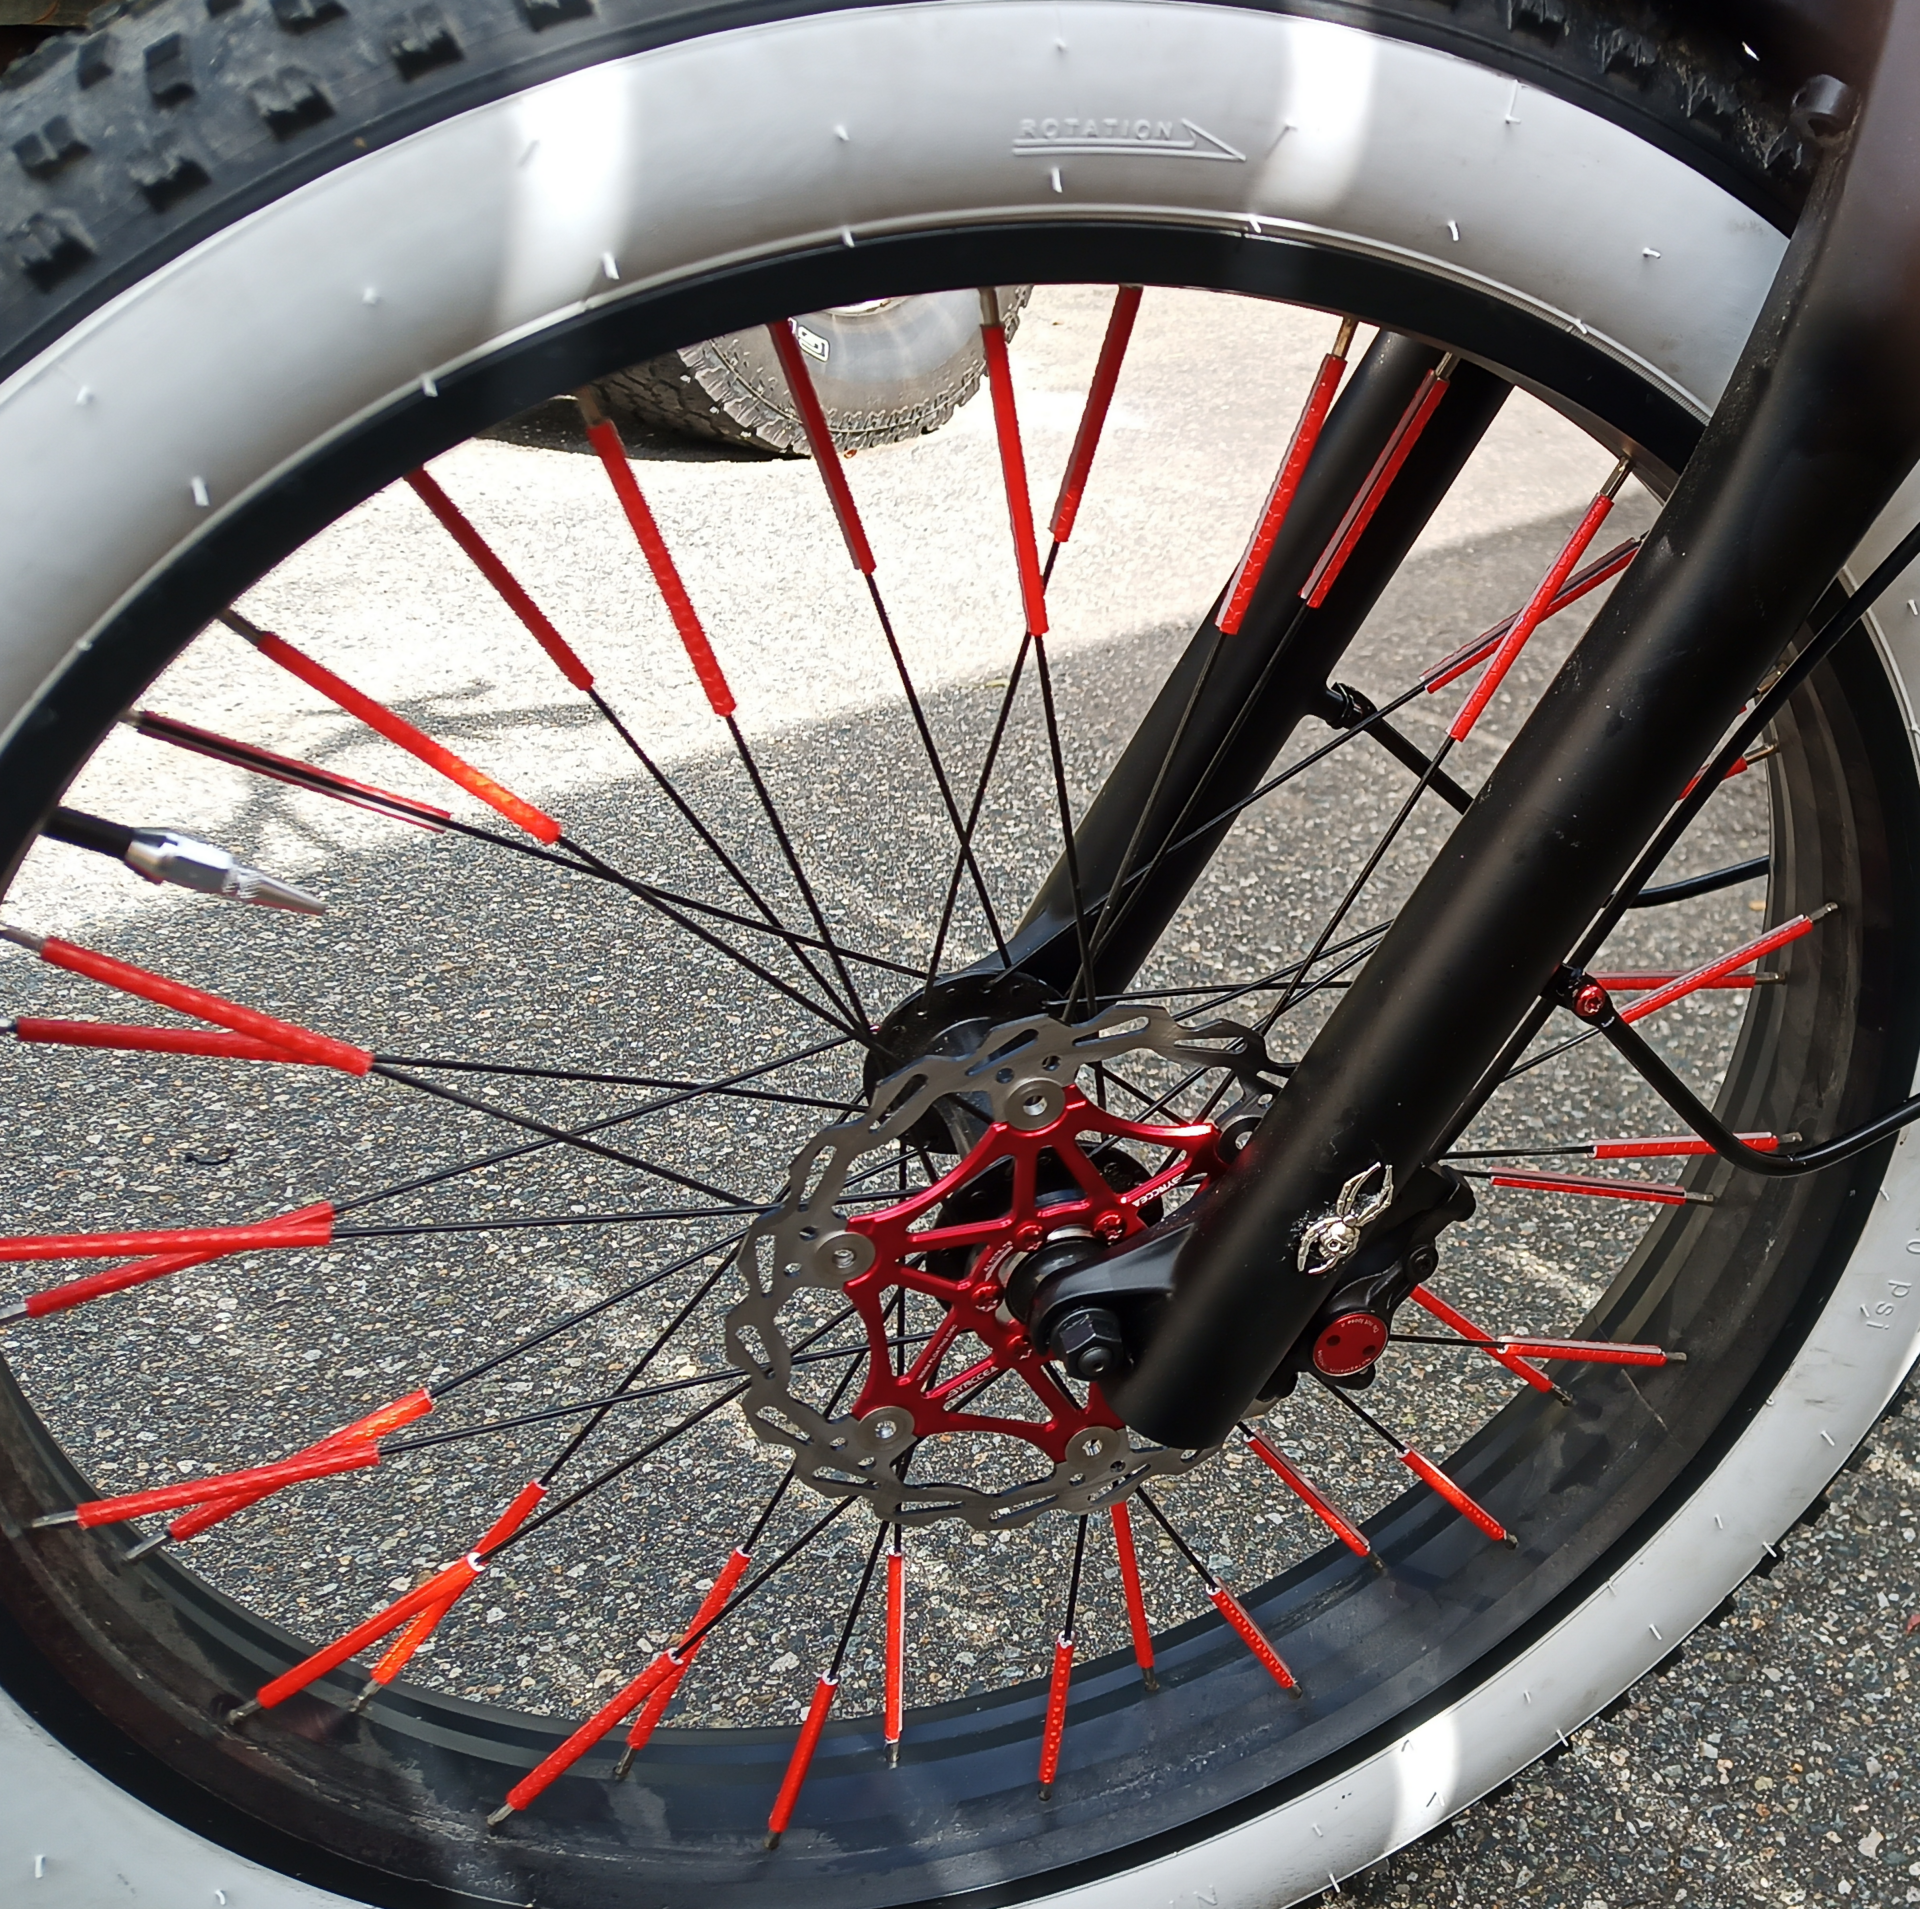
Which is just this el-cheapo.
Got one for the rear too, but I'm probably not putting that on for a couple days. I dislike swapping out brakes front and rear at the same time just in case something goes south with the new one.
I've had folks elsewhere ask what I use to adhere my little trinkets like the one on the side of the fork, the front fender, the top tube, or the rear fender, and where I got them.
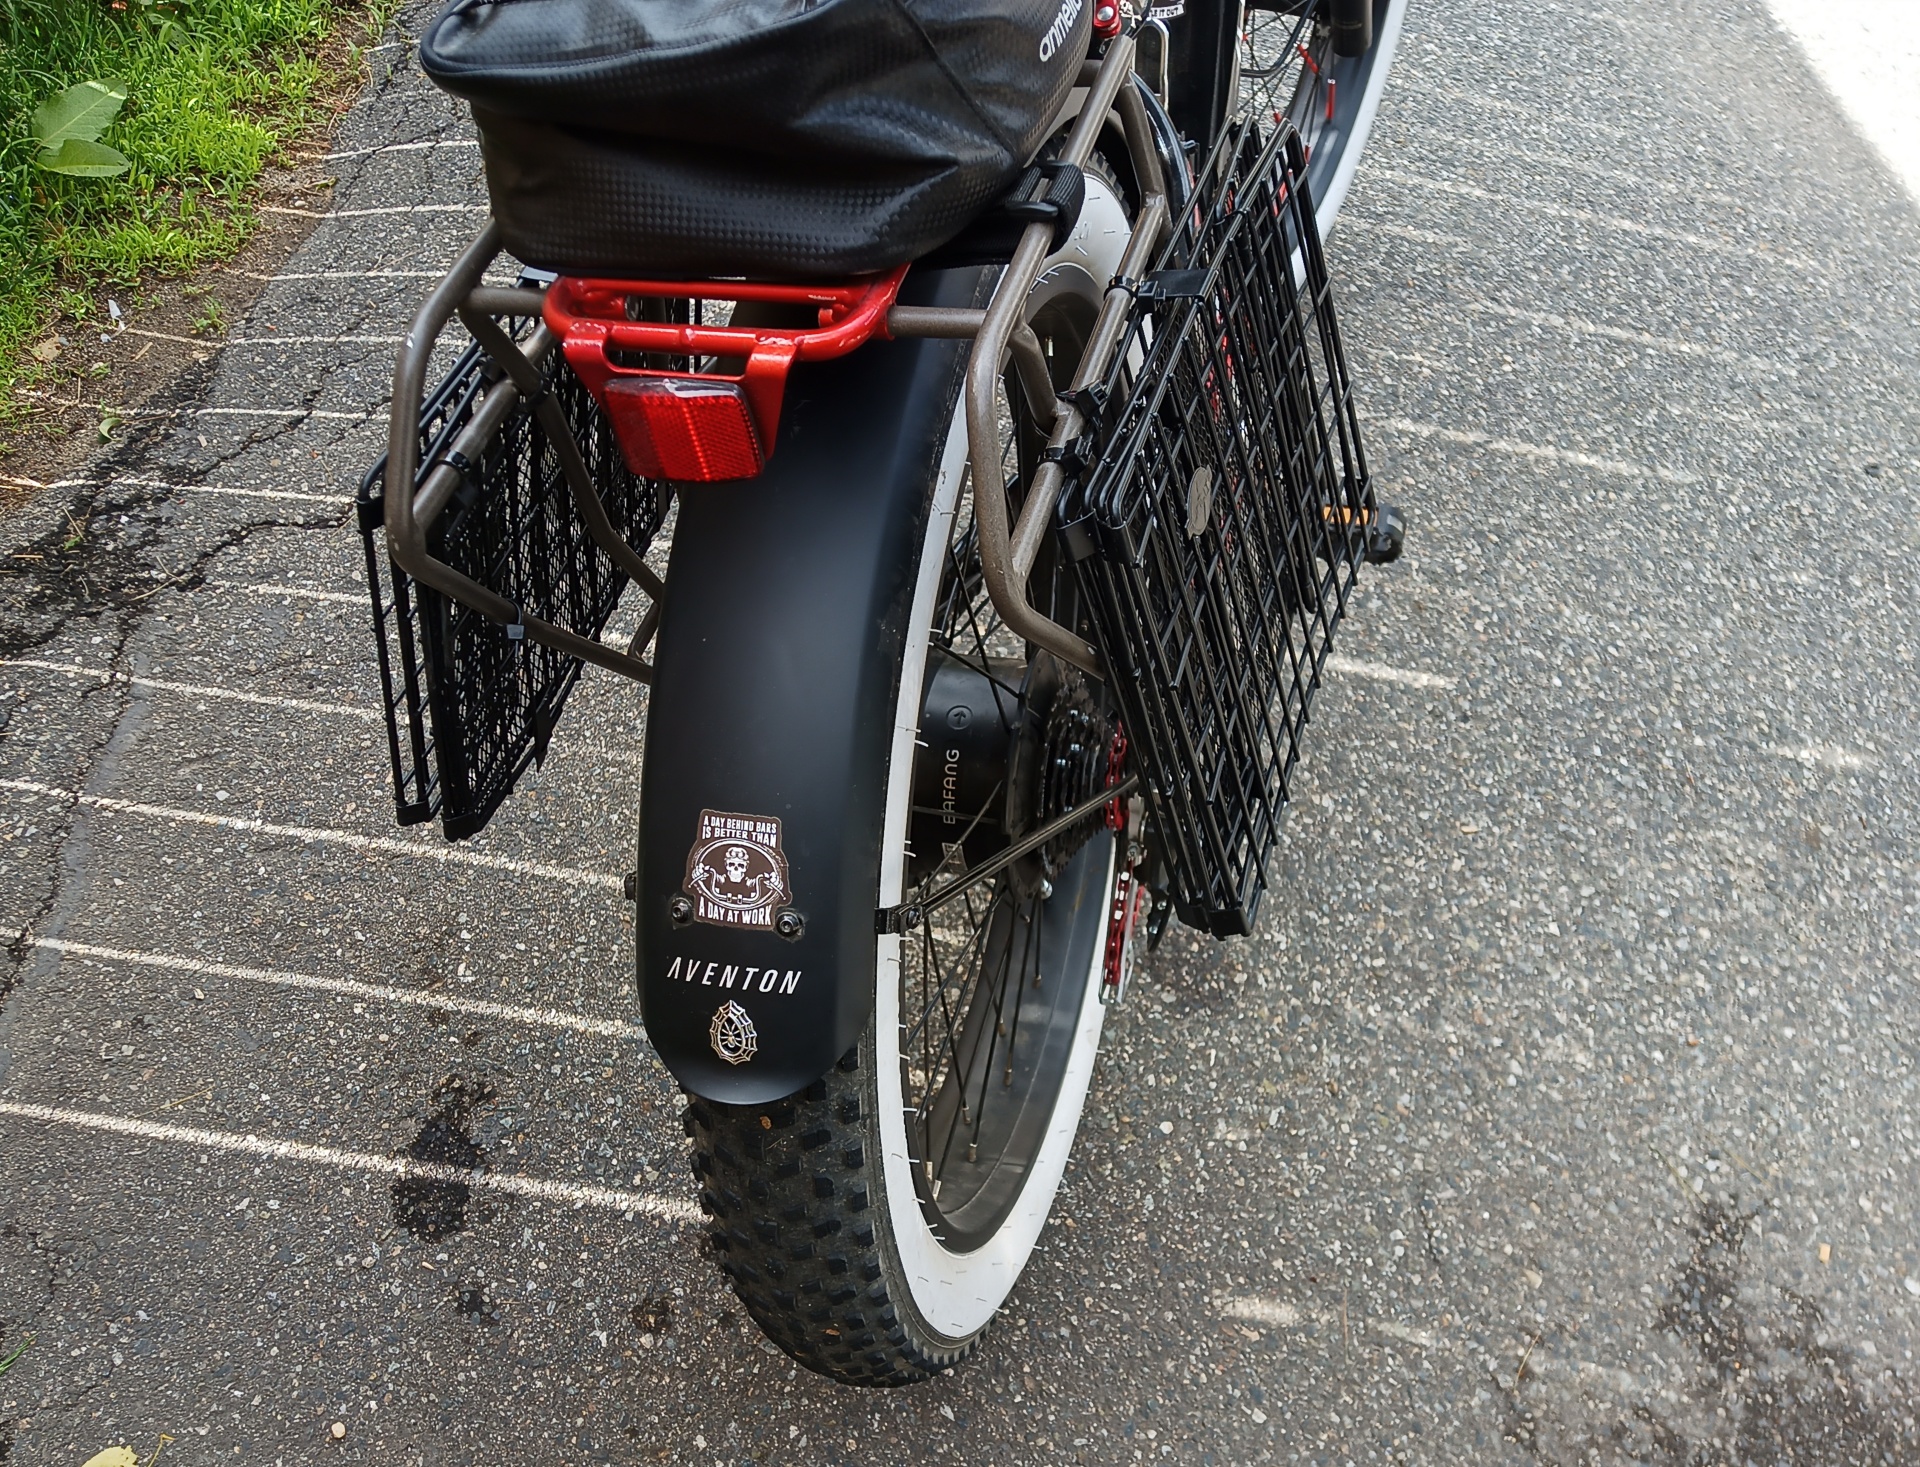
They're just amulet trinkets that are like two to ten bucks for a giant bag of 'em off e-fence or Amazon. Simple snips take the little mounting eyelet right off. For glue, my weapon of choice is Gorilla's "Clear grip contact glue". It's a thick clear contact cement, that solidifies up good enough it's not coming off from normal wear and tear, but if you yank with a twist just right, can be removed if you change your mind. Like all contact cements you apply to both surfaces -- I like to put a ton on the trinket, apply to the area, then remove -- let dry for two minutes, then stick them together again. Any excess can be removed with a toothpick or other soft edged tool.
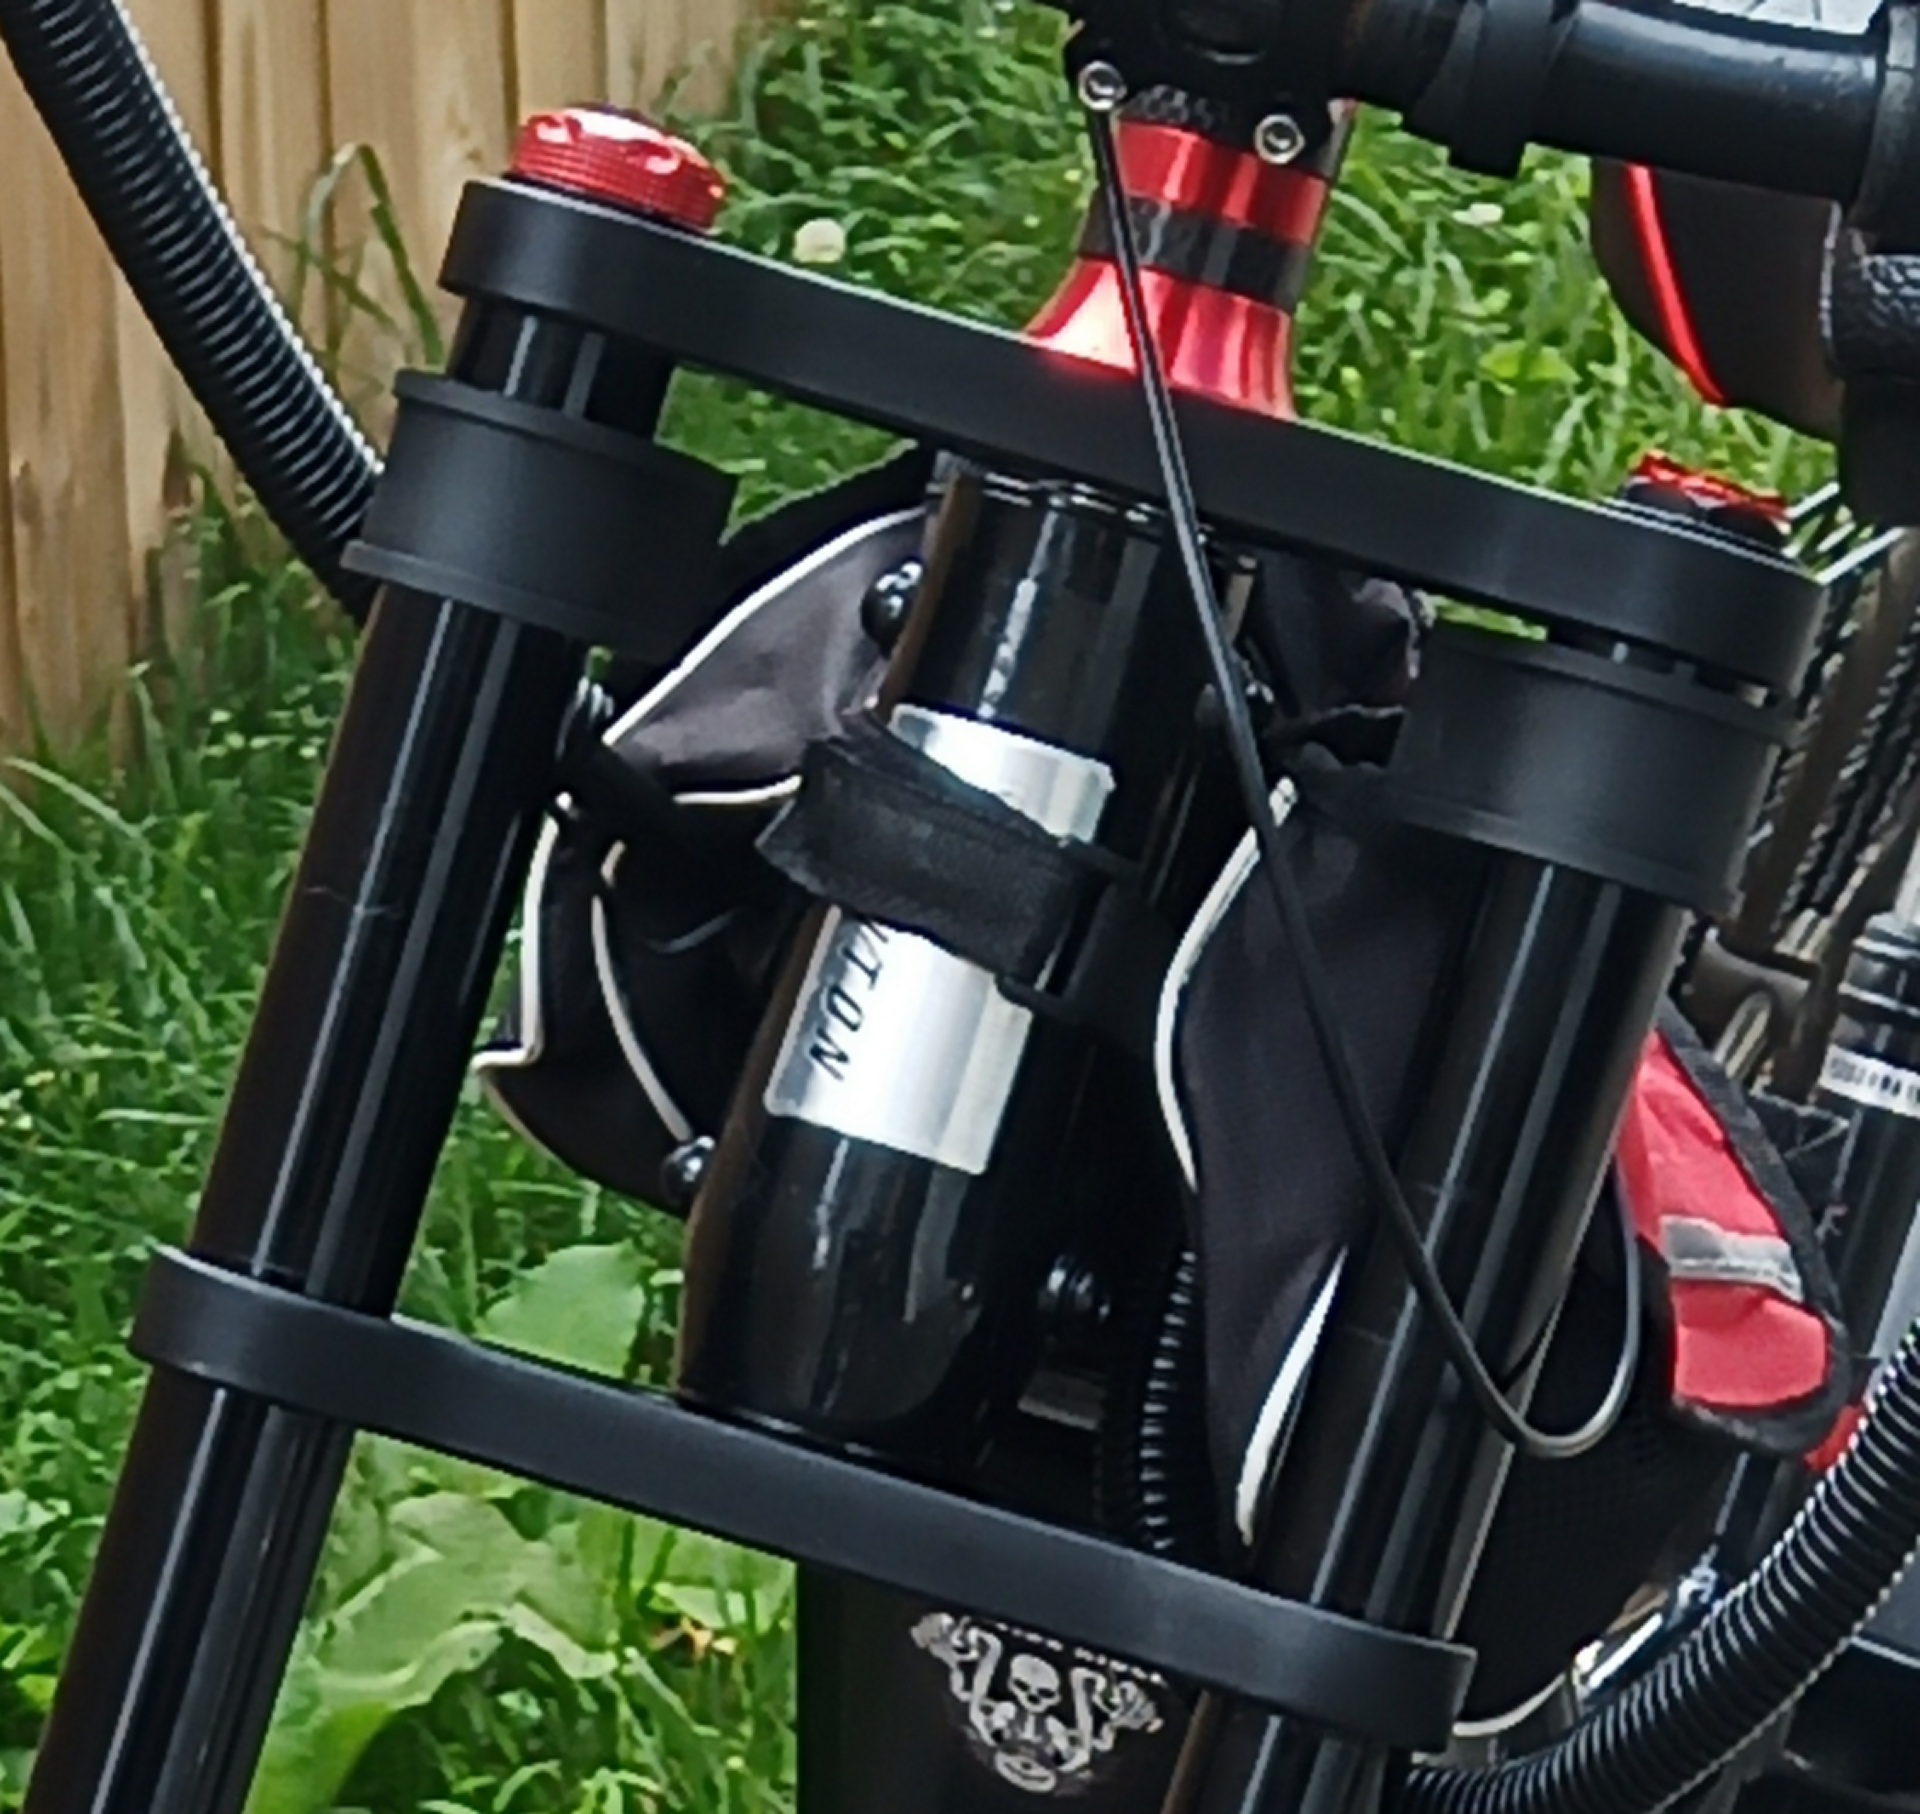
One word of warning for people looking at the aventure, the bottle cage mount on the "small" is pretty useless for anything larger than 16oz.
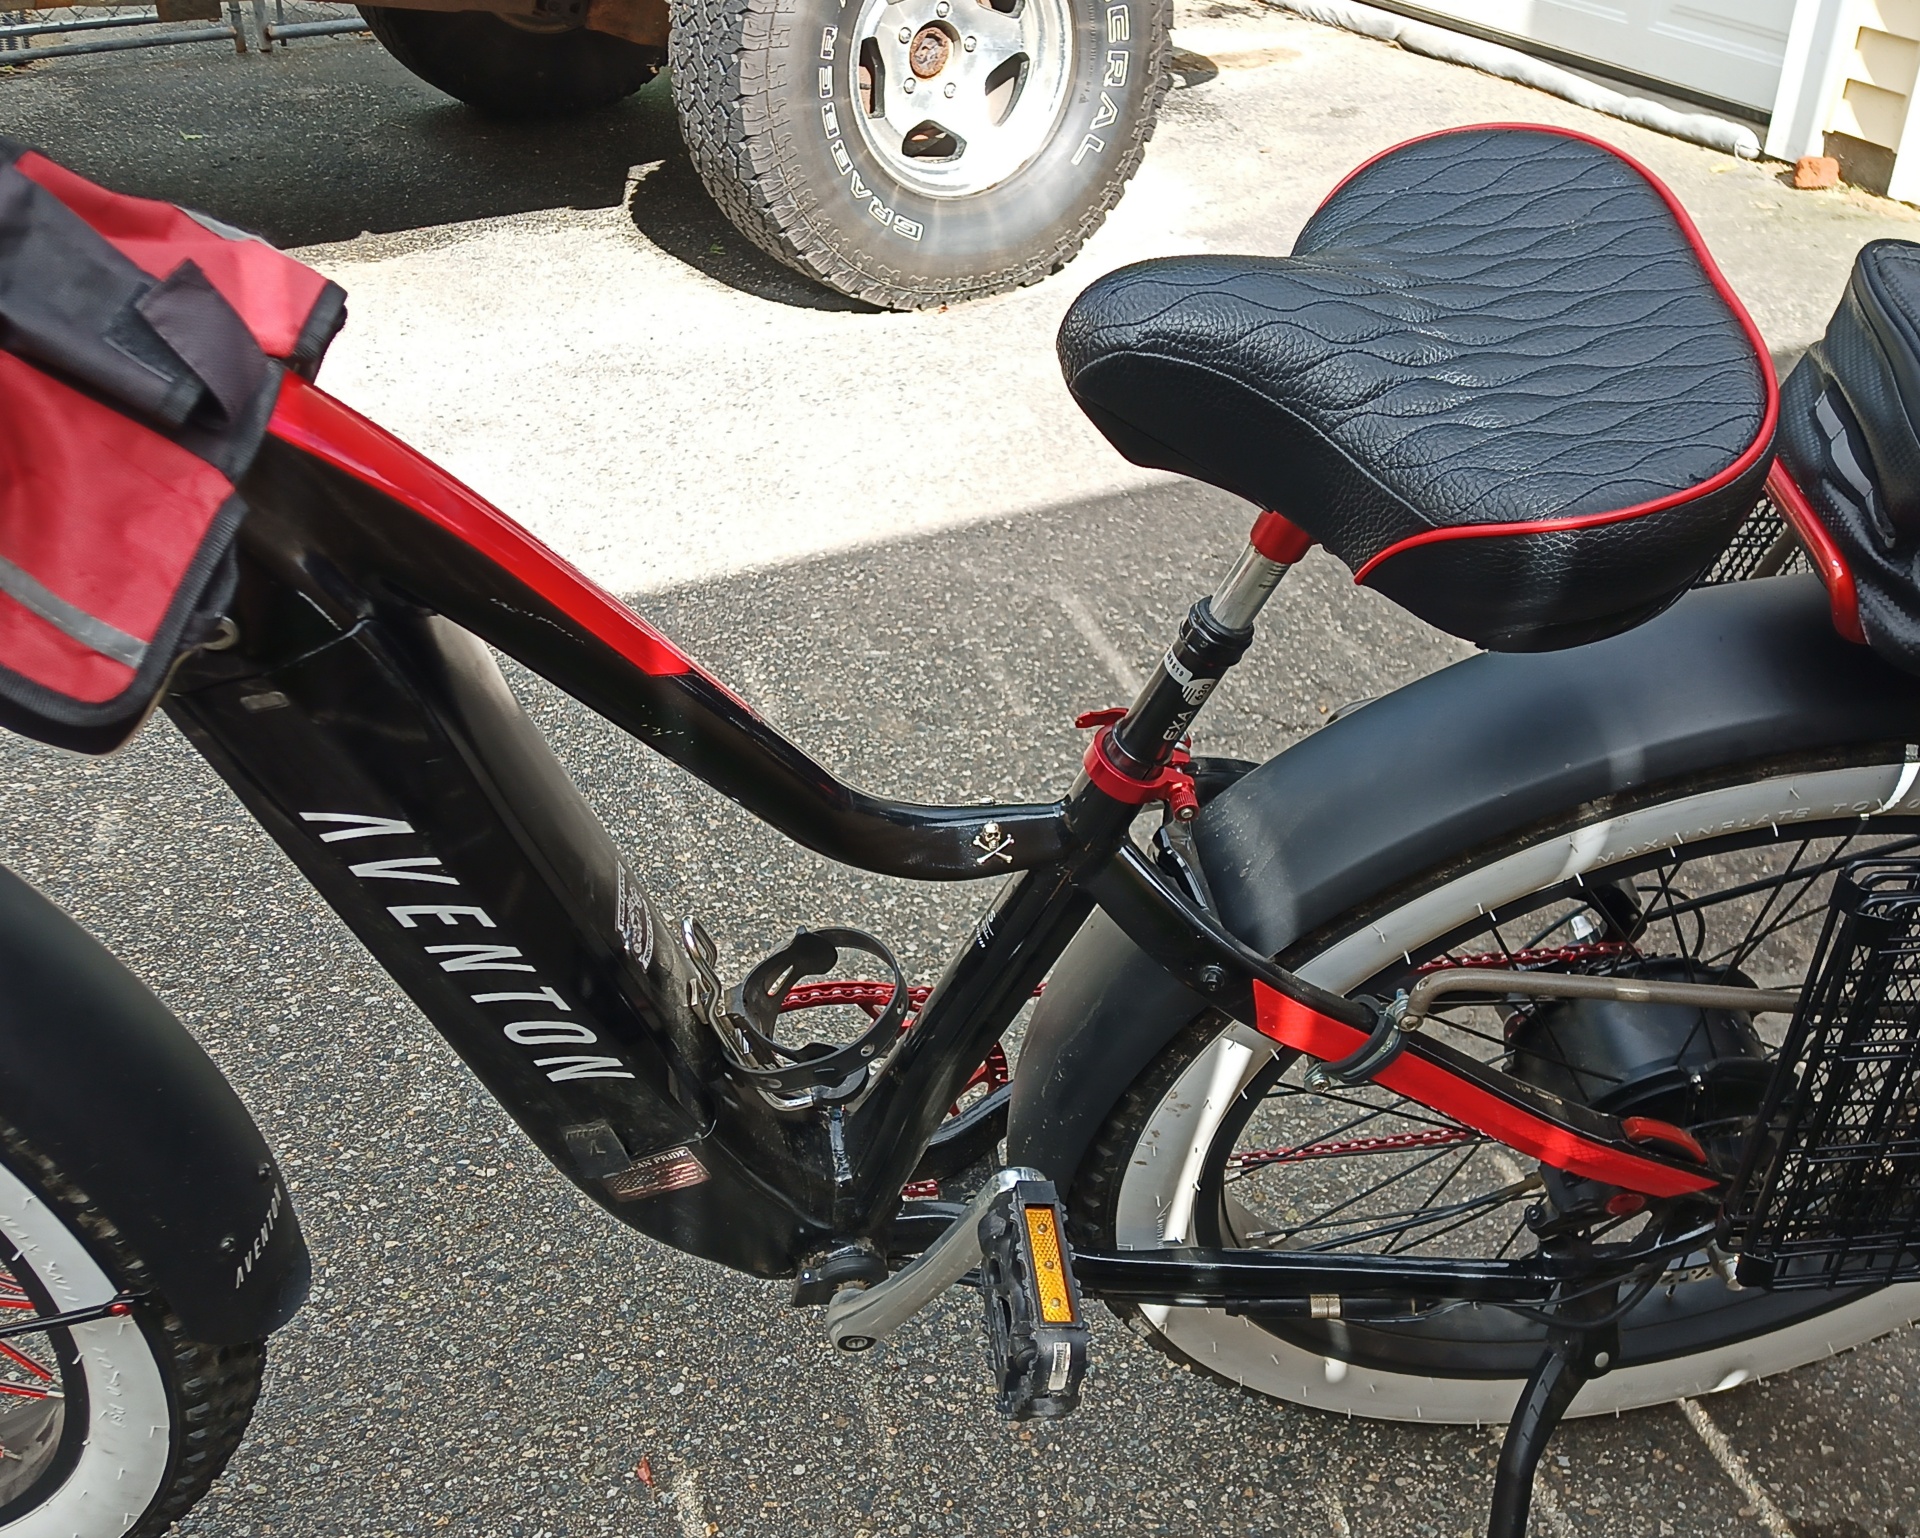
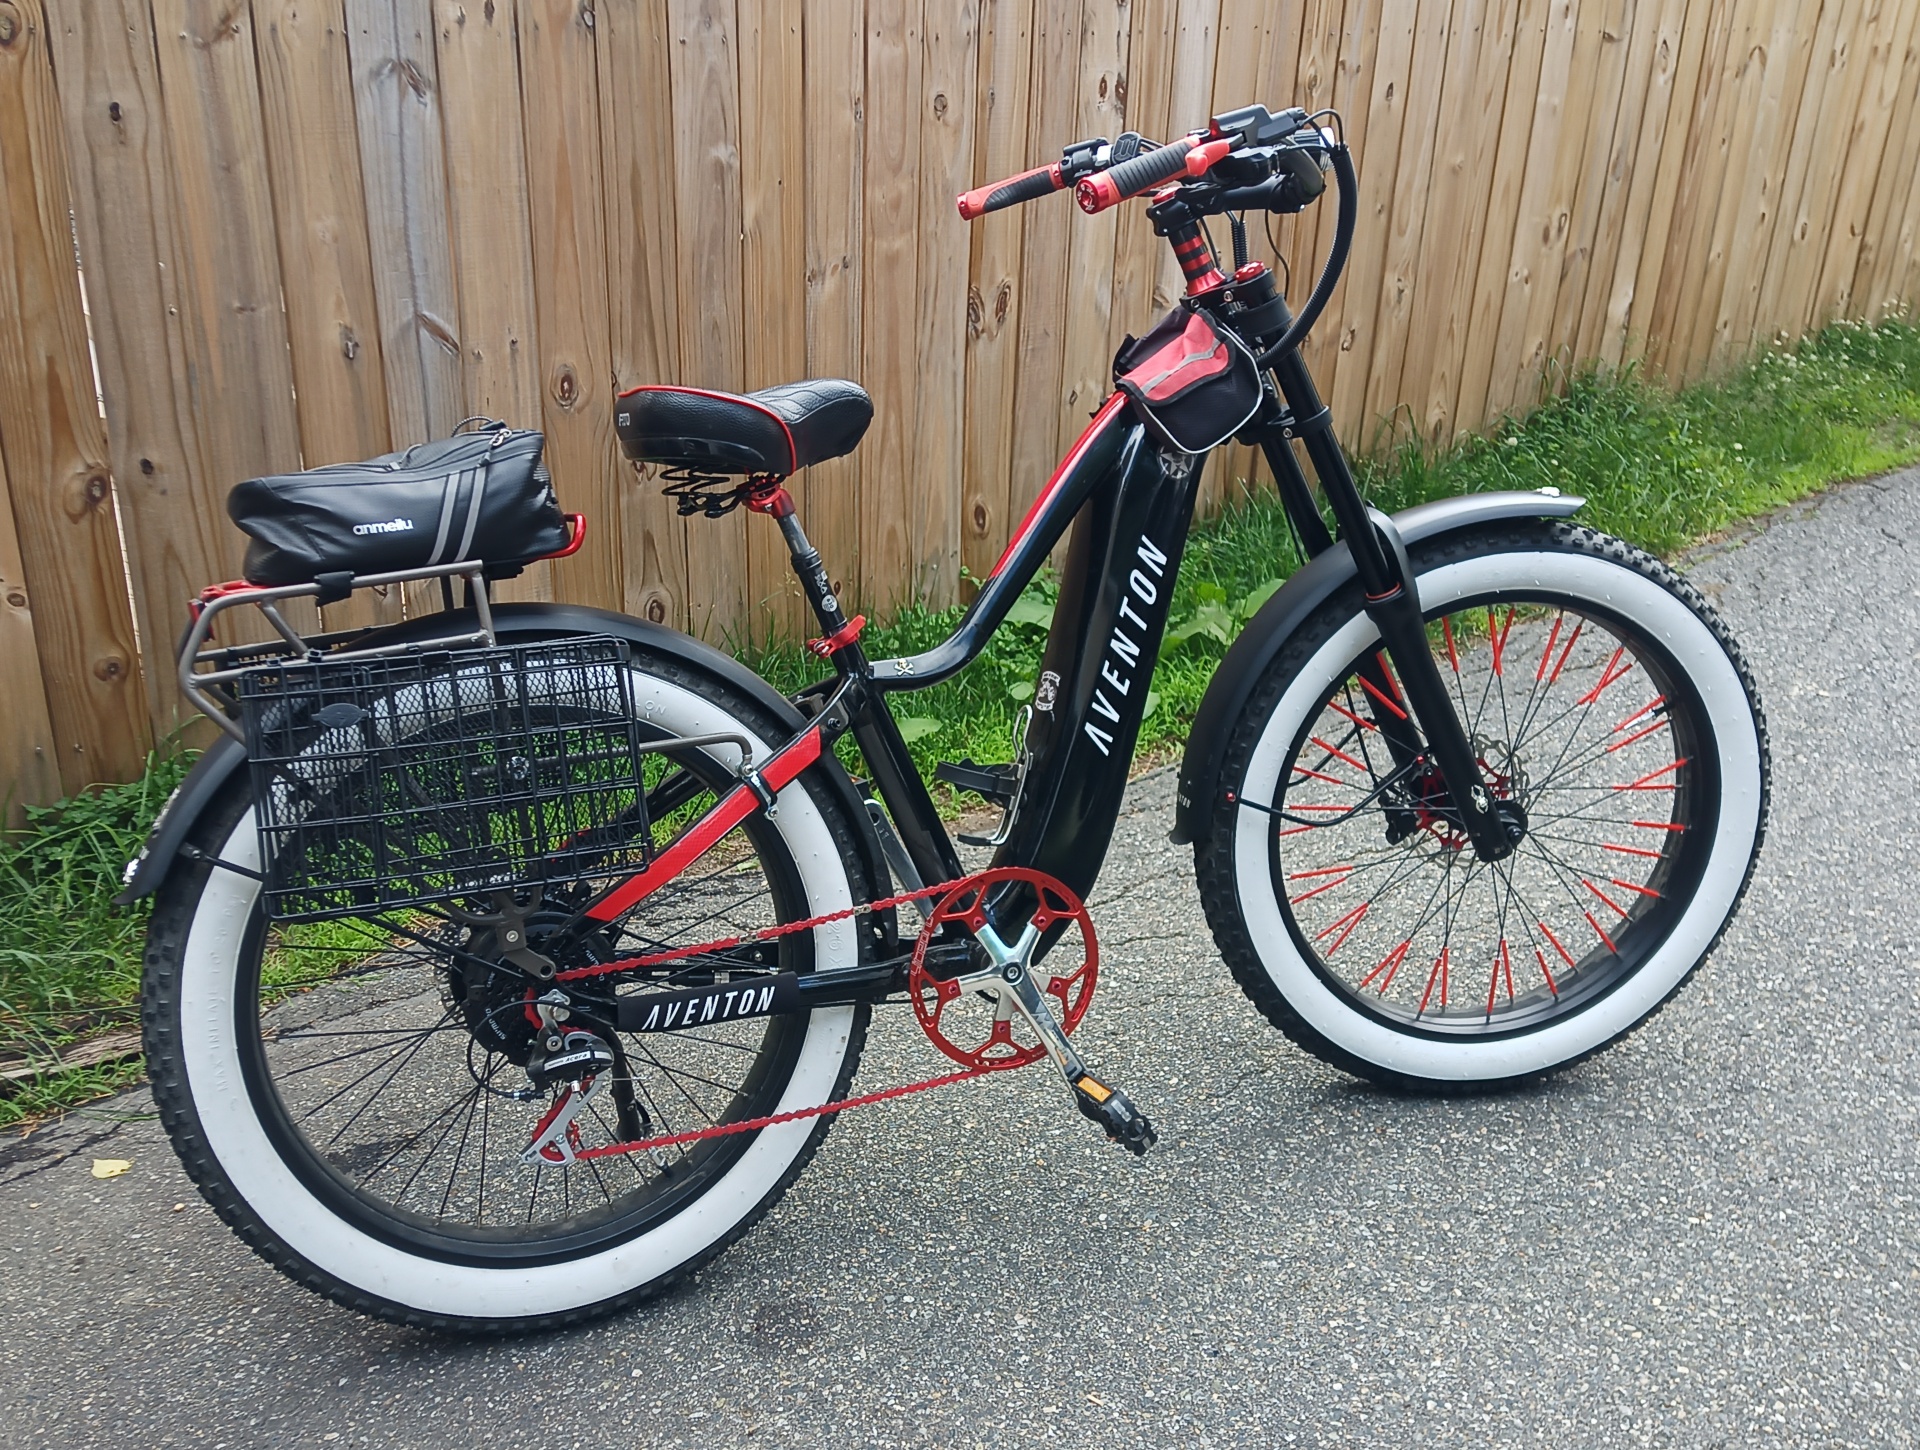
Also note that I got rid of the butt floss seat for a bit more cush. Christmas on a cracker people, don't those crappy little narrow seats screw up your tailbone? The seat it came with -- that I've even heard people praise -- hurt so bad I could barely get up my stairs. I see everyone riding these narrow little arse pounders... that HAS to hurt! It think I said it before, just because when sitting normally most of the force is applied to the sitz bones, is no reason to redirect ALL the force there!
I think I'm going to lose the sloppy cheap (two dollar) top tube bag for a larger handlebar one. It just doesn't fit the frame properly due to the curve Aventon puts on the tube. It is likely more viable to bar mount now that I've got the taller fork. It actually "feels" like there should be something mounted there. Might even be able to mount a bar bag TO the fork instead of the bars. I dunno, is that a bad idea?
I also re-arranged the placement on my bars again
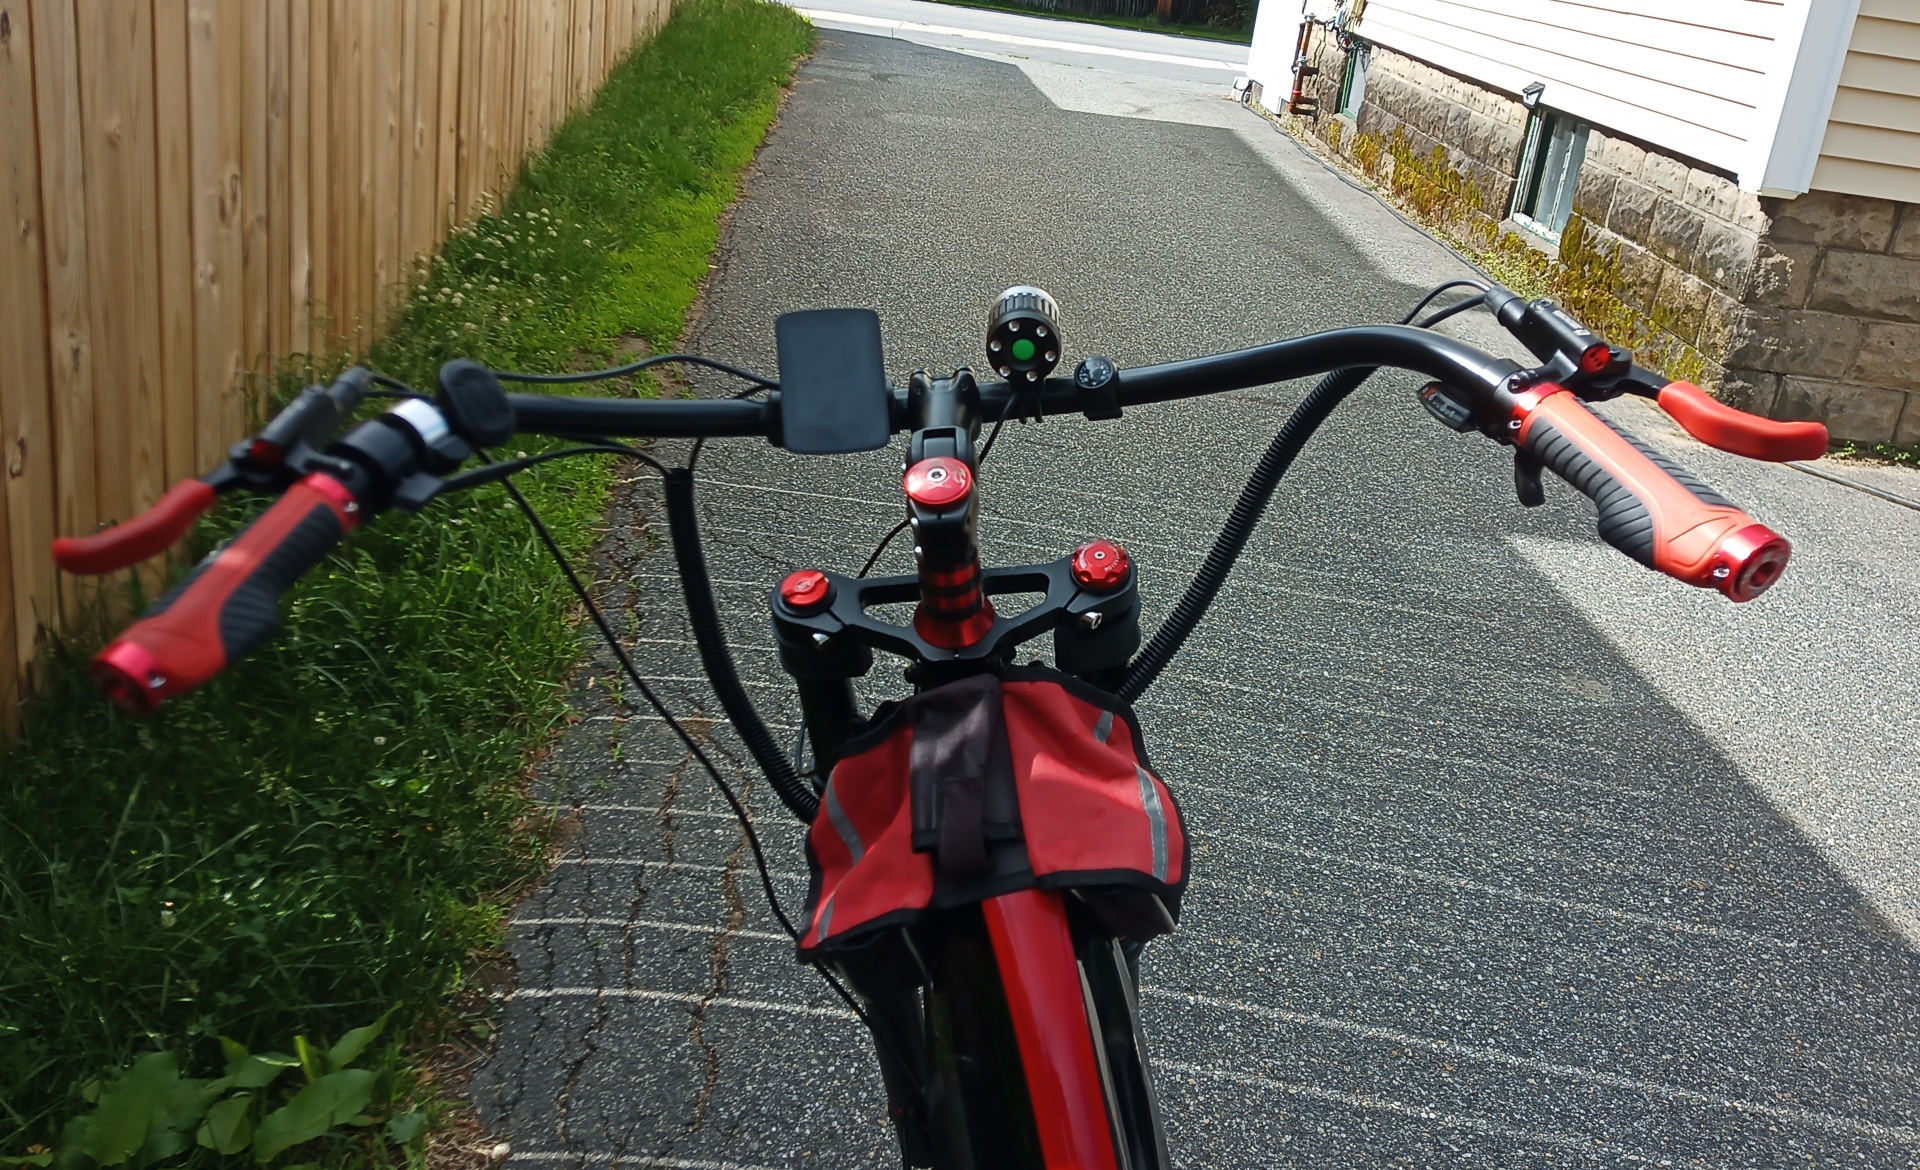
Moving the display over lets me angle it down for less daylight glare. I think I'm going to take some waterpoof neoprene and cut a hood for it to further improve daylight visibility. Again, contact cement is your friend on projects like that. Moving it there let me put the control pad back over where it's supposed to be next to my bell.
Also that pic really shows how little slack there is on the brake hose.
I'm still amazed how good those replacement bars came out considering they had rusted to the floor of my garage for a decade, needing to be pried up off the floor. As I said in my initial thread, a bit of sanding, filler putty, steel wool, pine-sol, warm water wash, primer and top coat of black satin spray, good as new.
I've also switched to a different lamp:
I have two small 4x 18650 packs I keep in the top tube bag. That of course will likely be moved to the handlebar bag when I make my decision on that. Having two separate packs are nice because you get around 12 hours runtime on them, so when one dies you just swap and charge the other when you get back. It's also nice to know if I accidentally run the main pack flat, the lights have a separate power source. I was originally going to get fancy and tap into the existing 6v light power or the 48v source with a buck converter, but in the end decided against it.
I had a lot of troubles when I first got the "causing the non-criminal death of someone else" (what "aventure" means) with the non-working brakes and their horrifically bad to nonexistent customer service... but really I got it as a baseline with the plan to customize the Shakespeare out if it. The more I dial it in, the most satisfied I am with it.
As evidenced by the ear to ear grin I had going down the local "rail trail" that I think was creeping out the squares.
Thanks to the non-24 I live a 26 hour day. That means sleeping an extra hour and being awake an extra hour, so every 6 days I'm 24 hours off from the rest of the world. That's why you might see me posting here all sorts of odd/crazy hours. It also means when I'm awake at 3AM with nothing to do, I get on my bike... as such I try to be lit up like a Christmas tree.
I made a previous thread that listed all my upgrades and parts from back in October '21
My "misaventure" in e-biking
Originally this was going to be a very different post... outlining the past six months, issues with members of the community, and so forth. But I'm setting that aside for now to just talk about where I'm finally at. Having a working e-bike that I like and enjoy riding. Instead I'm just going...
electricbikereview.com
But over the past couple weeks I've made a number of updates. The biggest of which is a new fork.
It's not the greatest or best, but came recommended from a friend and looked typical of what's available in 135mm width in the style I want at that price point. The extra 40mm of travel and that I was able to adjust it an inch and a half taller than the stock one, and being an inch forward makes a huge difference in how it rides. Looks great too.
The only real problem is that the taller stance has the front brake hose so taut I can't even run it through the fork guide. I've got a real of hose and some fittings on the way.
I also swapped out the front rotor for something nicer and lighter. Ok, it's only 5 grams lighter, but whatever.
Which is just this el-cheapo.
Got one for the rear too, but I'm probably not putting that on for a couple days. I dislike swapping out brakes front and rear at the same time just in case something goes south with the new one.
I've had folks elsewhere ask what I use to adhere my little trinkets like the one on the side of the fork, the front fender, the top tube, or the rear fender, and where I got them.
They're just amulet trinkets that are like two to ten bucks for a giant bag of 'em off e-fence or Amazon. Simple snips take the little mounting eyelet right off. For glue, my weapon of choice is Gorilla's "Clear grip contact glue". It's a thick clear contact cement, that solidifies up good enough it's not coming off from normal wear and tear, but if you yank with a twist just right, can be removed if you change your mind. Like all contact cements you apply to both surfaces -- I like to put a ton on the trinket, apply to the area, then remove -- let dry for two minutes, then stick them together again. Any excess can be removed with a toothpick or other soft edged tool.
One word of warning for people looking at the aventure, the bottle cage mount on the "small" is pretty useless for anything larger than 16oz.
Also note that I got rid of the butt floss seat for a bit more cush. Christmas on a cracker people, don't those crappy little narrow seats screw up your tailbone? The seat it came with -- that I've even heard people praise -- hurt so bad I could barely get up my stairs. I see everyone riding these narrow little arse pounders... that HAS to hurt! It think I said it before, just because when sitting normally most of the force is applied to the sitz bones, is no reason to redirect ALL the force there!
I think I'm going to lose the sloppy cheap (two dollar) top tube bag for a larger handlebar one. It just doesn't fit the frame properly due to the curve Aventon puts on the tube. It is likely more viable to bar mount now that I've got the taller fork. It actually "feels" like there should be something mounted there. Might even be able to mount a bar bag TO the fork instead of the bars. I dunno, is that a bad idea?
I also re-arranged the placement on my bars again
Moving the display over lets me angle it down for less daylight glare. I think I'm going to take some waterpoof neoprene and cut a hood for it to further improve daylight visibility. Again, contact cement is your friend on projects like that. Moving it there let me put the control pad back over where it's supposed to be next to my bell.
Also that pic really shows how little slack there is on the brake hose.
I'm still amazed how good those replacement bars came out considering they had rusted to the floor of my garage for a decade, needing to be pried up off the floor. As I said in my initial thread, a bit of sanding, filler putty, steel wool, pine-sol, warm water wash, primer and top coat of black satin spray, good as new.
I've also switched to a different lamp:
I have two small 4x 18650 packs I keep in the top tube bag. That of course will likely be moved to the handlebar bag when I make my decision on that. Having two separate packs are nice because you get around 12 hours runtime on them, so when one dies you just swap and charge the other when you get back. It's also nice to know if I accidentally run the main pack flat, the lights have a separate power source. I was originally going to get fancy and tap into the existing 6v light power or the 48v source with a buck converter, but in the end decided against it.
I had a lot of troubles when I first got the "causing the non-criminal death of someone else" (what "aventure" means) with the non-working brakes and their horrifically bad to nonexistent customer service... but really I got it as a baseline with the plan to customize the Shakespeare out if it. The more I dial it in, the most satisfied I am with it.
As evidenced by the ear to ear grin I had going down the local "rail trail" that I think was creeping out the squares.
Last edited: