Cannondale Topstone Gravel Ebike

  • Thread starter Deleted member 18083
  • Start date
I wanted to make use of the bottle cage mounts on the down tube. That ended up being more trouble than it's worth. I was able to make use of the seat tube bottle cage mounts. It is enough space for a can of beer, or a tool/repair kit. The King Cage lowering cage fits perfectly.
IMG_20210328_120907.jpg
 
On the XL frame the Revelate tangle bag just fits and leaves room to use both bottle cage locations. The battery goes in on the drive side of the bag and fits just right with the cover fitted, in a protective woven cloth tube and allows for some low profile items to be kept in the left side of the bag with a panel between compartments.
20210328_121932.jpg
 
These bikes are heavy. I live in a hilly environment, and I brake a lot. Thus, I'm pretty sure I'm going to want to upgrade brake rotors. Any suggestions?
I've never had a bike with disc brakes prior to this.
It looks like Alaskan may have upgraded his from the stock offering.
 
these are the ice tech pads I put on the bike with cooling fins to reduce brake fade on long descents.

The rotors I put on are also use the Ice tech with aluminum centers for lighter weight and more efficient heat dissipation. from Jensonusa.com
Shimano XT SM-RT86 6 Bolt Ice-Tech Rotor
6 Bolt Style, 160mm​
Shimano XT SM-RT86 6 Bolt Ice-Tech Rotor
6 Bolt Style, 180mm​
br257l00-----6----160.jpg
s-l1600.jpg

 
I dropped my bike off at my LBS for service. I'm having Panaracer Gravelking 650 x 48c tires installed tubeless, along with a 80 mm stem in place of the 100 mm. They did not have a 180mm Shimano icetech rotor in stock, so that will have to wait. Bike stores in general are super busy, and I imagine this will only get worse as Summer approaches. I'm trying to get any service or upgrades I need/want taken care of now. I'm hoping having a tubeless setup will mean an end to flat tires.

1617047495990.png
 
My LBS ordered the wrong tires!!!!
There are two versions of the Panaracer Gravelking 650x48. One is basically slick, the other is more knobby, and appropriate for gravel. My LBS ordered the slick version. Oh, well. I guess I'll ride these for awhile. I should get better efficiency.
 
Yeah, Panaracer makes a few versions of the Gravelking. The Gravelking SK (small knob) is the popular gravel version you probably wanted. They also make the Gravelking SS (semislick) which has a slick center section with knobs on the edges, and also a pure slick version with basically no knobs at all.
 
These are definitely the "pure slick" version.

These tires setup tubeless definitely roll with less friction. The bike feels noticably lighter when I pick it up. I imagine I will get a mile or two more per charge with the lessened rolling resistance.

Speaking of charge I had a 4A Bosch charger die on me. Luckily I have a spare.
 
Last edited:
Looks like you've used up every available space on the bike for storage bags. 👍
So far I'm really enjoying my Specialized Pathfinders on pavement, but boy-oh-boy they don't like loose gravel or sand.
 
View attachment 84477
This is the final iteration of my bike packing setup. I have my tent, groundsheet, and sleeping pad in the handlebar bag. I have my sleeping bag in the seatpost bag. The spare battery and chargers fit in the triangle bag. A few items, including water, will be carried in a backpack.
What are the three bolt holes under the frame opposite the front wheel used for? It seems like a tight fit to put anything there.
 
What are the three bolt holes under the frame opposite the front wheel used for? It seems like a tight fit to put anything there.
The class 1 topstone I first had, those bolt holes had some type of plastic bolt in them. The class 3 I now have had open bolt holes, meaning water or anything could get into the battery compartment. If I had to guess those holes are for mounting some type of plastic down tube protector. I just used helicopter tape to cover the holes and most of the frame. It seemed like the helicopter tape might not stay adhered but it's holding up fine. I applied it dry without a squeegee.
 
Last edited:
Looks like you've used up every available space on the bike for storage bags. 👍
So far I'm really enjoying my Specialized Pathfinders on pavement, but boy-oh-boy they don't like loose gravel or sand.
The GravelKings I currently have on my bike have surprisingly good traction in a variety of conditions. They have a unique textured tread. The one exception is any amount of mud. They don't cut it in mud.

I ordered the GravelKing SK, which have the knobby tread. They were on sale for $35 a tire. I'll wait a few months before I swap tires to gain more traction on forest roads, etc.
 
The class 1 topstone I first had, those bolt holes had some type of plastic bolt in them. The class 3 I now have had open bolt holes, meaning water or anything could get into the battery compartment. If I had to guess those holes are for mounting some type of plastic down tube protector. I just used helicopter tape to cover the holes and most of the frame. It seemed like the helicopter tape might not stay adhered but it's holding up fine. I applied it dry without a squeegee.
The three bolt holes in the underside of the down tube on my class three have three rubber plugs shaped like short brads with the narrow pin part into the hole and the head lays close to the hole covering it. I have puzzled as to why those holes are there but have not come up with an answer.

If you remove the battery and look at them from the inside, there is a stainless rectangular nut that is threaded. If you are concerned about water ingress, a round head hex machine screw with some locktite would plug the hole too.
 
Last edited:
I think I'll clean the area that has the three holes and put down a strip of helicopter tape. I'm still looking for a 'fender' that I could attach to the bike's down tube using those holes.
 
I think I'll clean the area that has the three holes and put down a strip of helicopter tape. I'm still looking for a 'fender' that I could attach to the bike's down tube using those holes.
If you do attach a splash guard or fender to the downtube using those threaded holes, make certain that the machine screw does not protrude inside the downtube as it could make contact with the battery and possibly damage it. The threaded end of the screw should be either flush with the inner nut face or slightly recessed.
 
A few people have noticed with these bikes that a bolt inside the motor housing can work itself loose and start to make noise when pedaling. I think that has happened to me. It seems to be gradually getting more pronounced. I guess I'll take it into REI and have take off the motor cover and take a look. I'd like to be able to fix it myself in the future, especially if I go on a bike tour.

Also, a continuing issue I've had with my second topstone lefty is a very annoying squeek coming from the front brake. The first bike I had did not have this issue at all. It's really, really, really annoying. I've had the brakes adjusted, and they did some type of treatment which should have remedied the issue. However, it has not. I'm going to upgrade to the icetech discs and hopefully that will solve the problem.
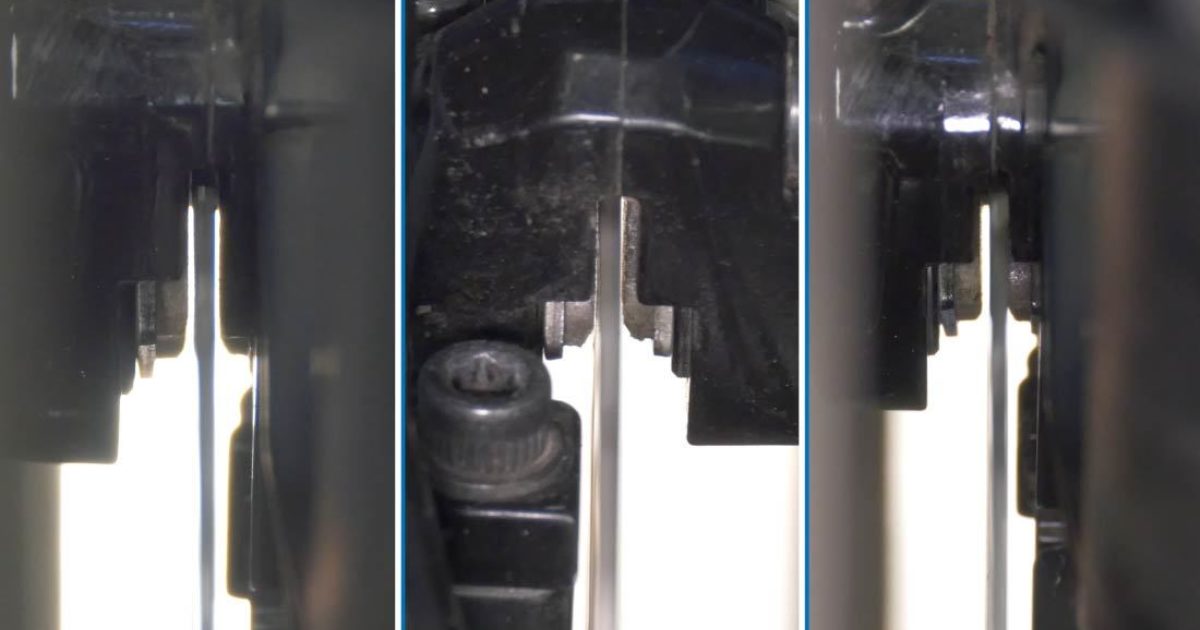
Centering the rotors on between the pads is a delicate and essential skill to master so you don't have to keep running to a shop to get it fixed. It requires three tools. One is a hex wrench to loosen the bolts that hold the caliper on the mount. The second is a flashlight to inspect which side is rubbing.

The third is a tool that takes some getting used to which is for correcting any warpage in the brake rotor.

There are some good videos on youtube to guide you through the process, in particular one by Park Tools.
 
Back