Wheel axle does not fit fork end

mizja

New Member
Hello,

I am new to assembling ebikes and bikes in general so I apologize if this is a stupid question.

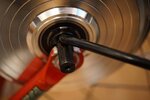
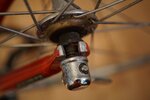
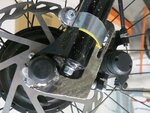
I would like to convert my old road bike into an ebike with a front hub conversion kit. Everything has gone well so far despite my lack of experience but I am currently stuck. The wheel axle does not fit in the fork end. It is quite difficult to see what actually stops it from sliding in place but I am guessing it is the fork end. Would you suggest to use a file on the fork end until it fits?

I have attached two pictures of the new wheel axle and a picture of the old one.

40493 40494 40495
 
Since a lot of people suggest not using an aluminum fork with a hub motor, and some of the safety shoulder is missing, my recommendation is to buy a new fork.
 
Ok thank you very much! I will look into that. I could not find much information about safety shoulder on Google. What is that?
 
Hello,

I am new to assembling ebikes and bikes in general so I apologize if this is a stupid question.

I would like to convert my old road bike into an ebike with a front hub conversion kit. Everything has gone well so far despite my lack of experience but I am currently stuck. The wheel axle does not fit in the fork end. It is quite difficult to see what actually stops it from sliding in place but I am guessing it is the fork end. Would you suggest to use a file on the fork end until it fits?

I have attached two pictures of the new wheel axle and a picture of the old one.

View attachment 40493 View attachment 40494 View attachment 40495
just remove the excess metal with a file
40497
 
Hello,

I am new to assembling ebikes and bikes in general so I apologize if this is a stupid question.

I would like to convert my old road bike into an ebike with a front hub conversion kit. Everything has gone well so far despite my lack of experience but I am currently stuck. The wheel axle does not fit in the fork end. It is quite difficult to see what actually stops it from sliding in place but I am guessing it is the fork end. Would you suggest to use a file on the fork end until it fits?

I have attached two pictures of the new wheel axle and a picture of the old one.

View attachment 40493 View attachment 40494 View attachment 40495


!!!!!!DO NOT USE THAT FORK!!!!!! IF you were using a 250W motor, and there were two torque arms, one on each side, you MIGHT get away with it.
 
if you motor power more than 350W you need improve with dropout amplifier like that
View attachment 40498
We have little information here. We don't know what the bike is or what the fork actually is. NOR do we know what size motor and it's expected torque. Custom torque arms are expensive adding another $50-$200 unless he can fashion his own. endless_sphere is a builder forum with lots of ideas and workarounds, but it'll take some research. If it's an inexpensive bike, I'd find a used bike that's acceptable with a steel fork. And yes it's common Mohave to file dropouts a bit to fit.


TORQUE ARMS
Torque_Diag2.jpg


Torque_Diag.jpg
Torque arms are used to prevent axle rotation in hub motors. When a hub motor is powered up running, for all the torque that the motor generates spinning a wheel forwards, there is an equal and opposite torque on the axle causing it to rotate backwards.

In most electric bicycle hub motors, the axle is machined with flats on either side which key into the dropout slot and provide some measure of support against rotation. In many cases this is sufficient.

However, in high power systems that generate a lot of torque, or in setups with weak dropouts, the forces present can exceed the material strength and pry the dropout open. When that happens, the axle will spin freely, wrapping and severing off the motor cables and potentially causing the wheel to fall right out of the bike.

To give a sense of the magnitude of these forces, a hub motor with a 12mm axle generating 40 N-m of torque will exert a spreading force of just under 1000lb on each dropout. A torque arm is a separate piece of metal attached to the axle which can take this axle torque and transfer it further up the frame, thus relieving the dropout itself from taking all of the stresses.

Grin Tech Torque Arm Designs
There are countless unique styles and geometries of bicycle fork and dropout area, so one of the challenges for us has been to design a device that will accommodate at least the large majority of them without much customization. Our solution to this has been a unique 2-piece approach, which gives the necessary flexibility to fit the wide range of dropout angles and tube locations without compromising the anti-rotation ability.

torque arm rev 1
TorqArm_V1
We developed our first such 'universal' torque arm design in late 2009. In this model, the arm part was attached to the fork with a single hose clamp, and the the axle plate could pivot to fit different dropout slot angles. When the motor is powered, it tends to rotate the plate clockwise, and with the pivot point on the back this causes it to further 'push' the axle up deeper in the dropout. Notice that if the torque arm is mounted backwards, on the front side of the fork, then it would have the opposite effect and axle torque would tend to pop the wheel out of the dropout. While this design did work, we did run into several instances of failure from the hose clamp in cases where a motor controller had shorted mosfets. The curved hose clamp slot in this design put stress concentration points on the clamp which facilitated the hose clamp tearing in half. As a result we discontinued manufacturing this model in 2010 and do not recommend its usage.
torque arm rev 2
torque arm rev 3
torque arm rev 4
TorqArm_V2
The Rev2 design was engineered to make use of the existing fender eyelet holes that are on most front forks. This can lead to a smaller arm and a tidier installation than using hose clamps around the fork, and we recommend its use whenever there is a suitable eyelet present.
TorqArm_V3
For forks that don't have fender eyelets, or where the fender eyelet holes don't line up, we created up updated variant of the original hose-clamp model with the Rev3 layout. Here, there are small slits for 2 or even 3 hose-clamps to provide extra spinout strength, and the long curved slot in the axle plate allows for for the clamping arm to attach parallel with the fork tube and always intersect correctly.
TorqArm_V4
Rear bicycle dropouts are usually thicker and stronger than the front fork dropouts but in cases with shallow vertical dropouts, or with powerful (>1000 watts) motor setups, a torque arm can be important. Our Rev4 design uses multiple hose clamp slots to secure to the the arm to a seatstay tube. The axle plate can flip directions to accommodate both horizontal and vertical dropouts, while the hose-clamp arm clears up and over most eyelet holes present on the rear.


TrqRev4_Install.jpg

General Torque Arm Info
Manufacturing:
All of our torque arms are currently laser cut in the USA and assembled and finished in Canada. We use thick ¼" stainless steel plate for the anti-rotation slot and use industrial stainless steel hardware for all the fasteners as well.

Purchasing:
The front Rev2, Rev3, and rear Rev4 torque arms are all available directly from our Torque Arms store page, from various dealers around the world, and also via Amazon.com. If you are in the US and only interested in a torque arm purchase, then amazon will be your best bet to obtain it quickly and with cheap or free shipping.

Installation:
The images above show the correct installation alignment for the various torque arm models we've designed. There are a few important points:

Tighten the 1/4" bolt between the axle plate and the arm as snug as possible. If this nut is loose, then axle can rotate some amount and the bolt will slide in the slot. Though it will eventually bottom out and prevent further rotation, by the time this happens your dropout may already be damaged.
The tolerances on motor axles can vary from the nominal 10mm. The plate may slide on freely with a bit of play, it may go on perfectly snug, or in some cases a small amount of filing may be necessary for the plate to slide on. In situations where the axle flats are a bit narrower than 10mm and you feel play, it is not much of an issue, but you can "preload" the axle plate in a clockwise direction as you tighten everything up.
Many dropouts have quick release "lawyer lips" that come out sideways and prevent the torque plate from sitting flat against the dropout. If this is the case, you will want to be sure to have a washer that fits inside the lip area. We make custom "spacer 'C' washer" for this job, though the lock washer that comes with many hub motors is often about the right width and diameter.
For the hose-clamp model, a small length of heat-shrink tubing over the stainless steel band can make the final installation look more discrete and protect the paint job from getting scratched. We include several pieces of shrink tube with each torque arm package.
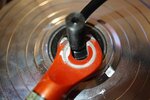
 
I used a 4 1/2" body grinder to open up the fork slot in my Huffy Savannah. Use safety glasses with power tools. It was a steel fork. I still used 2 torque arms. Take a piece of steel 1/8" thick 1 to 1 1/2" wide , say a piece of bed frame rail 4" long. Drill 2 5/16" in holes in it close together. Connect the dots and make the oblong for a bike axle with nicholson files (not the harbor freight imitations). Round file & triangle file work for me. Drill #11 hole in the end. Don't use hose clamps, make a steel strap out of a piece of 1 1/2" wide sheet metal cut from a dead appliance like a box fan. Drill lots of #11 holes in the strap. Bend the strap into a U, wrap around the fork. Use 10-32 or 5 mm machine screws to fasten torque arm to strap. Use another to clamp strap around the fork strut. Use elastic stop nuts (mcmaster.com) to keep the torque arm from coming unscrewed.
 
My motor is 500W, and the bike is a GT Force road bike from the late 90s. I know little about the bike but BikePedia says the fork material is chromoly and the frame material I'm not sure if chromoly or aluminium. Will that be strong enough without custom arms? I'd preferably avoid expensive custom torque arms. The conversion kit included a torque arm which is the TorqArm_V1 in the information you sent, but it is probably not high quality.
Maybe the easiest solution is to find a newer bike with steel forks?
 
My torque arms cost $0. About 2 hours work each. Bed frame rails & box fans get thrown away all the time. Get up early in the morning, cruise around on your bicycle to avoid wasting gas. I use string to strap rails to the bike basket & handlebar. You have to have drill index & drill motor, safety glasses, vise, dirty shop area. Sheet metal shears (wiss) for cutting the strap. Round & triangle files (real). You can put 3" wheel on arbor in the drill motor if you're not ready for a body grinder yet.
Bikes with steel forks get thrown away all the time, follow the junk man in his pickup. Or cruise charity resale shops, or more expensive, flea markets. My yard man that can't drive & picks up cans in the mornings, brought me bed frame rails for $5 until I had to stop him.
 
My motor is 500W, and the bike is a GT Force road bike from the late 90s. I know little about the bike but BikePedia says the fork material is chromoly and the frame material I'm not sure if chromoly or aluminium. Will that be strong enough without custom arms? I'd preferably avoid expensive custom torque arms. The conversion kit included a torque arm which is the TorqArm_V1 in the information you sent, but it is probably not high quality.
Maybe the easiest solution is to find a newer bike with steel forks?
Does a magnet stick?
 
Ok thank you very much! I will look into that. I could not find much information about safety shoulder on Google. What is that?
On your first picture, the shoulder that has the paint and metal ground off. If the nut should come loose for some reason, and you hit a bump and the front end floats a little, the wheel won't drop out of the slot. The washer slides until it bumps against that shoulder. No idea how you ground off the material, but since you will be riding at more speed now, better safe than sorry!
 
My motor is 500W, Will that be strong enough without custom arms? I'd preferably avoid expensive custom torque arms. The conversion kit included a torque arm which is the TorqArm_V1 in the information you sent, but it is probably not high quality.
Maybe the easiest solution is to find a newer bike with steel forks?
The torque arms I posted are some of the very best. I have used them on a front drive 750W Aluminum fork. My friend has been riding it for 4 years. He insisted, I objected but since we used quality torque arms it's worked. I still don't recommend, and would never sell a motor to a customer planning to build off an aluminum fork. Were it some high tensile strength aluminum, which they aren't, I'd consider it.

!!!!DO NOT BE SILLY STUPID AND CHEAP OUT!!!!
 
Ok, I think I will find a different bike with steel forks, better safe than sorry.

Thank you all for the input. It has been very insightful!
 
Torque arm that I bought for my Tern Verge Si8 was not that expensive. I think around $27 Can...cheaper than buying another bike. Are you not mechanically inclined? What Thomas is recommending makes perfect sense and safe.
 
I might have misunderstood some of the points as English is not my first language. I would much rather install some torque arms instead of buying a need bike. So adding one or two high quality torque arms to my alunimum forks would be safe enough? I do not need to have steel forks?
I live in Europe so I would like to avoid ordering from the US as it would be very expensive with shipping and duties. Would these be considered safe enough? They look quite thin. https://www.amazon.co.uk/dp/B07QD5QWJ1

These are thick but only for rear wheel hub motors, and therefore not what I need, if I understand correctly: https://ebay.us/MwfF52
 
What if I installed a new steel fork instead of the aluminum fork I have currently and then added some torque arms? Is this possible and would this be the optimal solution?
 
Back