Specialized Turbo Vado SL: An Incredible E-Bike (User Club)

So I was talking to a 'bike guy' who suggested that I look for a set of thru axle 700C mountain or cross country wheels with boost spacing.
This would provide a 12x148 rear and a 15x110 front. He then suggests that I switch the end caps at the front hub to accommodate the 12x110.

What say you about this idea?
We did that with mrs e-levity's SL 5. DT Swiss sells 12 and 15mm end caps that can be swapped.
In her case we used DT350 boost hubs and 27.5 carbon rims.
 
With regards to the seatpost - I like the look of the PNW coast dropper (40mm suspension and 100mm drop). I know it comes with external or internal routing- has anyone had success with internal routing of a dropper? (It looks so much neater). The rear brake and derailleur don't seem to leave any room for a 3rd cable. (I tried a search bit couldn't find any guides to an install - sorry!) and I know specialized advise its not compatible.

We routed the dropper cable for rigid 90mm PNW posts internally on our SL 5 bikes. It's tricky threading the housing over the motor and up the seat tube. You will also need to trim the plastic cover where the cables exit the upper down tube to accommodate all three cables.
 
We did that with mrs e-levity's SL 5. DT Swiss sells 12 and 15mm end caps that can be swapped.
In her case we used DT350 boost hubs and 27.5 carbon rims.
I'd guess those 27.5 wheels & tires really change the character of the ride
 
I'd guess those 27.5 wheels & tires really change the character of the ride
The main thing is that is allows use of wider tires and lower pressures for off-pavement riding.
The Panaracer Gravel Kings used measure 51mm wide on i30 rims (these won't fit in the standard fork).
The bottom bracket is a bit lower, but the tires are tall and wide so handling isn't that different.
 
Noticing Stefan's excellent explain of 'slam' I saw no pics. This shows the stem 'flip', yes keep the light the mounts swap around. Full 'slam' implies all spacers removed below the stem, not shown. Saddle position implies I ride on the 'horn'.

Flatbar gravel, 3yrs 12k miles of smiles, anxious for carbon options
 

Attachments

  • 20240115_131542 (2).jpg
    20240115_131542 (2).jpg
    632.3 KB · Views: 35
Last edited:
Full 'slam' implies all spacers removed below the stem, not shown. Saddle position implies I ride on the 'horn'.
I think I kept some spacers below the stem as removing all of them made my riding position too forward.

Thank you for the explanation of 'flip' vs 'slam'!
 
(Very early) good morning, guys!

I had an issue with my Vado SL (a.k.a. Fearless) in the last week of February. I had the e-bike transported to another city, where I was expected to do a training with an industrial customer. Having an e-bike with me made my life easy, from a breakfast at a service station at 4:30 am through commuting to a late dinner. However, something felt very wrong about my Fearless. There was a loud creaking in the motor area with each revolution of the cranks. It was making my rides inefficient and unpleasant.

To make a longer story short, it turned out the splined hole of the drive-side crank-arm got worn out. The reason was heavy beating that specific crank-arm was getting during my numerous crashes. (My brother swapped the L and R crankarms for a test and said it was obvious the R crankarm was damaged).

I could have ordered a full L + R set of crankarms for 
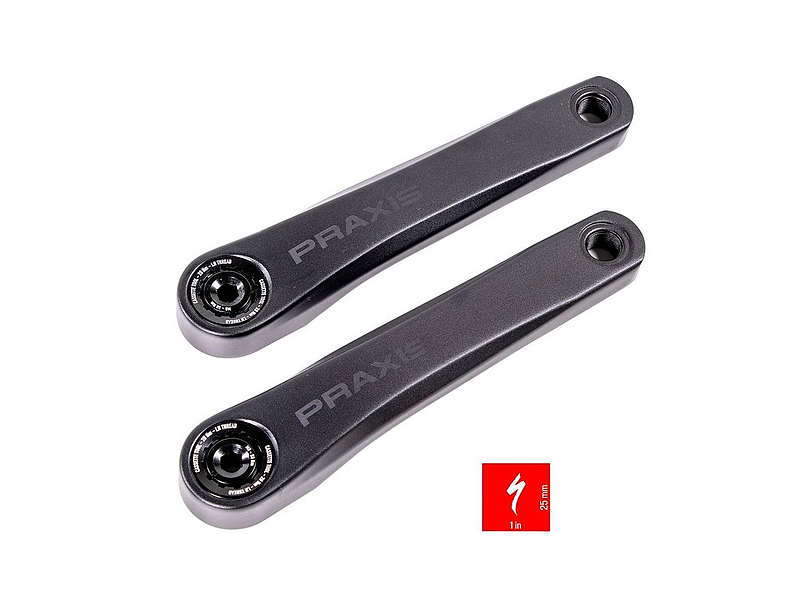
Specialized SL 1.1 motor in Germany:
The cost including shipment would be some 90 euro.

It was also possible to buy a single Drive-Side crankarm:
The price including shipment would be some 60 euro.

1710050535011.png

I decided to order the part via my Specialized LBS. The price I paid for the correct crank-arm was some 56 Euro. (Do not pay the attention to the bike lock!) :)

The rest was easy. I got my diagnosed Fearless with loosen pedal and crankarm. Now, the splined motor spindle was already treated with a lots of grease. I just mated the crankarm with the spindle, inserted a 20 cm (8") 8 mm hex key into the socket and started rotating the wrench clockwise. After the splines found each other, I simply rotated the wrench as long as it stopped turning, then gave a mighty push with one hand to provide the tightening torque (you actually do not need a long torque wrench to complete the operation: once the wrench stopped turning, you cannot turn it any more).

1710051328052.png

Done!

Let us see how it works today!
 
Last edited:
The reason was heavy beating that specific crank-arm was getting during my numerous crashes.
Numerous crashes? Exactly how often do you crash, Stefan? Do these happen at random times or do you have a particular schedule that you follow so that you remember to crash? ;)

In any case, nice job on the repair and a good explanation of the mechanics involved. I hope that it holds up for you!
 
Exactly how often do you crash, Stefan?
I used to crash very often 😊
It could be a crash on rough ice (that hurt!), occasionally riding onto a curb at night, many crashes offroad (it is a usual thing) or a mishap on a speed bump at high speed (a good helmet saved my skull!)

During the night crash, Fearless took the entire impact so I came out unscathed but the crankarm bent. Jacek had to hammer it to straighen the part.

All this made the connection to the spindle damaged. Now, I am on a ride, and everything is perfect 😊 I wish I had no crashes anymore!
 
Picked up my new Turbo Vado SL 4.0 EQ from the Specialized flagship store in Medellin this morning and rode it home. I LOVE IT! Its a much better match for me and what I want and like than the Turbo Vado was.
I love the 10 kg weight reduction, and the controls are much simpler…and I am a total believer in Thoreau‘s mantra-“simplify, simplify, simplify!”
also love the fact that it feels like a road bicycle!
I'm so glad to hear it, Marquez! Your dream has come true! ❤️

Let us know your early experiences and some photos maybe. I'm writing it on my night shopping ride on a Vado SL (like yours), a cold and windy night!
 
The rest was easy. I got my diagnosed Fearless with loosen pedal and crankarm. Now, the splined motor spindle was already treated with a lots of grease. I just mated the crankarm with the spindle, inserted a 20 cm (8") 8 mm hex key into the socket and started rotating the wrench clockwise. After the splines found each other, I simply rotated the wrench as long as it stopped turning, then gave a mighty push with one hand to provide the tightening torque (you actually do not need a long torque wrench to complete the operation: once the wrench stopped turning, you cannot turn it any more).

View attachment 172334
Great - can you just confirm that you only need the 8mm hex to get the crank arm off. It looked like you needed a special spline tool so I didn't want to go too far !!
Also am I correct that to remove its anti-clockwise on the chainring side ??
 
Last edited:
Great - can you just confirm that you only need the 8mm hex to get the crank arm off. It looked like you needed a special spline tool so I didn't want to go too far !!
Also am I correct that to remove its anti-clockwise on the chainring side ??
Yes, the only tool you need to remove or install the "self-extracting" crank-arm is a long (20-21 cm) 8 mm hex wrench!
The crank-arm is extracted by normal rules (anti-clockwise to extract, clockwise to pull on) on either side. (The crank-arms for Drive-Side and Non-Drive-Side are different). It is the whole beauty of the self-extracting crank-arms!

To avoid any confusion: there are two markings on the crank-arm: "Cassette tool -- 20 Nm - LH Thread" and "M8 -- 50 Nm". Please never apply the cassette tool: it is irrelevant to us. A simple 8 mm hex wrench is the only tool needed.
 
They're here! My new custom wheels from ProWheelbuilder.com arrived today. Why new wheels? Mainly because I wanted them and it's fun to configure a bespoke wheelset. They're built around silent Onyx Vesper hubs and silver bladed Sapim spokes (stays with the black & silver scheme of my Vado SL 5.0) with DT Swiss RR481 rims.

They're of course tubeless compatible but I'm staying old-school with the more familiar tubes. Frankly, there are few flat hazards in my area and all the sealant stuff would just be a hassle for me. I'll be mounting 700x42 Pathfinder Pro tires. I'll post pics when I have everything mounted up on the bike.

2024-03-12 12.45.41.jpg

2024-03-12 12.46.14.jpg
 
To avoid any confusion: there are two markings on the crank-arm: "Cassette tool -- 20 Nm - LH Thread" and "M8 -- 50 Nm". Please never apply the cassette tool: it is irrelevant to us. A simple 8 mm hex wrench is the only tool needed.
The cassette tool is in case you want to remove the inset ring that the bolt presses against when self-extracting?
 
They're here! My new custom wheels from ProWheelbuilder.com arrived today. Why new wheels? Mainly because I wanted them and it's fun to configure a bespoke wheelset. They're built around silent Onyx Vesper hubs and silver bladed Sapim spokes (stays with the black & silver scheme of my Vado SL 5.0) with DT Swiss RR481 rims.
Wow! What a nice upgrade Doug! I'm sure these wheels are more lightweight than the stock ones, and you will get a benefit as a lightweight rider. I can also remember you have always been for silent hubs! :)

Remember to move the magnet to the rear wheel when you have installed the brake rotor!
 
Back