Jeremy McCreary
Bought it anyway
- Region
- USA
- City
- Carlsbad, CA
Thanks! Figured no better place to share inexpensive but durable and effective finds than EBR. Pricier isn't always better.
Thanks! Figured no better place to share inexpensive but durable and effective finds than EBR. Pricier isn't always better.
Wasn’t sure about which vinyl, plastic or poly tape? I see an inexpensive 3M clear paint protection vinyl film for under $10, but then “helicopter tape” for $30-40?
I buy it this way and cut the shapes that I need.
Maybe the manufacturing standards are higher when you're taping helicopters together?Wasn’t sure about which vinyl, plastic or poly tape? I see an inexpensive 3M clear paint protection vinyl film for under $10, but then “helicopter tape” for $30-40?
I have this as well and it's very handy. I do recommend paint protection under the straps. The motion of repeatedly pulling out and replacing a water bottle polished a shiny strip in my matte paint under the straps pretty quickly.
Whoa...PERFECT! I do the same, throw the bike in the bed. I get road spray/salt on the front. I've been looking for something like this.I assume this thread also applies to products that aren't specifically designed for bike use but can be repurposed.
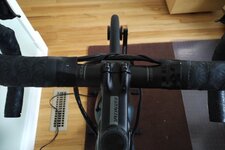
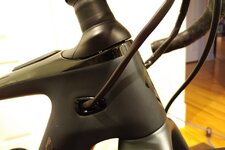
I carry my bikes in the open bed of a pickup truck and the handlebar accessories take a beating on the highway from wind, rain & airborne debris. Over the years, I've tried various handlebar protectors, some cheap and some not so much. None have lasted more than a few trips before the wind tears them up.
A few years back, I came across these arm protector sleeves
At $11/pair, they are the least expensive protectors I've tried that actually stand the test of time. After 5 years and over 5000 miles, they show no signs of deterioration.
View attachment 147810 View attachment 147811
They are made of weatherproof nylon & PVC and the elastic openings allow them to be installed quickly and easily.
Okay, got the 3M clear vinyl stuff, and it’s works fineWasn’t sure about which vinyl, plastic or poly tape? I see an inexpensive 3M clear paint protection vinyl film for under $10, but then “helicopter tape” for $30-40?


The silicone fusion tape was a great recommendation, thanks. MUCH better than electrical tape.For small jobs, such as finishing bar tape, I like self-fusing silicone tape as it only sticks to itself, stretches and conforms, removes easily and doesn’t leave any residue behind. Branded X-Treme in the US and Fusion Pro in Canada.
View attachment 149069View attachment 149071
Another trick I use to adhere bar tape is to apply a layer of electrical tape sticky side up. Cheap and no mess to clean up.
Heat shrink tube is another great way to keep cables neat and tidy.
View attachment 149070
These bullhorn bar ends have been great for me, to allow multiple hand positions when climbing and to prevent numbness especially during 4-6 hour rides. Only $14.99 !! Has lasted me 6000+ miles and 1.5 years so far.
https://www.amazon.com/Yizhet-Handlebar-Ergonomic-Mountain-Non-Slip/dp/B08MTGXDKV
I have several sets of panniers I've acquired over the years, but they won't attach to the thicker tubing used on the rear racks of many e-bikes. Faced with the prospect of spending $$$ on new panniers, I began looking at other ideas. There are rack adapters out there but they can be pricey and are difficult to fit on some bikes. Replacing the rear rack in my case is out of the question since the racks on my bikes are integral to the frame.
Instead, I made up this simple auxiliary rail using smaller 1/2" aluminum tubing which my panniers will fit. I attached the tubing to the bike frame using these insulated cable clamps:
View attachment 147881 View attachment 147883
The clamps are rubber lined and won't mar the bike's paint.
View attachment 147884 View attachment 147886
For a finished look, I added these end plugs:
View attachment 147882 View attachment 147885
I've been using these pannier rail adapters for 5 years now and they've held up perfectly.
View attachment 147887 View attachment 147888 View attachment 147889
It's a very simple DIY project requiring just a screwdriver and a pair of pliers. It took around a half hour to install. All the parts are readily available in most home improvement stores and cost less than $20. Far cheaper than a new rack, rack adapter or new panniers.