HOW TO REBUILD AND TRUE THE REAR WHEEL ON A CURRENT (ENVIOLO)
Method 1 - The Easy Way
Bring your bike to your trusty LBS and pay them to service your wheel. Done!
Method 2 - I'm a Pro or a Masochist
Set aside a couple of hours to follow these steps carefully:
- Spend remaining money on a truing stand, bike repair stand and wheel-building tools (spoke wrench, nipple driver, thread prep, extra 13g spokes, tension meter, etc.).
- Watch relevant tutorial videos listed above.
- Secure bike in stand with rear wheel elevated.
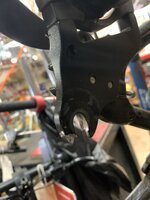
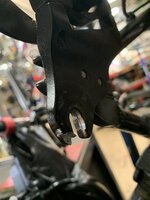
- Photograph relative positions of all components, especially CVT mechanism (a) cable holder (points toward front of bike), (b) inner ring (rotates while shifting gears), and (c) disc-side index (situated downward in left drop-out).
- Unclip both CVT cables, remove from holder, and lay them neatly aside.
- Remove both axle nuts (with spacers) using 15mm box wrench.
- Lower wheel gently to the ground while carefully unlooping drive belt from rear sprocket. DO NOT BEND, PINCH OR TWIST BELT!
- Place rear wheel on table, resting flat with drive-side axle pointed down.
- Let air out of tire and unseat drive-side bead using tire levers.
- Remove inner tube (air valve stem last) and set aside. (Optional: Seal any punctures.)
- Unseat remaining tire bead and set tire aside. (Optional: Check tread for debris.)
- Gently pry up and remove rim tape, noting valve hole location, and set aside.
- If rebuilding, aligning or tensioning, secure wheel in truing stand.
- Check for bent, loose or missing spokes. (Optional: Replace damaged spokes.)
- Prep spoke threads as desired (Spokesmith Spoke Prep, Permatex Thread Sealant with PTFE, Pedro's Waterproof Grease, etc.) and observe 2X-cross lacing pattern.
- Tension all spokes to approximately 110 kgf, checking rim for radial/lateral true.
NOTE: If lacing new head-in/shoulder-out spokes on disc side, follow these additional steps required to permit spoke insertion past disc rotor:
- With wheel lying flat on workbench, brake side up, unscrew the 8mm axle bolt and set aside.
- Use O-ring pick, jeweler's flathead screwdriver or some other small tool to pry open the copper locking C-clip and remove it from triangular axle shaft.
IMPORTANT: NOTE RELATIVE POSITION (i.e. 60-degree angle) BETWEEN BLACK PLASTIC MOLDED "INDEX PUCK" (surrounded by 7 small Torx bolts) AND CABLE HOLDER ON DRIVE SIDE!
- Remove index puck by lifting off triangular axle.
- With brake disc bolts now accessible, unscrew them using a star pattern (noting initial torque) and set aside.
- Remove the 180mm disc rotor and set aside. (Optional: Check for flatness.)
- Thread in new spoke(s) and secure with nipple(s), bedding, tensioning and destressing finished wheel as usual.
- Perform Steps 1-5 in reverse order to reinstall rotor and all axle components.
Tire and tube reinstallation is the reverse of removal process, as are the steps for placing the wheel back onto the bike. However,
be prepared to need more than two hands, as you must simultaneously (a) fully seat axles into dropouts, (b) while aligning "index" on disc side, (c) avoid pinching the CVT adjustment cables, (d) looping drive belt around both front chainring and rear cog without introducing any bends, kinks or torsion, and (e) ensuring that CVT cable holder correctly points toward front of bike.
Pro tip: Use the Gates Carbon Drive mobile app to check your belt's tension!
Finally, CVT cable reattachment is the reverse of removal, though slight rotations of the grip shift during this process may help provide a bit of extra cable slack as necessary.


