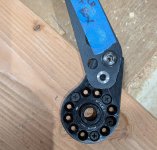
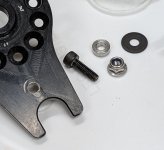
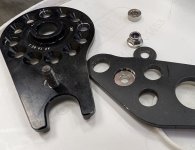
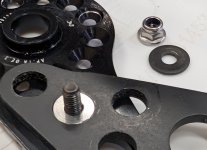
New High Torque IGH announced by 3x3

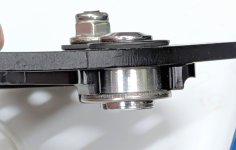
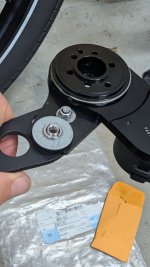
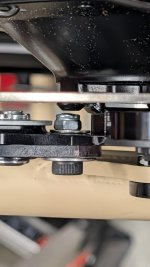
There is a guy claims there is a part can fail under high torque in the 3X3 nine hub and he makes reinforced part replacement for it. Anyone knows anything about it?


View attachment 205328

View attachment 205329
Yeah i saw this and mentioned it in another thread where someone was switching their Ultra bike from Rohloff to 3x3.
Other than the seller I've seen no mention of this possible failure.
 
I've got a 3x3 NINE on my project list for a cargo bike. Was going to transfer my Speedhub over and got surprised by the 142x12 thru axle. Doh!

I'm working through torque arm issues because Yuba played shenanigans with the rear brake mount dimensions, so the stock kit won't quite mesh with this frame.

I ordered up an axle plate from VLP to play with. I was caught off guard how large this axle plate is, after 25 years of playing with Speedhubs. I want to pay this step its due respect, because I am familiar with how the torque from Speedhubs can destroy frames if they're anchored improperly or if the dropouts weren't built with sufficient beef. I expect the 3x3 NINE hub will be similarly impactful since the torque output is a straightforward mathematical product of rider input, gearing, and resistance.

I have a selection of spacers, bolts, nuts and washers to try to mate this thing to a Rohloff torque arm. I think the torque arm will be my "safest" option but also the easiest to get working. 3X3 doesn't offer an off-the-shelf torque arm solution which is why I'm walking this down the DIY path.

Failing that, the fallback plan is to either modify or custom machine a new brake adapter. The spacing is close and relies on the lower IS bolt to anchor this thing, but it also means removing quite a bit of material from the brake adapter.

Click on the thumbnails to view the full-sized image:

View attachment 205333View attachment 205334
After getting an axle plate and a shifter box from VPL, the US distributor for 3x3, and a few small orders of spacers and such, I've come up with what I think is going to be a solution for getting this hub mounted the the Yuba Mondo EP8. This is an adaptation using a Rohloff torque arm.

I'm not 100% confident anchoring the torque arm to what is essentially an unsupported tube hanging out at the end of the frame, but it's 17 gauge steel, and I ran it by Rohloff and they didn't think it was a problem — so here we go!

PXL_20260301_204043357.jpg
 
Following up on my past couple of posts in this thread (January and March -- I'm working slowly), I've finally gotten around to assembling a crack squad of componentry to bring this 3x3 Nine cargo bike to life.

I'll save all that noise for its own thread, once my build is complete, though that's going to be at least another month out. I am still collecting parts from all four corners and then some, and a couple are stragglers.

But I did finish up on the Rohloff torque arm conversion, which is what I posted about in this thread 9 months ago, and with the 3x3 hub in hand, I made a few slight modifications to get it properly fitted to the frame:

* redrilled the hole in the axle plate to get better alignment for the cables entering the shift box
* ground down the hub end of the Rohloff torque arm for clearance
* found a thicker P-clamp that's the same gauge steel Rohloff uses for their torque arm clamps
* switched the black bolts to "shoulder bolts" which have a non-threaded shank for better shear resistance

The point of me sharing this post & photos isn't so much a how to, but just for some inspiration of adaptation. I'm not sure how I would have / could have gone about this had this not worked out so cleanly, but I realize this is all very specific to the Yuba Mondo and probably can't be replicated in whole on just any other frame. This was necessary primarily because the frame has a non-standard disc tab placement. It was fortunate that VPL was willing to work with me and get me some prototype parts to play with before I committed to ordering the hub.

Oh, and just a note, the major reason for the delay was that my beloved outgoing analog cargo bike kept getting used all summer, and plus I was really hesitant to sell it -- I put a lot into that bike and created many memories. I should have just added a front hub motor to it and called it a day. By comparison, this Yuba just isn't an inspiring bike. The old cargo bike took up a lot of space in the garage, and I committed to not start this build until that bike was gone. I finally found a buyer last month, allowing this build to commence.

I wrote notes for each photo below to narrate the sequence / assembly process. If you hover your cursor or click on the photo, the text should appear.

3x3 Nine w/ Rohloff torque arm, Yuba Mundo, final configuration (frame as pictured is upside down, in the workstand).
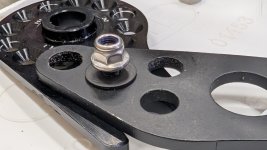
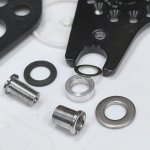
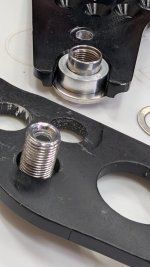
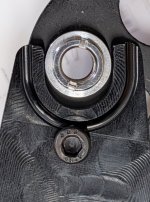
Axle plate fastened to 2x4, preparing to drill 6mm hole through spacer. Spacer here is sacrificial and used to center the drill bit, then thrown away. 'U' groove / chainring bolt stack is installed and tightened to determine drilling location.Newly added 6mm hole in axle plate, M6 bolt, spacer, washer, nut.10mm x M6 x 4mm spacer inserted in toque arm; M6 bolt through axle plate.Axle plate & torque arm joined; this will center the other torque arm hole over the axle plate 'U'.The black washer is a retainer for the spacer to prevent the nut from pulling out.Spacer stack / chairing bolt / washer assemblySpacer stack assembled and how it fits in the axle plate 'U' groove.At some point I decided I needed to flip the torque arm. Notice in other photos the torque arm is not symmetrical.This change messed up the alignment of my holes. Above the gap in the 'U', the spacer is no longer nested in the saddle. Needed to redrill the 6mm hole in a new axle plate to correct this.Chainring nut fits through the spacer stack and the washers securely sandwich these two pieces.Back side, final assembly. Changed to a larger fender washer to ensure full engagement with the lip on the back side of the axle plate 'U'.Final assembly, clearance from rotor bolts is tight.
 
Last edited:
Following up on my past couple of posts in this thread (January and March -- I'm working slowly), I've finally gotten around to assembling a crack squad of componentry to bring this 3x3 Nine cargo bike to life.

I'll save all that noise for its own thread, once my build is complete, though that's going to be at least another month out. I am still collecting parts from all four corners and then some, and a couple are stragglers.

But I did finish up on the Rohloff torque arm conversion, which is what I posted about in this thread 9 months ago, and with the 3x3 hub in hand, I made a few slight modifications to get it properly fitted to the frame:

* redrilled the hole in the axle plate to get better alignment for the cables entering the shift box
* ground down the hub end of the Rohloff torque arm for clearance
* found a thicker P-clamp that's the same gauge steel Rohloff uses for their torque arm clamps
* switched the black bolts to "shoulder bolts" which have a non-threaded shank for better shear resistance

The point of me sharing this post & photos isn't so much a how to, but just for some inspiration of adaptation. I'm not sure how I would have / could have gone about this had this not worked out so cleanly, but I realize this is all very specific to the Yuba Mondo and probably can't be replicated in whole on just any other frame. This was necessary primarily because the frame has a non-standard disc tab placement. It was fortunate that VPL was willing to work with me and get me some prototype parts to play with before I committed to ordering the hub.

Oh, and just a note, the major reason for the delay was that my beloved outgoing analog cargo bike kept getting used all summer, and plus I was really hesitant to sell it -- I put a lot into that bike and created many memories. I should have just added a front hub motor to it and called it a day. By comparison, this Yuba just isn't an inspiring bike. The old cargo bike took up a lot of space in the garage, and I committed to not start this build until that bike was gone. I finally found a buyer last month, allowing this build to commence.

View attachment 216297View attachment 216301View attachment 216299View attachment 216302View attachment 216304View attachment 216303View attachment 216306View attachment 216308View attachment 216307View attachment 216298
My old chum gave me a rough time about using a nice ss clamp on the torque arm-His solution two cheap plastic wire ties he absolutely didn't like that"big" metal clamp!
 
A pair of fat zip ties is what I used on the former cargo bike. I thought it would be temporary but they went the distance – about 8 years.

The difference here is that on the Xtracycle, the torque arm was primarily being driven into the frame – in the low gears, the force pushes the torque arm clockwise, or UP in this photo. No real strain on the zip ties.

In the 3 highest gears, the torque arm pulls, but it's only ever about 10% of the input force.

Screenshot_20261010-081943.png


On this new Yuba build the torque arm placement is flipped: it still primarily rotates clockwise, but now it will be pulling away from the frame & clamp, and with the motor involved as a force multiplier, I can't trust my zip tie solution. I've seen this torque output literally crack chainstays in half on mountain bikes (using the axle plate engaged directly with the disc brake mount, not using the torque arm), so I know the force is real and needs to be shown due respect –and figured this was a good opportunity to get it right.
PXL_20260218_231534996-EDIT.jpg


For what it's worth, here are a couple of other torque arm orientations I tried.

I liked this first option because the torque arm is tangential to the axle plate, and the 'U' groove would have been pushing / pulling from the sides. The anti-torque force would be supported by the welded frame crossmember. But I wasn't sure how I would secure the cut end (dashed line) to the frame, and there was a minor axle plate misalignment (red circle) due to interference between the axle plate & shift box that would have required a light amount of axle plate material removal (yellow crosshatch) to resolve.

PXL_20260226_015502745-EDIT-EDIT.jpg


This second option would have been very similar to the orientation of my Xtracycle / Speedhub setup in the first photo (bike with the red net).

I never had a lick of trouble with the shift housing looping down like this, but I didn't like the way it looked — it just ended up that way out of necessity. And with this 3x3 / Mundo, this orientation also came with a very slight axle plate misalignment that would have required a small amount of grinding to straighten out.

PXL_20260226_012658393-EDIT.jpg

PXL_20260226_013528288-EDIT.jpg
 
Last edited:
Nearly all of my trinkets have arrived for my 3x3 cargo build, and I had some free time today to get the shifter cabled up.

I have a 25 year history with the Rohloff Speedhub, and one thing I appreciate with 3x3's setup is their method of cable termination.

With the Speedhub and using Rohloff's external shifter, the cables need to be precisely pre-cut, and then wound around the shift spool, and this can be kind of fiddly.

The Nine lets me thread the full length cable through the spool and the retention nuts, then cut them to length after everything is tidied up and verified to shift correctly.

I'd say the downside is that because I had to snip the cables to length while holding them "bent out" a little, they didn't cut evenly and the ends frayed, but this doesn't have a practical impact. Also, the uncut cables need to be threaded sequentially though three holes – one of them blind (the retention nut) – but this wasn't the challenge I expected. I also prefer Rohloff's aluminum spool vs. 3x3's plastic version, because when threading the cable through, the sharp ends tended to grab on to the ramped surface and I had to pick at them a little with a hooked tool to encourage them along. But all-in-all, this was a really easy job.

First ride and the hub shifts nicely. It feels very familiar, like a Speedhub, and my first short ride was satisfactory, including the ability to shift on a steep climb. I've got some finishing touches to do, and maybe I'll have a build thread in another week.

First three images are the 3x3 Nine cabling, compared to the second three images depicting the Rohloff Speedhub:

Screenshot 2026-11-04 at 6.03.30 PM.png

PXL_20261105_001045881.jpg
PXL_20261105_001235443.jpg

Rohloff Speedhub pre-cut method:
csm_handbuch02_081_1_72afc35269.png
csm_handbuch02_081_4.en_54611d34fe.png
csm_handbuch02_081_6_1495a9ceea.png
 
Last edited:
Yes the Rohloff process can be fiddly your first time around... but I'm not sure I would call this an improvement. I guess one thing you can possibly try next time around is to slide some heat shrink over the end before you cut it. It looks like there's enough clearance and it should end up looking more presentable.
So how do you know when you have the cable the correct legnth? How many tries did it take to get it right?
But more importantly (for me) how do you like the larger jump between gears?
I really appreciate the ability to pick the perfect gear with the Rohloff often changing just 1 gear.
Probably not as important on a cargo bike though....
 
I'm hoping the large gaps between gears aren't disagreeable on this bike! I'm aware I'm sensitive to it – I got really annoyed with uneven, large gaps with the Alfine 8 on my commuter so switched it out for an 11, and I'm constantly "fine tuning" my Nuvincis even though those bikes are just cruisers (one's electric, ones analog), so i 100% expect it's something I'll notice with the 3x3.

Anyhow, I knew of this spacing going in to this project, and convinced myself I can live with it on an electric cargo bike, but I won't know for sure until I complete the build and complete a few missions. One of my regular runs will be 11 miles out. I'll share my thoughts when I post the build thread.

For the cabling, I agree, I thought this system might be an improvement, but came away ambivalent. The heat shrink sounds like a great idea, it's something I commonly use instead of cable end crimps. Wish I would have thought of it. But the frayed / splayed ends live inside of those "ramps" (2nd photo) so despite them being ugly, they don't affect anything and are hidden beneath a cover.

I got it right on my first try without having to think about it or measure, that's the benefit to this system. Cutting the cables is the last step after it's all cinched down and shifting. Also, the twist shifter has a ton of extra capacity beyond the printed gear numbers, so will tolerate a minor misjudgment (though the gear #s wouldn't align with the pointer). And like with the Rohloff, the 3x3 cabling can be reversed to run the shifter "moto style."
 
Back