You are using an out of date browser. It may not display this or other websites correctly.
You should upgrade or use an alternative browser.
You should upgrade or use an alternative browser.
I just bought an ET.CYCLE T1000
- Thread starter PCeBiker
- Start date
PCeBiker
No-Hands No-Pedaling No-Credentials
- Region
- Canada
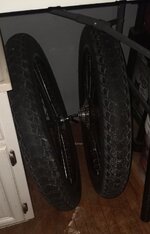
I'm installing the Tannus inserts.
The Tannus had a smaller diameter than the tire, and floats around inside the tire, and the tube is folding inside the Tannus, so I pumped up the tube a bit to hopefully expand the Tannus.
I covered the tube and Tannus with baby powder so things can slide around and not bind.
The tire pops off the rim really easy. It only took one tire iron.
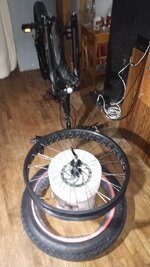
I'm just going to let it sit overnight to see if it expands.
Its still got about ½-¾ inches to go...
The Tannus had a smaller diameter than the tire, and floats around inside the tire, and the tube is folding inside the Tannus, so I pumped up the tube a bit to hopefully expand the Tannus.
I covered the tube and Tannus with baby powder so things can slide around and not bind.
The tire pops off the rim really easy. It only took one tire iron.

I'm just going to let it sit overnight to see if it expands.
Its still got about ½-¾ inches to go...
PCeBiker
No-Hands No-Pedaling No-Credentials
- Region
- Canada
I got the back wheel off.
It was a bit of a chore and I realized that the supplied wrenchs weren't big enough for the axle nuts.
It takes an 18 mm. A ¾ inch works but it's a bit sloppy.
I put an 18mm wrench in my tool kit for the bike.
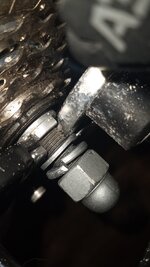
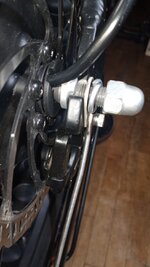
The axle didn't want to let go of the frame, then I noticed that this washer was attached to the frame to keep the wheel from falling off.
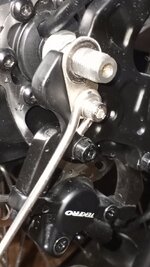
I still couldn't get the wheel free, then I noticed that the squares of the axle were biting into the frame so I rotated the axle a smidgen to free it up.
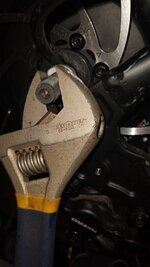
The cable connector came apart relatively easily but I did use a pair of pliers.
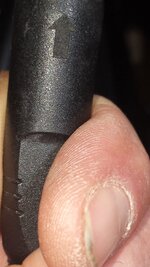
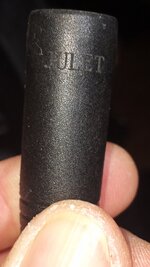
So the motor cable is a 9 pin julet cable with 3 fat pins for high current.
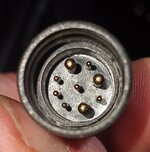
I'm going to be caking the pins with dielectric grease, as well as all the other connectors.
Wheel and tire removed,..
I managed to get the tire removed from the rim with just my hands.
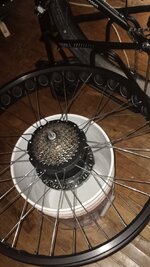
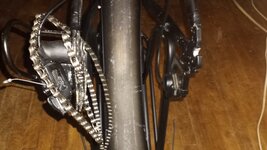
The caliper,..
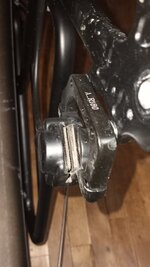
I've got the tube inflated and installed in the Tannus inserts and tire.
Hopefully the Tannus inserts will expand by tomorrow.
It was a bit of a chore and I realized that the supplied wrenchs weren't big enough for the axle nuts.
It takes an 18 mm. A ¾ inch works but it's a bit sloppy.
I put an 18mm wrench in my tool kit for the bike.


The axle didn't want to let go of the frame, then I noticed that this washer was attached to the frame to keep the wheel from falling off.

I still couldn't get the wheel free, then I noticed that the squares of the axle were biting into the frame so I rotated the axle a smidgen to free it up.

The cable connector came apart relatively easily but I did use a pair of pliers.


So the motor cable is a 9 pin julet cable with 3 fat pins for high current.

I'm going to be caking the pins with dielectric grease, as well as all the other connectors.
Wheel and tire removed,..
I managed to get the tire removed from the rim with just my hands.


The caliper,..

I've got the tube inflated and installed in the Tannus inserts and tire.
Hopefully the Tannus inserts will expand by tomorrow.
Last edited:
PCeBiker
No-Hands No-Pedaling No-Credentials
- Region
- Canada
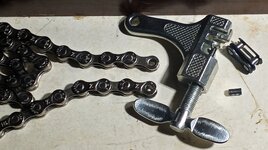
I decided to splurge and send my chain to the SPA for a hot wax treatment. Lol
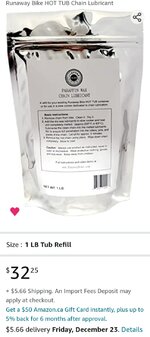
It was too much money to buy the paraffin wax, Teflon powder and the Molybdenum Disulfide powder separately, so I bought the prepackaged stuff.
You just put the bag in a pot of boiling water and throw the chain in the bag and cook it.
Pull the chain out when it's done, and seal the bag up and store it until the next time you need it.
I have the chain off the bike now, so I want to get it treated and reinstalled before my new off-road display arrives, so that I can give everything a test drive.

Runaway Bike HOT TUB Paraffin Wax Chain Lubricant, Sports & Outdoors - Amazon Canada
Runaway Bike HOT TUB Paraffin Wax Chain Lubricant in Sports & Outdoors.
a.co
It was too much money to buy the paraffin wax, Teflon powder and the Molybdenum Disulfide powder separately, so I bought the prepackaged stuff.
You just put the bag in a pot of boiling water and throw the chain in the bag and cook it.
Pull the chain out when it's done, and seal the bag up and store it until the next time you need it.
I have the chain off the bike now, so I want to get it treated and reinstalled before my new off-road display arrives, so that I can give everything a test drive.
Did you give it a nice massage as well at the spa?I decided to splurge and send my chain to the SPA for a hot wax treatment. Lol
View attachment 142356
Runaway Bike HOT TUB Paraffin Wax Chain Lubricant, Sports & Outdoors - Amazon Canada
Runaway Bike HOT TUB Paraffin Wax Chain Lubricant in Sports & Outdoors.a.co
It was too much money to buy the paraffin wax, Teflon powder and the Molybdenum Disulfide powder separately, so I bought the prepackaged stuff.
You just put the bag in a pot of boiling water and throw the chain in the bag and cook it.
Pull the chain out when it's done, and seal the bag up and store it until the next time you need it.
I have the chain off the bike now, so I want to get it treated and reinstalled before my new off-road display arrives, so that I can give everything a test drive.
PCeBiker
No-Hands No-Pedaling No-Credentials
- Region
- Canada
Did you give it a nice massage as well at the spa?
Not really.
I did the opposite.
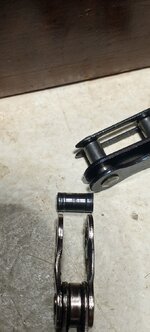
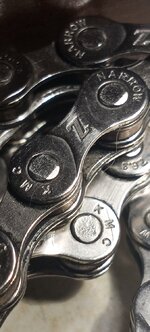
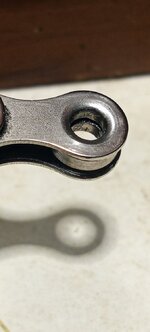
I was trying to push the pin out the wrong way at first.
I was reefing like crazy on the tool and it felt like something was going to break.
The pin did move a smidgen though.
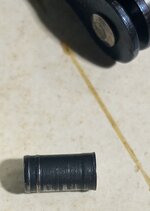
That's when it occurred to me that it might be a directional link pin, so I tried pushing it out the other way, and it popped right out.
I should have checked the link pin diameters on each end to look for the oversized end, but I didn't think of that, and it's really hard to flip the chain around to look when it's locked to the bike frame.
Hopefully I didn't damage the link and I can get the pin to pop back in without it just falling out?
PCeBiker
No-Hands No-Pedaling No-Credentials
- Region
- Canada
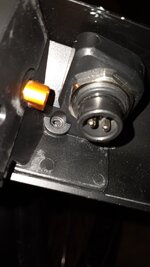
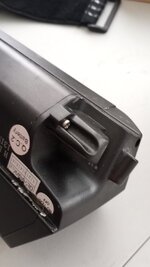
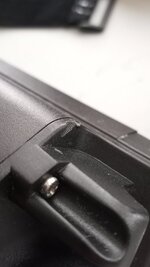
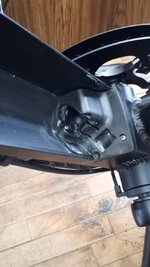
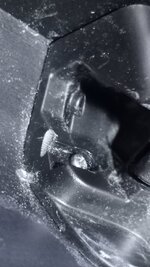
It says "NO TEAR OFF".
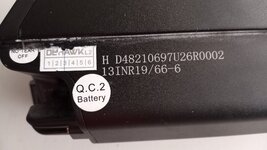
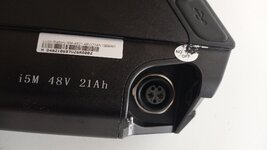
I don't need to tear it off. It removes itself in no time.
I wonder if it is designed to void it's own warranty? They'll just say that I removed the sticker to open the battery case and I voided my warranty.
I would just heat the sticker with a blow dryer to remove it, then stick it back on after I had the battery case put back together.
I'm not too keen on the Reention design.
The plastic holders are too flimsy for a 10 pound battery and the whole mechanism is still moving around even with the screws replaced and tightened.
The battery is still bouncing around.
Reention needs to redesign their battery holder/lock.
A heavy battery needs a heavy duty clamp.
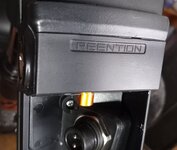
I'm going to keep strapping down the battery so it doesn't break.


I don't need to tear it off. It removes itself in no time.
I wonder if it is designed to void it's own warranty? They'll just say that I removed the sticker to open the battery case and I voided my warranty.
I would just heat the sticker with a blow dryer to remove it, then stick it back on after I had the battery case put back together.
I'm not too keen on the Reention design.
The plastic holders are too flimsy for a 10 pound battery and the whole mechanism is still moving around even with the screws replaced and tightened.
The battery is still bouncing around.
Reention needs to redesign their battery holder/lock.
A heavy battery needs a heavy duty clamp.

I'm going to keep strapping down the battery so it doesn't break.
I strap mine down with a Velcro strap even though I haven't had any problems.It says "NO TEAR OFF".
View attachment 143304View attachment 143305
I don't need to tear it off. It removes itself in no time.
I wonder if it is designed to void it's own warranty? They'll just say that I removed the sticker to open the battery case and I voided my warranty.
I would just heat the sticker with a blow dryer to remove it, then stick it back on after I had the battery case put back together.
I'm not too keen on the Reention design.
The plastic holders are too flimsy for a 10 pound battery and the whole mechanism is still moving around even with the screws replaced and tightened.
The battery is still bouncing around.
Reention needs to redesign their battery holder/lock.
A heavy battery needs a heavy duty clamp.
View attachment 143308
I'm going to keep strapping down the battery so it doesn't break.
PCeBiker
No-Hands No-Pedaling No-Credentials
- Region
- Canada
I strap mine down with a Velcro strap even though I haven't had any problems.
Yeah, I think of it as preventative maintenance.
Although I didn't do it in time to prevent the maintenance. Lol
PCeBiker
No-Hands No-Pedaling No-Credentials
- Region
- Canada
You just put the bag in a pot of boiling water and throw the chain in the bag and cook it.
Pull the chain out when it's done, and seal the bag up and store it until the next time you need it.
I was wrong about that.
You aren't supposed to put the bag into hot water, it's a refill for the tub. (although putting the bag in hot water may have worked?)
The tub is just a wide mouth plastic jar but it is twice the money and comes with half as much wax.

So I made my own jar.
I tried a peanut butter jar, but it started to melt, so I used a plastic container that is made with different plastic.
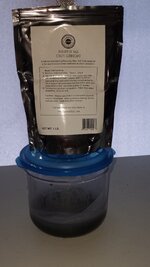
I got my chain waxed and reinstalled.
The master pin for the chain seemed to snap into place so I think that I didn't bugger it up too bad when I removed it.
I didn't realize you received the display. This is the so-called "offroad display" from Australia? Did you have to do any messing about with connectors? Or was it plug and play? I guess without even riding it, you can see if it allows you to set Turbo, Normal, Eco -- which the stock one didn't. I think I mentioned that I didn't see a hell of a lot of difference with these settings, but settled on Eco as it felt slightly more natural.The weather is supposed to warm up and dry up by next week, so I should be able to get out for another test drive with my new display.
View attachment 143314
I also did a bit more on that Reention battery I had disassembled. Not 100% sure, but I think it may be a BMS problem. It charges OK thru the discharge port and I only took it up to around 49V, but I'm pretty sure it would have continued. I just didn't want to fully charge in case cells were out of balance and some would get overcharged. However, on the charge port the charger only sees about 33V, so naturally it won't charge. I'm trying to source a BMS. The trick is getting a small one that fits. Most of them don't support the on/OFF switch or the lights that show charge level, so not sure I'll get that part to work. Actually I'm not sure why I'm doing all this as it's only a 13Ah battery and I already have 2 bigger ones!
PCeBiker
No-Hands No-Pedaling No-Credentials
- Region
- Canada
Yup (New Zealand actually, but close enough. Lol)I didn't realize you received the display. This is the so-called "offroad display" from Australia?
NopeDid you have to do any messing about with connectors?
YupOr was it plug and play?
YupI guess without even riding it, you can see if it allows you to set Turbo, Normal, Eco -- which the stock one didn't.
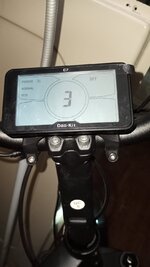
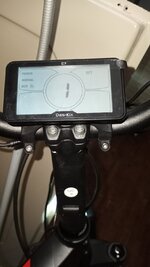
I think I mentioned that I didn't see a hell of a lot of difference with these settings,
Yeah you did.
I was hoping the Australian display would make a more of a difference with my bike.
but settled on Eco as it felt slightly more natural.
I wasn't settling for ECO,
That's what I was hoping for.
Turns out that it has made no damn difference at all. lol
My last remaining hope is that if I turn the damn thing down to 6 kph, that it won't launch me to that speed in ¼ second.
Last edited:
Can't recall if we talked about this, but if you really don't want the PAS at all (which is pretty close to what you would do if you set max PAS speed to 6 kph), I suppose one could disable or disconnect the PAS sensor?Yup (New Zealand actually, but close enough. Lol)
Nope
Yup
Yup
View attachment 143322View attachment 143323
Yeah you did.
I was hoping the Australian display would make a more of a difference with my bike.
I wasn't settling for ECO,
That's that's what I hoping for.
Turns out that it has made no damn difference at all. lol
My last remaining hope is that if I turn the damn thing down to 6 kph, that it won't launch me to that speed in ¼ second.
PCeBiker
No-Hands No-Pedaling No-Credentials
- Region
- Canada
Can't recall if we talked about this, but if you really don't want the PAS at all (which is pretty close to what you would do if you set max PAS speed to 6 kph), I suppose one could disable or disconnect the PAS sensor?
I will probably just turn my PAS mode to 0 in the settings to turn it off.
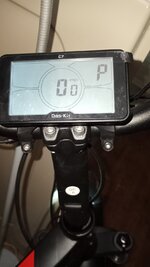
But first I want to try PAS mode 20 and throttle mode 20 and 6 to see if the acceleration is reduced as well as the top speed.
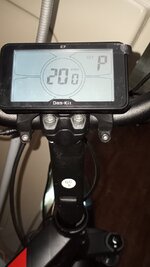
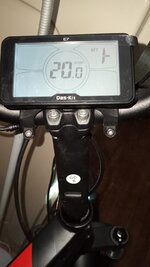
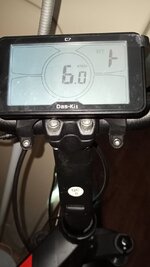
I'm hoping that if I turn my throttle down to 20 kph or 6 kph that my throttle sensitivity will be more granular?
It only takes me 10 seconds to enter the settings and change them, so I could pull over at the start of the dirt trail and turn it down for the dirt, then turn it back up when I get back on the road.
Should be interesting to see how those different settings affect the ride.I will probably just turn my PAS mode to 0 in the settings to turn it off.
View attachment 143354
But first I want to try PAS mode 20 and throttle mode 20 and 6 to see if the acceleration is reduced as well as the top speed.
View attachment 143355View attachment 143356View attachment 143357
I'm hoping that if I turn my throttle down to 20 kph or 6 kph that my throttle sensitivity will be more granular?
It only takes me 10 seconds to enter the settings and change them, so I could pull over at the start of the dirt trail and turn it down for the dirt, then turn it back up when I get back on the road.
PCeBiker
No-Hands No-Pedaling No-Credentials
- Region
- Canada
I also did a bit more on that Reention battery I had disassembled. Not 100% sure, but I think it may be a BMS problem. It charges OK thru the discharge port and I only took it up to around 49V, but I'm pretty sure it would have continued. I just didn't want to fully charge in case cells were out of balance and some would get overcharged. However, on the charge port the charger only sees about 33V, so naturally it won't charge. I'm trying to source a BMS. The trick is getting a small one that fits. Most of them don't support the on/OFF switch or the lights that show charge level, so not sure I'll get that part to work.
These are the voltages on my battery and charger.
Charger,..
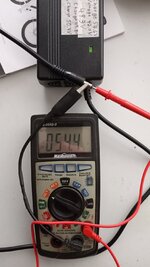
Battery output,..
(it's not fully charged.)
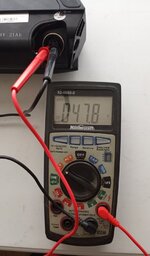
And battery input,..
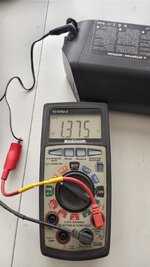
The voltage on the input is only 1.375 volts, but the charger plugs right in and starts charging.
Try testing the different voltages on your input and output of the BMS with the charger plugged in.
See if the charger voltage is getting to the BMS and what the BMS is outputting on each wire.
You may have a bad cell or two that are depleted quickly and shutting down the battery well before the remaining cells are depleted.
Try running the battery down until it shuts off and take voltage measurements of each cell group and each individual cell if possible.
It takes 12 cells in series to get 48 volts and to add capacity, each of the 12 cells has 2, 3, or more cells in parallel with each of the 12 cells to provide more current and more capacity.
I think one of those 12 cell groups has lost capacity and is shutting down the battery.
Actually I'm not sure why I'm doing all this as it's only a 13Ah battery and I already have 2 bigger ones!
It's always fun to learn how stuff works and batteries are expensive so it's worth the effort.
But,.. BE FRICKEN CAREFUL !!!
You know what can happen if you short out a wire or your probe slips and touches something it shouldn't.
And apparently a lot of battery fires are from batteries being rebuilt using old used cells.
If you've got 12 cells in series and one of them has lost capacity, then that cell will overcharge because the other cells in the series haven't reached full voltage yet.
That's where the BMS comes in.
It measures the individual voltage of each cell in the series and shuts off the battery if any one cell voltage is too high during charging or too low during discharge.
Last edited:
Similar threads
- Replies
- 1
- Views
- 4K
- Replies
- 6
- Views
- 4K

