Converting old Raleigh 3 speed

This is not the ideal example but it is what I got today. I am building a bike now and took a couple of photos.

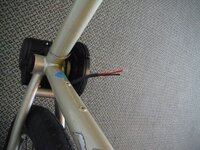
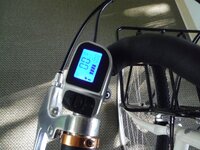
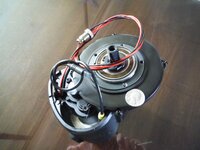
Firstly look for the secret compartment used for hiding extra wire from the display. The yellow one will be chopped and sealed inside the compartment on this build because I do not need it. The red and black will run directly from the inside of the motor to the connector under the battery, where it will be soldered and sealed. The grey tipped black one connects to the display inside the hidden compartment.

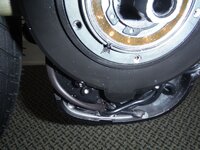
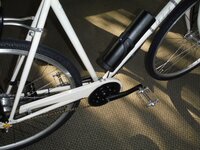
Next you can see how I needed to run contiguous shift housing from the shifter, over the bottom bracket and to the derailleur. This bike had bare un-housed cable running under the bottom bracket and that will not work. I do not like zip ties but had to use them for this cable run on this build, so I painted them to match the frame. The battery will be on the seat tube disguised as a water bottle.

Zoom in to view the BB area.
 

Attachments

  • TS.Compartment.JPG
    TS.Compartment.JPG
    245.2 KB · Views: 198
  • StumpjumperFS06.JPG
    StumpjumperFS06.JPG
    693.3 KB · Views: 190
Update.
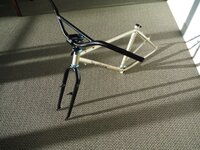
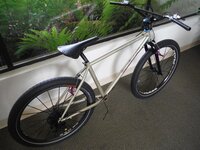
And what it looked like just after I refurbished the frame and installed the headset and fork.
It will be done after lunch.
 

Attachments

  • StumpjumperFS07.JPG
    StumpjumperFS07.JPG
    410.3 KB · Views: 180
  • TS.Compartment2.JPG
    TS.Compartment2.JPG
    306.8 KB · Views: 185
  • StumpjumperFS02.JPG
    StumpjumperFS02.JPG
    689.3 KB · Views: 187
Unsure if Mark Stonich is still in business so check before you order https://www.bikesmithdesign.com/CotterPress/cotters.html
I emailed him.
This is not the ideal example but it is what I got today. I am building a bike now and took a couple of photos.

Firstly look for the secret compartment used for hiding extra wire from the display. The yellow one will be chopped and sealed inside the compartment on this build because I do not need it. The red and black will run directly from the inside of the motor to the connector under the battery, where it will be soldered and sealed. The grey tipped black one connects to the display inside the hidden compartment.

Next you can see how I needed to run contiguous shift housing from the shifter, over the bottom bracket and to the derailleur. This bike had bare un-housed cable running under the bottom bracket and that will not work. I do not like zip ties but had to use them for this cable run on this build, so I painted them to match the frame. The battery will be on the seat tube disguised as a water bottle.

Zoom in to view the BB area.
I love the secret compartment!
Have you added a heat sensor to any of you ebikes?
 
Unsure if Mark Stonich is still in business so check before you order https://www.bikesmithdesign.com/CotterPress/cotters.html
Welcome back Cotter! Yes, he has them available, thanks!

His reply:
Yes. I have standard 9.5mm, Raleigh cut 9.5mm and just a few 9.0mm

Mark Stonich 612-824-2372 (home)
BikeSmith Design & Fabrication 612-710-9593 (work & cell)
5349 Elliot Ave S. Minneapolis, MN 55417 USA
http://bikesmithdesign.com
https://www.flickr.com/photos/bikesmith/
 

Attachments

  • 9B7964B5-4914-4F0E-B72C-968267B3CD43.jpeg
    9B7964B5-4914-4F0E-B72C-968267B3CD43.jpeg
    72.2 KB · Views: 182
Welcome back Cotter! Yes, he has them available, thanks!

His reply:
Yes. I have standard 9.5mm, Raleigh cut 9.5mm and just a few 9.0mm

Mark Stonich 612-824-2372 (home)
BikeSmith Design & Fabrication 612-710-9593 (work & cell)
5349 Elliot Ave S. Minneapolis, MN 55417 USA
http://bikesmithdesign.com
https://www.flickr.com/photos/bikesmith/
Will you be using the aluminum square taper crank arms that come with the kit? They are lighter weight. Sometimes I polish them to match a bike's theme. I am not sure the old arms will fit.
This one is before I learned of the secret area to tuck the extra wire.
 

Attachments

  • DSCF6684.JPG
    DSCF6684.JPG
    378.1 KB · Views: 189
  • DSCF7251.JPG
    DSCF7251.JPG
    654.3 KB · Views: 196
Will you be using the aluminum square taper crank arms that come with the kit? They are lighter weight. Sometimes I polish them to match a bike's theme. I am not sure the old arms will fit.
This one is before I learned of the secret area to tuck the extra wire.
Yes, I will. It's just in case for the other bike that will stay stock.
 
Last edited:
If you don't mind keep us updated how things go with your project. Unlike Pedaluma I prefer to use the speedometer/odometer function with the rear wheel magnet pickup (and it is a requirement for my bike with the xh18 display to work without shutting off every several minutes). I did replace the tsdz2 battery connectors with Anderson Powerpoles on the 36v motor (I have had problems with the Anderson connectors breaking and wouldn't use them again) and XT90 connectors on the 48v motor (requires soldering with a decent soldering gun). Depending on your supplier you could consider asking about the small (6 pin) C3 display which is pretty nice and has 5 levels of assist to choose from instead of 4 with the other display/controls. Eco-ebike supplied that display on my 48v version because the xh18 was out of stock so I got lucky on that. Some sellers like eco-ebike might put the connectors of your choice on your motor for you.
Yes, I will. It's great fun and extremely helpful to get help from you folks.
For starters I want to find a good vendor in the US because I want to be able to return if there is a problem. Seems Amazon only has the higher wattage ones.
I'm lookin at the 250/350w TS with either a Kettle or water bottle shaped battery and a thumb throttle and front and rear lights. I also want to install a temp sensor.
I am not sure which display I prefer yet.
 
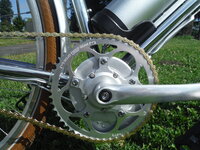
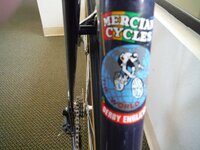
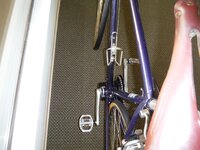
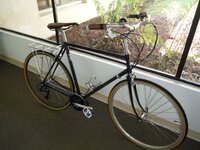
It was made in Darby, England in 1974 and it is now electric. @Antonella, how is the project?
 

Attachments

  • MercianCycles01.JPG
    MercianCycles01.JPG
    300 KB · Views: 201
  • MercianCycles02.JPG
    MercianCycles02.JPG
    367.1 KB · Views: 196
  • MercianCycles03.JPG
    MercianCycles03.JPG
    410.4 KB · Views: 198
Looks great! Love the minimalist design.
I am still trying to get the pedals off
Of my bike. I am
Slow.
Trying to find a 250w/350w Tongsheng motor and it is difficult.
I would like to know what to do when I shift and the S/A gear goes slack and the pedals spin around. Is it an adjustment of the cable or is it the gears inside? And what would happen when that happens with the mid drive installed?
I can switch wheel if necessary.
Thank
You!
 
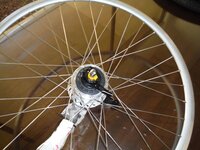
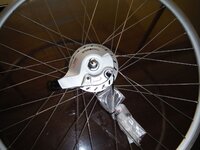
Just saw the old crank arms off if you need to. It does seem odd that the pedals will just spin. That does not sound like an adjustment but more like internal mechanical failure. You could pop on a new wheel with an attached hub pre-laced in. One like this would work. It is a Nexus 8 with a roller brake. The cog is 16-T for a nice top end. Or you could lace in a new hub of the same dimensions as the existing S/A. Or use new spokes with the same rim and make it a five-speed: https://www.ebay.co.uk/itm/18461994...g8fkOoXOb6CnDw%3D%3D|ampid:PL_CLK|clp:2334524

I see this motor on eBay UK: https://www.ebay.co.uk/itm/254894332559?hash=item3b58e2da8f:g:VP4AAOSwE7Nc2mZ~
 

Attachments

  • NesusInter701.JPG
    NesusInter701.JPG
    222.2 KB · Views: 169
  • NexusInterMRollerBrake01.JPG
    NexusInterMRollerBrake01.JPG
    220.3 KB · Views: 174
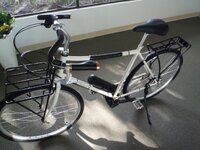
I just finished this old Raleigh 3-speed conversion this morning. It was a $150 Craigslist bike with a 3-speed.
750W, 95Nm, 48V torque sensor, no throttle. Trigger shifter to Nexus Inter-7 with internal brake.
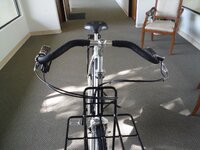
The concept was to make a touring bike for all weather that can take roads and trails while providing a comfortable upright riding position with a cockpit that allows for changes in hand positions for long rides.
 

Attachments

  • RaleighIDo11.JPG
    RaleighIDo11.JPG
    148.8 KB · Views: 179
  • RaleighIDo12.JPG
    RaleighIDo12.JPG
    316.5 KB · Views: 185
  • RaleighIDo13.JPG
    RaleighIDo13.JPG
    387.8 KB · Views: 187
  • RaleighIDo14.JPG
    RaleighIDo14.JPG
    396 KB · Views: 198
  • RaleighIDo16JPG.JPG
    RaleighIDo16JPG.JPG
    375.4 KB · Views: 185
  • RaleighIDo20JPG.JPG
    RaleighIDo20JPG.JPG
    387.7 KB · Views: 190
  • RaleighIDo21JPG.JPG
    RaleighIDo21JPG.JPG
    213.2 KB · Views: 180
  • RaleighIDo22JPG.JPG
    RaleighIDo22JPG.JPG
    364.2 KB · Views: 174
I just finished this old Raleigh 3-speed conversion this morning. It was a $150 Craigslist bike with a 3-speed.
750W, 95Nm, 48V torque sensor, no throttle. Trigger shifter to Nexus Inter-7 with internal brake.
The concept was to make a touring bike for all weather that can take roads and trails while providing a comfortable upright riding position with a cockpit that allows for changes in hand positions for long rides.
Nicely done. The old Raleigh is new again. :)
 
I'm finally building my ebike made from my Raleigh Sport theee speed girls bike with a Tongsheng 350v mid motor. Should I post the steps on this thread or make brand new one?
 
I'm heading into my 2nd Raleigh build. This one will be 500w.

This one will be another rear hub drive like my last one, but this time I'll lace the small rear hub into a factory rim to keep it even more hidden.

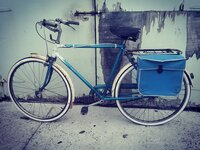
The rear pannier will hold the battery, imobliser/alarm, speed controller and a USB port.

I've clocked up near 5000km on my original Raleigh conversion so far.
 

Attachments

  • IMG_20211214_210524.jpg
    IMG_20211214_210524.jpg
    632.8 KB · Views: 182
  • IMG_20211214_210649.jpg
    IMG_20211214_210649.jpg
    419.4 KB · Views: 164
  • Screenshot_20211123_073912.jpg
    Screenshot_20211123_073912.jpg
    150.2 KB · Views: 165
Last edited:
I'm finally building my ebike made from my Raleigh Sport theee speed girls bike with a Tongsheng 350v mid motor. Should I post the steps on this thread or make brand new one?
Congrats! I’d keep posting on this thread as all previous posters should receive new post alerts.
 
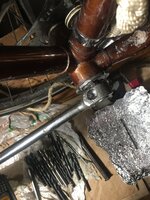
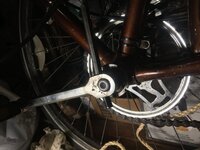
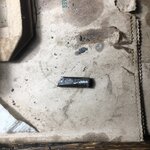
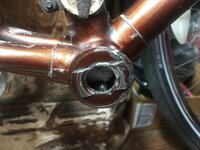
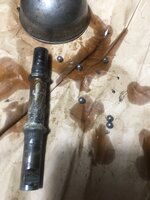
Thanks Dewey! Okay. Okay so it was a bear to remove the left crank and I tried heating and also pressing with a vice to no avail and so I had to drill the cotter out little by little with a small and then larger drill bit. Back and forth. The right side was much easier: wd 40 letting it sit and then I put a vice on it using a socket over the cotter and little by little tightening the vice over hours and I was pleasantly surprised to hear a pop and the little sucker came out halfway.

I am still trying to get the right side pedal off. The surfaces are a little rounded and the wrench or vice grips keep slipping off. I have yet to try heat but don't think it will do the trick.
 

Attachments

  • 988C1BED-8F2E-4D71-992D-87E7344D11BA.jpeg
    988C1BED-8F2E-4D71-992D-87E7344D11BA.jpeg
    315 KB · Views: 157
  • 33E253ED-1275-4F66-9006-7005A260E4CE.jpeg
    33E253ED-1275-4F66-9006-7005A260E4CE.jpeg
    365.5 KB · Views: 157
  • A74D959C-D0D3-4D78-A2D2-5EE1C66A459C.jpeg
    A74D959C-D0D3-4D78-A2D2-5EE1C66A459C.jpeg
    563.5 KB · Views: 167
  • 5FE25423-7B16-4D76-A289-B8923AB939CF.jpeg
    5FE25423-7B16-4D76-A289-B8923AB939CF.jpeg
    411.7 KB · Views: 156
  • E47393AD-D67A-4596-AFBA-77BAC22CEA9A.jpeg
    E47393AD-D67A-4596-AFBA-77BAC22CEA9A.jpeg
    236.4 KB · Views: 164
Back