I just about installed Peartune MSO 4.0 for
Specialized 1.1. I managed to damage the connectors in the process due to being daft.
If anyone is installing this, please read the instructions carefully!
Painful to route the cable - I tried the usual tricks but had to buy a cable puller/router for bikes. The magnetic cable puller helped in routing the cable from the motor to the cable side entry on the down tube/battery tube(I used a 30N magnet, which I had lying around); I then attached a 3.6mm (Orange) strimmer wire and pulled through, tying knots at both ends. This was the easy bit!
Routing the cable puller from the TCU/Top tube to the side slot was an absolute royal pia. I spent much time using the magnetic cable puller but could not route the wire as the magnet was getting stuck onto some ferromagnetic thing in the head tube. Moreover, the cable must turn 3/4 of the circle from the top tube to the down tube. I tried using loads of different techniques and countless hours. Finally, I used a 2mm stainless steel rope from the top tube, and a few attempts later, I could see the steel rope through the side cable entry port (I have no idea why the stainless steel rope worked, but I was able to reproduce this a few times!) I used an Allen key to gently fish it out from the cable entry in the down tube. Then taped, the orange cable to the steel wire and pulled it through so that the orange cable extended from the top tube(TCU) to the battery house.
I again used electrical tape to pull the Peartune cables from the TCU/Top tube to the motor housing. All connected up and heat shrinking done.
Test ride - Working well.
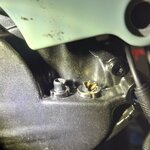
PS: I did have some significant problems and managed to damage my motor connectors. I had failed to follow the fine print! I accidentally removed the last two screws instead of loosening them; this resulted in the motor falling off and shearing the connector housing. I have managed to work around this using heat shrink; who knows how long this will work!

