Second Conversion - Priority Continuum Onyx Build Thread

Shel-done

Member
Region
USA
City
PNW
Hi EBR forum goers,

Creating a thread to document my upcoming ebike conversion project. I have high hopes for this build after returning a pre-built ebike that didn't meet my expectations.

My primary use-case for this bike will be commuting to work at minimum 3 days a week (approx. 70 miles per week), while also riding to/from the grocery store and running random errands (maybe 100ish miles per week average). Commute miles will not vary based on weather - rain or shine I'll be commuting via bike.

Here is a quick list of my requirements:
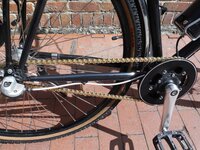
  • Belt drive - it rains a lot here and the amount of road grime picked up by chains makes maintenance more of a chore
  • Internally geared hub - along the same lines of a minimal maintenance approach, needs a high enough ratio/range for hills
  • Integrated lights - charging multiple separate batteries is not something I desire on a bike with a 7-10+ lbs battery already
  • Hub motor - simplicity, again, with some redundancy from the drivetrain
  • Brakes - hydraulic only for the reliability and low maintenance
  • Medium battery capacity >48v - no need for 20+ ah with the miles I'll be riding. Anything in the 14-19ah range that is narrow enough for a frame bag. 48 volts should provide enough speed
  • Reasonable overall bike weight - I store my bike on a wall hanger due to space constraints, need it <45lbs without battery
  • Rear rack w/light mount - will use a pannier for commuting and have an integrated taillight on the rack for rearmost positioning
  • Fenders - there are more rainy days than sunny here, this is a must
  • Classic design - having owned several steel bikes (steel is real) I prefer the standard straight tube/open triangle frame design
  • Display - minimal and unobtrusive. I'm not a fan of big screens on bikes and not convinced there is a tangible value add from color/large screen real estate
Do you know of any pre-built e-bikes for <$3500 that meet the above points?

.......Enter a DIY ebike project, starting with a Priority Continuum Onyx (should be delivered tomorrow). This bike checks a lot of the boxes above while hitting a competitive price point of $1300.

I'm still mapping out my conversion parts but it will likely be the Shengyi SX1 w/Grin V4 Baserunner. Will post updates as things arrive and I get to building.
 
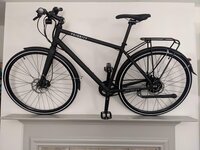
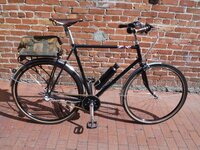
Received and built the bike last week. Took a test ride and found it to be exactly what I was looking for, albeit a bit compact (went with a 19" frame size, should have gone for the 21").

PXL_20220301_025244109.jpg

Absolutely love the Nuvinci Enviolo CVT and Gates Belt. They are everything I wanted in a bike drivetrain. Wasn't as stoked about the handlebars or saddle though. Overall, this bike is incredibly impressive at such a competitive price point. Props to Priority for top notch packaging and well thought out bike design.
 
Last edited:
Purchased several components and started installing things as they arrived. Here is a list of items that have arrived and are now on the bike:
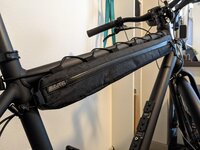
Installed most of the items but am still working on cable management for the motor, battery and throttle. Will likely buy a half-frame bag or tube frame bag to help with cable management and storing tools/spare tubes. Also considering running the motor cable to the controller in the downtube, however, that will be a ton of effort...we'll see.

PXL_20220309_170150803.jpg

I'm awaiting delivery of these items:
Will also be making a "custom" pannier using my work Timbuk2 messenger + these universal hooks.
 
Purchased several components and started installing things as they arrived. Here is a list of items that have arrived and are now on the bike:
Installed most of the items but am still working on cable management for the motor, battery and throttle. Will likely buy a half-frame bag or tube frame bag to help with cable management and storing tools/spare tubes. Also considering running the motor cable to the controller in the downtube, however, that will be a ton of effort...we'll see.

View attachment 116311

I'm awaiting delivery of these items:
Will also be making a "custom" pannier using my work Timbuk2 messenger + these universal hooks.
Good for you. Many people are passive, waiting to be served while you took the bull by the horns and made it happen.
 
Good for you. Many people are passive, waiting to be served while you took the bull by the horns and made it happen.

Thanks, PedalUma. I definitely wanted to go passive previously but am glad to be going this route in the end.

Update on progress:
  1. All parts ordered & received and some installed. Since last update that includes:
  2. Decided to route the motor cable in the bottom tube since the holes exist. This requires the following extra steps:
    • Removing the shifter cable from the separate tube holes on the bike and routing them in the same but expanded hole (won't impact frame integrity)
    • Snipping off Z910 Higo plugs from controller cable and both ends of the 100cm extension cable
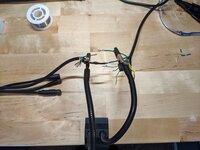
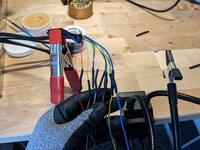
    • Soldering the extension directly to the controller cable then routing it through the downtube
    • Soldering the female Higo plug onto the end of the routed extension cable
      Soldering Motor Cable.jpg
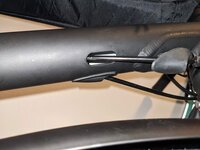
      Cable will enter in the larger hole without a grommet (shifter cable will be moved to the other hole with a grommet):
      Bottom Tube Cable Routing Holes.jpg
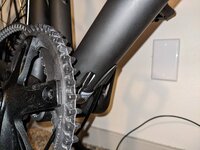
      Cable will exit near the fork with enough slack to turn handlebar lock-to-lock without resistance:
      Bottom Tube Cable Routing near Fork.jpg
      Motor cable route.jpg
  3. For remaining cable management I have the following items to-do:
    • Snip off the 2-pin Higo connector end from the Amazon taillight and route through rear fender using prior tubing on the bike
    • Drill two new holes in the rear fender for proper cable routing of the rear light
    • Solder a male DC jack connector on the taillight cable once routed (or alternatively use crimp on spade connectors, haven't decided yet)
    • Shorten the SPL-01 1900 power switch cable for the length required, removing excess cable around the handle bars
    • Shorten the rear hydro brake hose for less interference with frame tube bag
    • Route throttle, light cables (front & rear), and controller harness into the frame tube bag
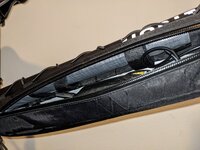
    • Use a combination of spiral wrap, aluminum add-on cable guides and zip ties to cap it off (frame bag has enter/exit holes in top for cables + velcro loops for management):
      Internal Frame Bag with Top Loops.jpg
Eager to see the end-result come together and hopefully have this bike ready to ride by EOW. Will take a ton more photos once done.
 
Thanks, PedalUma. I definitely wanted to go passive previously but am glad to be going this route in the end.
Will take a ton more photos once done.
I cannot wait to see photos in its natural habitat. Here is one that I made electric over the weekend.
1647973210054.jpeg


1647973135207.jpeg
 
I cannot wait to see photos in its natural habitat. Here is one that I made electric over the weekend.

Very nice. That is incredibly clean and minimal! Exactly my preference. Would love to do a similar build for my spouse in the future. Not sure if this is for a family member or not, but what are your thoughts on that coffee cup holder on the bars? Debated getting one since morning commutes without coffee sound pretty miserable.
 
Thank you, I use one one my go to daily bike. This time of year it is good for a smoothie. I get them from Public Bikes. This red bike has one that is polished. It is a three speed with a coaster brake because the owner has hand issues and needs to stop somehow.
1647981151224.jpeg
1647981208924.jpeg
 
Wow, you do some really clean conversions - is that a tiny hub motor and small bottle battery on both builds? I'm not familiar with either.

Thanks for the Public Bike mention, was curious which one it was. I think I may like Public Bike's better than PDW's Bar-ista. Hmmmm...
 
I agree. If you buy it from Mike's Bikes you can get free shipping by getting one or two other items shipped with it. Mike's has everything, thousands of items. I just came back from my local Mike's where I purchased some brake parts. The new version of the cupholder is thicker than the old one in the photo below.
Here is the bike I rode there.
1647990368934.jpeg
 

Attachments

  • UnionJack13.JPG
    UnionJack13.JPG
    692 KB · Views: 233
  • UnionJack14.JPG
    UnionJack14.JPG
    823.1 KB · Views: 228
Update on soldering....boy this was a bit more than I wanted to do in the pursuit of clean cable management.

The 9-pin motor cable is comprised of 3 larger gauge (16-18ga) wires and 6 tiny wires. My wire strippers don't go down to that tiny of a gauge so its been a real treat trying to strip without cutting the internal strands of the wire itself. Was forced to remove the extension cables rubber insulation to make the job manageable. Plan on replacing it with a Techflex braided cable sleeving. If that doesn't work, I'm going to buy some Techflex Fabric Shrink tube.

Motor Cable Extension Soldered.jpg

Still hoping to finish up this project by Sunday so I can start testing riding to work before our formal return to office in April. Stay tuned!
 
Over the weekend I worked on finishing up the bike. Accomplished most of what I wanted to do:
  • Widened downtube grommet holes with a rotary tool, they now fit both shifter cables with minimal loss of metal (zero concerns)
  • Finished soldering the 9-pin motor cable extension to the controller, wrapped in tech flex and routed through downtube
  • Finished soldering the 9-pin higo connector back onto the extension and tested (worked!)
  • Routed the rear light cable under fender to the frame bag, soldered on a female barrel plug connector to hook up to controller (Grin Baserunner uses barrel plugs for lights)
  • Shortened the rear hydro brake hose
  • Routed and managed throttle and lights thru frame bag
Took it for a test ride last night and had a scare when the throttle stopped working (or the motor). Pulled over and unplugged the throttle JST and plugged back in. That worked and the issue never happened again on my way home. However, the connector didn't feel loose so I'm a bit concerned about the true cause of motor power not working under throttle, randomly.

Things I'd like to do in the future: Shorten excess cables from the throttle & lights for less mess in the frame bag, potentially add a deflopilator, clean up the bag attachment cordage

PXL_20220328_143048310.jpg
 
I finished this one yesterday. Now I need to dismantle a motor and reconfigure it for a fat bike application with a longer driveshaft and third bearing extension.
 

Attachments

  • BlackVida1.JPG
    BlackVida1.JPG
    390 KB · Views: 291
  • BlackVida2.JPG
    BlackVida2.JPG
    535.4 KB · Views: 276
I finished this one yesterday. Now I need to dismantle a motor and reconfigure it for a fat bike application with a longer driveshaft and third bearing extension.

You sir are a master at your craft. I wish I had the confidence to rock a 36v battery setup so I could do a build using dual bottle batteries on this frame. I'd do exactly what you've done with that Specialized and try to disguise them as bottles. My spouse had a Blix Aveny with a 36v 17ah battery and the power sag she experienced with a 250w rear hub motor was palpable. Granted that bike was heavy as hell too and not at all sporty. That experience just always put me off to 36v systems.

Otherwise I don't care. My aim is to pedal more than not, using the motor to augment and help with hill climbs or to make the ride a bit less sweaty. Honestly, having a throttle only setup on this build is already showing me what I feared...I'm just not a fan of throttling. That will likely lead to me using assist even less, which my body needs anyway.
 
Just finished a quick test ride around town on this lovely afternoon. Was a great ride with no power loss issues whatsoever. I have to assume the throttle connection was just loose on my last ride.

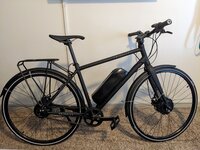
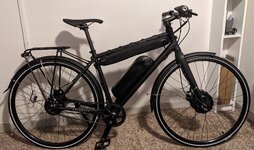
Photos of the finished (for now) result:

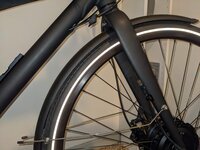
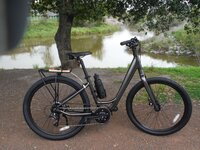
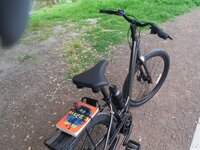
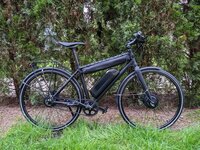
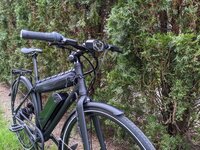
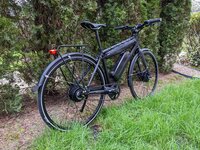
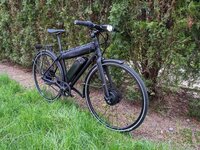
Priority-ebike-side view.jpg Priority-ebike-cables.jpg Priority-ebike-taillight.jpg Priority-ebike-headlight.jpg

Next up I'll be swapping the basic Techflex on the 9-pin motor cable for Techflex fabric to add more water resistance. Each wire in the 9-pin cable is individually insulated but minimally so and I live in the PNW where it rains 50%+ of the year. I'm also going to start the arduous research for a small display + PAS setup to replace the throttle only mode. I adore the simplicity right now but don't enjoy the cheap, barely variable thumb throttle experience.

If you have any ideas or recommendations for things I could do to improve my commute experience, I'm all ears!
 
I see that you have used some heat shrink tubbing. Given the amount of rain you may want to seal connectors. Getting PAS up and running will be nice. Some of those thumb throttles are like a switch.
 
I see that you have used some heat shrink tubbing. Given the amount of rain you may want to seal connectors. Getting PAS up and running will be nice. Some of those thumb throttles are like a switch.

Yea, the soldered connections are all heatshrinked for watertightness. The connectors are Higo plugs that should also be water resistant to a large enough degree.

Getting a PAS running will require me to source a display that works with the Grin Baserunner V4. I'm not going to use the Cycle Analyst and Grin is still working on other 3rd party display options for their controller. Time will tell how this goes. Would like to do a BB torque sensor with a small display and no throttle.
 
I think you would die of old age before Grin gives up their CA v3. It took them forever to do the v3 to replace the v2. Heck they didn't even bother to publish a manual to the thing until maybe a year ago. This comes from the fact that Grin's audience is wholly in the realm of DIY builders who figure things out for themselves. The CA is a data tool that appeals to that group over and above any user-friendliness. With that said, the CA can support a PAS sensor and some very sophisticated PAS programming. Or so I've heard. I have stayed away from Grin stuff because of that damn CA. They are all very good products though so don't let what I am saying stop you from trusting their gear.

Maybe I'm wrong and an revision is in the works. Either way you owe it to yourself to make the assist automatic on pedaling, which is a wonderful thing.

For Higo/Julet cables, if water resistance is your bag then you really want to add a dab of dielectric grease to every one of those connections. They are indeed pretty much waterproof. The grease will take that a step further.
 
First, great build, I like your choice of bike, I recommended the Priority Continuum model in my recent blog post on Enviolo CVT hubs because it uses the trekking model which is stronger than the City model which is the other Enviolo hub Priority use.

Matt's right, the Grin Baserunner manual describes three setups but on p.7 says they only sell the 3rd party display wiring to OEM customers not retail, and on p.8 says the headless option means you are unable to change PAS power level. A torque PAS bottom bracket sensor would be a good addition to your rig based on how you describe you want to ride, so maybe try the CA3 and see how it performs as you want it to.
 
Last edited:
Back