New build

@Dynz, Congratulations. You are now in the game. I like your sprit. Not overly risk adverse and willing to try and willing to learn.
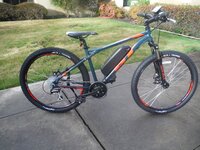
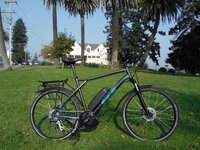
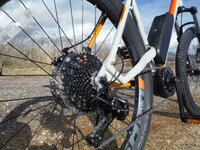
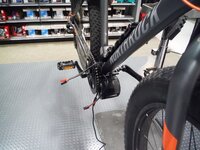
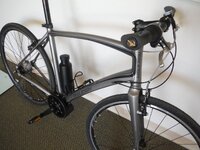
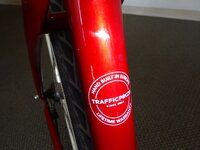
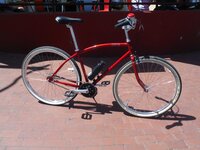
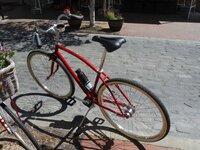
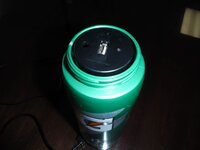
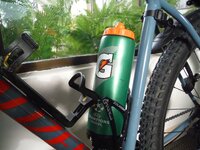
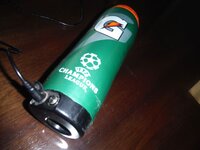
It brings back memories. Here are some of my very first builds. Then for comparison, one I finished yesterday. It is cleaner than the first ones and it comes in at 15.6 Kilos with one major flaw, it has a zip tie.
 

Attachments

  • 051920a (2).jpg
    051920a (2).jpg
    369.8 KB · Views: 196
  • DSCF6644 (2).JPG
    DSCF6644 (2).JPG
    461.5 KB · Views: 187
  • DSCF6669 (2).JPG
    DSCF6669 (2).JPG
    428.9 KB · Views: 199
  • DSCF6680 (2).JPG
    DSCF6680 (2).JPG
    291.3 KB · Views: 183
  • Cadent2101.JPG
    Cadent2101.JPG
    285.2 KB · Views: 196

Attachments

  • CremeGlider05.JPG
    CremeGlider05.JPG
    30.9 KB · Views: 181
  • CremeGlider06.JPG
    CremeGlider06.JPG
    452.1 KB · Views: 178
  • CremeGlider07.JPG
    CremeGlider07.JPG
    616.4 KB · Views: 185
Wait. Water bottle battery? 🤯
Weighs 3.05 lbs. or 1.39 Kg. Does the candy apple red bike even look like an electric bike? Look again at the thru-frame wiring on the grey bike above. The bike below has a dust cover on its battery to protect its USB.
 

Attachments

  • dust cover03.JPG
    dust cover03.JPG
    104.4 KB · Views: 172
  • dust cover.JPG
    dust cover.JPG
    272.4 KB · Views: 182
  • dust cover02.JPG
    dust cover02.JPG
    138.7 KB · Views: 169
I wonder if it's an rpm limiter. Or maybe it's the lack of a speed sensor. Mine is the BBS02 and I recall that if the speed sensor gets knocked out of alignment, I get an error signal after about 10 seconds of riding, but I don't recall if that stops the motor or if I can go on again.
I just tried a few more times and never got an error code to show up on the display.
 
Ok so I received the new bike and I'm stoked. Removing cranks and bottom bracket went more smoothly than I anticipated. However an issue has arisen (if it's an issue at all).

There's a piece of welding on the bottom bracket which obstructs the motor from hanging tight against the downtube, making it so that the motor hangs quite low. Here's a video.

Would this bit need to be trimmed down or is this no biggie at all? Please advise!
 
In general, I would never trim down a weld. I would guess its purpose is to relieve stress on the unsupported edge of the downtube. Take it off, and you might get stress cracks coming off the end.
 
In general, I would never trim down a weld. I would guess its purpose is to relieve stress on the unsupported edge of the downtube. Take it off, and you might get stress cracks coming off the end.
So you're saying just let it sit tight against the weld then? It just looks a bit low compared to other builds to be honest.
 
So you're saying just let it sit tight against the weld then? It just looks a bit low compared to other builds to be honest.
It's nice to put a piece of hard rubber/soft plastic between the frame and the motor.
Doing this just above the weld might allow it to ride over it... Maybe?
I used a sliver of sprinkler funny pipe.
IMAG0866.jpg
 
I did some more research and apparently most Marlin riders have trimmed or cut that bump down at least a little bit in the middle to give the motor some more ground clearance.
As I don't wanna risk hitting a bump and potentially breaking it, I'm thinking of filing it down a bit as well (I don't have a cutter disc or grinder). But then again, the guy in this video seems to know what he's doing and he doesn't seem to care about it hanging low like mine does. So maybe it's ok after all?

A bit of rubber between kit and frame is a good shout, thank you @Gionnirocket!

Everything on the handlebars is mounted and ready to go, also mounted the battery which I'll be securing with some heavy duty velcro stretch straps cause it has too much wobble for my liking. I just need to pick up some longer screws and washers to go through the mounting plate. What size/length screws are recommended?
 
It's hard to tell how big or if it is a problem with the info provided but I wouldn't stress about it.
First ask yourself where do you intend to ride this bike?
Then mount the motor and measure the actual ground clearance for a better understanding if it really has any impact potential.
For some reference... Mine has 26.5 cm clearance and this is on a low end fs mtb set up for comfort. I mostly ride paved trails but do occasionally ride slowly through root strewn trails. I've taken it off some pretty large curbs in both directions and it's walked down 2 flights of stairs on every ride. I've yet to hit the motor.
As for the battery, the weak point is the Discharge Port on these shark packs. So check and clean it if necessary every few hundred km. Mine lasted about 4500km before it failed, but in all fairness I was pretty ruff on it bouncing the hell out of it as it is mounted on a rear rack and my initial install wasn't the best design.
 
Last edited:
I do have a few questions:
1. I don't plan on fitting the light or gear sensor, and would like to get rid of the cables for these as to keep wiring nice and neat. What do people usually do when cutting/shortening them? Keep in mind that I'm on a budget 😁.
2. I'd like to reduce the length of the cable + extension cable between the battery and the motor. I don't have soldering equipment. What would be recommended for this?
3. The chainring has a bit of clearance from the chainstay but only the bare minimum. I'd like to increase the distance ther for safety. What spacer should I pick up? Anything cheap out there that will do? I'm running the stock 46T atm.
On my install...
1. I sealed mine off with heat shrink and tucked in in the wire Loom along with the other cables. I did not cut them.
2. A water tight Butt Splice that I then put heat shrink over each wire. If you stagger them you can make a tighter bundle.
3. Spacers are typically inexpensive.. But more importantly is maintaining a good chainline to the rear cassette. You should be straight front to back when in the middle of the rear cluster .
 
In general, I would never trim down a weld. I would guess its purpose is to relieve stress on the unsupported edge of the downtube. Take it off, and you might get stress cracks coming off the end.
Just in case others end up facing this issue - i trimmed the weld down with a dremel I borrowed off someone but only ever so slightly, and mostly in the middle of that bump. All good so far.
 
Back