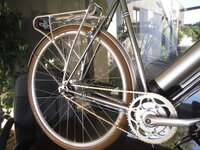
Is this bicycle, a Scott Sub 20 hybrid, a good candidate for conversion to E-bike?

I have not seen this thread in months. It is good to see that it is still going. I am doing an American bottom bracket bike. This shell is 51.5 and the motor fits 34.8. I am using a eccentric adaptor. In your case a headtube reducer might be the ticket. It will add 1mm in width to each side. You might also be able to fit a section of pipe or just an old bottom bracket shell from a junkyard with a couple of spot welds from the local trades school or a farmer. Here is the part that I am using.
View attachment 111904
Thanks for the tips. Those Luna adaptors look very pretty, shame they won't be seen very often.
I wondered about headtube reducers, would they work if the BB is already 73mm? Maybe a section of 1mm thick pipe slotted around the motor BB shaft would work? covered in a thick layer of grease. And some blue loctite to keep the brackets in place. It's all part of the highly enjoyable process of problem solving.
 
You only have about 8mm between the main motor housing and the portion that goes through the bottom bracket. That is why that adaptor I have is eccentric. If it were concentric, it would not fit. On some that are very tight I will split the main housing in two with the four outer bolts and assemble them back together on the bike. It is easier than it sounds. Headtube reducers are exactly the right size, but are they strong enough? You might just give it a try.
 
@m@Robertson has another fastener product, I can’t recall..
I do two different things, which I have consolidated to just one and it seems to be plenty.

The first of the two is to use a pair of interlocking hose clamps. One really big one goes around the body of the BBSHD, front to back. Interlocking with this 'ring' is another that wraps the down tube of the bike. You use black heatshrink to line the one wrapping the black BBSHD (no need to heat it up) and some silicone tape or color-coordinated heatshrink (or both) around the frame tube to prevent any scraping and also to render the clamp well nigh invisible. This makes a physical, unbreakably stable connection to the frame using $5 worth of materials. Done right, it is invisible. I have BBSHDs I installed in 2017 still locked up tight with this method.

IMG_20180609_090732.jpg


The second method, used in conjunction with the above, is now the only one I use, and it has turned out to be plenty sufficient on its own.

Step 1: Rather than using the inner lock ring and the outer trim ring that comes with your install kit, buy a second inner ring. The outer ring is largely for cosmetic use and it cannot take much in the way of torque. So toss it aside and use a nut that is. Stack the two of them one atop the other to make them jam nuts. The inner ring doesn't look like it but it uses about the same threads as the outer trim ring, so you aren't going to have a thread space issue. Also since you only use one type of ring, you only need to buy one type of ring socket. NOTE: In the pic above, from 2018, you can see I used a thin washer (a BB spacer) between the two rings. Turns out this was a dumb idea. Largely negates the jamming force the second ring adds. Don't do that.

Step 2: Use a real torque wrench. Not those little hobbyist Bafang two sided thin installation wrenches. They work best to remove skin off your knuckles and make your fingers hurt like hell. With your real torque wrench, use a proper Bafang socket. These things are like forty bucks these days but we are talking right tool for the job here and this is it.


The torque wrench I use is a 1/2" automotive wrench and this is a big sucker. It needs to be given the next step:

Step 3: I got this advice straight from Luna when they were building all of their retail BBSHD'd bikes: Tighten the lock ring ... not to the 30 or 40 ft lbs Bafang says to... do it to 100 ft lbs. Yes the threads will take it just fine. You will probably want the bike to be off the repair stand and on the ground when you do this. You need that big wrench to make this happen without forcing it. And remember: Since we are using two of these outer rings as jam nuts, you will do this twice. 100 ft lbs for each.

Step 4: Draw a line with a Sharpie across the bottom bracket and the two rings so you can glance down and instantly, visually tell if anything ever moves. None of mine have, ever. Except for my Bullitt recently because I forgot to use a torque wrench and just eyeball/farmer tightened it. It loosened in a few months as a result of not following protocol.

Notice I never used the word 'loctite' anywhere. I have always found that thread lockers are the necessary substitute only if torque wrenches and a proper torque spec are not used.

IMG_20200718_142311.jpg
 
I do two different things, which I have consolidated to just one and it seems to be plenty.

The first of the two is to use a pair of interlocking hose clamps. One really big one goes around the body of the BBSHD, front to back. Interlocking with this 'ring' is another that wraps the down tube of the bike. You use black heatshrink to line the one wrapping the black BBSHD (no need to heat it up) and some silicone tape or color-coordinated heatshrink (or both) around the frame tube to prevent any scraping and also to render the clamp well nigh invisible. This makes a physical, unbreakably stable connection to the frame using $5 worth of materials. Done right, it is invisible. I have BBSHDs I installed in 2017 still locked up tight with this method.

View attachment 112088

The second method, used in conjunction with the above, is now the only one I use, and it has turned out to be plenty sufficient on its own.

Step 1: Rather than using the inner lock ring and the outer trim ring that comes with your install kit, buy a second inner ring. The outer ring is largely for cosmetic use and it cannot take much in the way of torque. So toss it aside and use a nut that is. Stack the two of them one atop the other to make them jam nuts. The inner ring doesn't look like it but it uses about the same threads as the outer trim ring, so you aren't going to have a thread space issue. Also since you only use one type of ring, you only need to buy one type of ring socket. NOTE: In the pic above, from 2018, you can see I used a thin washer (a BB spacer) between the two rings. Turns out this was a dumb idea. Largely negates the jamming force the second ring adds. Don't do that.

Step 2: Use a real torque wrench. Not those little hobbyist Bafang two sided thin installation wrenches. They work best to remove skin off your knuckles and make your fingers hurt like hell. With your real torque wrench, use a proper Bafang socket. These things are like forty bucks these days but we are talking right tool for the job here and this is it.


The torque wrench I use is a 1/2" automotive wrench and this is a big sucker. It needs to be given the next step:

Step 3: I got this advice straight from Luna when they were building all of their retail BBSHD'd bikes: Tighten the lock ring ... not to the 30 or 40 ft lbs Bafang says to... do it to 100 ft lbs. Yes the threads will take it just fine. You will probably want the bike to be off the repair stand and on the ground when you do this. You need that big wrench to make this happen without forcing it. And remember: Since we are using two of these outer rings as jam nuts, you will do this twice. 100 ft lbs for each.

Step 4: Draw a line with a Sharpie across the bottom bracket and the two rings so you can glance down and instantly, visually tell if anything ever moves. None of mine have, ever. Except for my Bullitt recently because I forgot to use a torque wrench and just eyeball/farmer tightened it. It loosened in a few months as a result of not following protocol.

Notice I never used the word 'loctite' anywhere. I have always found that thread lockers are the necessary substitute only if torque wrenches and a proper torque spec are not used.

View attachment 112087
Good stuff! On Bafang builds I score the bottom bracket shell of a bike. This way the side plate teeth dig in and do not rotate. You need to first do a test fit. This marks the shell edge. Use a sharpie to highlight the slight indentations. Then use a stubby hack saw every 40 degrees to make a sort of nine space clock face that is 2.5mm deep. The teeth of the side plate then have a space to dig in and hold. Yes, tighten with a large lever! A 16 inch section of heat molded PVC can also work in a pinch, when using the kit tool.
 

Attachments

  • ShortyHack.JPG
    ShortyHack.JPG
    219.5 KB · Views: 188
10 personal BBSxx series motors. Lock ring tool, rubber mallet and two primary rings. Never a drop other than on the test ride. I’m thinking I met your stated torque value. Doug former California eBike owner ended the pain for many, but stabilizers aren’t ideal for all frames. I’m surprised you had an issue. Were yours all OEM controllers? Or maybe you ride like you stole it? <silly grin>

Good stuff for a fix! Thanks, as usual!

Maybe if missed it but what are the fins on your BBSHD?
 
Last edited:
Good stuff! On Bafang builds I score the bottom bracket shell of a bike. This way the side plate teeth dig in and do not rotate. You need to first do a test fit. This marks the shell edge. Use a sharpie to highlight the slight indentations. Then use a stubby hack saw every 40 degrees to make a sort of nine space clock face that is 2.5mm deep. The teeth of the side plate then have a space to dig in and hold. Yes, tighten with a large lever! A 16 inch section of heat molded PVC can also work in a pinch, when using the kit tool.
When I first saw you post this idea... I thought it was sheer brilliance. Unfortunately I was too preoccupied with the myriad details that went with my last build (the Bullitt) to do this myself. In fact it was that preoccupation that had me putting on the crankarms and proceeding with the build before I had done a final torque on that motor (mentioned that goof above), and I paid the price for it in needing to pull the arm off months later and redo the job. Since then its stayed put.

Maybe if missed it but what are the fins on your BBSHD?

It gets dam hot in Fresno :)


Something I just picked up on above is you folks were discussing spacers for the axle/BB. I went another way - this was on fat bikes where you have a 100mm bottom bracket, but you have to move the drive side outboard some in order to have the secondary housing clear the chainstays (which in turn may necessitate a 120mm motor rather than a 100). You could stack BB spacers of varying sizes, and I did find that on AliExpress, steel 1cm wide spacers were surprisingly well made. Lacking my own machine shop, I found an option on McMaster-Carr: Custom metric press-fit drill bushings. You can order them sized in 1mm length increments and ID and OD sizing in (I kid you not) 0.0025mm increments. Also one end has an inner bevel/chamfer, and the other end an outer one. This turns out to be perfect for a precise fit to the inside surface of the BBSHD. I specified the inner diameter as 34mm, which is tighter than a BB spacer (you might be able to get away with 33.5mm, but 34 is just enough to easily clear the threads of the BBSHD axle). I specified the outer diameter as 44mm which again is much bigger than a BB spacer but fits just within the entire recess on the BBSHD secondary housing. This fatter flat surface makes for a really solid contact with the frame, which you can see in the pic below.

For the one pictured below, same bike as above, I needed exactly 9mm of length. 2Fat's enormous chainstays needed a 17mm spacer. They take about 4 weeks to deliver and these days will run you about $47. Once again not cheap but again if you are minus a machine shop, this is a great way to get your setup *just* right.
IMG_20180525_175509.jpg
 
Last edited:
@m@Robertson @PedalUma Yikes, it’ll be a shame if this discussion gets buried in a thread... really good stuff from you two.
Start a new thread with BBS* Mounting Solutions for these treasures.
Page 6 on a specific bike build might as well be written in Chinese
Not enough experience on my end but the standard BBSO2B hardware with a little threadlock and a bumper where the motor touches the frame has held up for 2 years/6.6k mi for me.... But I'm far from a power rider.
Double nutting (two primary rings here) is a time tested solution in many applications
 
Last edited:
Just asking. What about using inner diameter 34.8 headtube spacers or headtube reducers?
 
Just asking. What about using inner diameter 34.8 headtube spacers or headtube reducers?
I think someone mentioned those earlier but I couldn't find it again when I was looking. Its not something I ever considered. Should work so long as strength is not critical. I believe that would be a hair smaller inside diameter than a BB spacer. I suppose it would work for a non-drive-side spacer for sure, although I have used the 1cm steel spacers from AliExpress whenever I needed a non drive side spacer to soak up the sins a 120mm motor visits upon a 100mm BB.

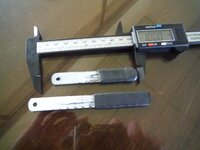
Here's the link to the ones I bought. The image on the listing today looks scruffier than the ones I received. Ali tells me I bought them in 2018. They measured out precisely to 1 cm when I put calipers to them.

 
Off topic. By word of mouth referral, someone in LA wants me to convert their bike. That is a first. They will bring it the 500 miles and stay in the area for a few days. I can picture a few Hollywood types ditching their clunky rides and riding with elegance.
 

Attachments

  • DSCF7255.JPG
    DSCF7255.JPG
    620.5 KB · Views: 195
Off topic. By word of mouth referral, someone in LA wants me to convert their bike. That is a first. They will bring it the 500 miles and stay in the area for a few days. I can picture a few Hollywood types ditching their clunky rides and riding with elegance.
You're famous or infamous?
 
Nobel Prize and a criminal record
It is subversive! It is so fun to pass by some guy in spandex on a $9400 bike while blowing my clown horn on a three speed that does not look electric. The guy is doing Strata data logging to post and boast. Then I will sip coffee on the climb. Criminality never felt so fun.
When that other guy gets off his bike he walks like a pregnant penguin just like a looser in spandex to order his coffee.
 
Last edited:
I am considering purchasing this battery pack for increased range when my 36V 9.6Ah LG bottle battery may not suffice. Is this a good choice? Does anyone have experience with this brand? Does anyone have any other recommendations?
 

Attachments

  • 51v8t00weiL._AC_SL1000_.jpg
    51v8t00weiL._AC_SL1000_.jpg
    47.6 KB · Views: 160
I am considering purchasing this battery pack for increased range when my 36V 9.6Ah LG bottle battery may not suffice. Is this a good choice? Does anyone have experience with this brand? Does anyone have any other recommendations?
I looked. I do not know the re-brand. The weight is right for the stated capacity. The seller does not have a North American presence. The make of cells is not stated, loudly implying they are dirt cheep generics that are prone for problems including fires.
 
So you are saying that only Samsung, Panasonic or LG cells are worth buying and that anything else is dirt cheap generics that are prone for problems including fires?
 
So you are saying that only Samsung, Panasonic or LG cells are worth buying and that anything else is dirt cheap generics that are prone for problems including fires?
Not quite. A seller is normally proud of the cells that they use. If they say that it has something nice such as Sanyo then you know what you are getting and may be willing to pay for premium. If they do not say, then there must be a reason not to disclose. It could be that this battery pack is wonderful. Ask an expert such as @m@Robertson for a second take. Do not trust only me. We have peer review.
 
Last edited:
Back