Busse Woods
Member
- Region
- USA
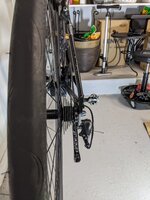
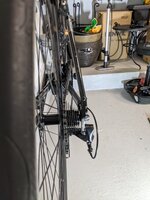
Can I somehow use the two existing rear derailleur cable guides that are welded to the frame when installing a new one piece cable housing. Can I cut the housing and run the cable through the existing guides? Any ideas on how best to deal with that. I can't get a clear enough look at PedalUmas photos to see what he has done.
Edit: decided to go with these cable guides that make use of the existing guides.
Or how about just drilling out the old cable guides?
Edit: decided to go with these cable guides that make use of the existing guides.
Amazon.com : Farbetter 4 Pieces Bicycle Cable Guide, Hydraulic Brake Cable Housing Holder, Hose Wire Clips Clamps, Cable Grip, Black Alloy : Sports & Outdoors
Amazon.com : Farbetter 4 Pieces Bicycle Cable Guide, Hydraulic Brake Cable Housing Holder, Hose Wire Clips Clamps, Cable Grip, Black Alloy : Sports & Outdoors
www.amazon.com
Or how about just drilling out the old cable guides?
Last edited:


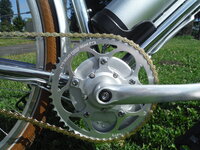
 . What is the solution? A different chainring? I use the low gears of my 8 speed much more than I use the high ones. I also get noise from the chain/cassette in the middle gears if I lift the bike and pedal with no load. Did not have that before installing the motor. Adjustment of the derailleur does not seem to help. Also rates a