Giant SyncDrive Pro 2020 "tuning"

There is always the mechanical option of speed derestricting. Planet3 offers a gear reduced magnet system that takes all of five minutes to install. I put it in my reign 1pro.
Works like a charm with two magnets and can hit speeds of 37km/h. You can use just one magnet and hit speeds around 55km/h but when in the four easiest gears it will throw a speed sensor code and occasionally looses power.


min interested to k is if anyone else out there notices thst when you hit a steeper hill, say 15 degrees plus, the bike actually reduces your power and forces you to an easier gear to maintain power...... Ive riddden two other companies equivalent ebikes and this is not the case with them. Wonder if it had anything to do with the three sensors the bike has???? Anyone else notice this?
That thing looks interesting! (I'd tried and failed to install a BikeSpeedRS on my 2019 Explore E+1.)

I didn't see a contact us option on the site you linked to... They list some Giant bikes, but nothing about the Explore. I'd like to ask them.

About that "four easiest gears" thing... is it really a function of which gear you're in, or does cadence also have something to do with it?

cadence was a part of the error code, but it did only do it with one magnet in the reduction gear and only the four easiest gears on my bike. Once I put the second magnet in, I had no problems with the speed Sensor, just a lower top speed.
 
Yep, i think this is gonna be a challenge...

I ordered the special lockring removal tool but I didn't get the same one as you did

The one I got is this one : Thadix Spider for Giant SyncDrive
Not sure what kind of extra tool do I need to use with that..?
From the photo and the description, it's pretty obvious (at least to me) that you need a 1/2" driver. It'll fit on the driver exactly as a socket would.
 
From the photo and the description, it's pretty obvious (at least to me) that you need a 1/2" driver. It'll fit on the driver exactly as a socket would.

Thanks, I got one and it fits indeed. I haven't had a bike for years and I never unmounted one so apologies if I'm asking silly questions :D
Still haven't had a go at it yet, as I am trying to get all the right tools before - I've seen tutorials but they are often on older or different versions and it seems mine (2020) is slightly different...


I guess I have to start by unscrewing the one in the middle (in red), right ?
I've read that I'd need a 6mm allen key but on mine it looks more like a 8mm. It reads "M15" inside.
Do I need to unscrew the blue ones (they are 5mm allen) as well at some point ? On some tutorials I've seen they do, on some others they don't...

Thanks !
 
Last edited:
Thanks, I got one and it fits indeed. I haven't had a bike for years and I never unmounted one so apologies if I'm asking silly questions :D
Still haven't had a go at it yet, as I am trying to get all the right tools before - I've seen tutorials but they are often on older or different versions and it seems mine (2020) is slightly different...


I guess I have to start by unscrewing the one in the middle (in red), right ?
I've read that I'd need a 6mm allen key but on mine it looks more like a 8mm. It reads "M15" inside.
Do I need to unscrew the blue ones (they are 5mm allen) as well at some point ? On some tutorials I've seen they do, on some others they don't...

Thanks !
Yes, the red one in the middle. You do NOT need to open the ones circled in blue. Those would be only if you're changing the chain rings.

Don't worry about asking "silly" questions!!!!! We all do it! :) And the folks here won't laugh either. We've all had to start somewhere.

Remind me again please which bike you have? The crank arms might need a "puller" to remove. Once you get that red one out, that's when you'll probably need the puller.
 
I have the Explore Pro E+1 GTS, I think it's a model sold only in Europe
It is fitted with the SyncDrive Pro, which is most powerful motor of the SyncDrive line and makes the 25kph limitation all the more frustrating...
I'll let you know how it goes
 
Last edited:
I have the Explore Pro E+1 GTS, I think it's a model sold only in Europe
It is fitted with the SyncDrive Pro, which is most powerful motor of the SyncDrive line and makes the 25kph limitation all the more frustrating...
I'll let you know how it goes
Is yours a 2020 model? I have a 2019 Explore E+1 GTS (no Pro in the name) and it was the last 2019 with small frame size in all of Canada. It's a real shame that Giant doesn't sell the new E+1 in North America as it's got really great components and features.

On mine, once I got the crank arms off, I needed a large socket with thin walls in order to remove the nut holding the chain ring in place. That was a little hard to find, but I got it. Looks like yours needs the special tool you showed a photo of earlier.

I might have said this to you before (I can't remember) but it's worth repeating... As you open the motor (meaning as you start to pivot it away), be very careful to take photos of exactly how all the wires are positioned. You will need this for when you try to put it back together, and even without adding any extra wiring and speed gadget, it all must fit exactly. Much tougher than a jigsaw puzzle.

Best of luck!
 
Okay, I had another try, and I'm close to giving up already...

I don't even understand how I am supposed to remove the crank.
I started by removing the middle 8mm hex nut (so far no problem), then I tried using the crank removal tool, as I saw on videos : first screwing the black part inside clockwise, then adding the silver part and screwing it also clockwise with a wrench.


Well first, as you can see on the pic above, the black part doesn't go fully inside. I've tried applying quite a lot of force with a pretty big wrench but that's far as it will go.
When I add the silver part, I can screw it all the way inside with little to no resistance, but the crank does not move one bit.


This is how it looks like on the inside :


What am I doing wrong ? Did I get the wrong tool again ?
It's not an easy job, that's for sure... especially if you've never done it before.

I'm not quite sure if your removal tool is the right one. The one I have is this one. If you look at the description and the photos of it, you'll see that it has a thin end piece and a thick one. You choose the right one for your crank. Your last photos are not particularly clear so I can't see for sure. But I'm wondering if the end of your puller tool is too thick/wide to fit right inside at the middle. It could be that it's pushing up against the shoulder of the crank and not the center part. And if so, you'll never get it off.

Have you got the black part of the removal tool all the way in? If so, then you turn the silver part and it DOES take a lot of force to remove. I had to hit my wrench with a rubber mallet to get it loose. Oops, I see that you mentioned the black part doesn't go fully inside. I had to work mine a bit... first put the black part as far inside as possible, then tighten the silver part and slowly as it starts to force the crank off, you retighten the black part, and then the silver part again, and so on. But I'd first suspect your silver part is too thick at the end to fit into the center where it must. Which is why the tool I use is reversible, offering both thin and thick end parts.

For what it's worth, I really struggled a lot with mine, getting the cranks off. It was really tough. But then the toughest part (and most frustrating) was trying to get the speed device and the extra wiring back into the tubes, and that's where I gave up.

I hope someone else can offer you better advice.
 
I managed to do it, you're right I needed the extra thin end piece and then it worked. It wasn't included in the first crank removal tool I bought but luckily I had bought a second one just in case and it did have it.

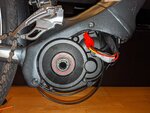
Now I'm blocked a bit further...I can't remove the motor. I've unscrewed all the screws I could see, but the motor is still firmly attached to the frame. There must obviously be something holding it in place but I've looked everywhere for 15 minutes now and I just can't see it...all the videos online are on different models with different screws positionned elsewhere, that doesn't help !

Right side :
IMG_20200724_221457.jpg

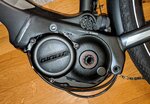
Left side :
IMG_20200724_221430.jpg

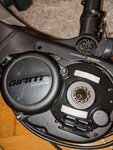
Left side - I even removed the plastic cover but there are no more screws underneath...
IMG_20200724_222657.jpg


What have I gotten myself into...but I was warned indeed.
 
I managed to do it, you're right I needed the extra thin end piece and then it worked. It wasn't included in the first crank removal tool I bought but luckily I had bought a second one just in case and it did have it.

Now I'm blocked a bit further...I can't remove the motor. I've unscrewed all the screws I could see, but the motor is still firmly attached to the frame. There must obviously be something holding it in place but I've looked everywhere for 15 minutes now and I just can't see it...all the videos online are on different models with different screws positionned elsewhere, that doesn't help !

Right side :
View attachment 59970

Left side :
View attachment 59968

Left side - I even removed the plastic cover but there are no more screws underneath...
View attachment 59969


What have I gotten myself into...but I was warned indeed.
That does look different than mine does. But you don't actually REMOVE the motor... the bolt that is furthest back should just be loosened a bit and then used as a pivot point so that the motor swings down and out of the way. Could there be some kind of screw on the top from the frame side? Or one in the middle front of the motor that you didn't see? Maybe time to give a shout out to @Stefan Mikes as I think his motor is the same as yours. And he (together with a friend) opened his up successfully. Anyway, now that I've mentioned his name he's sure to come and take a look here. Let's hope he has some insight to this.
 
Yep I've read that the back bolt should just be loosened for the motor to pivot, but as it wasn't moving at all I tried to remove it all together and it makes no difference.

I don't quite get it, there is this big Torx30 nut at the back, a similar one on top which I removed (both sides), but I don't see anything else holding it yet it doesn't move an inch.

Thanks for the help, appreciate it !
 
Okay I actually managed to pivot it ! There was no extra screw to remove, but I had to "lever" the motor down using a flat head screwdriver

Now the dreaded part, connecting it and trying to put it back together...
 
Ok, I made it !!! 😍

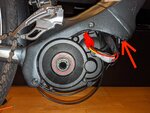
Interestingly I did not have any problem fitting the device ! There was not a lot of space, but surely enough. Maybe that's because I have a L-size frame, or maybe the Volspeed V2 is a bit smaller than the Bikespeed RS. I didn't put it in the battery chamber, just below, at the very bottom of the downtube, where the red arrow is on the picture.
IMG_20200724_221457 (1).jpg

The advice I would give here : don't pull out all the cables when you pivot the motor. There are just two that you need to unplug, identify them and plug the device while keeping the cables where they are if you don't need to move them. That way it was quite easy to put everything back together.

It still took me several hours, but the hardest part for me 1) understanding which tools I needed 2) the unmounting process itself, because it looked a bit different than all the tutorials online which were made on older versions.

So for the tools, this is what I needed on mine (Explore E+1 Pro 2020 with SyncDrive Pro) :
  • 8mm hex key with a long handle - long handle is important to be able to apply enough torque, the nuts on the pedals are very tightly fastened and there is just no way to remove them with a tiny pocket tool (I tried and failed).
  • 4mm hex key - needed to remove the motor cover.
  • Crank puller tool + 16mm wrench (also long enough for the same reason as above, also tried and initially failed using one that was too small). You need a tool compatible with a ISIS drive, not Octalink ! (with the thick rotating tip)
  • Giant spider + 1/2” torque wrench
  • T20, T25 and T30 Torx keys
  • Flathead screwdriver (to pivot the motor once unscrewed)
  • I did not need the chain whip tool. You can use the rear brake to prevent the wheel from rotating when using the spider.
I had a short test drive with the limit upped at 32 km/h and it makes already a big difference with 25 km/h. With the Volspeed it is possible to set the limit with the remote without having to unmount it again.

Again thanks a lot for the support ! And hopefully this little feedback can help someone else
 
Ok, I made it !!! 😍

Interestingly I did not have any problem fitting the device! There was not a lot of space, but sure enough. Maybe that's because I have an L-size frame, or maybe the Volspeed V2 is a bit smaller than the Bikespeed RS. I didn't put it in the battery chamber, just below, at the very bottom of the downtube, where the red arrow is on the picture.
View attachment 60030 The advice I would give here: don't pull out all the cables when you pivot the motor. There are just two that you need to unplug, identify them, and plug the device while keeping the cables where they are if you don't need to move them. That way it was quite easy to put everything back together. It still took me several hours, but the hardest part for me 1) understanding which tools I needed 2) the unmounting process itself because it looked a bit different than all the tutorials online which were made on older versions. So for the tools, this is what I needed on mine (Explore E+1 Pro 2020 with SyncDrive Pro) :
  • 8mm hex key with a long handle - long handle is important to be able to apply enough torque, the nuts on the pedals are very tightly fastened and there is just no way to remove them with a tiny pocket tool (I tried and failed).
  • 4mm hex key - needed to remove the motor cover.
  • Crank puller tool + 16mm wrench (also long enough for the same reason as above, also tried and initially failed using one that was too small). You need a tool compatible with an ISIS drive, not Octalink! (with the thick rotating tip)
  • Giant spider + 1/2” torque wrench
  • T20, T25 and T30 Torx keys
  • Flathead screwdriver (to pivot the motor once unscrewed)
  • I did not need the chain whip tool. You can use the rear brake to prevent the wheel from rotating when using the spider.
I had a short test drive with the limit upped at 32 km/h and it makes already a big difference with 25 km/h. With the Volspeed it is possible to set the limit with the remote without having to unmount it again. Again thanks a lot for the support! And hopefully, this little feedback can help someone else

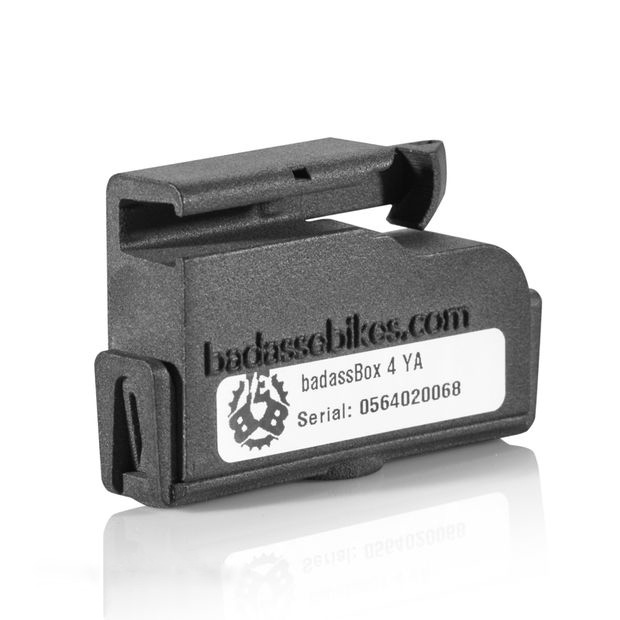
For the benefit of other EBR members, try using the BadAa$$ box to tune your Yamaha motor.

No motor drop or disassembly is required ... just clip the box to your speed sensor. Job Done! 😉

 
Last edited:
Back