6zfshdb
Well-Known Member
- Region
- USA
- City
- Northeast Pennsylvania
Here's an idea for a small pocket meter that will measure voltage & battery capacity on Dorado Shark, Hailong, Pedego and other batteries that use a 4 prong spade connector.
My bikes all have volt meters which is great when the battery is in the bike. I have 3 bikes which I store in an unheated garage and a total of 7 batteries which I keep in my shop. Installing a battery in the bike just to check it's voltage isn't practical.
I usually do a check 3 or 4 times during the off season and adjust the charge level if necessary for proper storage. I got tired of getting out a voltmeter and connecting the leads every time I wanted to take a reading. Last year, I built this little gauge which just plugs into the battery without even removing it from the shelf. I can check all 7 batteries in less than 10 seconds using just one hand.
These are the required parts:
Gauge:

Connector:

Epoxy:
Bond the connector to the back of the gauge with the JB Weld plastic epoxy:


Solder the leads observing the correct polarity:

Although it isn't necessary, I encapsulated the connectors with more epoxy to protect the wiring:

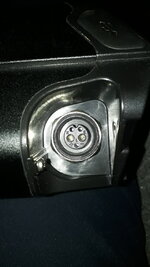
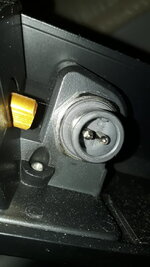
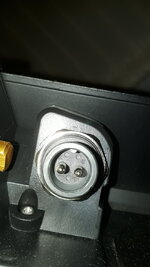
To read voltage, insert into any battery that uses a 4 prong spade connector observing the proper polarity:


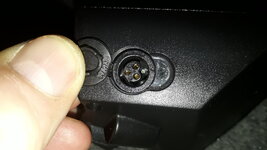
I added a flat vinyl cap to keep the prongs from damaging other items in a pocket or other storage container.


The project cost around $25 and took about an hour to put together. I realize it isn't useful for everyone. Many of us are in the off season now so I thought I'd post in case the idea helps someone.
My bikes all have volt meters which is great when the battery is in the bike. I have 3 bikes which I store in an unheated garage and a total of 7 batteries which I keep in my shop. Installing a battery in the bike just to check it's voltage isn't practical.
I usually do a check 3 or 4 times during the off season and adjust the charge level if necessary for proper storage. I got tired of getting out a voltmeter and connecting the leads every time I wanted to take a reading. Last year, I built this little gauge which just plugs into the battery without even removing it from the shelf. I can check all 7 batteries in less than 10 seconds using just one hand.
These are the required parts:
Gauge:
12V 24V/ 48V Battery Status Charge LCD Digital Indicator Monitor Meter Gauge US | eBay
Find many great new & used options and get the best deals for 12V 24V/ 48V Battery Status Charge LCD Digital Indicator Monitor Meter Gauge US at the best online prices at eBay! Free shipping for many products!
www.ebay.com
Connector:
Hailong Battery Case Discharge Power Connector 4pins or 5pins Male or Female | eBay
Use for: Hailong 1 battery case, Hailong 1-2 battery case, Big hailong battery case and samll Hailong battery case. We will try our best to reduce the risk of the custom duties.
www.ebay.com
Epoxy:
J-B Weld 0.85 oz. Plastic Bonder Epoxy 50133H - The Home Depot
J-B Weld Plastic Bonder Syringe is a quick-setting, 2-part, urethane adhesive system that provides strong and lasting repairs and works on thermoset, carbon fiber composites, thermoplastics, coated metals,
www.homedepot.com
Bond the connector to the back of the gauge with the JB Weld plastic epoxy:
Solder the leads observing the correct polarity:
Although it isn't necessary, I encapsulated the connectors with more epoxy to protect the wiring:
To read voltage, insert into any battery that uses a 4 prong spade connector observing the proper polarity:
I added a flat vinyl cap to keep the prongs from damaging other items in a pocket or other storage container.
The project cost around $25 and took about an hour to put together. I realize it isn't useful for everyone. Many of us are in the off season now so I thought I'd post in case the idea helps someone.
Last edited: