Changing RadMini gear ratios

cayjak

Member
New RadMini (2018 model) owner here. I find the discussion in other threads about changing gear ratios interesting, because I too would like to slow down my pedal cadence. To do this, as I understand it, you can change either the rear gears (the freewheel), or the front chainring, or both.

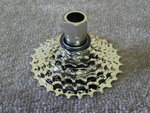
The stock freewheel (on my 2018 RadMini) is a Shimano MF-TZ500-7 with tooth count of 14-16-18-20-22-24-28. If you change to the DNP 11/28 freewheel (link below), which is a direct replacement, it has tooth count of 11-13-15-18-21-24-28. With the DNP, you are reducing your pedal speed in 3rd through 7th gears, but the two lowest gears (1st and 2nd) remain unchanged. Replacing the freewheel may require a special deep thin wall freewheel tool.

On the other hand, if you change the front chainring from the stock 48 tooth to a larger 53 tooth (link below), you will decrease your pedal cadence (at any given speed) in ALL 7 gears. Replacing the chainring will require replacing or lengthening the chain.

For the greatest possible degree of change, you could replace BOTH the freewheel AND the front chainring.

The question is: which option, new freewheel or new chainring, gives you the most bang for the buck?

To answer this question, we can reduce each combination to a simple number called "gear inches". To find this number you divide the number of chainring teeth by the number of teeth on the freewheel sprocket. This produces a "gear ratio" number. Then you multiply the gear ratio by the diameter of the rear wheel. This produces the "gear inch" number.

Since most of us are primarily interested in decreasing our pedal cadence in top gear, I will only do the 7th gear calculation for the the stock setup, plus the 3 possible combinations listed above. I used 22" for the wheel diameter, because that is what is set in the motor control panel on my bike.

Here are the results, listing the percent improvement over stock for each combination, in 7th gear:

( stock ) 48t chainring divided by (stock) 14t (7th gear) sprocket = 3.43 ratio times 22" wheel diameter = 75 gear inches (stock)

(bigger) 53t chainring divided by (stock) 14t (7th gear) sprocket = 3.79 ratio times 22" wheel diameter = 83 gear inches (11% better than stock)

( stock ) 48t chainring divided by (DNP ) 11t (7th gear) sprocket = 4.36 ratio times 22" wheel diameter = 96 gear inches (28% better than stock)

(bigger) 53t chainring divided by (DNP ) 11t (7th gear) sprocket = 4.82 ratio times 22" wheel diameter = 106 gear inches (41% better than stock)

Cost of modifications:

Replacing the front chainring costs about $53 (Amazon Prime) plus the cost of replacing or extending the chain, for 11% improvement.
Replacing the freewheel costs about $32 (Amazon Prime) plus the cost of a freewheel tool (use the original chain), for 28% improvement.
Replacing both the front chainring and the freewheel costs about $85 (plus cost of chain and a freewheel tool) ), for 41% improvement.

My conclusion:

If your primary objective is to slow down your cadence in the upper gears (3rd through 7th) for the least expense, then the new freewheel would seem to be the best choice. Although I only calculated the percent change in 7th gear, you would also see a improvement in gears 3 through 6. If it turns out you still want more reduction in pedal speed after trying the new freewheel, you could then replace the front chainring.

NOTE: I am just a novice at this bike gear stuff, so if I made any errors in my math, please feel free to point them out!

https://www.amazon.com/gp/product/B071LPKGT2/ref=oh_aui_detailpage_o02_s00?ie=UTF8&psc=1

https://www.amazon.com/DNP-Epoch-Freewheel-Nickel-Plated/dp/B007A8RPUS
 
I purchased two 20" folding bikes a year ago and put hub motors in them. I bought two 34T/11T DNP freewheels. One bike had a 52T front cog, but the one I prefer to ride is 46T, so cadence is too fast at the bike's limits (20 mph). That's not worth the extra expense, and maybe having to add a link to my chain to me to match both bikes.

Serious bikers seem to detest the DNP products. They do look to me not as well made as a less expensive Shimano. Well, serious bikers detest freewheels. I guess when you put all your weight on the drivetrain 26 or 28 hours a day, freewheels wear out fast.

By the way, there are 11/28T, 11/32T, and 11/34T DNP freewheels. With a 20" wheel, the 11/28T or 11/32T might offer a closer ratio, as the big gear is rarely needed.

The Park FR1.3 freewheel tool fits my ebikes and was $7.95 shipped on ebay.
 
Thanks for your comments, HarryS. Yes, I have read the reports that the DNP freewheels are not strong, and tend to wear out quickly. Even so, they are really the only available choice if a RadMini owner wants to reduce pedal cadence by swapping freewheels. The low gears (1st and 2nd) on the stock bike are already too low (in my opinion), so there would be little interest in any bigger sprockets. What we RadMini riders crave is SMALLER sprockets on the freewheel, especially in the cruising gears. The DNP 11/28T fills that need.

Since the RadMini is a geared hub motor bike, the freewheel is not subject to motor torque. The style and seating position of the bike does not lend itself to grinding on the pedals in the cruising gears, so the "human" torque being applied should also be relatively modest. I think the DNP freewheel will probably hold up OK in this application simply because it won't see much stress.

Since this same freewheel swap also applies to the RadRover, this gives us a larger number of potential installations. I hope the members who have made this swap (on either bike) will check back in and report on any problems encountered with the DNP 11/28T unit.
 
Last edited:
Well, there's no other choice other than a DNP freewheel for you and me. It's a good thing we aren't working it hard. Math would suggest the teeth see 21% more action than a 14T, and that doesn't include the higher force from the smaller lever arm.
 
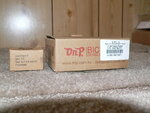
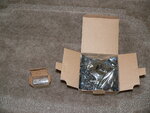
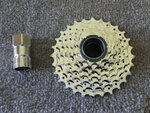
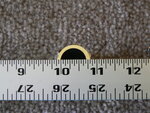
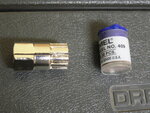
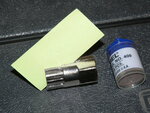
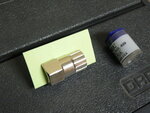
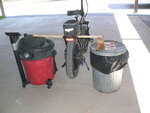
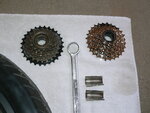
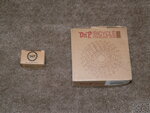
Putting my money where my mouth is...I ordered the DNP 11-28T freewheel and tool. For the benefit of those who are a bit nervous about making the swap, I will document the installation of the freewheel with some (hopefully) helpful photos. First up, a look at what you get when you order the DNP parts. Photo below shows the freewheel and the tool. There seems to be some question about whether the DNP tool has to be modified to work with the RadMini motor. The hole in the freewheel tool is about 11/16", or about 0.6875", or about 17.5mm. It WILL fit over the RadMini motor connector, but it WILL NOT fit over the axle nut. The only way the DNP tool will work is if it is cut in half. Period.

P1050050.jpg

P1050052.jpg

P1050053.jpg

P1050055.jpg

P1050056.jpg

P1050057.jpg

P1050058.jpg
 
Last edited:
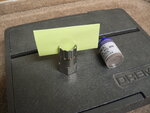
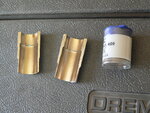
Once I determined that the tool would have to be split, I dug out my 30 year old Dremel tool and got to work. My Dremel uses the small 15/16" diameter cutting wheels, and I had some #409 wheels on hand. They worked fine for this job. I used one wheel on each side. Cutting the DNP tool was not hard - it just takes a little care and patience to make straight clean cuts. I wanted to remove as little material as possible, so that the tool would still fit properly after being split. It worked out great. Photos below show the progress of the cutting from start to finish.

P1050060.jpg

P1050061.jpg

P1050063.jpg

P1050065.jpg

P1050067.jpg

P1050068.jpg
 
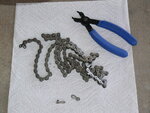
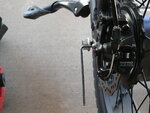
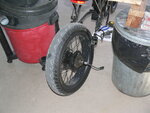
When the DNP tool is split, you have finished all the hard work. The rest is easy. Take the rear wheel off the bike. I had already "broken" my chain when I replaced the tires, so I just unhooked the master link and dropped the chain. Disconnect the motor electric plug, loosen the axel nuts, remove the screw from the torque arm, and drop the wheel.

P1050070.jpg

P1050071.jpg

P1050073.jpg

P1050074.jpg

P1050075.jpg

P1050076.jpg

P1050077.jpg
 
There seems to be some question about whether the DNP tool has to be modified to work with the RadMini motor. The hole in the freewheel tool is about 11/16", or about 0.6875", or about 17.5mm. It WILL fit over the RadMini motor connector, but it WILL NOT fit over the axle nut. The only way the DNP tool will work is if it is cut in half. Period.

Sometimes I am a bit dense, so bear with me. Why not just remove the axle nut? That's what I do when the tool does not fit (I'm referring to other bikes I have worked on, not the Rad specifically). Also, the tool is not needed to install the freewheel; it is only necessary when you need to remove it.
 
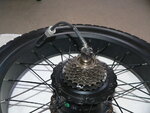
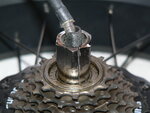
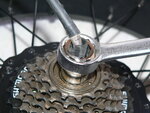
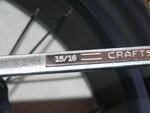
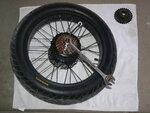
Place the wheel in a comfortable working position Remove the axel nut and washers on the freewheel side. Place your split DNP tool into the recess on the freewheel, and turn it (counter clockwise) with a wrench. I found a 15/16" box end wrench worked perfect on the DNP tool. My freewheel was not tight at all - I barely had to lean on the wrench and it broke loose.

P1050078.jpg

P1050079.jpg

P1050080.jpg

P1050081.jpg

P1050082.jpg
 
Last edited:
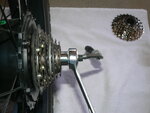
Once the original freewheel is broke loose, it unscrews easily by hand. Install the new freewheel (put a little grease on the threads), being VERY CAREFUL not to get it cross threaded. Tighten it up by hand. You can stop there, if you want. As you pedal the bike the freewheel will continue to tighten up. Me, I feel better snugging it down with the tool so it doesn't feel like it is "slipping" on the first ride. Besides, after spending time cutting the tool in half, I wanted to get as much use out of it as possible. Reinstall the wheel in reverse order of removal. Go for a ride!

P1050083.jpg

P1050084.jpg

P1050085.jpg

P1050086.jpg
 
Last edited:
Took the bike out for a ride with the new freewheel, and was REALLY pleased! I had to make a couple tiny little adjustments in the derailleur positioning for 6th and 7th gears. After that, shifts were smooth and quiet through all gears. The top half of the gear range is now MUCH more useful. Before, I would spin out at about 19-20 mph in 7th gear, and the pedaling was basically useless in PAS 3-4-5. After the mod, I can continue to pedal with some resistance all the way up to just under 25 mph in 7th gear & PAS 5. I am now actually helping the motor in the top gears, instead of just being along for the ride. I believe this upgrade will make the RadMini much more enjoyable to ride, plus providing me with more exercise, which is a good thing.

Bottom line: I highly recommend the DNP 11-28T freewheel.
 
Last edited:
Nice work, Cayjak, in cutting that socket! Some owners try to drill out the hole, but a drill that large isn't cheap and will get ruined.

Just about all good 20" folders use 11-28 to 11-34 and 52T in front. Otherwise, owners could never go over 20 mph like you said.

I do see that your connector won't go thru the nut. Mine are 10.4mm in diameter, which fits thru a 12 mm axle nut. Did Rad reverse the plug genders? The cable coming out of my motors have male pins. The cable side from the controller is female, and would be over 12 mm.
 
Nice work, Cayjak, in cutting that socket! Some owners try to drill out the hole, but a drill that large isn't cheap and will get ruined.
Even if you had a suitable drill press and a sufficiently large bit, drilling still would not solve the problem. The splined end of the DNP tool cannot be any larger in OD, since it has to fit into the freewheel socket. The walls of the splined part are as thin as they could possibly be and still have any strength left. So even at maximum possible I.D. the tool would not go over the axel nut.

I suppose it would be possible to reduce the outside diameter of the axle nut with some judicious grinding on the High points. The nut takes a 18mm wrench, so the diameter across the "flats" is ALMOST small enough to go through the tool. Cutting the DNP tool in half seemed easier to me.
 
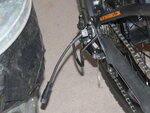
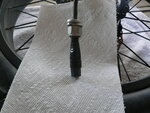
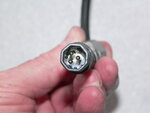
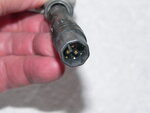
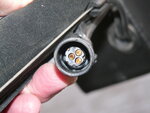
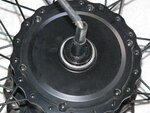
Here's a few photos of the RadMini power cord and plugs. The male plug is attached to the motor. The RadMini axle is 11mm, so that's the size of the hole in the axel nut. The power plug has a O.D. of about 16mm, so obviously the nut isn't going over the plug. The torque washer (the one with a tang on it) has a O.D. of 20mm. This is why drilling the DNP tool could never work. You couldn't make the center hole in the tool that big without destroying the tool.

P1050093.jpg

P1050095.jpg

P1050096.jpg

P1050097.jpg.
 
My ebike motors use 12mm axles with 17mm hex nuts. Rad uses a smaller axle, but they size the nut for 18mm? And a crazy connector too! They sure went out of their way to make it hard for you! Congrats on foiling their game.
 
The RadMini axel might actually be 12mm. I was using a cheap set of calipers to measure. The male power plug is marked 8FUN, so the whole motor and power cord assembly might come this way from the BAFANG factory. Perhaps we can't blame Rad Power Bikes for this design snafu.
 
Last edited:
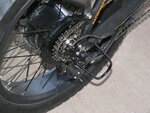
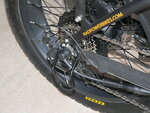
I've been experimenting with the mounting of my DNP freewheel. When riding my bike, I was noticing noise from the gears when in high gear (7th speed). I tried adjusting the derailleur, but was not able to entirely eliminate the noise. Close examination showed me that the upper chain line in 7th was causing the chain to rub on the adjacent sprocket, but not enough to cause a shift. It seemed to me that the smallest outer sprocket was positioned too far outboard (to the right, looking from the rear of the bike), causing the chain to rub on the adjacent sprocket.

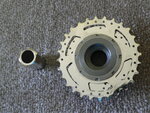
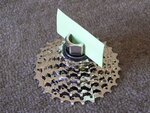
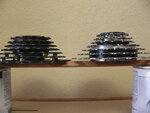
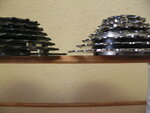
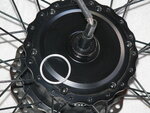
I remembered that when I switched freewheels, I saw a spacer ring under the original unit. I left it in place when installing the DNP freewheel. I decided to try removing the spacer ring, to see if that would reposition the DNP freewheel slightly further inboard, and quiet down the chain noise. When I removed the DNP freewheel and compared it to the original freewheel, I discovered they are slightly different. The way the DNP unit is constructed moves the whole sprocket set further outboard when compared to the original. I tried to show this in the photos below. The spacing between the sprockets appears to be equal on both freewheels. The spacer ring measured about 3/32" or about 2.4mm thick. So leaving the spacer ring in place PLUS the offset of the DNP sprockets moved the whole assembly outboard, causing my noise problem.
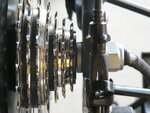
I reinstalled the DNP freewheel without the spacer, and put the bike back together. Test ride revealed the noise in 7th gear was now gone, but I had a shifting problem. I could not shift into the lowest gear (1st). I tried adjusting the derailleur, but it doesn't have enough range of movement to move far enough inboard to fully seat on the biggest sprocket. I never use 1st gear anyway, so this is no big deal. Moving the whole freewheel assembly back inboard makes the top chain line on the smaller sprockets much straighter, and eliminates the chain noise in 7th gear.

The last photo shows the positioning of the smallest (7th gear) sprocket after I removed the spacer ring.

For now, I am going to leave it as it is, and do without 1st gear. Just thought I would bring this up in case anyone else had the same problem.

P1050087.jpg

P1050088.jpg

P1050090.jpg

P1050091.jpg

P1050101.jpg
 
Last edited:
I reinstalled the DNP freewheel without the spacer, and put the bike back together. Test ride revealed the noise in 7th gear was now gone, but I had a shifting problem. I could not shift into the lowest gear (1st). I tried adjusting the derailleur, but I can't get it to move far enough inboard to fully seat on the biggest sprocket.

Is the spacer wider than the rear shoulder that is on the DNP freewheel? In my mind that would be the only possible reason why it would no longer shifts to the 1st cog, because the new freewheel would be further inboard. That said, a derailleur has enough range to cover eight gears, so I'm wondering if there is some adjustment you missed.
 
Last edited:
Back