@mbouck - No luck, unfortunately. That cable must be plugged in at the motor and then spliced to the wire from the light. The plug is the male one and I need the female. I did find another cable (on a European
@mbouck - No luck, unfortunately. That cable must be plugged in at the motor and then spliced to the wire from the light. The plug is the male one and I need the female. I did find another cable (on a European site) but by the time I bring it in with the international shipping charges it would cost more than a new bottom model e-bike light from Giant. My dealer is going to call me back with a price but he thinks the light is about $40. Still a lot of money.
I'm probably just going to give up my idea of keeping the wiring completely stock and change those connectors to something else. Only challenge is going to be to find one small enough to fit through the hole into the frame. But I can get a bunch of connectors for under $10 and change them on the stock light and wire in the bike, and also on my new light. I guess it doesn't really matter to anyone (future buyer of my bike) that the connector might not be the original Giant one.
I'd be foolish to spend the money on a light just to get the connector, or to pay the price of getting a different cable from Europe.
Digikey
02T-JWPF-VSLE-S
General Guide
You are using an out of date browser. It may not display this or other websites correctly.
You should upgrade or use an alternative browser.
You should upgrade or use an alternative browser.
Electric Bike Lights
- Thread starter Chris Nolte
- Start date


Mtl_Biker
Active Member
FANTASTIC!!!! I just ordered half a dozen each of the male and female.
May I ask how you possibly knew about that connector and source? I'd been searching most of the day and talking to people and I'd given up.
You don't have a location set on your profile, but if you ever get to Montreal, the beer's on me!
Thank you very much.
May I ask how you possibly knew about that connector and source? I'd been searching most of the day and talking to people and I'd given up.
You don't have a location set on your profile, but if you ever get to Montreal, the beer's on me!
Thank you very much.
FANTASTIC!!!! I just ordered half a dozen each of the male and female.
May I ask how you possibly knew about that connector and source? I'd been searching most of the day and talking to people and I'd given up.
You don't have a location set on your profile, but if you ever get to Montreal, the beer's on me!
Thank you very much.
I stumbled across the connector mentioned earlier in the thread, which I bought overseas. It was Lupine's cable for Yamaha motors. It was also the wrong fitting (it was male, I needed female).
I was at that point, on a mission.
I hope that you also purchased the corresponding connection terminals and that you have the appropriate crimper, or maybe just one that works well enough for the job.
Reminds me, I should I update that linked light guide with these pieces. Thanks!
I'm San Francisco area in California, much appreciated for the offer!
Edit: connection terminals link
Last edited:
mbouck
Member
Great find! Just bear in mind that part number is for the housing only (i.e. not the pins). You'll also need:
- CONN PIN 22-26AWG CRIMP TIN (maybe get 4 or 5 pins so you have extra)


Mtl_Biker
Active Member
Oh DARN IT!!!! No, I didn't order pins / connection terminals. What an idiot! Now I have to place another order with them and pay an additional shipping. I hope there's not a minimum order requirement.I stumbled across the connector mentioned earlier in the thread, which I bought overseas. It was Lupine's cable for Yamaha motors. It was also the wrong fitting (it was male, I needed female).
I was at that point, on a mission.
I hope that you also purchased the corresponding connection terminals and that you have the appropriate crimper, or maybe just one that works well enough for the job.
Reminds me, I should I update that linked light guide with these pieces. Thanks!
I'm San Francisco area in California, much appreciated for the offer!
Edit: connection terminals link
Mtl_Biker
Active Member
No, I didn't order the pins. Didn't realize they were needed. I thought the plug was complete. SIGHGreat find! Just bear in mind that part number is for the housing only (i.e. not the pins). You'll also need:
Typically you'd use an expensive specialty crimp tool to crimp the pin to the wire but you can probably just do it carefully by hand with some needle nose pliers. I'd probably also solder the wire into the pin (just to guarantee it's not going anywhere) before inserting the pin into the housing.
- CONN PIN 22-26AWG CRIMP TIN (maybe get 4 or 5 pins so you have extra)
Live and learn.
I ordered male and female connectors. Anything else I need? I guess the pins need appropriate sockets. What a dummy!
mbouck
Member
No, I didn't order the pins. Didn't realize they were needed. I thought the plug was complete. SIGH
Live and learn.
I ordered male and female connectors. Anything else I need? I guess the pins need appropriate sockets. What a dummy!
If you got both gender housings then, yes, you'd need the corresponding sockets for the pins.
Mtl_Biker
Active Member
Do you know if those pins (and sockets) are somehow standard? A good electronics supply shop should have them? Or would they be specific to this plug housing?If you got both gender housings then, yes, you'd need the corresponding sockets for the pins.
(A little knowledge is a dangerous thing, I always say.)
Do you know if those pins (and sockets) are somehow standard? A good electronics supply shop should have them? Or would they be specific to this plug housing?
(A little knowledge is a dangerous thing, I always say.)
Sorry I wasn't more clear/thorough to begin with.
Those really aren't standard.
I'm sure you could place then reorder from Digikey to consolidate your orders?
Mtl_Biker
Active Member
No need for you to apologize! I'm the dummy for not realizing. You were terrific just by pointing me in the right direction on this. And years ago (really, like 30 years ago) I used to build special serial cables for a project and then I had plugs and pins. I had to attach the pins to the wires and then insert them into the plugs. I can't remember if I soldered or crimped them. But as it was a commercial project, they were done right. If I remember right, there was also a little tool that was used to push the pins into the plug. Is something like that needed also?Sorry I wasn't more clear/thorough to begin with.
Those really aren't standard.
I'm sure you could place then reorder from Digikey to consolidate your orders?
I placed my order yesterday after 5pm Eastern time and by the time I got home and saw your messages, Digikey had ALREADY SHIPPED my order!!! Incredibly fast. And they're using FedEx with one day delivery. Hard to believe for the price. They charged me $8 for shipping.
Anyway, I guess I'll order the pins and sockets from them. Insertion tool needed?
Thank you again!
No need for you to apologize! I'm the dummy for not realizing. You were terrific just by pointing me in the right direction on this. And years ago (really, like 30 years ago) I used to build special serial cables for a project and then I had plugs and pins. I had to attach the pins to the wires and then insert them into the plugs. I can't remember if I soldered or crimped them. But as it was a commercial project, they were done right. If I remember right, there was also a little tool that was used to push the pins into the plug. Is something like that needed also?
I placed my order yesterday after 5pm Eastern time and by the time I got home and saw your messages, Digikey had ALREADY SHIPPED my order!!! Incredibly fast. And they're using FedEx with one day delivery. Hard to believe for the price. They charged me $8 for shipping.
Anyway, I guess I'll order the pins and sockets from them. Insertion tool needed?
Thank you again!
No insertion tool needed. I'd say you need patience and a steady hand but with your background that should be easy enough. Good luck!
Mtl_Biker
Active Member
I've got everything... light, connectors and I've already tried the light. It's a fabulous improvement over the stock light I had. When I get home tonight I'll be cutting the cable to a more appropriate length, soldering my leads and then heat shrink tube the connections. Piece of cake. Oh, besides ordering the pins, I found (Digikey) they also had some lengths of wire with the pins already attached. So I didn't have to do any crimping. Those are the leads I'll be soldering to the wire from the new light. And I've already got the polarity correct.

I've got everything... light, connectors and I've already tried the light. It's a fabulous improvement over the stock light I had. When I get home tonight I'll be cutting the cable to a more appropriate length, soldering my leads and then heat shrink tube the connections. Piece of cake. Oh, besides ordering the pins, I found (Digikey) they also had some lengths of wire with the pins already attached. So I didn't have to do any crimping. Those are the leads I'll be soldering to the wire from the new light. And I've already got the polarity correct.
That's awesome! Glad its working out.
reinhardtius
New Member
Hi Folks,
My Haibike (Bosch Performance Speed motor) tail light stopped working. I notice the previous owner @Ravi Kempaiah had attempted to fix the wire, but now it is no longer working. I cannot confirm if the light has failed or the wiring is no good, so I am going to replace both.
I am going to replace it with a Supernova E3.
I want to confirm that the tail light on a Bosch system is 6V. This source says so: https://eurocycles.com.au/blog/how-to-hook-up-your-ebike-lighting-system/
Can anyone else confirm that the system requires a 6V light? If so, then I think I can buy and install this E3, available on Amazon: https://www.amazon.com/gp/product/B00A78C8Z0/ref=ask_ql_qh_dp_hza
Attachments
Ravi Kempaiah
Well-Known Member
- Region
- Canada
- City
- Halifax
Can anyone else confirm that the system requires a 6V light? If so, then I think I can buy and install this E3, available on Amazon: https://www.amazon.com/gp/product/B00A78C8Z0/ref=ask_ql_qh_dp_hza
Hey Hunter,
Yes, that 6V Supernova light will work just fine.
Ebiker01
Well-Known Member
Hi Folks,
My Haibike (Bosch Performance Speed motor) tail light stopped working. I notice the previous owner @Ravi Kempaiah had attempted to fix the wire, but now it is no longer working. I cannot confirm if the light has failed or the wiring is no good, so I am going to replace both.
I am going to replace it with a Supernova E3.
I want to confirm that the tail light on a Bosch system is 6V. This source says so: https://eurocycles.com.au/blog/how-to-hook-up-your-ebike-lighting-system/
Can anyone else confirm that the system requires a 6V light? If so, then I think I can buy and install this E3, available on Amazon: https://www.amazon.com/gp/product/B00A78C8Z0/ref=ask_ql_qh_dp_hza
That’s an easy fix(1hour job) , no need to throw a good light and get other one.
It may actually be easier to fix it then install the new one, b/c you will need to route the cable, open the controller case, etc...
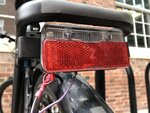
It looks like the purple cable connector came out . It was either not soldered correctly or not soldered at all.
I would open that red light plastic case and see how’s the connector there.
The cable may need to be extended with a similar gauge cable(few inches) then the connector soldered onto that small pin inside the case.
Them close case , and done.
Need solder gun, needle nose pliers , cable stripper, 4-6inch cable(cut an old cable from any charger and use either that one or the thinner cable inside) , electrical tape.
reinhardtius
New Member
That’s an easy fix(1hour job) , no need to throw a good light and get other one.
It may actually be easier to fix it then install the new one, b/c you will need to route the cable, open the controller case, etc...
It looks like the purple cable connector came out . It was either not soldered correctly or not soldered at all.
I would open that red light plastic case and see how’s the connector there.
The cable may need to be extended with a similar gauge cable(few inches) then the connector soldered onto that small pin inside the case.
Them close case , and done.
Need solder gun, needle nose pliers , cable stripper, 4-6inch cable(cut an old cable from any charger and use either that one or the thinner cable inside) , electrical tape.
Thanks.
From my understanding these BM (Busch and Müller) lights cannot be opened, but I will take a look. Now, the light is working, for some unknown reason.
It needs to work 100% of the time, so, in any case, I will replace the wiring, and if I am not satisfied with the result, I'll just install an E3 tail light. I have one on the way, already.
Ebiker01
Well-Known Member
Is the connector ,is loose.Thanks.
From my understanding these BM (Busch and Müller) lights cannot be opened, but I will take a look. Now, the light is working, for some unknown reason.
It needs to work 100% of the time, so, in any case, I will replace the wiring, and if I am not satisfied with the result, I'll just install an E3 tail light. I have one on the way, already.
reinhardtius
New Member
Is the connector ,is loose.
It must be loose somewhere, but the wires connecting to the light appear secure. I will investigate tonight after work.
Mtl_Biker
Active Member
Can you trace the wiring from where it connects to the rear fender? Granted it's not the same make or model of bike, but on my 2019 Giant Explore E+1, the rear light kept intermittently not working. I found that the (cheap) way Giant used to connect the wire to the front of the rear fender and again from the back of the fender to the light simply was not well-designed. I posted a thread with photos of how I fixed it, but basically what they had done was to have a metal washer-like contact embedded into the fender, which in turn made the contact to a ribbon cable running along the inside of the fender. So, imagine a couple of holes in the front and again in the back of the fender. The wire coming from the motor area and again from the rear light to the fender was simply pushed into those holes and held in place by a plastic pin. It really didn't make a good contact. I found tiny bolts (m4 I think they were) and made a much more solid connection front and back and then covered it with black silicone.It must be loose somewhere, but the wires connecting to the light appear secure. I will investigate tonight after work.
I doubt your light is bad. And also doubt the connection inside the light is bad. Much much more likely are the connections along the fender.
Similar threads
- Replies
- 0
- Views
- 811
- Replies
- 10
- Views
- 5K
- Replies
- 5
- Views
- 3K
- Replies
- 25
- Views
- 26K