Deciding on a kit

fit4lyfe

New Member
Hi all - I'm looking for some feedback on the kits I'm considering. I have a 2014 Diamondback Outlook mountain bike. I ride it frequently for recreation and also use it once or twice a week for commute. I'm looking to install an ebike conversion kit on it so the ride is easier on the commute (less sweat) and if I want to go a little faster when I ride for fun.

I'm looking for a simple but reliable kit where I can remove the battery if I just want to ride the bike as a normal bike. The two choices I am considering is the EBO Phantom kit and the hub motor kits offered by Lunacycle.

The EBO Phantom kit is really attractive to me because there's a low amount of components compared to the kits at Lunacycle (no need to replace the handlebar grips for one). The issue I have is that the EBO kit doesn't include a torque arm and based on what I read at Lunacycle, it's highly recommended for safety reasons. I also read that I shouldn't have a front hub motor if I have front suspension.

Does that rule out EBO for me?
 
Don't rule out the EBO kits, just get it in rear drive! I have two of the EBO Burley kits, and two of my neighbors have EBO Phantom kits - all of them rear wheel drive. All have worked great and are very good quality. You only need a torque arm for front wheel kit. Get the rear wheel kits so you have better handling and don't have the torque arm issue. There is almost no rolling resistance if you want to use it as regular bike. This is what my wife does with her's - rides for 3/4s of our 25 mile ride with it turned off as she wants to get more exercise, and just uses the motor for the last part with up hills back to our house. Works great.
 
...The issue I have is that the EBO kit doesn't include a torque arm and based on what I read at Lunacycle, it's highly recommended for safety reasons. I also read that I shouldn't have a front hub motor if I have front suspension...

Aluminum dropouts can fracture with hub motors. The problem can occur when the tire looses traction momentarily, such as on pavement with a sandy surface, then grabs traction, again.
 
Aluminum dropouts can fracture with hub motors. The problem can occur when the tire looses traction momentarily, such as on pavement with a sandy surface, then grabs traction, again.
Yes indeed - on front hub motors! This is why putting them on the rear is much better where you have two strong triangulated points. This is not an issue with rear hub motors.
 
It has happened... with no torque arm, or an improperly fitted arm allowing the axle to spin.
emco5, Yes, I'm sure your right. Even in the rear triangles of some aluminum frames could be week with some of the higher powered - 500 watt & higher kits. All the bikes I've installed the kits on have had chromoly frames which are plenty strong for 350 watt rear hub motors. It is good of you to bring up this possibility for a potential kit buyer.
 
Thanks for the help guys. Great to hear from someone with first hand experience with the EBO kit. I guess I can pick up a torque arm from Amazon separately if I do end up getting this kit.

Alphbetadog - did you get the hub with or without a freewheel? I don't know much about how complicated it is to remove a freewheel so it if isn't something simple, I should just get the hub with a freewheel installed.
 
A direct drive hub motor will have some drag when not using the batteries. A gear drive motor does not have that issue.
 
Alphbetadog - did you get the hub with or without a freewheel? I don't know much about how complicated it is to remove a freewheel so it if isn't something simple, I should just get the hub with a freewheel installed.
There are freewheels, which are most common in older and/or less expensive bikes, and there are cassettes that are on newer/more expensive bikes. Freewheels are pretty easy to remove with the special tool, but I'll bet your local bike shop will remove it for free or at the most a very nominal charge. Putting them back on is easy - just spin it on. If have a freewheel then you can reuse it on the EBO wheel, if not then order one, but you can get them from Amazon for significantly less money.

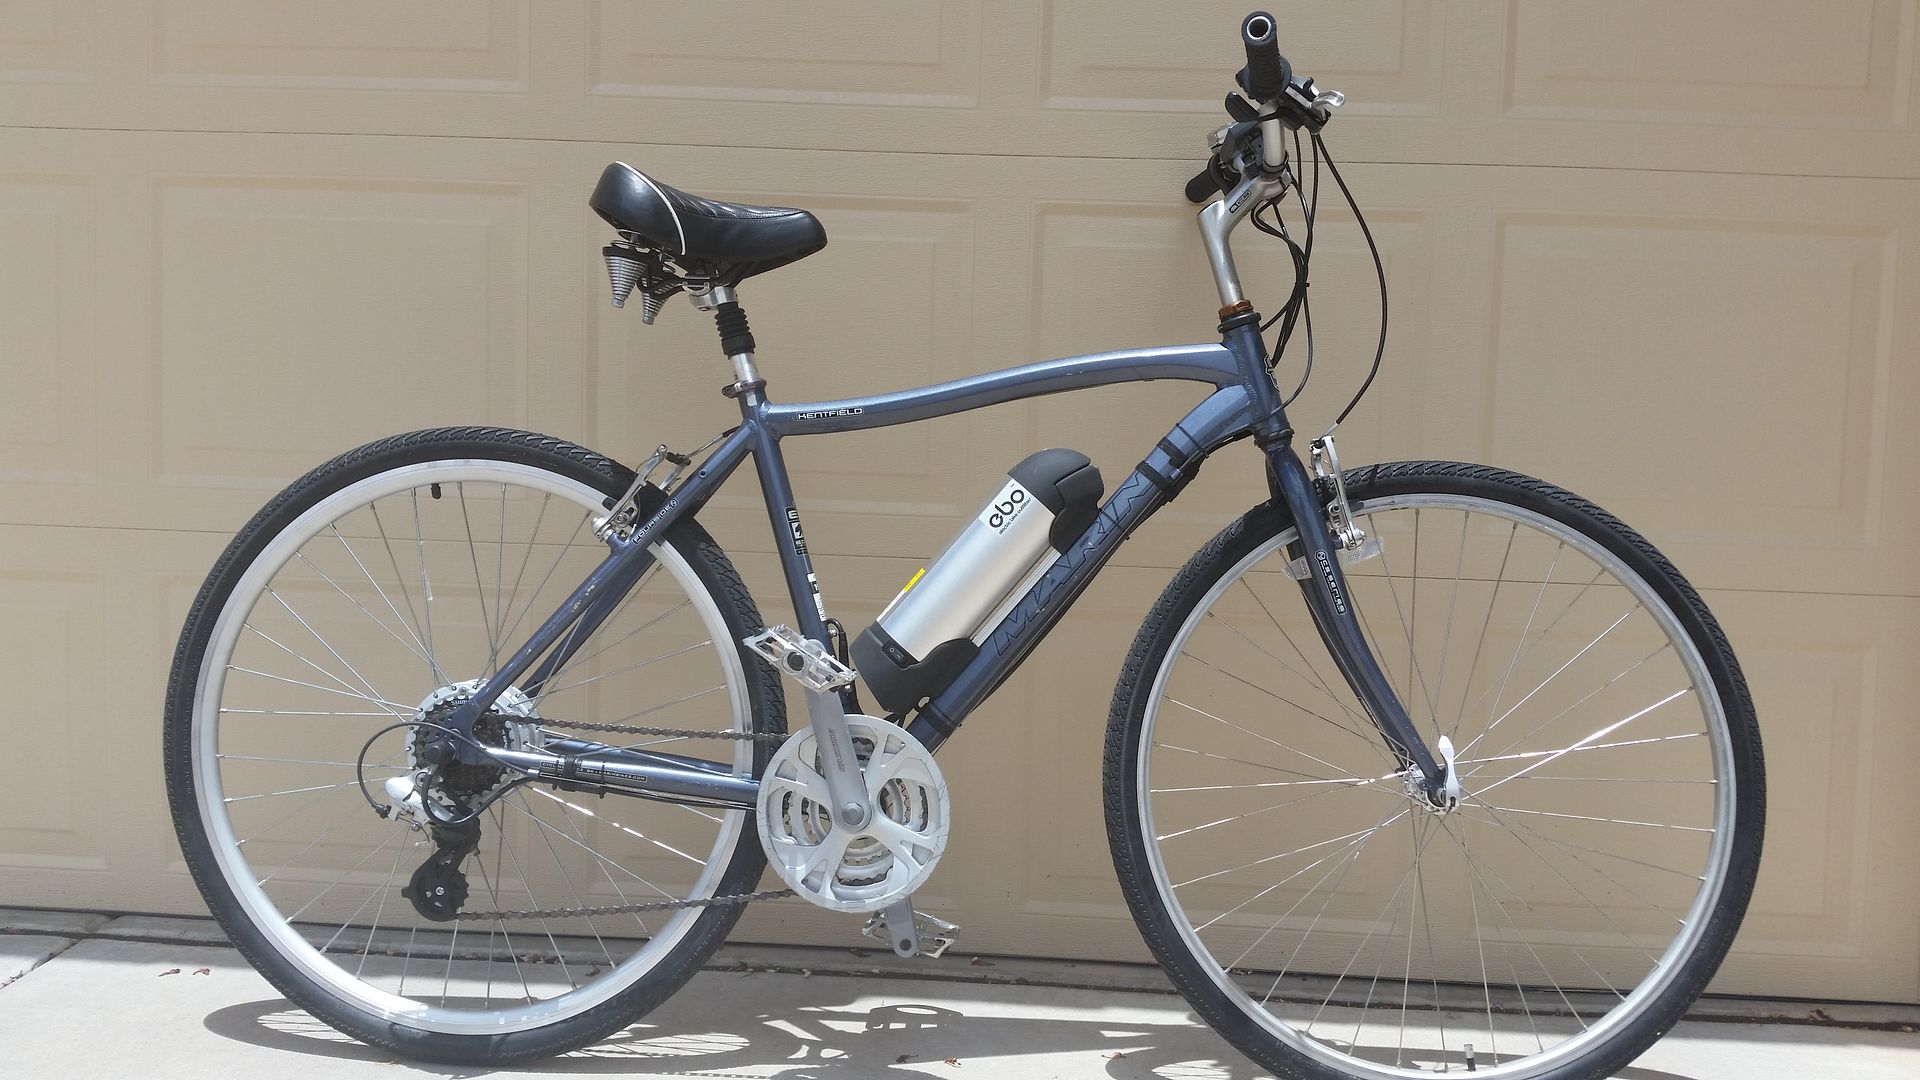
Here is a photo of an EBO Phantom kit I installed on one of my neighbor's bike. He loves it.
20160629_124010_zpsgrjt9di2.jpg

(Link Removed - No Longer Exists)
 
I dropped the money on the Phantom kit. Looks like I will need to take apart the bottom bracket to install the PAS. If I get a standard bicycle tool kit, will it have everything I need to do this install (remove bottom bracket and transfer current freewheel to new rim)? I'll probably get a tool kit and torque arms from Amazon.
 
Congrats on the purchase! If you have a sealed bottom bracket wrench, you'll need the appropriate socket tool, if you have an old-style bearings and cone style crank axle then you might get away with typical tools, but a pin spanner will be nice. Beware that the bottom bracket has left hand treads! You will need the puller to remove the crank arms. On the wheel you will need the correct socket to remove the freewheel. I've noticed that Performance Bicycle has a pretty decent tool kit for around $40-50. Just take your time and don't get frustrated or discouraged - it will all come together, then you'll have a much better understanding on how your bike works. Also, spend some time watching YouTube how to videos. Park Tools has a nice series of videos, and I also like "RJ the Bike Guy". Good luck!
 
Do any of these kits have a 'walk assist' mode? That is an important consideration for me, as there's about a 300 yard stretch where I'm forced to use a sidewalk, and local laws prohibit riding on sidewalks.
 
You "only" have to remove the crank arms to mount a pedal sensor disk. I bought a crank puller for $8 on ebay, but lost it and replaced it with one that was $14 from the local bike shop.

Pretty simple job. A youtube video will show you how simple. I've mounted five pedal sensors. Only had one bike where the arms did not easily come loose.

Some bikes (usually with high end pricey BB and cranks) do not have enough space for disk to fit along the arm, but no need to worry about that now.
 
Congrats on the purchase! If you have a sealed bottom bracket wrench, you'll need the appropriate socket tool, if you have an old-style bearings and cone style crank axle then you might get away with typical tools, but a pin spanner will be nice. Beware that the bottom bracket has left hand treads! You will need the puller to remove the crank arms. On the wheel you will need the correct socket to remove the freewheel. I've noticed that Performance Bicycle has a pretty decent tool kit for around $40-50. Just take your time and don't get frustrated or discouraged - it will all come together, then you'll have a much better understanding on how your bike works. Also, spend some time watching YouTube how to videos. Park Tools has a nice series of videos, and I also like "RJ the Bike Guy". Good luck!

This might sound very simple but I need help installing the hub into the rear dropout. I feel like the 135mm doesn't fit but I measured the inner distance between the 2 dropouts and it is 135mm. But if I place the hub into the dropouts, the inner nuts are preventing it from seating all the way in the slots. If I remove the inner nuts, I can fit the hub into the slots but I'm not sure if the position is correct. Any advice on the correct order the nuts/washers should go?

This is how it looks with the inner nuts still threaded to the hub
20170901_170507.jpg 20170901_170603.jpg

With the inner nuts loosened to let the axle fit all the way down the slots
20170901_172205.jpg 20170901_172229.jpg
 
Humm... I vaguely remember having the same problem on a bike. Are you absolutely sure there aren't any more washers you can take out, perhaps on the freewheel side? If not, I would put the nuts in a vise and file them a little thinner. you probably just need a half millimeter on each side to make it work smoothly.
 
I looked at three of my hub motors. No nuts on the disk brake side. Some have a small nut that holds a bushing on gear, but it's very small so it can fit inside the freewheel. Without the nuts, will the hub on the brake side amd the freewheel on the other side spin freely and not touch the dropouts? I would look at that to see how necessary the nuts are. You can always thin them or replace them with washers as spacers.

As far as alignment, I try to get the wheel in the center as most of my bikes use rim brakes and the wheel has to be in the middle. If you're using a disk brake, you might need an extra spacer washer on the brake side to make sure the disk spins clear of the frame. Then you adjust the caliper position. You still want to center the wheel. If both wheels are centered, the bike should track better and you can ride no handed. :)

If they built the wheel right, the rim will be centered in the middle of the axle, not the middle of the hub, which is offset for the gears.


axle1.jpg axle2.jpg axle3.jpg
 
I was able to find a combination of washers/nuts to install the hub centered in the axle. First, I had to take the extra nuts out on both sides as it was way too thick. On the freewheel side, the sequence was axle nut - torque washer - dropout - washer - hub. The other side was hub - washer - torque washer - dropout - axle nut.

Now my problem is the battery holder. It looks like I can only fit one screw on the lower section because the frame is a small size. Plus, the existing screw I have isn't long enough even if the washer is removed (which I can't). I guess I'll have to see if the bike shop can sell me a long bottle holder screw.
 
The bike shop may also be able to install a riv but so your holder can have two bolts attaching it to the frame
 
I'm 90% complete! Only thing left is the pedal assist sensor. The tool kit unfortunately didn't have the right crank puller I needed so I'll hold off installing the sensor. Honestly, I wasted money on that tool kit (hopefully Amazon will give me a refund). The only thing I used out of it were the tire levers. I did use the allen keys and the screwdriver but they are something I already have in the house. I think I read that the tool kit is made for newer bikes. I guess my 2011 (don't know why I said 2014 in the OP) bike is considered ancient.

I did a few test rides and it was very fun! Someone asked about the walk assist mode and I tried that too. It felt more like "jog" assist to me. Maybe there's a setting I can adjust.

Thanks for the suggestion JRA. I'll consider it later on in the future. I am using a zip tie to secure the top section of the battery holder in the mean time.

Does anyone know what type of crank puller will work with this? The one that was in the tool kit can't thread into it because the pushing part is in the way even when all the way down.

20170904_175751.jpg
 
Back