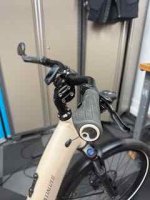
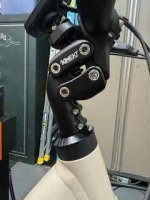
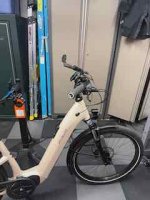
Como 2022+ Handlebar Question

That's exactly it though, this is a general purpose e-bike for the mainstream. Please remember, it's a bike aimed primarily at people who will just buy it and ride it.... those who want to or know how to alter it are probably only a very small minority of purchasers.
Gotta say tho, what an excellent job you've done there, thanks for posting, especially the photos... very informative 👍

My problem is, I love the style of OEM handlebars... I'd just like them to be a little bit higher.... I dunno if there's enough room on the headtube to fit a third spacer on my size large (F in the diagram posted earlier) but I think that might be all that I'm looking for.
Fair enough ... I can see your point. And you're right, a large portion of the population probably doesn't want to tinker. I guess I just assumed that even those people would want to:

1) Buy it.
2) Adjust the seat height and handlebar angle to their body type and incline/reach preference.
3) Ride it.

I followed @CiscoComo suggestions exactly and it worked like a charm. My wife loves the fit of the bike now. I chose a ($40) 90mm stem that can rotate 90 degrees, and a ($37) handlebar with 90mm rise that also can rotate within that stem. That combination results in a large range of handlebar adjustments. Furthermore, now that the handlebar is a standard round shape, something as simple (and safe) as a ($27) flashing headlamp can be mounted easily and cheaply. Couldn't do that effortlessly with OEM handlebars.

I bought a ($7) variety pack of stem headset spacers, containing eight 1-1/8 diameter pieces, ranging in height from 2 to 10mm. That way, I could pick the exact combo to match my steerer tube height and aftermarket stem.
 
Excuse my lack of knowledge, but surely I could find handlebars even more upright than the existing Como handlebars and try this, right? I know they're already pretty upright but sometimes I do feel like I have a slight lean and would like the complete upright feel of a Gazelle bike.
 
Excuse my lack of knowledge, but surely I could find handlebars even more upright than the existing Como handlebars and try this, right? I know they're already pretty upright but sometimes I do feel like I have a slight lean and would like the complete upright feel of a Gazelle bike.
I installed a 90mm long rotatable stem, but they come in other lengths (110mm) as well. The longer the stem, the more adjustable range you'll have to increase handlebar height. Here's the Satori brand I chose:


As an alternative method, you could use a medium length (90mm) stem like I did above, but then choose a different handlebar with more "rise" or curve. Here's the one I chose for my wife that had a 90mm rise:


But there's no reason why you couldn't choose one with more rise, like a 120mm version.

Before install, you may want to cut down the overall length though, as some of these aftermarket handlebars are a bit too wide. (Just make sure you cut off equal amounts from both sides of the handlebar.) I think I measured the OEM Specialized handlebar to be about 720mm wide.


Finally, if you wanted to go full "Harley Davidson" and have your hands floating up above your head, you could combine both of these extension methods. Either or both will give you all sorts of flexibility in handlebar height and lean angle.
 
Last edited:
Did you guys use any seal below the steerer bearings cover to protect them from water etc.?
I bought the exact same FSA part and now there seems to be a pretty wide gap between the cover and the frame.
Thanks!
 
Did you guys use any seal below the steerer bearings cover to protect them from water etc.?
I bought the exact same FSA part and now there seems to be a pretty wide gap between the cover and the frame.
Thanks!
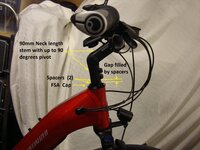
@CiscoComo does mention that the split compression ring sits about 1.5mm above the headtube (see his pictures earlier in the thread), meaning that the FSA cap will sit slightly proud from the frame itself, but I'm not exactly sure if that's the gap your referring to. My FSA cap rests on this split compression ring resulting in a small gap between it and the frame.

To fill a different "gap" -- between the adjustable stem and FSA cap -- I placed two aluminum spacer rings that added up in height to slightly LESS than the total remaining distance between them. I bought a variety pack of spacers off Amazon for $7, then chose the proper combination to fill said gap. I say "LESS" because you want the handlebars to rotate freely without the FSA cap grinding on the split compression ring (in frame).


I suppose you could try to fill that remaining 1.5mm gap between the FSA cap and frame, but it would have to be a somewhat sophisticated part, containing both a watertight seal and bearing capabilities. The FSA cap rotates with the handlebar assembly. The frame (and compression ring) it sits on doesn't. Thus the requirement for some type of bearing with seal. I suppose a custom cut teflon ring of exact thickness (1.5mm) could potentially seal up this gap, but may also introduce unwanted friction when turning the handlebars.

I've attached a labeled pic of my set-up.
 

Attachments

  • ComoHandlebars_Side_withLabels_1.jpg
    ComoHandlebars_Side_withLabels_1.jpg
    607.9 KB · Views: 121
I suppose you could try to fill that remaining 1.5mm gap between the FSA cap and frame, but it would have to be a somewhat sophisticated part, containing both a watertight seal and bearing capabilities. The FSA cap rotates with the handlebar assembly. The frame (and compression ring) it sits on doesn't. Thus the requirement for some type of bearing with seal. I suppose a custom cut teflon ring of exact thickness (1.5mm) could potentially seal up this gap, but may also introduce unwanted friction when turning the handlebars.

I've attached a labeled pic of my set-up.
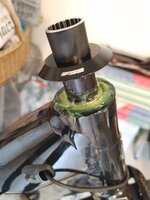
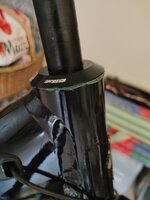
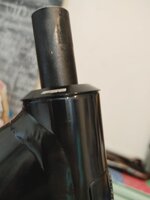
Thank you for a thorough reply, that's the exact problem I meant. What I did just now is I applied a super thick layer of grease, squeezed out the excess with the top cover and it seems to be sitting pretty flush. No idea on how long it will last, but surely it won't hurt anything just being there.
 

Attachments

  • 20240406_123212.jpg
    20240406_123212.jpg
    182 KB · Views: 102
  • 20240406_123252.jpg
    20240406_123252.jpg
    222.7 KB · Views: 111
  • 20240406_123854.jpg
    20240406_123854.jpg
    132.7 KB · Views: 97
Last edited:
Thank you for a thorough reply, that's the exact problem I meant. What I did just now is I applied a super thick layer of grease, squeezed out the excess with the top cover and it seems to be sitting pretty flush. No idea on how long it will last, but surely it won't hurt anything just being there.
Nice! Very creative solution. In a wet environment, this may just be all you ever need, assuming your bike is fender-equipped. And cheap too.

That being said, in an environment containing a lot of dust and dirt (i.e. off road), I suspect a frequent cleaning/replacement of grease could be necessary, and you may find yourself seeking alternate solutions.

Given that I live in a dry climate and ride on paved surfaces most of the time, I probably haven't noticed yet these contamination problems you've run into. Thanks for giving me something to look forward to ... ha, ha! I'll certainly be keeping your grease solution in mind. Let us know if it works out for you in the long-run.
 
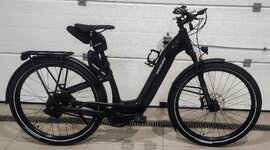
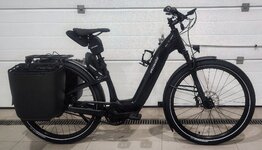
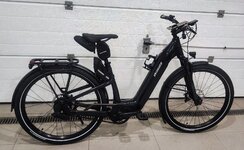
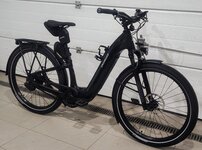
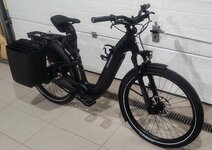
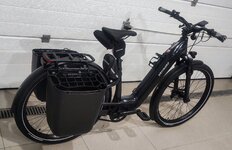
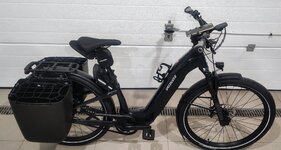
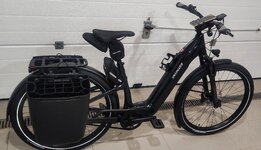
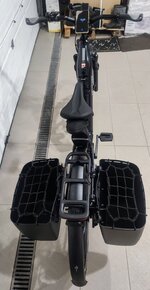
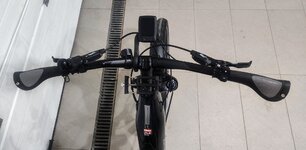
Job done. I actually ordered a red bike too, but they sent a black one. It turned out well though. I especially like how the Mastermind screen aligned with a mounted smartphone, which fitted perfectly in the handlebar's curve. Lots of work in general: finding fitting bags, shims, spacers etc.

Additional parts:
- Cane Creek Thudbuster LT with a cover and an elastomer fitted to the weight
- Cane Creek's seat-tube shim
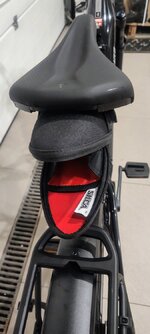
- Specialized Rivo Sport Saddle (the thickest regularly-shaped saddle they have on offer)
- Carbon handlebar (I believe it might have been the most curved one from this link not entirely sure though: aliexpress.com/item/1005003192366212.html)
- the aforementioned FSA cap
- wide carbon spacer (they need to be wide, the narrow ones looked really bad: aliexpress.com/item/1005003726189616.html)
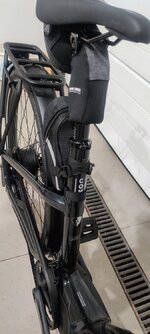
- Silca Capsule bag, the only one with a zip I managed to find that would work with a Cane Creek seatpost (that's a cheap "alternative" IYKWIM, but you can get it directly from Silca on a sale for relatively cheap too. I bought both actually)
- Rockbros bottle cage (very practical, got it for $4.14: aliexpress.com/item/1005006047436100.html)
- Enlee's bike alarm with a remote (got it on sale for $4.49: aliexpress.com/item/1005006363390391.html)
- GUB-84 smartphone mount (it's the nylon/plastic one for safety purposes, using it myself on an XC racing bike and it works fine. Better to break the mount than your leg)
- Bag for storing the Abus chain (got it for $1.99 during a sale: aliexpress.com/item/1005006441996648.html)
- Specialized Coolcave panniers with guard rails (you can download the 3D-print template or buy them here: ebay.com/itm/175982118013)
- Cheap front blinker (paid $2.69 for a pair: aliexpress.com/item/1005005713494003.html)

What's left to install:
- Samox 155 mm crank arms. I'm not sure if and how the lockring from the original praxis arms can be moved, but the crank arm itself fits perfectly. (I bought this particular one: https://www.ebay.com/itm/175462616764). Does anyone have an idea how to do this?
- ABUS 4750XL R wheel lock, beneath the seat tube back. The bag is there to carry the Abus chain (I put a protective wrap on the frame to shield it from rubbing).

I might post this as a separate topic maybe since I took the time to describe the fitting parts. Finding them might be a chore.
 

Attachments

  • 1.jpg
    1.jpg
    513.7 KB · Views: 132
  • 2.jpg
    2.jpg
    492 KB · Views: 124
  • 3.jpg
    3.jpg
    563.3 KB · Views: 121
  • 4.jpg
    4.jpg
    655.6 KB · Views: 128
  • 5.jpg
    5.jpg
    622.5 KB · Views: 123
  • 6.jpg
    6.jpg
    538.4 KB · Views: 121
  • 7.jpg
    7.jpg
    431.4 KB · Views: 122
  • 8.jpg
    8.jpg
    439.9 KB · Views: 112
  • 9.jpg
    9.jpg
    193.6 KB · Views: 120
  • 10.jpg
    10.jpg
    262.8 KB · Views: 110
  • 11.jpg
    11.jpg
    148.7 KB · Views: 122
  • 12.jpg
    12.jpg
    187.6 KB · Views: 125
Last edited:
Excuse my lack of knowledge, but surely I could find handlebars even more upright than the existing Como handlebars and try this, right? I know they're already pretty upright but sometimes I do feel like I have a slight lean and would like the complete upright feel of a Gazelle bike.
Hello, yes you can. You'll just have to do some research and find the right stem and handlebars that will give you the desired position. Maybe a short stem with a 45 degree or more and some riser bars with a 35mm rise?
 
Did you guys use any seal below the steerer bearings cover to protect them from water etc.?
I bought the exact same FSA part and now there seems to be a pretty wide gap between the cover and the frame.
Thanks!
Hello, the gap on mine was very minimal, maybe 1mm? But once you tighten the stem bolt and add compression, the gap on mine is very small, a fraction of a millimeter. Before I put on the new stem and handlebars I cleaned and regreased the top bearing, put a good coat to protect from any water. The FSA cover also has a rubber gasket that hugs the steerer tube and helps prevent anything from seeping in, and it is 2mm wider in diameter than the headtube, so that might also help from things getting in.
 
Thank you for a thorough reply, that's the exact problem I meant. What I did just now is I applied a super thick layer of grease, squeezed out the excess with the top cover and it seems to be sitting pretty flush. No idea on how long it will last, but surely it won't hurt anything just being there.
I see now, You probably figured it out now, but the pics you provide are before you tighten the stem bolt and compress everything. once you do that the gap will shrink.
 
Hello, the gap on mine was very minimal, maybe 1mm? But once you tighten the stem bolt and add compression, the gap on mine is very small, a fraction of a millimeter. Before I put on the new stem and handlebars I cleaned and regreased the top bearing, put a good coat to protect from any water. The FSA cover also has a rubber gasket that hugs the steerer tube and helps prevent anything from seeping in, and it is 2mm wider in diameter than the headtube, so that might also help from things getting in.
Did you mean a layer of grease by saying "coat"?
Yes, I think the bearings should be fine now, thanks for making this build possible.
 
My problem is, I love the style of OEM handlebars... I'd just like them to be a little bit higher.... I dunno if there's enough room on the headtube to fit a third spacer on my size large (F in the diagram posted earlier) but I think that might be all that I'm looking for.
I'm in the same boat. I have a large frame (I'm 5'11") and the bike is fine, but I do think I would like the bars just a tad closer, if possible. Did you ever try just adding a spacer and keeping the existing handlebars?
 
I see now, You probably figured it out now, but the pics you provide are before you tighten the stem bolt and compress everything. once you do that the gap will shrink.
Is there any reason you couldn’t leave the handlebar spacer (Part F) where it is and then put the FSA cover on top of that? Would that address the gap and bearing exposure that people have concerns about? I assume it’s that spacer closest to the frame that has the best fit.
 
Back