This is from the emtb forum. Came from someone who rep'd
Specialized. Thought it was useful so here goes. Here is the link to the full thread also.
Hi Specialized I have a 2019 Turbo Levo. I'm wanting clarification of Support vs Peak Power plse. Have read forum answers where I can and I think I've established that at 100% Support and 100% Peak Power, with a 500w battery, say rider input of 100 watts then bike will deliver 320w (3.2 x...

www.emtbforums.com
Support = the multiplier of rider power added by the motor
Peak Power = maximum electrical power available to supply the motor
In terms of support, each e-Bike motor is slightly different. 100% on the slider means 4.1x rider power for 2019 Levo (2.1 motor), 3.8x for 2018 Levo (1.3 motor) and 3.2x for older Levo (1.2)
When you talk about motor power, bear in mind that two types of
power regularly get confused when discussing e-bikes:
a) Electrical input power (battery power that the motor consumes)
b) Mechanical output power (motor power that is added to rider power at the crank)
Mission Control
(+ all other apps using ANT data) measure the electrical input power to the motor
(Battery Voltage x Current). This is what you see if you view the stats page whilst riding, and it's what you limit when you reduce peak power - if you reduce peak power to 50% you're effectively limiting the motor to draw up to 50% of maximum permitted battery current. Reducing peak power therefore helps you to preserve battery life/range.
In the real world, what you actually care about/feel is the mechanical output power of the motor. Motors are not 100% efficient, some power is lost to heat so let's use 75% efficiency as an arbitrary estimate. In this example, for every 100W of electrical power the battery supplies to the motor you'd get 75W mechanical power at the crank.
However there are two other things to bear in mind - YOU are not 100% efficient either, often riding in the wrong gear and asking the motor to do all the hard work - PLUS the motor is happiest when you ride in the right gear at a good cadence - let's say 70-90 rpm. So when you're riding in optimum gear and around 80rpm, you're turning 75% of the electrical power consumed into mechanical power - but when you're riding in the wrong gear at 40rpm uphill don't expect the same results!
Below is a graph (data presented by us but measured/validated by an independent lab) showing how power varies with cadence for a number of motors - you can see that aiming for a constant cadence of around 80-90rpm will not only give you optimum power but also efficiency. Whether you are after power or range, pedaling at the right RPM makes a big difference.
To put all of this together, let's talk through the default support settings in Mission Control. You can change these to suit your riding style at any time, but let's use these as an example.
In Turbo mode on a 2019 Levo with 4.1x rider support at 100%, you'll only need to put in about 140W rider power for the motor to supply you with the maximum assist of 560W (taken from the graph above), assuming you're spinning at about 80-90 rpm. Lots of fun, also useful to get to the trail but possibly too powerful for steep climbing - especially if the ground covering is loose.
On the same bike with Support set to 35%, you're getting approx 1.5x rider support. This will feel much more natural to ride and you'll use less battery - in Trail mode with 100% peak power the motor will still reach it's maximum assist of 560W but this time you need to put in 390W rider power to get there. You get more of a work out and in practice you'll use far less battery. Aim for this mode to give you the best blend of power and efficiency so that you also have optimum control for trail riding.
In Eco mode with support set to 35% you still have approx 1.5x rider support - however you're now limited to 35% peak power (35% of 560W is approx 200W maximum motor assistance). In practice this means that you'll get linear support from the motor up until you put in about 140W rider power (200W added from the motor), but above 140W rider power you'll still only receive 200W support from the motor. This is great to preserve battery life but if you hit that peak support limit whilst climbing something steep, you have to make up all the extra with your legs.
Note: All power mentioned in this Mission Control example is mechanical power output by the motor. If you look in the stats screen of Mission Control whilst riding you will see electrical power consumed by the motor which will be higher. Re-read this article a few times and if still completely unsure...


 I cannot understand obscure explanations though.
") .
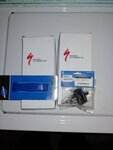
. However, I'm anxious to learn. I'm willing to pay for step by step instructions to change out front and back tire in case I flatten out. Is this everything I need? And are you up for the task? Mind you nothing pretty like being on a bike stand. I haven't gotten around to that yet. I need step by step visual instructions for dummies like myself on the side of the road for fixing a flat. I'm willing to pay for the demo and walk through. The Youtube videos assume a lot. Rather then a patch job, I want to change out the entire tube. And learn how to do the patch job at home.