kahn
Well-Known Member
- Region
- USA
- City
- northWET washington
Why are you needling folks?Nobody owns a needle here?
")
Why are you needling folks?Nobody owns a needle here?


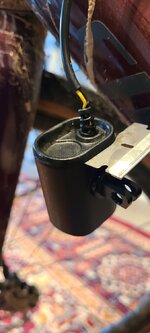
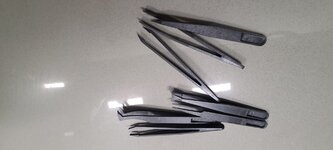
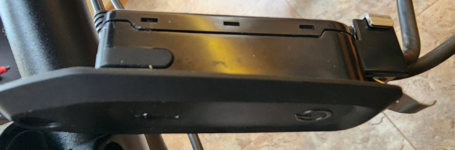
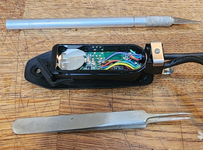
If only US military secrets were as secure!HI Everyone I took the pry off the rear cover approach. Tried the tweezer approach, didn't work, tweezers were too flimsy. With an exacto pry up each clip on the back cover to release the lid, then lift up and go to the next of the 3 clips, kind of a 3-handed job. Then pop the cover, which is held down with adhesive. This exposes the back of the battery which I use the pointy edge of dig into the batter enough to push it out while holding down the metal retainer tab in the front. The adhesive did hold but the clips look distressed.
If I did this again I would take a straight pin approach and bend the tip enough to act as a claw to pull that edge of the casing on the battery, there is a lip that could be grabbed.
But in the end, the bike fired up and it's on the road again.
Cheers
What led me to replace the battery was the bike was stored in the garage for the winter, and it wouldn't turn on. I charged it, and the light came on and seemed brighter but wouldn't stay on. This lead me to find out that the battery needed to be changed in the TCU. So yes, your bike won't work. You could do a field change with the right tools and a good dose of luck. What concerned me when I unplugged the connectors was how frail the wires are., Be very careful when plugging it back in. Kind of like installing a CPU in a motherboard all those little pins, and yes I've bent them.As a Spesh-curious, I'd like to know does this render the bike inoperable until the batterty is replaced? doesn't seem like something you'd want to attempt as a field repair..
Some manufacturers also place a sticker on one side of the battery. That sticker is meant to prevent the battery to be shorten, and it also contains a very bitter compound so kids would not like to swallow the battery. If there is a sticker on the battery, you need to remove it prior to any other action.Made sure I had a good 1620 battery - Even though they are still sealed in retail packages, they are sometimes dead when you break them out of their polyethylene prison.
Thank you Resnais!!!!!! Both my husband and I tried variations of all of the above. Out of frustration I came back here and read your brilliant post. As I already had scotch taped the little rubber plug out of my way, and then torn off a little piece of tape and taped over the spring clip, tapping the whole case on it’s end made that little goober pop right out! Thanks again for saving my day from ruin! Haha!Did this today on my Creo SL E5. Removed the TCU, compressed the spring clip with a long pin and managed to prise up the battery past the clip. I then banged the TCU against something solid, in my case a chair back covered witha towel and the the battery gradually made its way out. TCU replaced and all A OK
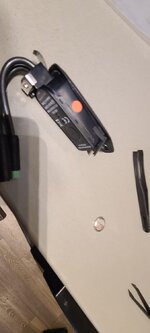
I had similar problem with rear light which got damaged. Dealer got me a new light which had a long cable to connect inside the frame but it was impossible to get the old cable out so I just cut the cable and used a solder joint to joint themOK - got it out. I got some plastic tweezers from Amazon but they can't reach in far enough to get a grip. I used a jewelers screw drive (yes - practially the size of a big needle) and stuck it down the side of the battery and gently 'rolled' it out. The little metal pin in front of the battery pushed down for me and stayed there. I was afraid I broke it but popped back up and all working. On another slightly related topic - I crashed my bike today coming off some wet wood planks causing the handlebars to turn full 180 degrees and pulled the wire out of my Lezyne light. I tried to open the lamp to pull wire back through but case must be glued and I couldn't break the adhesive without really damaging the light. Will order new and splice in. Wish stuff could be opened and fixed.
Thank you for this post. It was invaluable today when I replaced batteries in my Creo and Vado. The pictures made it a quick and easy job. The batteries almost fell out when I depressed the retaining clip. Unplugging the two wires and holding the TCU so that gravity pulled the battery down was key.Whenever you get this error message on your SL TCU Gen 1: