Customstockz
New Member
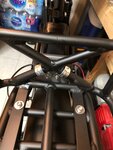
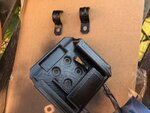
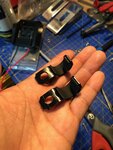
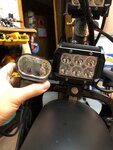
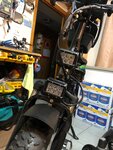
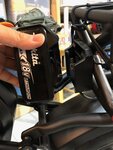
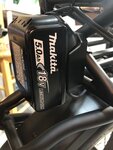
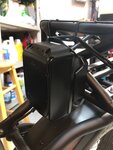
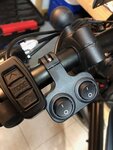
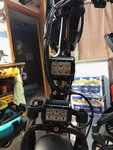
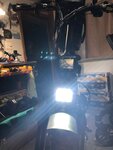
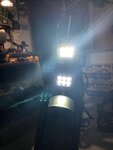
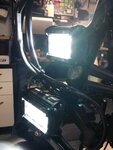
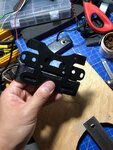
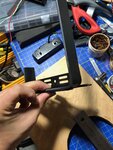
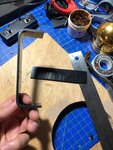
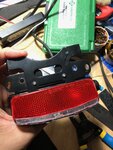
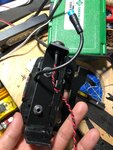
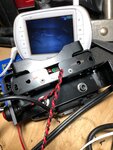
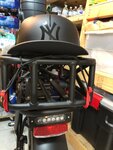
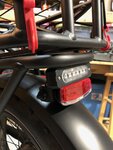
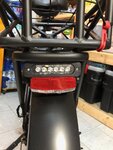
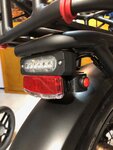
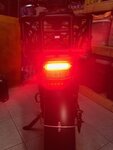
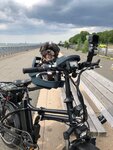
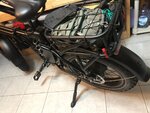
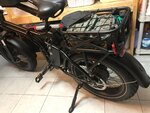
I find that the Rad Mini Stock headlight wasn't bright enough so I had upgraded it with 2 automobile flood lights using the stock brackets for the top and customized the bottom one that is above the front fender. For the power source I did not want to use the factory battery because I would like that power source for bike itself and decided to go with an Makita 18 volt battery with a 3D printed female power adapter. Painted it all black and using pieces of 2mm rubber sheets as liners for the 1/2 EMT conduit mounts for a little shock Resistance and preventing scratches to the read basket also lock nuts to hold them in place. Still in progress and will try to update it soon. I have decided to add a 19 mode police strobe tail light for some extra visibility at night and it is pretty darn bright!. The left switch is the on and off button and the right switch is the mode button which you cycle through so you can have the option on what patterns suit your needs, some of the patterns are really annoying that can blind whoever is behind you.
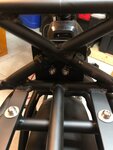
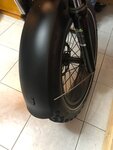
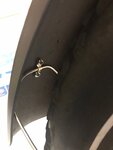
Update, I have took the idea of a member on the stainless steel fender support bending and tucking in to make it a more appealing look instead of it being outside of the fenders.
Update, I have took the idea of a member on the stainless steel fender support bending and tucking in to make it a more appealing look instead of it being outside of the fenders.
Attachments
-
 IMG_1086.jpg229.6 KB · Views: 666
 -
 IMG_1088.jpg238.8 KB · Views: 669
 -
 IMG_1092.jpg580.6 KB · Views: 644
 -
 IMG_1095.jpg249.8 KB · Views: 652
 -
 IMG_1096.jpg198.2 KB · Views: 657
 -
 61231052200__E4C4E0E0-7D34-4D1E-A031-A521AAE45BD5.JPG283.4 KB · Views: 586
 -
 IMG_4408.jpg340.7 KB · Views: 654
 -
 IMG_4802.jpg252.2 KB · Views: 634
 -
 IMG_4803.jpg226 KB · Views: 598
 -
 IMG_4804.jpg202 KB · Views: 675
 -
 IMG_4805.jpg270.4 KB · Views: 638
 -
 IMG_4806.jpg315.1 KB · Views: 653
 -
 IMG_4807.jpg219.6 KB · Views: 649
 -
 IMG_4808.jpg149.7 KB · Views: 632
 -
 IMG_4809.jpg231.8 KB · Views: 627
 -
 IMG_4556.jpg318.8 KB · Views: 631
 -
 IMG_4557.jpg323.9 KB · Views: 623
 -
 IMG_4560.jpg397.7 KB · Views: 638
 -
 IMG_4563.jpg338.2 KB · Views: 630
 -
 IMG_4564.jpg298.3 KB · Views: 606
 -
 61308145512__CDEBA46F-A902-4076-AE05-C4C3F161BADE.JPG311.3 KB · Views: 503
 -
 IMG_4563.jpg338.2 KB · Views: 588
 -
 IMG_4564.jpg298.3 KB · Views: 609
 -
 61308145512__CDEBA46F-A902-4076-AE05-C4C3F161BADE.JPG311.3 KB · Views: 517
 -
 IMG_4810.jpg274.4 KB · Views: 598
 -
 IMG_4799.jpg270.2 KB · Views: 600
 -
 IMG_4798.jpg288.6 KB · Views: 618
 -
 IMG_4800.jpg281.7 KB · Views: 612
 -
 IMG_4801.jpg179.5 KB · Views: 644
 -
 IMG_4594.jpg400.6 KB · Views: 647
 -
 IMG_5007.jpg196.3 KB · Views: 623
 -
 IMG_5010.jpg139.9 KB · Views: 590
 -
 IMG_5012.jpg495.2 KB · Views: 637
 -
 IMG_5013.jpg495.8 KB · Views: 626
Last edited:


")