Rad Mini Headlight upgrade.

Customstockz

New Member
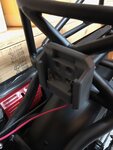
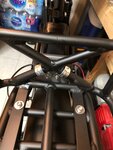
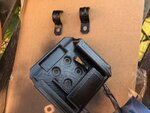
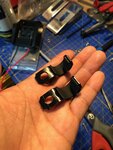
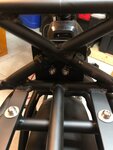
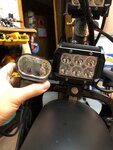
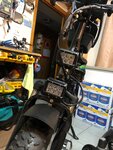
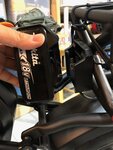
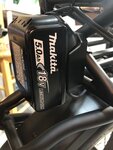
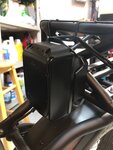
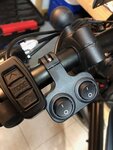
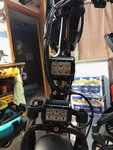
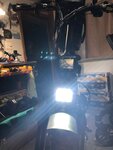
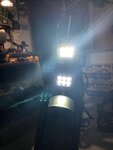
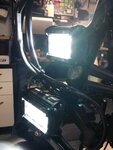
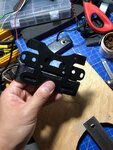
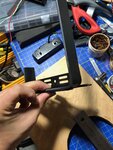
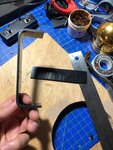
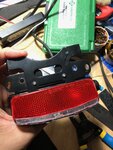
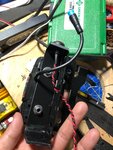
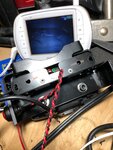
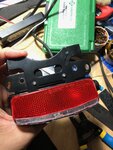
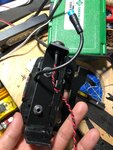
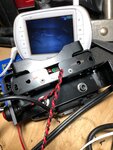
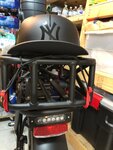
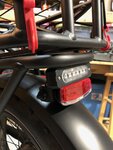
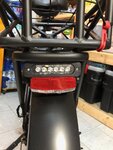
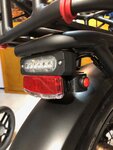
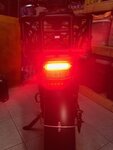
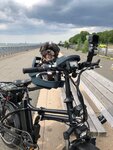
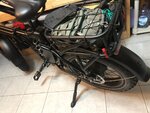
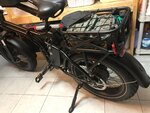
I find that the Rad Mini Stock headlight wasn't bright enough so I had upgraded it with 2 automobile flood lights using the stock brackets for the top and customized the bottom one that is above the front fender. For the power source I did not want to use the factory battery because I would like that power source for bike itself and decided to go with an Makita 18 volt battery with a 3D printed female power adapter. Painted it all black and using pieces of 2mm rubber sheets as liners for the 1/2 EMT conduit mounts for a little shock Resistance and preventing scratches to the read basket also lock nuts to hold them in place. Still in progress and will try to update it soon. I have decided to add a 19 mode police strobe tail light for some extra visibility at night and it is pretty darn bright!. The left switch is the on and off button and the right switch is the mode button which you cycle through so you can have the option on what patterns suit your needs, some of the patterns are really annoying that can blind whoever is behind you.

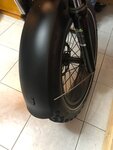
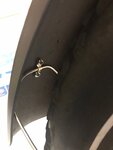
Update, I have took the idea of a member on the stainless steel fender support bending and tucking in to make it a more appealing look instead of it being outside of the fenders.
 

Attachments

  • IMG_1086.jpg
    IMG_1086.jpg
    229.6 KB · Views: 503
  • IMG_1088.jpg
    IMG_1088.jpg
    238.8 KB · Views: 487
  • IMG_1092.jpg
    IMG_1092.jpg
    580.6 KB · Views: 470
  • IMG_1095.jpg
    IMG_1095.jpg
    249.8 KB · Views: 490
  • IMG_1096.jpg
    IMG_1096.jpg
    198.2 KB · Views: 485
  • 61231052200__E4C4E0E0-7D34-4D1E-A031-A521AAE45BD5.JPG
    61231052200__E4C4E0E0-7D34-4D1E-A031-A521AAE45BD5.JPG
    283.4 KB · Views: 436
  • IMG_4408.jpg
    IMG_4408.jpg
    340.7 KB · Views: 509
  • IMG_4802.jpg
    IMG_4802.jpg
    252.2 KB · Views: 476
  • IMG_4803.jpg
    IMG_4803.jpg
    226 KB · Views: 459
  • IMG_4804.jpg
    IMG_4804.jpg
    202 KB · Views: 493
  • IMG_4805.jpg
    IMG_4805.jpg
    270.4 KB · Views: 471
  • IMG_4806.jpg
    IMG_4806.jpg
    315.1 KB · Views: 475
  • IMG_4807.jpg
    IMG_4807.jpg
    219.6 KB · Views: 469
  • IMG_4808.jpg
    IMG_4808.jpg
    149.7 KB · Views: 475
  • IMG_4809.jpg
    IMG_4809.jpg
    231.8 KB · Views: 456
  • IMG_4556.jpg
    IMG_4556.jpg
    318.8 KB · Views: 458
  • IMG_4557.jpg
    IMG_4557.jpg
    323.9 KB · Views: 459
  • IMG_4560.jpg
    IMG_4560.jpg
    397.7 KB · Views: 464
  • IMG_4563.jpg
    IMG_4563.jpg
    338.2 KB · Views: 466
  • IMG_4564.jpg
    IMG_4564.jpg
    298.3 KB · Views: 439
  • 61308145512__CDEBA46F-A902-4076-AE05-C4C3F161BADE.JPG
    61308145512__CDEBA46F-A902-4076-AE05-C4C3F161BADE.JPG
    311.3 KB · Views: 353
  • IMG_4563.jpg
    IMG_4563.jpg
    338.2 KB · Views: 413
  • IMG_4564.jpg
    IMG_4564.jpg
    298.3 KB · Views: 445
  • 61308145512__CDEBA46F-A902-4076-AE05-C4C3F161BADE.JPG
    61308145512__CDEBA46F-A902-4076-AE05-C4C3F161BADE.JPG
    311.3 KB · Views: 345
  • IMG_4810.jpg
    IMG_4810.jpg
    274.4 KB · Views: 441
  • IMG_4799.jpg
    IMG_4799.jpg
    270.2 KB · Views: 438
  • IMG_4798.jpg
    IMG_4798.jpg
    288.6 KB · Views: 448
  • IMG_4800.jpg
    IMG_4800.jpg
    281.7 KB · Views: 441
  • IMG_4801.jpg
    IMG_4801.jpg
    179.5 KB · Views: 461
  • IMG_4594.jpg
    IMG_4594.jpg
    400.6 KB · Views: 471
  • IMG_5007.jpg
    IMG_5007.jpg
    196.3 KB · Views: 445
  • IMG_5010.jpg
    IMG_5010.jpg
    139.9 KB · Views: 424
  • IMG_5012.jpg
    IMG_5012.jpg
    495.2 KB · Views: 462
  • IMG_5013.jpg
    IMG_5013.jpg
    495.8 KB · Views: 470
Last edited:
I had a similar idea after a very dark ride at 25mph with the OEM on my Qualisports Dolphin. I wound up hooking up a 6-12v atv light bar under my front basket, but it drew too much current and fried a sacrificial fuse in my KT controller. I haven't bothered to replace that yet, but interested to see how your kit works out.
 
I had a similar idea after a very dark ride at 25mph with the OEM on my Qualisports Dolphin. I wound up hooking up a 6-12v atv light bar under my front basket, but it drew too much current and fried a sacrificial fuse in my KT controller. I haven't bothered to replace that yet, but interested to see how your kit works out.
I Purchased the premium headlight as Rad calls it, it’s supposed to be more than twice as bright as the original headlight. Should arrive on Thursday, I’ll re-post when I get it
 
I find that the Rad Mini Stock headlight wasn't bright enough so I had upgraded it with 2 automobile flood lights using the stock brackets for the top and customized the bottom one that is above the front fender. For the power source I did not want to use the factory battery because I would like that power source for bike itself and decided to go with an Makita 18 volt battery with a 3D printed female power adapter. Painted it all black and using pieces of 2mm rubber sheets as liners for the 1/2 EMT conduit mounts for a little shock Resistance and preventing scratches to the read basket also lock nuts to hold them in place. Still in progress and will try to update it soon.

Super nice work... well done! How long does the light last on a single Makita battery?
 
I had a similar idea after a very dark ride at 25mph with the OEM on my Qualisports Dolphin. I wound up hooking up a 6-12v atv light bar under my front basket, but it drew too much current and fried a sacrificial fuse in my KT controller. I haven't bothered to replace that yet, but interested to see how your kit works out.
Hey, did you hook up the light bar to the bike battery?
 
I Purchased the premium headlight as Rad calls it, it’s supposed to be more than twice as bright as the original headlight. Should arrive on Thursday, I’ll re-post when I get it
Hey, Please do share how that premium headlight works out!
 
Yeah, but it was a bad idea. @Customstockz the Makita/Black&Decker power pack adapter is genius, and it all looks so clean. I see the cleanly incorporated red switch on the side of rear light, are the double toggles on handle bar for each of the front spots? Love it. All while on daddy duty too.

I hope it just burnt out the fuse in back of the battery, if not you would have to check the motherboard with a multimeter, did you do it a direct connection from the factory plug on the headlight?. I would recommend a "DC/DC male converter CPT step down regulator 14v/50v to 12 volt". that should do it.

Thank you for the complements! I tried to make it clean as possible hiding all the wires on back of the frame of the bike including twisting the wires inserting them in compression wire wrap and tube shrinks like if it was factory. The rear light switches I was kinda disappointing because I wanted it to make it flushed even more with hidden switches but that would require more time and better material instead of abs plastic and the momentary switch to be black as well, red is all I had at the moment. The left is a on/off and the one on the right is a momentary switch for the 19 mode of strobe patterns.The double toggles on the handles controls the 2 front lights so you can have the option on having the fender light on alone or top alone or both on. I will try to have a night time light shot on how it looks when I get a chance.
 
I find that the Rad Mini Stock headlight wasn't bright enough so I had upgraded it with 2 automobile flood lights using the stock brackets for the top and customized the bottom one that is above the front fender. For the power source I did not want to use the factory battery because I would like that power source for bike itself and decided to go with an Makita 18 volt battery with a 3D printed female power adapter. Painted it all black and using pieces of 2mm rubber sheets as liners for the 1/2 EMT conduit mounts for a little shock Resistance and preventing scratches to the read basket also lock nuts to hold them in place. Still in progress and will try to update it soon. I have decided to add a 19 mode police strobe tail light for some extra visibility at night and it is pretty darn bright!. The left switch is the on and off button and the right switch is the mode button which you cycle through so you can have the option on what patterns suit your needs, some of the patterns are really annoying that can blind whoever is behind you.

Love your latest bike accessory... multi-use as an alarm and horn. ;)

1592410738958.png
 
I hope it just burnt out the fuse in back of the battery, if not you would have to check the motherboard with a multimeter, did you do it a direct connection from the factory plug on the headlight?. I would recommend a "DC/DC male converter CPT step down regulator 14v/50v to 12 volt". that should do it.

Thank you for the complements! I tried to make it clean as possible hiding all the wires on back of the frame of the bike including twisting the wires inserting them in compression wire wrap and tube shrinks like if it was factory. The rear light switches I was kinda disappointing because I wanted it to make it flushed even more with hidden switches but that would require more time and better material instead of abs plastic and the momentary switch to be black as well, red is all I had at the moment. The left is a on/off and the one on the right is a momentary switch for the 19 mode of strobe patterns.The double toggles on the handles controls the 2 front lights so you can have the option on having the fender light on alone or top alone or both on. I will try to have a night time light shot on how it looks when I get a chance.

I'm scared to do anything further right now. The part I'm missing is the electrical competence to actually know what I'm doing with up and down converters. Lols. The last thing I want to do is pull a Milton and "set the building on fire".

Your ride looks amazing. Appreciate any picts so we can live vicariously!

Thank you for the complements! =) , If you need help or have any questions on the electrical, feel free to ask!
 
Back