Let's design an inexpensive work stand for the XP

johnboatcat

New Member
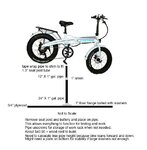
This is my idea. Not to scale. The union on the pipe is to keep the bike from going all the way to the ground. Would have to work out the pipe height because of the angle the bike will sit with the front down. Need to keep the front wheel off the ground but the rear will be up and easy to work on. Probably not strong enough to beat the back wheel into the frame but strong enough for most work I think.

You are not going to hurt my feelings. Tear it up or improve on it. Show us your ideas!
 

Attachments

  • workstand.jpg
    workstand.jpg
    66 KB · Views: 1,009
This is my idea. Not to scale. The union on the pipe is to keep the bike from going all the way to the ground. Would have to work out the pipe height because of the angle the bike will sit with the front down. Need to keep the front wheel off the ground but the rear will be up and easy to work on. Probably not strong enough to beat the back wheel into the frame but strong enough for most work I think.

You are not going to hurt my feelings. Tear it up or improve on it. Show us your ideas!
Looks good, I think I would double up the wood in the center where the flange is screwed/bolted down. I would also use my hole saws and make a plastic spacer to put on top of the union/coupling to protect the bike.
 
I don't have an XP so maybe I'm missing something but your instructions say:

"Remove seat post and battery and place on pipe.
This allows everything to function for testing and work."

How can if function without the battery? Are you removing the battery to make it lighter then replacing the battery after it's on the stand? If it's the latter, I think it's a great design!

I'm not sure of the weight distribution of the XP but you might even be able to attach the pipe to the bottom part of an old office chair and have it still be fairly stable? Then you could wheel it around and possibly even lower and raise the bike.
 
"Are you removing the battery to make it lighter". Yes. The more weight on top of the pipe the less stable it would be. For testing battery related operations you could leave the battery as they probably would not need aggressive forces applied to the bike like mechanical repairs. The chair idea is a good one but it would have to have long legs and wheel stops to work or it would topple or roll around as you worked on it.
 
Kimbo, a plastic spacer could be made with Starboard easily. Great addition to the plan! Never thought about adding wood to the top for stability. Another good addition. Crowd sourcing in action! :)
I also thought that once the exact pipe to seat post tube clearance was worked out that the fuzzy side of stick on velcro might be the perfect spacer/buffer rather than tape. Just need something to take the wobble out.
 
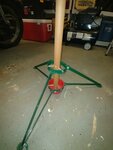
Well I finally made my version of Johnboatcat's bike stand. Darceman showed how he made one out of an old umbrella stand but I didn't have one of these and couldn't find one in the thrift stores. What I did find though was an old Christmas tree stand so I changed out the threaded screws for longer lag screws, added a closet rod which fits into the seatpost perfectly and ended up with a pretty solid repair stand for the grand sum of $1.00. I especially like how you can spin the bike around while working on it. Thanks Johnboatcat, this idea is the cat's meow!
 

Attachments

  • XP stand.jpg
    XP stand.jpg
    149.7 KB · Views: 639
Last edited:
I guess I put my bike stand on the wrong section of the forum...Here is mine, the stand Kimbo mentioned. It's a cast iron umbrella stand with a piece of pipe and the proverbial wooden dowel from a closet that fits perfectly inside. I put my bike on its side and then slide the dowel up inside the seat post tube then pick the whole unit up and sit it down ready to work. This stand is ultra-stable and I'm not worried about it falling over and scratching my high performance XP bike while I'm working on it...
 

Attachments

  • 20191116_122705.jpg
    20191116_122705.jpg
    487 KB · Views: 789
  • 20191117_110718.jpg
    20191117_110718.jpg
    72.8 KB · Views: 711
Well I finally made my version of Johnboatcat's bike stand. Darceman showed how he made one out of an old umbrella stand but I didn't have one of these and couldn't find one in the thrift stores. What I did find though was an old Christmas tree stand so I changed out the threaded screws for longer lag screws, added a closet rod which fits into the seatpost perfectly and ended up with a pretty solid repair stand for the grand sum of $1.00. I especially like how you can spin the bike around while working on it. Thanks Johnboatcat, this idea is the cat's meow!

I have to pay 20 bucks to home depot for the closet rod! Mine are metal and too skinny. Kimbo. How long of a closet rod do I need? 1 5/16?
 
I have to pay 20 bucks to home depot for the closet rod! Mine are metal and too skinny. Kimbo. How long of a closet rod do I need? 1 5/16?
Use a dowel then..it's cheaper or go to a metal shop and get the right size pipe..metal is better and probably cheaper...
 
Last edited:
Use a dowel then..it's cheaper or go to a metal shop and get the right size pipe..

I wish I knew the correct length. It appears that there are about 11inches of travel from the bottom of the bike up the frame to whatever part of the bike is going to stop the pipe. Darceman, how long of a dowell would you suggest I stick down my umbrella stand? 36"? 42"?
 
I wish I knew the correct length. It appears that there are about 11inches of travel from the bottom of the bike up the frame to whatever part of the bike is going to stop the pipe. Darceman, how long of a dowell would you suggest I stick down my umbrella stand? 36"? 42"?
The part that goes in the bottom of the seat post is 7 1/4"...you can move your seat post up and down to raise or lower the bike while working on it...the seat post is the stopper for the stand. As you can see in the pictures I had to use reducers to go from the size of the umbrella to 1 5/16" Hope that makes sense..
 

Attachments

  • 20200716_160817.jpg
    20200716_160817.jpg
    177.6 KB · Views: 459
  • 20200716_160843.jpg
    20200716_160843.jpg
    342.6 KB · Views: 489
  • 20200716_160810.jpg
    20200716_160810.jpg
    171.7 KB · Views: 472
Oh, I thought I could get away with just the wooden dowel stuffed down the umbrella holder. It appears you have some sort of telescoping section that I would have to figure out. As a buddy of mine says, "its never easy"
 
It was easy...I used spare peices of tubing and or pipe that fit inside each other until the wooden dowel fit snuggly in side it. Go to your local metal store and you can probably find all you need there..
 
It was easy...I used spare peices of tubing and or pipe that fit inside each other until the wooden dowel fit snuggly in side it. Go to your local metal store and you can probably find all you need there..

Not sure there are alot of metal shops in Palm Springs
 
Follow Darceman, I only use the tree stand because I can't find a patio/umbrella stand. The tree stand does work but is really flimsy, would be better if the tree stand had 4 legs though.
 
I think every XP owner should own the new "Umbrella Work Stand". I will send pictures after I return from the metal shop and home depot! Taking preorders soon
 
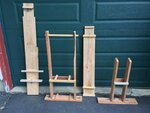
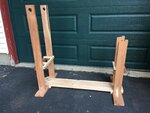
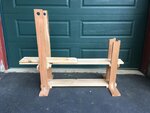
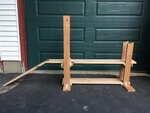
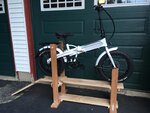
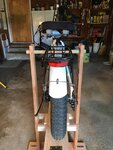
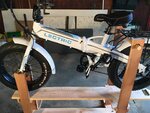
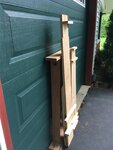
Here is my Lectric XP Workbench. I designed it to enable me to work on the bike, without having to lift the bike up. The workbench is held together using only 4 wingnuts and 2 clevis pins.

I have included 11 pictures to demonstrate it in case anyone wants to build one.

1. Folded and Stacked: When not in use, this is the size it stores to.
2. Four Parts: Front and Rear wheel supports; bottom frame; top platform
3. Bottom Frame: Connects the Front and Rear wheel supports using 2 wing nuts on each wheel support
4. Top Platform: Connected using 1 clevis pin in each wheel support to keep it in place
5. Top Platform with Ramp: Ramp is attached with one door hinge so it will unfold
6. Bike on Platform: Bike rolls up onto Top Platform with front wheel bolts in notched Front support
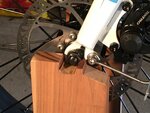
7. Front Wheel Notch: Close-up of Front support notch. Bottom of Notch must be 12" above platform
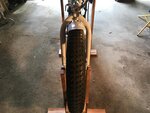
8. Front Wheel on Notch: Front supports must be 5.75" apart to support front wheel
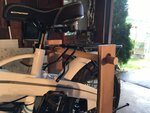
9. Rear Wheel Lift: A 1.25" dowel slides under the rear rack and into the Rear support holes.
10. Rear Wheel Lifted: Supports must be 14" apart so pedals will clear. Hole in support must be 25" above platform
11. Bike Raised on Rack: Using the above critical measurements. Both bike tires will be 2" off the platform

Final critical distance: The distance from the Front support Notch to the Rear support hole center is 40"

This workbench allows me to work on both of our bikes without any effort. The workbench is extremely stable and can be assembled and taken down in less than a couple of minutes. It takes little space to store un-assembled.

Hope this gives people some ideas.
1 Folded and Stacked .JPG2 Four Parts .JPG3 Bottom Frame .JPG4 Top Platform .JPG5 Top Platform with Ramp .JPG6 Bike on Platform .JPG7 Front Wheel Knotch .JPG8 Front Wheel on Knotch .JPG9 Rear Wheel Lift .JPG10 Rear Wheel Lifted .JPG11 Bike Raised on Rack .JPG
 
Back