Hub drive or mid drive.

You don't need to see it, in google earth just measure the distance between two points that you like to find the average grade, find the difference in height in between end points and divide it to the distance. The desktop version of earth actually have this as a feature built in but the web version does not.

View attachment 84428

I don't know if this is the part you mentioned. This section that I draw is 250m long and the elevation changes from 92m to 117m, 25m delta, hence the grade is around %10.
Golly, wait ´til yur 72 & lookin´ up from the bottom. My total vertical limit is not that far off.
 
You don't need to see it, in google earth just measure the distance between two points that you like to find the average grade, find the difference in height in between end points and divide it to the distance. The desktop version of earth actually have this as a feature built in but the web version does not.

View attachment 84428

I don't know if this is the part you mentioned. This section that I draw is 250m long and the elevation changes from 92m to 117m, 25m delta, hence the grade is around %10.
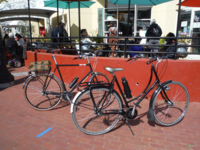
 
Looking good M@Robertson!
They have new a special box for shipping bikes.
I have been going gangbusters today. Working on these bikes is so much fun. I came directly to my office from the morning ride and diched the sweaty shammy. As I was in the process a guy walked in. I work by appointment only and someone left the front door unlocked. He wanted to do a surprise inspection. Surprise! The good news is that I passed and he is getting his gravel bike converted.
Wow! I’d freak out on that packing. I’m certain, but can often be wrong, that some ape man of a delivery driver could easily mangle that handlebar. Will ups and others allow that to be insured? Disclaimer... I don’t know IF it is a problem, I haven’t your experience shipping bikes. But lots of experience with damaged shipments.
 
Here's my two cents....

...

If you do go with a hub drive be sure to get one with regen braking - saves break wear and provides maybe 5% energy recapture.
Ken, Unfortunately all the popular geared hub motors (not sure if this is really "all", but it's all the ones I'm familiar with) have a clutch so they freewheel with virtually no load when no power is being applied. That clutched setup means that they can't be used for regeneration. It's the direct drive hubs that can of course be setup for regeneration, but they also have a small loading effect when they are unpowered. Justen at Grin Technologies has suggested that it might be possible in the future to have geared hub motors modified to provide a controllable clutch mechanism. I assume this would allow the popular geared hub motors to be setup to offer regeneration.

Interestingly there is new setup software (v1.4) from Grin Technologies for their BaseRunner and PhaseRunner controllers that offers a feature (called Virtual Electronic Freewheeling) that applies a small amount of voltage to the motor which would allow direct drive motors to better freewheel and therefore coast easier when you stop pedaling. I guess this also assumes that you haven't enabled regeneration.
 
I don't know if I would want to care a whit about regeneration. Only as a curiosity. I have a charger at home, one at work and oftentimes I have one mounted on the bike. As for brake wear, pads are cheap even if I buy the manufacturer's brand at $30 a pop. I changed the Surly's pads yesterday and on that behemoth they lasted 1300 miles, which is about half what I'd expect. 8 months. I usually buy pads a half dozen sets at a time every couple years from Rose Bikes in Germany for about half retail so... cost on that part is not something thats noticeable.

I think if you commit to buying consumable parts like you commit to buying muffins at Costco, you change the game in terms of what equipment is affordable or even makes sense.
 
I don't know if I would want to care a whit about regeneration.
AGREED! However, I have a coaster brake Trek Pure 3spd SA, it has a front rim brake. Braking was inadequate with the front hub motor, but DD regen braking made it a really efficient braking system.
 
NICELY DONE!!
I like this system for regeneration, because it goes forever:
1618165683044.png

These electric airplanes save battery weight too:
1618165873892.png

The third image is of the Town Bike Mid-drives we rode today.
 

Attachments

  • 1618166130676.png
    1618166130676.png
    796.4 KB · Views: 239
I
I like this system for regeneration, because it goes forever:
View attachment 84453
These electric airplanes save battery weight too:
View attachment 84454
The third image is of the Town Bike Mid-drives we rode today.
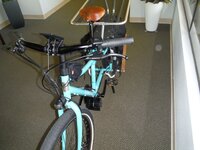
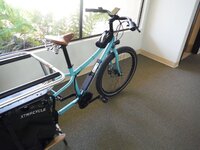
I am almost done working on a Cargo Conversion with the 1Kw BBSHD. My goal was to have a clean a build while making the motor mounting extra-strong. It just needs a little solder and the new chain.
 

Attachments

  • HDCargo02.JPG
    HDCargo02.JPG
    345.8 KB · Views: 216
  • HDCargo01.JPG
    HDCargo01.JPG
    322.2 KB · Views: 207
I am almost done working on a Cargo Conversion with the 1Kw BBSHD. My goal was to have a clean a build while making the motor mounting extra-strong. It just needs a little solder and the new chain.
I don't know if you've ever tried it, but I have had great luck using two inner lock rings, stacked together where the outer is a jam nut. You can tighten each of the rings safely to 100 ft lbs. Which means you have to have the big torque wrench and socket to do that. As well as enough BB sticking out, but oddly the outer ring seems to take up the same-ish number of threads as the inner does so if you can use an inner/outer you can do two inners. Also note the Sharpie registration mark. It still hasn't shifted and that pic was in 2019.
IMG_20191008_174043.jpg
IMG_20190928_121110.jpg

You can see the diff thread use on the 2nd pic (and the torque wrench/socket). My normal method is the two inners but this was an experiment. Failed because of in-frame cable exit under the motor interfered with shifting, so this never made it past the garage floor.

IMG_20200514_143253.jpg
 
Thank you for your suggestion. What I did was mark the bottom bracket shell and cut radial lines into it every 40 degrees so that the mounting plate sinks in, locking into the side of the bottom bracket. I tightened it down with a monkey wrench with an 18-inch PVC extension. I do not put any wires or cables between the motor and the bottom bracket shell on Bafangs. I used one zip tie on the front of the bike because the rider wants the brake cutout levers and the light kit. I mixed three colors of nail polish to help make the cable ties on the top tube blend in.
On one build with internal routing I had to cut, drill, and mill the frame because the rear brake hose exited the bottom of the down tube in exactly the wrong spot.
I will program the HD for 17Amps max so the drivetrain does not denigrate.
 
What I did was mark the bottom bracket shell and cut radial lines into it every 40 degrees so that the mounting plate sinks in, locking into the side of the bottom bracket.
Thats a really interesting idea. I have an extra fixing plate I could use for an initial press to the BB, then use those marks as guides to make a cut. Then use a fresh plate for final fitment. The 100 ft lbs ensures the plate digs in but I like the pre-made cut idea much better.

The only problem is I am just about done building bikes! I'm just flat out of space and need to sell some on to good homes before I can even think of doing any more. Wish I had heard about this a couple years ago :)
 
I don't know if you've ever tried it, but I have had great luck using two inner lock rings, stacked together where the outer is a jam nut. You can tighten each of the rings safely to 100 ft lbs. Which means you have to have the big torque wrench and socket to do that. As well as enough BB sticking out, but oddly the outer ring seems to take up the same-ish number of threads as the inner does so if you can use an inner/outer you can do two inners. Also note the Sharpie registration mark. It still hasn't shifted and that pic was in 2019.
View attachment 86680View attachment 86681
You can see the diff thread use on the 2nd pic (and the torque wrench/socket). My normal method is the two inners but this was an experiment. Failed because of in-frame cable exit under the motor interfered with shifting, so this never made it past the garage floor.

View attachment 86682

This is such a beautiful build. I am especially impressed on how well the cables are hidden.
 
This is such a beautiful build. I am especially impressed on how well the cables are hidden.
Thanks very much! This was my first cargo bike build and I really do love it. The 2.8" tires on the custom-built wider, super-strong wheels were icing on the cake. Despite its lack of suspension the bike rides like its rolling over gym mats even when loaded. This weekend I am converting its 76L (each) panniers to an upgraded attachment method. I consider the Envoy to be a game-changer insofar as being a donor platform to give riders the ability to put together a dependable cargo bike, good for daily commuting/beatings, at a lower price point than they could reach with another comparable platform. Cargo bikes can be quite expensive but this one from the factory will run under $800, and you can upgrade in bits as your budget allows.


Here it is loaded and not set up for beauty shots. I was actually on the way to donate some old sleeping bags and bedding and realized for once I had the bike fully loaded, so I pulled over en route and snapped some pics. This was when I was still running the narrower flatproof-but-rock-solid Conti tires. These days, I re-used the Jones bars for another bike so it has a flat 760mm titanium handlebar, longer 45-degree stem, Catalyst pedals, an Ergon gel seat and a better fender setup. I'm finishing up the handlebar switch this weekend too. After that I'll ride it for a bit and then, sadly, put it up for sale likely on Facebook.
IMG_20200327_123509.jpg
IMG_20200327_123453.jpg
IMG_20191203_152600.jpg
 
Back