Hi guys! I'm moving some content off of the main site and into the most relevant categories of the forum. This post was originally made on May 31st 2016:

If you ride any bicycle long enough and far enough, you will eventually succumb to an un-welcomed flat tire. Changing said flat on the side of a busy road for the first time may feel intimidating… For the electric bicycle owner especially, there are additional challenges to consider including electrical wiring, a heavier frame and the possibly bolt-on wheels vs. quick-release systems. This article is designed to help you prepare for that first flat and then understand how to actually fix it efficiently (skip down towards the end for that).
Preparation builds confidence and usually improves outcomes. Here are the essentials to being self sufficient for ebike flat repair, each item corresponds with a picture in the album below:
If you ride in an area where other cyclists are very common, you could luck out and get help and supplies from a passing rider but if you ride mostly during off hours, or out on remote roadways, it is much more important to be prepared… Perhaps you’ll be the one to help another cyclist, having the right knowledge and tools?
Fixing flats may be necessary but prevention usually costs less, both in terms of time and money. The following products are designed to reduce the odds that you’ll go flat:
Most of the advice shared above is designed for road, pathways and light trail riding. Going off-road on rocks and roots brings an entirely different set of obstacles and issues but flats themselves are similar. The Mountain bike community is moving towards tubeless tires which can be ridden with lower pressure for improved traction and surface area and this eliminates the options of liners, thicker tubes and slime. Below are a few more tips related to road, path and some off-road riding regardless of your tire/tube setup.

Recently I picked up a nail during a commute to work. I felt the wheel begin to get mushy and knew it was going down. I didn’t stop right away and went another 30 yards or so, crossing an overpass because it seem convenient. Finally, I dismounted and walked the bike to a safe place to check things out. The issue was a one inch long nail caught in the tire… Not only had it caught once, due to my additional riding it had gone through a second are of the tube. The outcome was a double-patch situation instead of just one, totally not worth those additinal 30 yards.
After you find a place you can work, make sure the power on your electric bike is turned OFF and consider removing the battery entirely to reduce weight. In many cases, it works well to flip the bike to do maintenance. Not all ebikes can be flipped for repairs, you may consider using wooden blocks or stones to elevate the bar ends creating more space for accessories like displays which sometimes cannot be removed (back to that multi-tool!). Examine the tires and try to find the source of the puncture but don’e immediately take it out, try to notice where it is so you can find the same spot on the tube inside. Depending on the situation, if you have Slime inside your tubes you may get away with leaving the thorn or object in the tire and pumping your tires up a few times to make it home… pulling an object out (just like with stab wound victims) can sometimes make the situation worse. If you’re going for a patch or complete tube replacement, go ahead and quick release any bags or panniers along with that battery mentioned earlier. You may need to shed your helmet, glasses and jacket as things get moving and you warm up with a little stress.
If you have a hub motor style ebike you will want to disconnect all wiring and possibly snip some zip ties holding it to the fork arm or chain stay. Be observant of wire tie locations so you can fix them later… consider bringing along some zip-tiesin your gear pack. if you have to cut them for wheel removal be careful not to cut the wires or cables used to operate your bike! If you have a mid drive motor, either wheel can usually be changed as a normal bicycle is done, this is one of their advantages. Changing the inner tube with a spare is the fastest and easiest fix for a flat vs. using a patch kit but it’s also more wasteful and adds more weight to your pack.
With my recent flat tire I didn’t have a spare tube, I hadn’t prepared very well. The first patch worked alright but the second one didn’t take, and I had a new, untried mini pump so I wasn’t sure if the air leak noise I heard was coming from the pump or tube. I was rescued by a kind soul driver/cyclist who went to his house, got a good pump, and another patch. His patch didn’t take either unfortunately, this can happen with dirty/old tubes… So anyway, this kind person gave me one of his own tubes off a spare wheel! In the end, a spare tube would have saved me 30-40 minutes of work and a lot of hassle.
Here are some universal steps to follow for changing bicycle tubes:
Your wheel is now ready to go. If you have a Presta value, close it all the way and mount the cap. Give the wheel a bounce and a spin in your hands. Next, remount the wheel until the axels drop into the frame drop outs. If you have a 15 mm or 20 mm mountain bike thru axel, be sure to not cross thread (forcing the thread or stripping it, I usually rotate them backwards until I feel it click into position then gently tighten forward). Remount any torque arms, rack posts and your bags. Be sure the wheel is aligned and the chain shifts through the gears before you firmly tighten down the axel. Once axel is secured, check for brake alignment with a spin of the wheel. Flip the brake release for road rim-brakes. Center pull-brakes may need a cable insertion. Finally, reconnect the electrical wires and secure wires to frame with those zip ties or tape to leave nothing loose. I like to use elastic cloth with Velcro to secure wiring to the frame.
Depending upon the condition of your chain, your fingers may be greased up a bit. The mountain man/woman method to clean hands on the go is to use fresh, wet, grass. Wipe those hands on the ground or pull up a bit of grass and rub it between your hands. If you’re more refined, a moist towelette works great. Hint, wipe the face first, then the hands
Once your gear is all setup and your’e ready to ride do a slow coast and test the brakes. I recently discussed flats with a co-worker who used to commute 26 miles (one way) in younger years. Besides going overboard by carrying 4 extra tubes, his best advice was to make yourself do a trial run tube-change/ flat repair at home every season. This exercise helps you to confirm you have all you need to be successful (patches, levers, glue, etc.) and keep on the road. It can be miserable work but it’s way less fun in the rain, when you’re late or if it’s very hot and having that practice will pay dividends. Thanks for allowing me to give you the Flat Facts. Feel free to comment and add ideas and pointers. – Co-written by guest writer, The Smart Ped`aleck.
If you ride any bicycle long enough and far enough, you will eventually succumb to an un-welcomed flat tire. Changing said flat on the side of a busy road for the first time may feel intimidating… For the electric bicycle owner especially, there are additional challenges to consider including electrical wiring, a heavier frame and the possibly bolt-on wheels vs. quick-release systems. This article is designed to help you prepare for that first flat and then understand how to actually fix it efficiently (skip down towards the end for that).
Preparation builds confidence and usually improves outcomes. Here are the essentials to being self sufficient for ebike flat repair, each item corresponds with a picture in the album below:
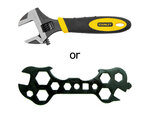
- If your bike does not have quick release points on the wheels, consider a small adjustable wrench or lighter weight bicycle-specific flat wrench
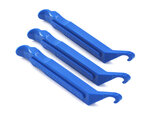
- A set of tire levers for getting the tire off the rim
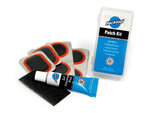
- Either a spare inner tube (that matches your tire size ie. 20″, 24″, 26″, 27.5″, 700c, 29″ and stem type Schrader (wide) or Presta (narrow)) or a small patch kit
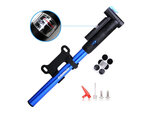
- A portable hand pump with Schrader and Presta valve options, this one has a pressure gauge so you know how full to go (the recommended PSI is usually listed on the side of the tire)
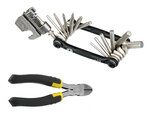
- A multi-tool may be needed for loosening a torque bar, cutting a zip tie or adjusting reflectors, displays, your saddle or some other piece of hardware on your bike (this is especially true if you flip the bike to repair the wheel), this onehas a chain repair tool built in but doesn’t have any cutters, consider a small clipper like this and also some spare zip-ties for when you’re putting everything back together
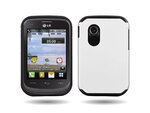
- A cell phone, in case all fails and you need a pickup… Tracfone sells a bunch of affordable models with “pay as you go” so this doesn’t have to break the bank if you don’t already have a mobile phone
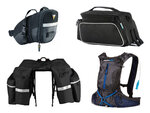
- Some sort of storage solution like a saddle bag, trunk bag, panniers or hydration pack to carry all of this junk around in


If you ride in an area where other cyclists are very common, you could luck out and get help and supplies from a passing rider but if you ride mostly during off hours, or out on remote roadways, it is much more important to be prepared… Perhaps you’ll be the one to help another cyclist, having the right knowledge and tools?
Fixing flats may be necessary but prevention usually costs less, both in terms of time and money. The following products are designed to reduce the odds that you’ll go flat:
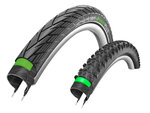
- Puncture resistant tires… Good tires are your #1 preventative option and many are now available with a Kevlar lining (this is the material used in bullet proof vests) to help resist glass and small metal objects from penetrating your inner tube. One popular brand for ebike tires is Schwalbe Tires. They produce a line called Energizer Plus that is available in a range of popular sizes and includes “GreenGuard” which is their own version of puncture-resistant liner. I see these more and moe on premium purpose-built electric bikes like the BESV Jaguar. Tire selection is very important beyond flat-resistance, you may also want to consider rolling resistance, traction and wet performance. Here are some puncture resistant off-road tires from Schwalbe called Smart Sam with GreenGuard. Puncture resistant tires will be slightly heavier due to lining and a thicker tread, but I find that this is less of an issue with electric assist.
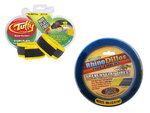
- Tire liners add a second layer of prevention between the tire and tube. Liners are available from brands like Tuffyand RhinoDillo, they mostly look the same and come in a range of sizes (so pick the correct one for your bike!) These plastic-looking strips are inserted between the tube and tire before the tube is inflated. I have used Tuffy liners and had success but they need to be installed correctly and can be a little tricky to get right. If you don’t have a bicycle stand consider buying these from a local shop and getting help to install them. Note that when riding at higher speeds, 25-28 mph, the added weight due to liners and thicker tires may add momentum to the wheels and have a small effect on handling turns, take it easy – especially in wet conditions.
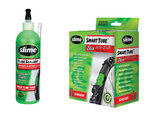
- A third option, with the least benefit, is to upgrade the inner tubes themselves. Some tubes are made a bit thicker, and some come with flat filling liquid, like Slime. I have tried these thicker tubes, and still caught a flat. The Slime material might work for a small glass or staple puncture but only helps to temporarily seal leaks vs. permanently fixing them. You may need to continuously re-inflate the tube to keep it rideable and this can be exhausting with a mini-pump. The product is designed to help you limp home vs. damaging your rim and tire. My experience with Slime is that it can be messy. The manufacturer recommends it to be replaced with fresh liquid every two years and does sell pre-Slimed tubes in a variety of sizes which are easier to deal with.


Most of the advice shared above is designed for road, pathways and light trail riding. Going off-road on rocks and roots brings an entirely different set of obstacles and issues but flats themselves are similar. The Mountain bike community is moving towards tubeless tires which can be ridden with lower pressure for improved traction and surface area and this eliminates the options of liners, thicker tubes and slime. Below are a few more tips related to road, path and some off-road riding regardless of your tire/tube setup.
- Avoid riding in the junk that gets swept to the edge of the street, sometimes called “road hash”. I have seen roads with 8ft shoulders just covered with rock, glass and metal debris that could inflict major damage to bicycle tires. I once came upon a scattered box of 6″ decking nails covering a 20 ft length of shoulder that must have fallen out of a construction truck? The interesting thing is that the road itself was clear… the force of cars passing tends to move this junk to the side where unsuspecting cyclists may encounter it. In terms of flat-avoidance it is best to stay left, on the white line if car traffic allows but you don’t want to risk your life by riding in traffic or getting clipped by a side mirror. It’s can be a difficult situation and some ebike riders have resorted to moped ultra-thick tires for this reason.
- Avoid running your bike into curbs and other hard, sharp edged obstacles which can cause “snake bite” tube punctures. Basically, so much force is focused onto a small section of the tire that the rim presses through the tube (spreading the air out to other sections) creating two little holes that look like a snake bite. I usually bunny hop my front wheel, wait for a ramp or dismount and lift. Recently I tried to jump the front wheel of a heavier ebike (it had a front mounted hub motor) and ended up slipping off and cutting the crap out of my shin on the metal pedals… months later I still have deep scabs, I would have been better off dismounting
- Check your tire pressure. Checking the pressure once a week will help decrease rolling resistance and possibly prevent a “snake bite” if you encounter a pot hole. Higher pressure may be needed for heavier riders and t hose riding with lots of gear. When riding on pavement, keep the pressure on the higher half of the range listed on the side of your tires (usually something like 40 to 65 PSI).
- Ride slower at night because objects may appear suddenly with limited visible light. This will help you avoid sharp objects but also just avoid crashes in general.
- Be a good citizen when stopped at a light. Look down for junk that might harm other cyclists and chuck it off the road or into a trash can. This is like the gum rule, don’t leave something harmful for the next person to deal with.
Recently I picked up a nail during a commute to work. I felt the wheel begin to get mushy and knew it was going down. I didn’t stop right away and went another 30 yards or so, crossing an overpass because it seem convenient. Finally, I dismounted and walked the bike to a safe place to check things out. The issue was a one inch long nail caught in the tire… Not only had it caught once, due to my additional riding it had gone through a second are of the tube. The outcome was a double-patch situation instead of just one, totally not worth those additinal 30 yards.
After you find a place you can work, make sure the power on your electric bike is turned OFF and consider removing the battery entirely to reduce weight. In many cases, it works well to flip the bike to do maintenance. Not all ebikes can be flipped for repairs, you may consider using wooden blocks or stones to elevate the bar ends creating more space for accessories like displays which sometimes cannot be removed (back to that multi-tool!). Examine the tires and try to find the source of the puncture but don’e immediately take it out, try to notice where it is so you can find the same spot on the tube inside. Depending on the situation, if you have Slime inside your tubes you may get away with leaving the thorn or object in the tire and pumping your tires up a few times to make it home… pulling an object out (just like with stab wound victims) can sometimes make the situation worse. If you’re going for a patch or complete tube replacement, go ahead and quick release any bags or panniers along with that battery mentioned earlier. You may need to shed your helmet, glasses and jacket as things get moving and you warm up with a little stress.
If you have a hub motor style ebike you will want to disconnect all wiring and possibly snip some zip ties holding it to the fork arm or chain stay. Be observant of wire tie locations so you can fix them later… consider bringing along some zip-tiesin your gear pack. if you have to cut them for wheel removal be careful not to cut the wires or cables used to operate your bike! If you have a mid drive motor, either wheel can usually be changed as a normal bicycle is done, this is one of their advantages. Changing the inner tube with a spare is the fastest and easiest fix for a flat vs. using a patch kit but it’s also more wasteful and adds more weight to your pack.
With my recent flat tire I didn’t have a spare tube, I hadn’t prepared very well. The first patch worked alright but the second one didn’t take, and I had a new, untried mini pump so I wasn’t sure if the air leak noise I heard was coming from the pump or tube. I was rescued by a kind soul driver/cyclist who went to his house, got a good pump, and another patch. His patch didn’t take either unfortunately, this can happen with dirty/old tubes… So anyway, this kind person gave me one of his own tubes off a spare wheel! In the end, a spare tube would have saved me 30-40 minutes of work and a lot of hassle.
Here are some universal steps to follow for changing bicycle tubes:
- With bike upside down, in a stand or tipped forward/back with a double-leg kickstand, loosen the quick release, or remove nuts, washers and torque arms on a fixed axel hub motor.
- With the chain set in the high gear (the smallest rear sprocket), move the rear derailleur down with your hand to allow the chain to open, then pull out the wheel for removal.
- With the wheel removed, use the tire levers or any special tire tool to dislocate one side of the tire to the outside of the rim.
- Remove the inner tube.
- Check the inside and outside of your tire for any sharp items still in the tire and remove them. It’s a bummer to get a second flat after you’ve just changed the tube if a nail, staple or glass is lodged in the tire, but be careful when checking not to cut your hand… Check the rim and make sure the spoke liner is not compromised.
- If patching the tube, pump it up a bit before putting it back on the bike wheel and consider spitting on and around the patch to make sure it’s holding (you will see air bubbles if not). Sometimes there are tiny bubbles but you don’t have an extra patch… just pump it up and hope the patch is compressed onto the tube once it’s inside the tire, enough to get you home
- At this point, prepare to replace the tube with a fixed or brand new one.
- With a bit of air in the repaired or new tube to give it form, reinsert the tube, starting with the valve into the rim hole. Don’t over tighten the valve nut on Presta valves. Remount the tire onto the wheel. Make sure the tire tread orientation is correct. Most tires have a rotational direction arrow on the side wall where the pressure rating is listed. Orient your wheel with the cassette on the right, as normal if it’s the rear wheel.
- Begin to inflate the wheel until it forms. Then squeeze the tire to insure the tube is not twisted or pinched. I spin the wheel a bit and squeeze as I go to make sure everything is seated properly.
- Continue to pump air to the recommended operating range. That is typically 40-65 psi for medium tire widths, and 70-110 for skinny road tires under 28 mm. The tire’s PSI range is in writing on tire side wall as mentioned earlier but sometimes you have to wipe the sides a bit to see it. In addition, tires have a wire bead that rests inside the rim edge. If you have a small hand pump, don’t feel the need to put in max pressure at this point as it could be a lot of work and add to an already exhausting exposed situation. Add enough air to ride and top it off when you get access to a better pump/air source.
Your wheel is now ready to go. If you have a Presta value, close it all the way and mount the cap. Give the wheel a bounce and a spin in your hands. Next, remount the wheel until the axels drop into the frame drop outs. If you have a 15 mm or 20 mm mountain bike thru axel, be sure to not cross thread (forcing the thread or stripping it, I usually rotate them backwards until I feel it click into position then gently tighten forward). Remount any torque arms, rack posts and your bags. Be sure the wheel is aligned and the chain shifts through the gears before you firmly tighten down the axel. Once axel is secured, check for brake alignment with a spin of the wheel. Flip the brake release for road rim-brakes. Center pull-brakes may need a cable insertion. Finally, reconnect the electrical wires and secure wires to frame with those zip ties or tape to leave nothing loose. I like to use elastic cloth with Velcro to secure wiring to the frame.
Depending upon the condition of your chain, your fingers may be greased up a bit. The mountain man/woman method to clean hands on the go is to use fresh, wet, grass. Wipe those hands on the ground or pull up a bit of grass and rub it between your hands. If you’re more refined, a moist towelette works great. Hint, wipe the face first, then the hands
Once your gear is all setup and your’e ready to ride do a slow coast and test the brakes. I recently discussed flats with a co-worker who used to commute 26 miles (one way) in younger years. Besides going overboard by carrying 4 extra tubes, his best advice was to make yourself do a trial run tube-change/ flat repair at home every season. This exercise helps you to confirm you have all you need to be successful (patches, levers, glue, etc.) and keep on the road. It can be miserable work but it’s way less fun in the rain, when you’re late or if it’s very hot and having that practice will pay dividends. Thanks for allowing me to give you the Flat Facts. Feel free to comment and add ideas and pointers. – Co-written by guest writer, The Smart Ped`aleck.
Last edited:

