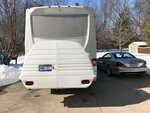
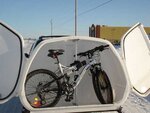
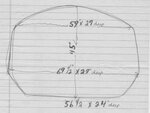
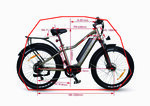
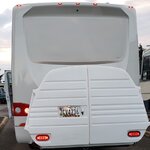
I am now camped at Lake Mayfield in Mossyrock, WA - and finally got a chance to revisit this subject to give you all an update. I received the Komo in good order at the RV dealership in Sandy, OR - just in time for my visit. The Biktrix Juggernaut arrived about the same time after a mix-up on shipping instructions (which Biktrix corrected). Here is my report, in case it helps...
So, yes, I did receive both the eBike and the Komo Bike Carrier at Johnson RV in Sandy, OR -- both in perfect shape. And I wanted to post a quick update, to start, on the Komo RV Chest.
As noted by another Member in a separate Forum for RVs, this is what I found:
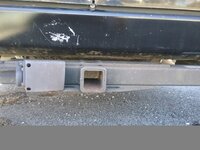
You do NOT need a Hitch Extender to install this on our Leisure Travel Vans "Unity" Model - well, at least on my 2017 model. I bought the single-arm support version because the double-arm costs $250 more. And the distributor reassured me that a single-arm was more than adequate.
Why are there two versions? Simple: The Single-Arm will occupy your main Hitch, so it eliminates the possibility of also towing a vehicle -- which you can do with this box installed, if you choose. The double-arm avoids the original Hitch, leaving it available to tow a car.
You would NOT want to attach a car to the rear end of the included Arm supplied with this box. Instead, they ship you two add-on Hitch Brackets that you bolt onto the crossbar of the towing setup, on both sides of the existing Hitch area. You would then need an extra-long Tongue Bar to attach your toad to the original Hitch, while retaining ALL of your original Towing Capacity (minus any effect the box subtracts from that). KEEP IN MIND there are a ton of "differences of opinion" concerning how Hitch Extenders and longer Towing Arms affect Towing Capacity.
DO YOUR OWN RESEARCH.
The two-arm setup may appear more stable when careening down the road. But I did not notice any amount of shaking or severe sway when viewing my setup through the rear camera and doing 65mph. Or going over bumps, pulling into parking lots, etc. Yes, you can move it up and down, yourself, but it does NOT appear to be unsafe or weak.
The single-arm version, therefore, eliminates any concern over "reducing the Tongue-Weight capacity by 50%" -- as claimed by eTrailer, and NOT claimed by BlueOx (as an example of various Hitch Extender manufacturers which dispute eTrailer's findings). Our Hitch retains its 500lb tongue capacity. Keep in mind that most Hitch Extender Manufacturers will not comment, either way, for what that's worth.To repeat myself, KEEP IN MIND there are a ton of "differences of opinion" concerning how Hitch Extenders and longer Towing Arms affect Towing Capacity.
DO YOUR OWN RESEARCH.
Side Note: The distributor claims this weighs 150lbs, total. Being 110lbs for the box, plus 40lbs for the frame. But my BOL on that shipment stated it was 110lbs, total -- and I did not have any way to actually weigh this. The BOL may not prove anything.
There is a catch, however - if it matters. That center arm is long enough to extend past the Komo box for one reason:
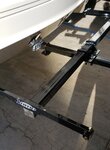
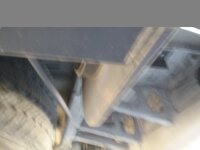
So you can also add an extra, normal Bike Rack to the rear, if you wish. In fact, the bottom frame comes in a forward position on that arm, upon delivery. If you were to mount the box in that position, it would hit the rear of the RV because our Hitch is recessed inward 5-1/2in from the outermost rear bumper edge. But if you loosen the bottom mounting bracket, you can slide the frame almost to the end of that arm -- allowing the box to clear the rear fascia by several inches. This eliminates the ability to attach a traditional rear bike rack. Such a rack would be a real pain because you'd have to either buy a tilting type in order to open the rear doors of the box, or remove it each time.
Next, this kit for the box is really solidly-built. The plastic shell is quite strong. The weather seals are substantial. The dealership (Johnson RV) installed it free-of-charge within a half-hour. They commented how much they liked it. And how nice the LED taillights are. They were impressed!
The bottom frame with the tongue bar comes as one section, pre-assembled. The support frame is hinged so it can tilt backwards. The box is a separate piece that bolts onto that support frame.
CAUTION: Attach the tongue bar first -- and USE A HITCH PIN to secure it BEFORE lifting the box into place. None of this is really a one-man operation, but one person can probably lift the frame into position, easily-enough. But not the box, in my opinion.
You will need to buy a Locking Hitch Pin (if desired), and a 7-pin to 4-pin Converter to hook-up the taillights - including the tag light. But this adapter depends on your existing hitch light setup. Your Brake Lights, etc. all still work and are visible at the same time as the lights on the Komo box since it is less-wide than the Unity coach (check the width on your car if setting this up on an automobile). The rear taillights on the box also act as blinkers, indicating a turn. They do not interfere with your coach taillights in operation.
You will NOT need a locking clamp/wobble stabilizer for the Hitch/Support Arm attachment, as it comes equipped with that. This keeps the entire assembly from rattling or banging within the Hitch, itself. So, really, the only extra bits I had to buy were the Locking Hitch Pin and Lighting Adapter (I added-in dielectric grease, on a recommendation).
This was the Wobble-Stabilizer I pre-purchased, but have returned:
https://www.amazon.com/gp/product/B0...?ie=UTF8&psc=1
This was the Locking Hitch Pin that I kept:
https://www.amazon.com/gp/product/B0...?ie=UTF8&psc=1
This was the Lighting Adapter that I used:
https://www.amazon.com/gp/product/B0...?ie=UTF8&psc=1
Note: All of these components from Mictuning seem to be of high-quality.
Unfortunately, my large Biktrix eBike does not fit with the Front Wheel installed. I must insert the bike with the front facing left (driver's side) because the kickstand creates an issue if it is facing right - it doesn't allow the bike to be angled and inserted deep enough in the box cavity, forcing the handlebars out just a tad too far).
The internal support post does come with two fairly substantial flip-lock pins, but they are a PITA to align with the holes in the top and bottom mounting channels. They also include three thick foam repositionable collars (plus one fixed collar, for a total of four) to help protect the bike when placed against that post -- and two Velcro tie-straps. There are also two fiddly Snap-Lock D-Pins that I find to be "problematic". This might become easier, once I get used to them. But I plan to replace them with something that locks with a key to make that post mostly non-removable by a thief (or at least, an irritant). The holes are too tight to that pin diameter, so leaning the post cannot work, and alignment under the best of conditions is irritating -- I plan to drill out each hole a bit larger.
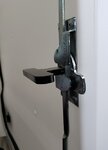
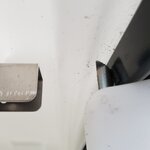
Let's talk about that rear door lock. Nobody is suggesting this box will stop any determined thieves. But the lock actually rotates into a 1/4" rod assembly on the opposing door. That rod is in two sections which protrude upwards and downwards as you rotate its control handle. Those rods extend about 1/2" behind the inner right-side aluminum door channels, across the top and bottom of the opening -- thereby, locking the right side fairly snugly at the top and bottom. So it isn't just a tiny flip-lock that you might laugh at on your side bin doors on the outside of the coach.
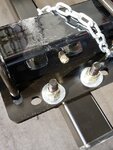
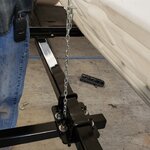
The only confusing part during the install was the small chain that comes pre-installed to the frame. Like most MEN, we did not read the instructions until after-the-fact! This attaches to the bottom of the box so it can tilt backwards. Used mostly with a car setup where you have a rear hatch. No real use to us on the Unity -- and certainly NOT a security or safety chain (our first guess). There was a rough Xeroxed instruction sheet inside the box, which cleared up the confusion. There were no other instructions included.
To be fair, I must say all of this has been happening between bouts of light and heavy rainfall since this the 29th of November. I did take the eBike to a local bike shop, Sandy Bikes -- and would like to give a big shout-out to the owner there for his patience and understanding. It cost $100 to get the eBike setup and tuned -- such as it was. The rain was coming down hot and heavy as we were loading it that Friday night. I actually drove off and left an empty large suitcase rolling around in his parking lot, which I retrieved within an hour -- but that's another segment to air soon on "Scarecrow's Hilarious Mishaps!"
I am adding photos as best I can here.
