Battery not charging, what am I doing wrong???

Hhhughes25

New Member
Region
USA
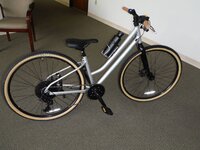
Hello everyone! I just finished my first Ebike build and everything is working great besides trying to get my battery charged.

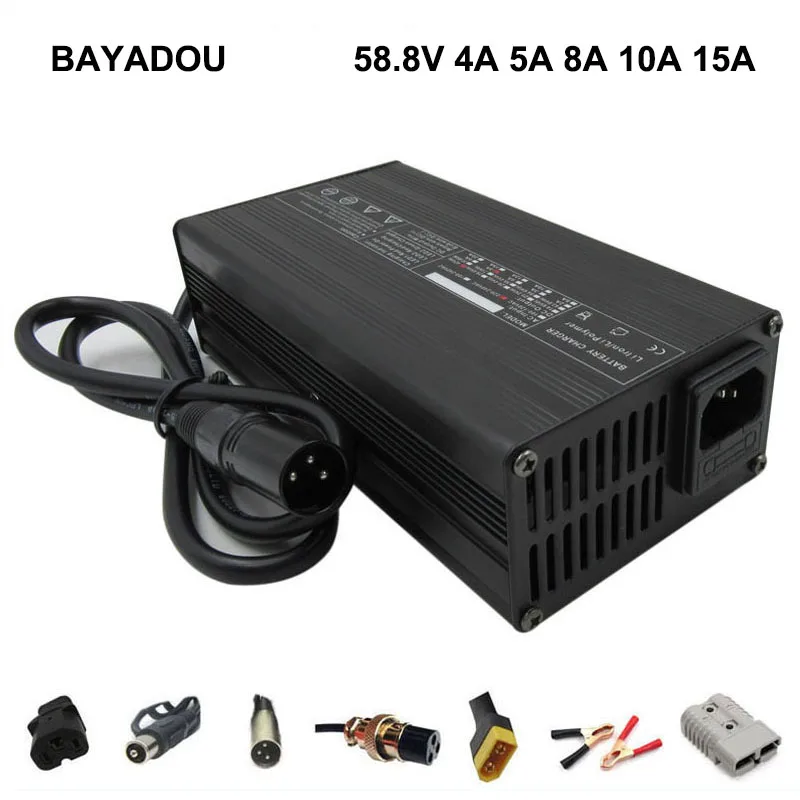
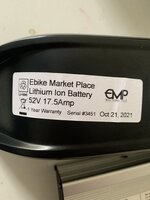
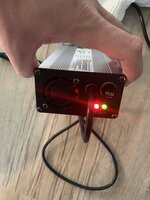
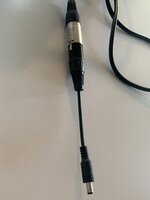
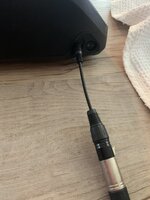
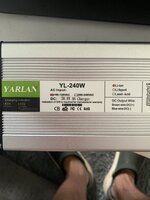
I have a 52v 17.5A battery I bought from Ebike marketplace and a 58.8V 4A charger that I bought on Amazon. When I plug it in nothing seems to happen. There are two lights on the charger, they are both supposed to turn red when it is actively charging. Also the battery company sent me an adapter for the three prong to the round end that goes into the battery. Please see pictures for more details.

So did I buy the incorrect charger? Or is my adapter maybe screwing things up? Does it matter if the battery is turned on or off for charging? Any help would be greatly appreciated!
 

Attachments

  • 666794F9-E1A5-4EDF-B52D-7FA73BBEFC49.jpeg
    666794F9-E1A5-4EDF-B52D-7FA73BBEFC49.jpeg
    173.8 KB · Views: 239
  • 36BA6BB8-81A4-4A2B-9614-7C016756EF00.jpeg
    36BA6BB8-81A4-4A2B-9614-7C016756EF00.jpeg
    197 KB · Views: 329
  • 2937FF73-2CEA-4DDC-A401-6E9CD9B78F3A.jpeg
    2937FF73-2CEA-4DDC-A401-6E9CD9B78F3A.jpeg
    84.9 KB · Views: 246
  • 786D87F2-BD43-4B42-AA22-A08E2EE91E31.jpeg
    786D87F2-BD43-4B42-AA22-A08E2EE91E31.jpeg
    245.4 KB · Views: 237
  • 122065F7-B036-490F-8495-709FE8CCDC8F.jpeg
    122065F7-B036-490F-8495-709FE8CCDC8F.jpeg
    223.1 KB · Views: 231
Is the battery already charged? Oh, and congratulations on you first build! Show some photos. On some battery management chips they will allow charging to 90% in the OFF position. That is good for long battery life. Just before you go on an extra long ride you can charge the last 10% by moving the battery to the ON position. Do not store it fully charged or run it all the way down. I have seen people wreck $12,000 bikes that way.
 
that adapter you have is likely not wired correctly, it is going from a 3 pin to a 2 pin.

on those XLR 3-pin connections, only 2 pins are used, pin1 is typically hot, and pin 2 or pin 3 can be the ground.

I have the same charger I had to jump pins 2 and 3 together on my adapter so that I could use the charger on different batteries, 1 battery used pins 1 and 2 where the other uses pins 1 and 3.


use a multimeter to figure out which is the ground on the charger, then either jump the two pins together in the adapter or move the ground to the other pin. IF your adapter connection opens (some are solid and don't open)

if the adapter doesn't open you can do it at the charger, that metal sleeve has a screw that opens it and then you slide it back.
 
well yeah. depends on how handy one is. personally I would just change or jump the connections. but I am an electronics. guy. wiring doesn't faze me. 5 minutes of work.
 
Is the battery already charged? Oh, and congratulations on you first build! Show some photos. On some battery management chips they will allow charging to 90% in the OFF position. That is good for long battery life. Just before you go on an extra long ride you can charge the last 10% by moving the battery to the ON position. Do not store it fully charged or run it all the way down. I have seen people wreck $12,000 bikes that way.
The battery is at about 75% charge when I was trying to charge it to see if everything worked. I will send some pictures soon! I did a Ebikeling kit with a 1200W motor on my canondale quick 4.
 
that adapter you have is likely not wired correctly, it is going from a 3 pin to a 2 pin.

on those XLR 3-pin connections, only 2 pins are used, pin1 is typically hot, and pin 2 or pin 3 can be the ground.

I have the same charger I had to jump pins 2 and 3 together on my adapter so that I could use the charger on different batteries, 1 battery used pins 1 and 2 where the other uses pins 1 and 3.


use a multimeter to figure out which is the ground on the charger, then either jump the two pins together in the adapter or move the ground to the other pin. IF your adapter connection opens (some are solid and don't open)

if the adapter doesn't open you can do it at the charger, that metal sleeve has a screw that opens it and then you slide it back.
Thank you I will give that a try!
 
Okay that will be my next option then. Thanks!
 
You might need a voltmeter to verify which wire is positive in the adapter wiring and to make sure it's going to the center pin on the round plug, You don't want to connect the charger backwards..

How is the ebikeling kit working?
 
Photos. Here is a recent build. Check out the sloppy zip ties, wires, and connectors. It is a mid-drive.
 

Attachments

  • MarinWireless1.JPG
    MarinWireless1.JPG
    353.7 KB · Views: 171
  • MarinWireless2.JPG
    MarinWireless2.JPG
    440.5 KB · Views: 162
  • MarinWireless3.JPG
    MarinWireless3.JPG
    323.2 KB · Views: 194
  • MarinWireless4.JPG
    MarinWireless4.JPG
    248.4 KB · Views: 147
You might need a voltmeter to verify which wire is positive in the adapter wiring and to make sure it's going to the center pin on the round plug, You don't want to connect the charger backwards..

How is the ebikeling kit working?
It’s working great!
You might need a voltmeter to verify which wire is positive in the adapter wiring and to make sure it's going to the center pin on the round plug, You don't want to connect the charger backwards..

How is the ebikeling kit working?
Copy! Seems to be doing the trick so far! I got up to about 35mph yesterday. The kit was pretty easy to install besides the issues I had with the brake levers. The kit comes with brake levers that have a switch to tell the motor you are braking. Once I installed them I could not get my brakes to get tight enough. I tried everything in the books but finally took my bike to the shop and they are going to adjust the brakes for me. But besides that it is a nice kit. Doesn’t look as fancy as the electric bikes you can just go out and buy but this was much cheaper!
 
Back