Hello Prairie, Just wondering did you run both remote wires through a single exit port or one out the drive side and one out the non-drive side? Mine both come out of my empty drive side port. Port was empty as I removed the dropper post cable when I installed standard seat post.Glad to hear that. I used 3/8" tubing and it also worked fine. It would have been nice to treat the other side with the same but it would have meant pulling out and re-routing the brake cable. Instead, I used a roll of self-fusing silicone tape that I had laying around. I also didn't find any need to wrap the cable/connectors with anything before stuffing them below the TCU. There isn't much room below there once the remote is installed. I did use a small zip tie to bundle the remote cables just to make them a bit more compact. My wife is still undecided where she wants the buttons placed on her Comp Carbon but it appears that she might be more inclined to have them up on top of the bars on either side of the stem.
You are using an out of date browser. It may not display this or other websites correctly.
You should upgrade or use an alternative browser.
You should upgrade or use an alternative browser.
2021 Creo Road Remote?
- Thread starter sapidus
- Start date


Prairie Dog
Well-Known Member
- Region
- Canada
- City
- Red Deer
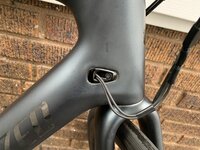
Like you, I routed both road remote cables through the drive side entry port as it sat vacant. It would have been too tight on space on the non-drive side with both the rear brake and Di2 cables.Hello Prairie, Just wondering did you run both remote wires through a single exit port or one out the drive side and one out the non-drive side? Mine both come out of my empty drive side port. Port was empty as I removed the dropper post cable when I installed standard seat post.
kattanm
Active Member
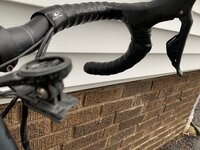
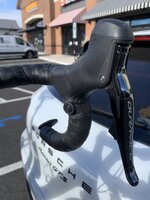
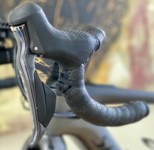
Here is my setup. On the bend lines up with outstretched middle finger. Used double wrap under the hoods while keeping buttons exposed. Routed cable drive side.
Attachments
Prairie Dog
Well-Known Member
- Region
- Canada
- City
- Red Deer
Great job!Here is my setup. On the bend lines up with outstretched middle finger. Used double wrap under the hoods while keeping buttons exposed. Routed cable drive side.
 Might I suggest a bit of finishing tape at both ends of the wrap? It will cover up any gap between the bar itself and the wrap. Is that ICR port one that you acquired from your Specialized dealer? Just wondering if it's the same version that ships with the new bikes.

kattanm
Active Member
Yes! Can you send me an amazon link to finishing tape? This is not my speciality here... That port came from my Specialized dealer — did not come with bike originally.Great job!
Prairie Dog
Well-Known Member
- Region
- Canada
- City
- Red Deer
I used self fusing silicone tape but electrical tape will do just as well. If you’re not sure, go to 10:25 near the end of this video.Yes! Can you send me an amazon link to finishing tape? This is not my speciality here... That port came from my Specialized dealer — did not come with bike originally.
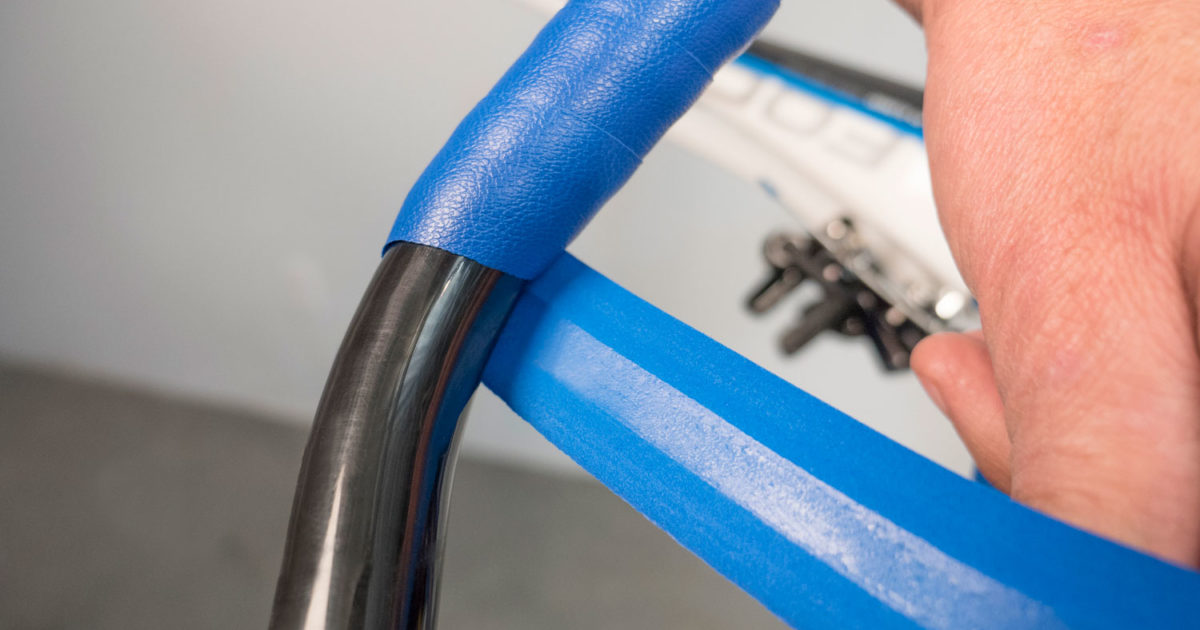
Handlebar Tape Installation (Drop Bars)
Wrapping drop handlebars is a skill that requires practice and patience. The finished job should look tidy and clean for the user.
kattanm
Active Member
Uh oh now I have a new problem. After installing the assist buttons, my left shifter is essentially dead — doesn’t do anything. Even the top button doesn’t change Garmin pages.
When I go into the e-tube project software, I see my two shifters. My goal for the left is to have the larger paddle downshift the rear and the smaller forward paddle upshift (reversing the right shifter, like an eTap setup). In the software, I can only program the right shifter. The left shifter just says front shifter up / down or some nonsense since I have no front derailleur here. Is this a side effect of having these new assist buttons? I did not have this problem when using the Levo controller.
When I go into the e-tube project software, I see my two shifters. My goal for the left is to have the larger paddle downshift the rear and the smaller forward paddle upshift (reversing the right shifter, like an eTap setup). In the software, I can only program the right shifter. The left shifter just says front shifter up / down or some nonsense since I have no front derailleur here. Is this a side effect of having these new assist buttons? I did not have this problem when using the Levo controller.
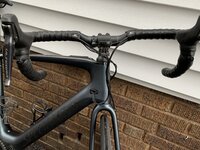
Got my power control buttons installed by LBS today. They got a new frame port from Specialized.
Attachments
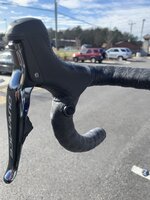
nice install. hope that position works for you cuz it looks really uncomfortable to me.Got my power control buttons installed by LBS today. They got a new frame port from Specialized.
I like riding on the hoods and my thumb falls at this point. We test fitted several locations and this seemed to work best for me. Thanks.nice install. hope that position works for you cuz it looks really uncomfortable to me.
No big deal really cuz pretty easy to reposition if things need to moved around. Enjoy the ride.I like riding on the hoods and my thumb falls at this point. We test fitted several locations and this seemed to work best for me. Thanks.
Prairie Dog
Well-Known Member
- Region
- Canada
- City
- Red Deer
Kudos on the install. Looks great!I like riding on the hoods and my thumb falls at this point. We test fitted several locations and this seemed to work best for me. Thanks.
I tend to agree with @eddief but as I said before, it all comes down to personal preference and where you feel your most convenient hand position is to reach the buttons. FWIW, my thumbs would never reach down that far. However, that does appear to be the prevalent spot for most of the road remote installs thus far.I have been suffering from a bad case of the N+1's and am considering adding a Creo EVO. The Creo that looks best for me (and is in stock at the LBS) does not include the remotes which I consider a must have. I think where you have the buttons would work best for me. Thanks for sharing.I like riding on the hoods and my thumb falls at this point. We test fitted several locations and this seemed to work best for me. Thanks.
BTW-your 4 wheel ride looks nice too
")
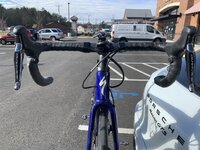
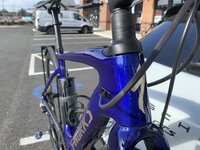
As others have stated, the remotes are really easy to relocate. This is my third position and (for me) is perfection.I have been suffering from a bad case of the N+1's and am considering adding a Creo EVO. The Creo that looks best for me (and is in stock at the LBS) does not include the remotes which I consider a must have. I think where you have the buttons would work best for me. Thanks for sharing.
BTW-your 4 wheel ride looks nice too
Attachments
Prairie Dog
Well-Known Member
- Region
- Canada
- City
- Red Deer
....unwrap, wrap, unwrap, repeat..
Prairie Dog
Well-Known Member
- Region
- Canada
- City
- Red Deer
Don't we all?I have been suffering from a bad case of the N+1's
They are great but the only issue with the Evo is you need a new gromit for the cable entry as original 2nd hole is not big enough. When used in conjunction with DI2, up on one hood and down on the other and Planet 3 outside USA the bike is fantasticYes, you can retrofit. I have them waiting for me at the LBS and hopefully will get them installed on my Creo Evo tomorrow, if I get myself organised - and upgrading to Di2 at the same time.
Would be even better if Specialized had collaboration with Shimano DI2 so that one of the levers did gears and the other power levelsWould be great if Specialized collaborated with Garmin so you could use Garmin touch screen to switch modes rather than adding more unneeded stuff to your bike. Love my Creo but seems like Specialized is behind the game when making Mission Control and Garmin integration easier to use and understand.
Hi, there is a revised port that accepts the dropper cable and the 2 button cablesI see some valid points in your post but I certainly don't feel that the remotes are fiddly and definitely prefer them over constantly glancing down at the TCU to change the power settings and having to remove either hand from the bar.
As for the drive side port, I didn't really encounter any issue with squeezing the plug ends through the holes. Yes, one hole is 5mm and the other is 4mm but I pulled each one individually through the larger hole and never had to drill out and enlarge the smaller hole. If both holes were 4mm then it likely would have required some drilling. It would be nice to know what replacement ports Specialized is including in the parts package with new bikes. Perhaps someone in the know can enlighten us. Part # for it is mentioned in the instructions that came with the remotes.
That being said, I could see the buttons being difficult to locate if they were buried under bar wrap but having them exposed is certainly not a problem for me and represents a much safer method over manually pushing the button on the TCU.
I think that there is going to be compromise in any scenario whether it be the Creo or the Levo remote.
It was previously a pain to look down but in my view the main benefit is the now sequential up and down of the assistance and in fact my battery consumption has improved as I now ride mainly on level 1 as it is so easy to flip up and down as previously I rode on level 2
Similar threads
- Replies
- 1
- Views
- 2K
- Replies
- 0
- Views
- 2K
- Replies
- 12
- Views
- 10K