Yamaha Interface X problem

Pawel69

New Member
Region
Europe
City
Silesia, PL
Hi,
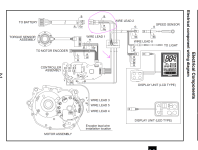
I have a plan to clean up my bike cockpit and put all cables and wires inside handlebar. But... Yamaha Interface X has two part - switch and display and I have to disconnect these to put wires via holes in handlebar and connect it again. Did anybody tries to do it? Have you electrical diagram of this system? Have you a method to open switch unit? Oranother way - where can you buy micro connectors to connect the cutted wire.
Thanks in advance...
 
Julet / Higo connectors

Screenshot_20250718_042002_Chrome.jpg

 
This offer I know. Finally I will buy it, however I looked for a something smaller.
And second thing - how many pins I need for this cable (I want to know before I will cut the cable or buy each of these :) )
 
Running the cable from the controller to the remote through the handlebars seems like drilling too many unnecessary holes. I'd leave that cable outside. Also, why the Interface X (unless you have it already, and/or need ANT+ in addition to Bluetooth)? It's not all that more compact than Display C, but has a lot of wasted space, and is more expensive.
 
Running the cable from the controller to the remote through the handlebars seems like drilling too many unnecessary holes. I'd leave that cable outside. Also, why the Interface X (unless you have it already, and/or need ANT+ in addition to Bluetooth)? It's not all that more compact than Display C, but has a lot of wasted space, and is more expensive.
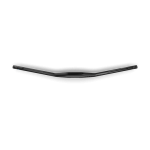
Hi, I didn’t have to drill anything because the handlebar already had the necessary holes for routing the electronic cables. The only holes I had to make were for the brake cables. I already had the X Interface with the bike, and I use Bluetooth with my phone instead of a Sigma display, which is convenient for navigation on longer rides.
 

Attachments

  • prha0573_pro-handlebar-koryak-e-perform_0006.png
    prha0573_pro-handlebar-koryak-e-perform_0006.png
    22.4 KB · Views: 17
Well, if you can't open one of the cases (remote switch or main X unit) and look inside, I'd cautiously cut and peel back the outer cable insulation close to the remote switch (or whichever side will have a longer run of cable outside the handlebars, to locate the connector), count the interior conductors, order the right pair of (waterproof) connectors, and cut the cable and splice in the connector where you already stripped the cable.
Running that short length outside still seems a lot easier.
Since the handlebars were already prepped for the "grand finale" yesterday, all that was left for me was to finally cut this cable to extend it and route it through the middle. It’s a four-core wire. Once I’m done, I’ll share photos of the finished (or nearly finished) cockpit with you.
If you ever have a similar idea, now you know which connectors to order :)
 
Back