Known Issues & Problems with Rize Bikes Products + Help, Solutions, & Fixes

I think if I was to do it all over again I would just use two sections of inner tube and wrap/tape both ends of the controller and forego the furniture pads. That way you have ~80% of the surface area uncovered for heat dissipation. Alternatively you could cement the controller in place with JB weld or something similar (the downside being that if you ever needed to remove the controller it would be quite difficult).

On another note, I had a chain link nearly separate at the master link, which caused the chain to skip as it passed over the rear sprocket. I was able to break the chain and insert a new KMC quick link before it failed completely, but it did cause some frustration as I was thinking the derailleur shift position had changed. I recommend you have a chain breaker tool and quick link in your home kit, as I did not.

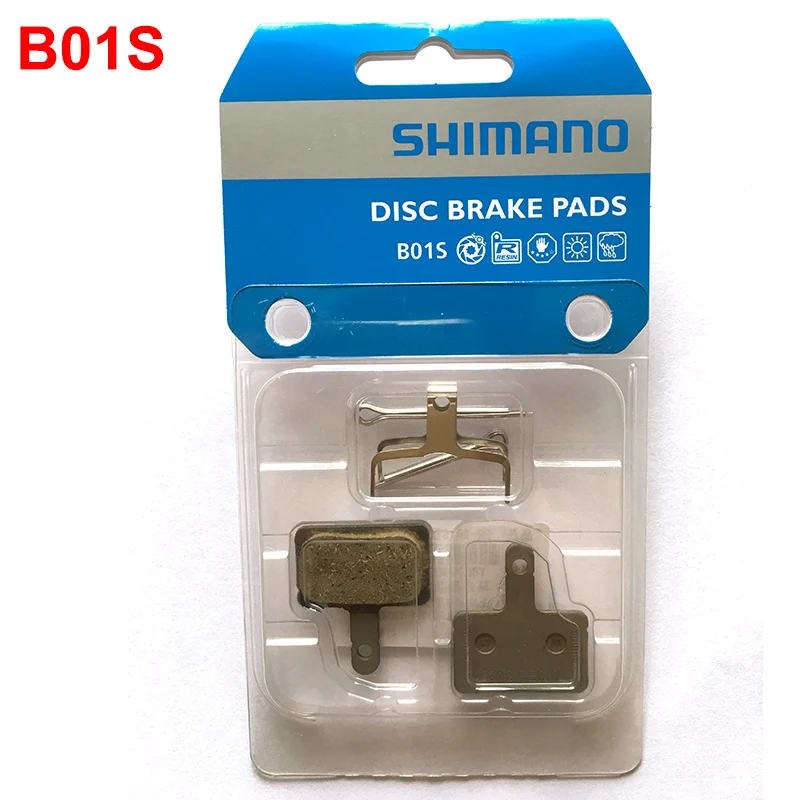
I'm also getting the flushing noise from the rear brake while under moderate to heavy braking. So far it's only the rear brake on the one bike. I have a set of inexpensive Shimano B01S organic pads that I'm going to put in to see if that resolves the issue. I'm going to do this without cleaning the rotor and see how it goes.

Additionally, I have attempted to protect the frame and cables from, in my opinion, poor cable management and rough frame edges, by installing clear vinyl stickers at notable touch points. There's a really, really bad touch point by the bottom bracket where the main wires from the battery and handlebars exit the frame to the rear. It appears that when the downtube was welded into place they chopped off the excess at the bottom and then painted over it without filing the edges down. It's not razor sharp at the moment but when the paint wears down I can imagine the cables eventually being compromised. It's pretty ugly and poor manufacturing in my opinion.It's the same on the other bike. Photos below:

IMG_0369.JPEG


There's definitely been some "teething" issues and will keep updating this page with new developments. Overall, the bike works as expected and my partner's bike has been working flawlessly so far. Luck of the draw I guess!
 
I think if I was to do it all over again I would just use two sections of inner tube and wrap/tape both ends of the controller and forego the furniture pads. That way you have ~80% of the surface area uncovered for heat dissipation. Alternatively you could cement the controller in place with JB weld or something similar (the downside being that if you ever needed to remove the controller it would be quite difficult).

On another note, I had a chain link nearly separate at the master link, which caused the chain to skip as it passed over the rear sprocket. I was able to break the chain and insert a new KMC quick link before it failed completely, but it did cause some frustration as I was thinking the derailleur shift position had changed. I recommend you have a chain breaker tool and quick link in your home kit, as I did not.

I'm also getting the flushing noise from the rear brake while under moderate to heavy braking. So far it's only the rear brake on the one bike. I have a set of inexpensive Shimano B01S organic pads that I'm going to put in to see if that resolves the issue. I'm going to do this without cleaning the rotor and see how it goes.

Additionally, I have attempted to protect the frame and cables from, in my opinion, poor cable management and rough frame edges, by installing clear vinyl stickers at notable touch points. There's a really, really bad touch point by the bottom bracket where the main wires from the battery and handlebars exit the frame to the rear. It appears that when the downtube was welded into place they chopped off the excess at the bottom and then painted over it without filing the edges down. It's not razor sharp at the moment but when the paint wears down I can imagine the cables eventually being compromised. It's pretty ugly and poor manufacturing in my opinion.It's the same on the other bike. Photos below:

View attachment 64502

There's definitely been some "teething" issues and will keep updating this page with new developments. Overall, the bike works as expected and my partner's bike has been working flawlessly so far. Luck of the draw I guess!
That really sucks.
I found this on Amazon. https://www.amazon.ca/gp/product/B07T23VWKV/ref=ox_sc_act_title_3?smid=A14OVEJZ9HTUBW&psc=1
Anyone know if this is the correct product to replace the chain link?

FYI I found this on Aliexpress - seems like a decent price for the brake pads
 
I can't find any master link on my City Bike chain. What distinguishes the master link on your bikes?
 
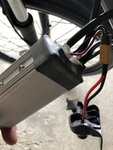
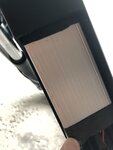
Pics of how I addressed the rattle of controller using an old inner tube wrapped around the 2 ends of the controller. So far so good. Noise is gone.
 

Attachments

  • IMG-6921.jpg
    IMG-6921.jpg
    219.5 KB · Views: 540
  • IMG-6922.jpg
    IMG-6922.jpg
    167.3 KB · Views: 543
That really sucks.
I found this on Amazon. https://www.amazon.ca/gp/product/B07T23VWKV/ref=ox_sc_act_title_3?smid=A14OVEJZ9HTUBW&psc=1
Anyone know if this is the correct product to replace the chain link?

FYI I found this on Aliexpress - seems like a decent price for the brake pads

Hey Barzy,

I ended up buying a Park Tool chain breaker (mini brute) at a LBS for about $25.00 which worked fine. I don't think you really need the other items in that set and I'm not too sure of the quality of those pieces. The mini chain brute is small enough to carry on rides and I also carry an extra link. If the chain fails I feel confident fixing it in under a half hour. Link to chain tool on Amazon: https://www.amazon.ca/Park-Tool-CT-...ocphy=9001598&hvtargid=pla-493941683196&psc=1

And these are the KMC links that I used: https://www.mec.ca/en/product/5063-660/Quick-Link-6-7-8-Speed-Chain-Connector-(2-Pac. They come in a 2 pack so not too bad price wise.
 
I can't find any master link on my City Bike chain. What distinguishes the master link on your bikes?

Hey Handlebars,

What I believe to be the masterlink (might not be the correct terminology) is indicated by the black/dark grey pin in one of the links. I checked the other bike and it also has this pin, but so far so good on that chain so your mileage may vary.
 
Hey Handlebars,

What I believe to be the masterlink (might not be the correct terminology) is indicated by the black/dark grey pin in one of the links. I checked the other bike and it also has this pin, but so far so good on that chain so your mileage may vary.
Scheidty, thank you for letting me know.
 
Hey Handlebars,

What I believe to be the masterlink (might not be the correct terminology) is indicated by the black/dark grey pin in one of the links. I checked the other bike and it also has this pin, but so far so good on that chain so your mileage may vary.
From what I see online, KLM 6,7, or 8 speed chains do not have a master link. Maybe something changed. On my bike I don't see any link that has a different pin in it or any difference at all from the rest.
 
I will enter any issues as I come across them.

When charging the battery, I thought the light on the charger is supposed to go from red to green once 100% (Battery indicator shows 4 green light and LCD shows 100%). Mine does not turn green.
Does anyone else have this issue ? I thought the first time I charged it maybe I didn't get the full 100%. I don't want to "overcharge" the battery if that's even possible.
 
Barzy-
How long has the charger been charging?
How old is this battery?
Do you have a voltmeter to measure the battery voltage?
Have you ever seen the green light?
 
Barzy-
How long has the charger been charging?
How old is this battery?
Do you have a voltmeter to measure the battery voltage?
Have you ever seen the green light?
How long has the charger been charging? I didn't time it but around 2 hours - LCD said 55%
How old is this battery? Brand new, got the bike August 31st
Do you have a voltmeter to measure the battery voltage? I do not
Have you ever seen the green light? never - but I thought I read it somewhere. Charger turns green when I unplug it from the battery itself
 
It sure sounds to me like you aren't letting it charge near as long as necessary. Think 6-8 hours at least! If the green light still isn't on, give it another couple hours after that.....
 
I will enter any issues as I come across them.

When charging the battery, I thought the light on the charger is supposed to go from red to green once 100% (Battery indicator shows 4 green light and LCD shows 100%). Mine does not turn green.
Does anyone else have this issue ? I thought the first time I charged it maybe I didn't get the full 100%. I don't want to "overcharge" the battery if that's even possible.
Yes, it does not turn green right away upon the display reaching 100%. You can verify how much the "actual" charge differs from how much the display reads when the charger is still applying a charge. When your battery is charging check the % on the display. Then unplug from the wall and take a look at what the display reads now. About 5% less. So when it hits about 90% it changes to a slower charge, and that difference might be 2 % under what the display says when it's still charging. After it hits 100% let it keep charging until the LED changes colour.
 
Noteworthy maybe, is the fact that the charger may still be balance charging the pack even though the voltage indicates a full charge.
 
It sure sounds to me like you aren't letting it charge near as long as necessary. Think 6-8 hours at least! If the green light still isn't on, give it another couple hours after that.....
Looks like you were right
I let it charge and came back to check after 6.5 hours and it was green.
Thanks
 
I’m trying to adjust the angle of the handle bar stem but am having trouble moving it. I loosened and removed the bolt but still cannot adjust tilt. Any help would be much appreciated.
Thanks
 
Yes, it does not turn green right away upon the display reaching 100%. You can verify how much the "actual" charge differs from how much the display reads when the charger is still applying a charge. When your battery is charging check the % on the display. Then unplug from the wall and take a look at what the display reads now. About 5% less. So when it hits about 90% it changes to a slower charge, and that difference might be 2 % under what the display says when it's still charging. After it hits 100% let it keep charging until the LED changes colour.
When you talk of the 'display' are you referring to the Bafang purion display system mounted on the bike or a different display? You mention that when the battery is charging to check the % on the 'display'. Where is this display? Also, do you have any recommendations on the best way to check the percentage of charge on the battery while charging? For example, if I want to charge the battery to 90% how would I know when it's at 90% charge?
Thanks!
My older version is a SparkBike City with a different display than yours. How I can check the charge level while charging, is to turn the bike on. Usually it reads higher by 5% when charging than after you unplug it. It immediately drops about 5 % when you unplug. It may even read 8% higher when plugged in, because after you unplug it and it goes down 5%, it can still settle down a few more % slowly.
When you're charging it and the charge reaches 90% it slows down to a slower gentler charge.

Remember to plug in to bike first, then plug charger to wall. Unplug from wall first, then from bike.
 
Last edited:
Back