Known Issues & Problems with Juiced Bikes Products + Help, Solutions & Fixes

Since this is a Known Issues Thread with Juiced Bikes I'd like to borrow from another's thread that noted that some new Juiced CCX's were sent out with the controller programmed with the CCS firmware. This will hamper your CCX's ability to take advantage of R(ace) mode. The easy way to test if you have this problem is to set your controller to Level 0 and if your bike shows that you have assist (similar to ECO mode) then you've got the CCS firmware. Go to Juiced's site for the solution which involves swapping your controller with one that has the CCX firmware.

I'll be going through this swap out and from looking at the video it appears to be a 10-minute task. I'll report back here on the results. I'm not very mechanically inclined so take my time and cut it in half for yours. ;)
 
Dan, 275# is the current rating, but the 1st edition CCS were rated for 300 or 325, can't recall which, but at least 300. Now maybe it was
just some pissed off guy on the line that threaded all my spokes from the outside, but that's the way I received it. Not being a wheel
builder, I assumed that was the way it was supposed to go. I didn't even notice the motor was counter-sunk on both sides 'til just
yesterday. It's a great bike still performing very well after 3400 mi., but I've had at least a mo. of down time fixing spokes that were never
properly installed in the first place & too flimsy to begin with.:mad:
John, if I remember correctly the early CCS bikes were all spoked non-alternating. When Juiced upgraded to Sapim spokes they also figured out how to correctly alternate them.
 
I saw this on juicedbikes facebook page.

The crankarm fell off of a new scrambler.

Just unbelievable.

I looked around the Juiced Bikes Facebook page, and I could not find that image of the fallen crank arm. I don't have a facebook login though, so maybe I cannot see it. Where did you find it, @dan silver ?

I do see a recent January picture of a messed up battery connector... Hard to believe...

https://www.facebook.com/photo.php?fbid=2296598463684066&set=p.2296598463684066&type=3&theater

I am forming an addiction to reading about Juiced problems... :p
 
First post. Received my new CCX in December, 2 weeks later power was intermittent. I emailed Juiced thru their support portal and received a reply from Gibram the following day requesting pictures of the battery terminal. I sent pictures and was told I need a new battery. I was given the option of shipping my battery at their cost but decided to take the 2 hour drive to San Diego. I arrived at Juiced Corp office yesterday afternoon and was greeted by Gibram who offered to inspect my bike, I declined due to time restrictions, picked up my new battery all within 10 minutes.
Going forward I’m going to leave the battery on the bike, no more unnessacery wear and tear on the terminals taking it off to charge.
I was very impressed with Gibrams follow up and the overall customer service that Juiced provided.
 

Attachments

  • EDBA1163-8BF0-4FE7-B9A6-210D38E7D36F.jpeg
    EDBA1163-8BF0-4FE7-B9A6-210D38E7D36F.jpeg
    650.2 KB · Views: 453
@dan silver Yes, Juiced offered a solution that is working right now. With preventative measures of my own, I hope it will last a long time.

I would not recommend Juiced Bikes until the battery design is changed.

Don't come back to this forum until they have changed the battery design.

Otherwise, you will succumb to the Juiced allure and suffer... but also love the darned bike too. Hahaha! ;)
 
I'm just about ready to hang it up with Juiced. While they seem to have good customer support, their quality control seems to be really bad.

My CCX was delivered with a bent rear rack and with the wrong CCS controller firmware ('0' and 'R' modes didn't function correctly). Juiced support was super responsive, and quickly sent out a replacement rear rack and new controller. The new rack looks OK (haven't mounted it yet), but the torque/cadence sensor with the new controller is completely broken (throttle works fine, but pedaling adds no power in any mode, and I rechecked all the connections/cabling). I'm hopeful Juiced will send me out another controller or tell me the magic incantation to make the torque sensor work correctly (still waiting to hear back from them).

Edit 1/12/2019: I'll reply in a new posting with more details and tricks to get the controller installed, but wanted everyone to know that I got the new controller working. In the end I think the new controller worked all along, but my testing methodology was bad. So while I'm not super happy that the bike originally had the rack & controller issues, Juiced support came through very quickly and the new controller they sent me was not defective in any way.

As noted, I got the new controller working, and I think the problem in testing the new controller was my error and not due to any defect in the controller. I do have some guidance for anyone else trying to install a new controller though.

The underlying problem I faced was that I was having some difficulty finishing up the controller install, and decided to try testing the torque/cadence sensor indoors after all the cables were connected, but before everything was buttoned-up (cable ties, routing through the frame, rubber strips in place). To test, I tried lifting the rear wheel, applying some resistance to the wheel with one hand, and pedaling with my other hand. My assumption was that this would be enough force to cause the motor to kick in to test the torque/cadence sensor, but this turned out not to be the case. After playing with it a lot more, and swapping the old controller back in (and finding the same issue), I concluded that I was doing something wrong, and finally found that the motor will only kick in if in the highest gear and pedaling like heck. That was enough to convince me that the controller was probably OK. Edit: to be clear, I did finish putting the bike together and did a quick road test to verify that everything does work.

Now for some suggestions for anyone replacing their controller which are not really mentioned in the installation video or guide:

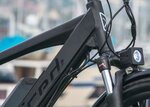
1. The three rubber strips along the bottom of the downtube that hold the cables inside the frame can be easily removed by just pulling straight out, starting from the bottom-most. However, you will not be able to reinstall by just pushing them in place the same way they came out (unless you have incredibly strong hands). You will also not be able to slide them in from the bottom of the frame if they're dry, as there is just too much friction. What you need to do is spray the edges with a soapy solution and then they will slide in fairly easily from the bottom. This was the major pain point in getting the bike back together. Edit: In retrospect, I'm not sure I absolutely had to remove the rubber strips- perhaps I could have snaked the cables down through the downtube without removing them. I'm not going to take everything apart again to find out ;-)

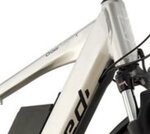
2. Before attaching the cables to the torque sensor and motor at the rear, and attaching the zip ties, double check the cable routing of the torque sensor, motor, rear brake, and rear derailleur cables to be sure that everything will go back together without too much cable crossover/interference inside the downtube. I probably assembled/disassembled the cables three times before I got it right.

3. Since you'll probably screw up #2 above a few times, get some extra zip ties. Standard 8" ties from the auto parts store are about the right size.

4. The torque sensor and motor cables are about 4 inches too long, and there is no good place to take up the slack. Therefore, you will have to create a loop in each of them that will go inside the downtube. This is a very tight fit, especially for the motor cable which is quite thick. Taking up the right amount of slack also requires that you attach and route the motor/torque sensor cables at the rear wheel first and work backwards toward the controller (thus leading to issues 2 & 3 above).
 
Last edited:
Thanks for this writeup Andy! I read through the PDF and watched the video and it looked like a piece of cake. I've got about 1000 zip ties we bought in one of those Costco bundles a long time ago and it's almost comical how many times we've used them! So handy. Your advice about routing from the motor and torque sensors first will help a lot - I most likely would not have done that. Not sure I understand about the three strips as they aren't mentioned or shown in the PDF or video but when I open up the downtube I'm sure I'll understand. You've most likely saved me a ton of time.
 
Thanks for this writeup Andy! I read through the PDF and watched the video and it looked like a piece of cake. I've got about 1000 zip ties we bought in one of those Costco bundles a long time ago and it's almost comical how many times we've used them! So handy. Your advice about routing from the motor and torque sensors first will help a lot - I most likely would not have done that. Not sure I understand about the three strips as they aren't mentioned or shown in the PDF or video but when I open up the downtube I'm sure I'll understand. Youut've most likely saved me a ton of time.

On the older CCS models Juiced ran the wires/cables externally along the bottom/front of the downtube. On the CCX they routed them inside the downtube in a channel protected by a strip of rubber, held in by grooves in the frame (on mine it was actually three strips butted together). The existing instructions don't show or mention how to deal with this difference.
 

Attachments

  • ccs.JPG
    ccs.JPG
    30.8 KB · Views: 467
  • ccx.JPG
    ccx.JPG
    22.1 KB · Views: 475
Thanks Andy! I brought my CCX in today from the garage and checked it out. I see the three rubber strips. So those slide in and out? Almost seems like they would pop in and out of an indentation in the downtube. I pushed the lowest one down slightly and it did't budge. And you have to remove all three to gain access to the top one? Ugh. I can tell that's not going to be a simple endeavor without some kind of lubrication.
 
Last edited:
I looked around the Juiced Bikes Facebook page, and I could not find that image of the fallen crank arm. I don't have a facebook login though, so maybe I cannot see it. Where did you find it, @dan silver ?

I do see a recent January picture of a messed up battery connector... Hard to believe...

https://www.facebook.com/photo.php?fbid=2296598463684066&set=p.2296598463684066&type=3&theater

I am forming an addiction to reading about Juiced problems... :p
Well I guess nothing is ever perfected when first invented. Amid the sundry hassles, I still love my CCS. Just a few things I'd like to change
is all. Mainly, I wish the stays had more room for a larger rear tire .
 
Thanks Andy! I brought my CCX in today from the garage and checked it out. I see the three rubber strips. So those slide in and out? Almost seems like they would pop in and out of an indentation in the downtube. I pushed the lowest one down slightly and it did't budge. And you have to remove all three to gain access to the top one? Ugh. I can tell that's not going to be a simple endeavor without some kind of lubrication.
Soapy water maybe helps to lubricate the strip?
 
First post. Received my new CCX in December, 2 weeks later power was intermittent. I emailed Juiced thru their support portal and received a reply from Gibram the following day requesting pictures of the battery terminal. I sent pictures and was told I need a new battery. I was given the option of shipping my battery at their cost but decided to take the 2 hour drive to San Diego. I arrived at Juiced Corp office yesterday afternoon and was greeted by Gibram who offered to inspect my bike, I declined due to time restrictions, picked up my new battery all within 10 minutes.
Going forward I’m going to leave the battery on the bike, no more unnessacery wear and tear on the terminals taking it off to charge.
I was very impressed with Gibrams follow up and the overall customer service that Juiced provided.

Found a 2 prong discharge connector online, Now I can put my battery on any bike of my choosing. Opens possibility of custom builds.
 
Thanks Andy! I brought my CCX in today from the garage and checked it out. I see the three rubber strips. So those slide in and out? Almost seems like they would pop in and out of an indentation in the downtube. I pushed the lowest one down slightly and it did't budge. And you have to remove all three to gain access to the top one? Ugh. I can tell that's not going to be a simple endeavor without some kind of lubrication.

I was able to pop them out pretty easily, but you have to pick an opening to get your finger under it to pull. Either start with the bottom one where the cables exit, or with the top one where there's an indentation on either side for the cables to enter. Pulling them out was pretty easy.

The only way I could get them back in was with soapy water (dish soap mixed with water), sprayed on the edges of each strip, and then slide it up from the very bottom. Yes, the soapy water helps lubricate the strip (while theoretically drying up when you're done so the strips don't just slide out). By the way, the three strips aren't all the same length- the one on the bottom is cut down a little at the bottom to fit (in case you forget which order you pulled them out in).

I would avoid using any type of oil-based lubricant because (a) it's not going to dry out, so the strips might slide out on their own over time, and (b) in my experience rubber can deteriorate with certain oils unless you're using something like Krytox.
 
On my crosscurrent S, when I ride over small bumps, the motor will activate for a brief moment and accelerate even though I'm not pedaling nor using the thumb throttle. I'm wondering if anyone else has this issue.

Yes, same happens with my CCX, and KAM1952's explanation for this behavior seems correct.
 
Well I replaced the CCX controller just now. It took about an hour.

All in all, it's not a terribly difficult process. Don't kid yourself watching their "how-to" video and thinking you could take care of it in 10 minutes. I did that originally but thankfully Andy posted his experiences and level-set me from the start of the project tonight.

Nothing too difficult other than those lousy rubber strips. Wow is that inelegant. I used a non-toxic glycerine-based lubricant that was non-rubber and latex sensitive. I used a lightly-dabbed Q-tip and ran it along the channel between the strips. I see what Andy means about strong fingers and thumbs! I called over my humongous football center 15-year old son with NBA hands and had him slide them up there. He said it was no problem.

Cable routing was no big deal either. I used more cable ties than originally came with the bike and in the kit. I rerouted them the way I wanted and am actually more pleased with how it looks now. A little cleaner than before with plenty of clearance. Taking up the slack was relatively simple but I started at the back courtesy of Andy and just tucked them in the downtube.

I was surprised by how seriously strong the connection is between the cables for the torque sensor and motor. You have to really use brute strength to pull those puppies apart and the same for connecting them. I'm used to working on computers where jumpers and cables are lightly connected.

I did not like the ECU. It had a metal plate on it that was held on by tape. I knocked it off as I was installing it and it fell to the floor. I thought about just tossing it but it occurred to me that it was there to more tightly fit in the downtube. I'm also guessing that this has something to do with the CCS and CCX controllers both being the same physical unit but the CCX downtube is larger and therefore needs the extra width so it doesn't move. It was fine once I put the tape back on and placed it in the downtube. No rattles or movement whatsoever.

There were little differences in their guide and video and what I needed to do. There weren't three screws on the battery mount. There was the screw to remove the external cover and two allen wrench bolts. Initially I did not like how it went back together but after tightening it all down it seems to be fine. I would imagine that imprecision would have something to do with some of these battery connection issues. My battery doesn't move and never has exhibited any problems and I don't think it will after this ECU changeout either.

I put it all back together, fired it up, put it in Assist Level 0 and rode it. No motor. Hooray! It all worked! Can't check out Race mode because it's night and raining and I'm lazy!

I packaged up the CCS ECU and put it in the same box the CCX one was shipped in, slapped on the label Juiced sent me a couple days ago and it will be in the mail tomorrow heading back to them.

They did send me follow up emails asking about their support on this issue and I responded favorably. I believe I saw this issue crop up last week, tested it out last Thursday and here it is Wednesday of the next week and my bike is up and running on the new CCX firmware. And I should point out that the bike was operational the whole week and I may have never noticed the issue had I not seen it on the forum. I did think it was odd that S and R mode basically were the same. This should help considerably.

Oh, another pleasant surprise was that all my settings were preserved so they must be stored in the controller display. That was cool.

And lastly, THANK YOU ANDY! Without his advice I would be dead in the water. Starting at the back and routing cables forward was critical. Lubrication of the rubber strips was critical. And just knowing that somebody tried this previously gave me some confidence.

You shouldn't have to install another controller on a three week old $2500 bike but things happen and that's a chance I took with going with any online bike company. Juiced treated me well, responded to all communications immediately, sent the correct part the first time, and asked me how I was doing. That's what I wanted to see.

All in all I'm glad this happened. I know a lot about my CCX now and am confident I can fix most things. By fix I mean change out parts!

Thanks forum!
That's such good information, Jonathan. Thanks.
 
Thanks for the write-up @SirJonathan and @andyraf !

Juiced sent my controller to the wrong address, so I will have to wait a bit before I can install mine.

Meanwhile, I'm going to print out a couple of these posts and study them.
 
I did not like the ECU. It had a metal plate on it that was held on by tape. I knocked it off as I was installing it and it fell to the floor. I thought about just tossing it but it occurred to me that it was there to more tightly fit in the downtube.

The plate sounds like it's there to also serve as a heatsink transfering heat from the controller to the frame.


I did think it was odd that S and R mode basically were the same. This should help considerably.

R & S feel pretty similar to me. I've read that 34mph is supposed to be easily achievable with R, but I feel like I hit a wall around 32. 0 mode does result in no assist according to the display wattage reading so I think my firmware is ok.
 
The plate sounds like it's there to also serve as a heatsink transfering heat from the controller to the frame.


R & S feel pretty similar to me. I've read that 34mph is supposed to be easily achievable with R, but I feel like I hit a wall around 32. 0 mode does result in no assist according to the display wattage reading so I think my firmware is ok.

I don't think that's the purpose. It's thin and they wouldn't use double-sided tape if it was a heat sink. The tape would melt. I don't think the ECU gets hot at all but I can't positively state that as I haven't tested it. Also, it did make it a nice tight fit once it was in place - without it I would imagine it would move about some. Juiced can probably shed some light on it. It was really a poor afterthought. It literally fell off as I was shifting the ECU to get it into place. Edit - what would be quite funny is if that's how they are shipped and the entire ECU was covered that way for protection and Juiced simply forgot to remove this one plate. If that's the case then I am an idiot.

I topped out at around 30mph in S and R mode and that was putting considerable effort into it. I might be able to eke out another 3-4mph in R this time with the proper firmware. I'll come back and report my findings in a couple days when it dries out down here in the Southland.
 
The external aluminum plate on the controller is attached to the controller with thermal compound tape (as an added heatsink for more efficient dissipation)
 
Back