Carbon Fat Bike Build: Dengfu E06 With Bafang Ultra.

I squeezed 14S5P in the original housing. It is a tight fit and I had to move the on/off button to a different location.

View attachment 99181
No room for the BMS so I placed the BMS on top of the case.
In the frame a hole was made for the BMS.

View attachment 99182

Saw a guy that put 70 x 21700 in the frame but that takes a bit more creativity.
He hacked the frame and made his own box.

View attachment 99183


There is also a company that sells bigger batteries for the E06 / E09 but it sticks out the frame.
20Ah / 48v (960wh)

View attachment 99184View attachment 99185
Thanks Daxxie!!

Can you send me a link to the last battery? Couldnt seem to find it online.
Thanks!
 
Nevermind, found it.

 
I'm one of those people who thinks if a jobs worth doing, it's worth doing right, otherwise why bother.

I think the beauty of Dengfu are the options, you've been able to directly purchase a fully built, quality, carbon fibre, Bafang, fat tyre, modern geometry ebike and i've been able to buy the constituent parts and custom build, that's a business model i like and can support, end the tyranny of 'brands', which in bikes is a curious thing when you think of it, every part of a bike is made by a different brand, even the frames aren't made by the 'brand', you pay a premium for a decal essentially.

Which is why i'm self building this bike and posting here. The disdain from certain quarters on this forum for 'fat tyres' 'Bafang' 'DIY' or various other detours 'off brand' is disgraceful, this build is two fingers to those people and a rally for those of us who enjoy self building.

Those pictures of your paint job are interesting, look around in the background, doesn't look like a 'cheap' operation to me, don't see any barefooted ragamuffin types forced into labour or any unsound manufacturing processes, in fact it looks very professional.

The seat tube iirc is about 27cm before the curve (21 inch frame), it'll fit a dropper no problems but it wont go all the way down, this is an area i am yet to decide on.


This will be ridden hard and in bad weather which is why I'm paying attention to the paint job, it is another component on your bike, do it cheap and you'll regret it. It has a ceramic clear coat and graphene treatments, mud and water will just fall off and not scratch it up, the only way you'll marr this is to crash, is that what you mean ;p
You mentioned about dropper post depth have you looked at one up they had the shortest insertion depth in the industry last I new? I must say I do wish one could get motors from companies like Yamaha and others as a option. Oh and by the way there really should be more Fats out there.
 
Nevermind, found it.

That's certainly one option. From the pics it looks like it requires a pretty tall crown race spacer (30mm?) to use. That would depend on your suspension travel, tire size, etc, of course.

I'm working on a dual battery setup myself. I really wish Dengfu had included a third waterbottle mount screw...I think a strap on the front of it may be a good idea as I don't feel like drilling a hole in the frame just yet.
Grin Technologies out of Canada makes a product called a triple bob that reinforces the water bottle mount area with a plate attached to the water bottle screws and then secured by hose clamps. I used shrink wrap around the hose clamps to prevent the frame from damage. Definitely highly recommended for a carbon frame:


Electrify Bikes carries them if you’re in the US.
 
Yeah thanks, I had actually picked one of those up before I knew what I was going to do. Now that I'm making my own box and can put the holes where they need to be, it doesn't really solve anything. My concern would be the strength of the top insert that will get the brunt of the load with the battery cantilevered so far forward of it. It would make a much cleaner install with a third fastener to the frame, but until I'm ready to drill a hole and install one I guess I'll just use a strap on the front of the battery to help out.
 
Yeah thanks, I had actually picked one of those up before I knew what I was going to do. Now that I'm making my own box and can put the holes where they need to be, it doesn't really solve anything. My concern would be the strength of the top insert that will get the brunt of the load with the battery cantilevered so far forward of it. It would make a much cleaner install with a third fastener to the frame, but until I'm ready to drill a hole and install one I guess I'll just use a strap on the front of the battery to help out.
I'm so glad you have just posted this. I have not been receiving notifications.

wtf.jpg

I'll return once i've caught up.
 
Well, I finally have an answer. Looks to me like my frame has the same bevelled edges as yours, so people don't need to worry about there being different versions of the frame:

View attachment 94199

View attachment 94200
I noticed after looking at your frame what some differences are and why, it's the frame size. Mines a 21 inch and if you look at the headtube its longer (by 20mm according to the tech drawings) this negates the fork issues some people have had, mine arches down to the bottom cup, smaller sizes are more level, so that 20 mil gives me clearance.

What i like about your colour is it shows off the curves very well.
 
Haystacks, what rear shock do you have on the bike?

I've been looking for a coil shock for this bike and can't find one that fits in the frame.
It's an exaform 185x50 with a 1000lb coil, absolutely solid performer. The DNM afterburner will fit, using offset bushings will bring the geometry almost back in line.
 
You mentioned about dropper post depth have you looked at one up they had the shortest insertion depth in the industry last I new? I must say I do wish one could get motors from companies like Yamaha and others as a option. Oh and by the way there really should be more Fats out there.
Brandx ascend xl fits absolutely perfect, this could also be due to my frame size, think the seat tube is slightly longer, but i wouldn't hesitate to put one on a shorter frame.

b2 (2).jpg


Dropper post is a must IMHO with this frame, it's transformational, i probably use it almost as much as the brakes.
 
I haven't posted for a while as i wanted my thoughts and opinions to be informed by usage, not just saying 'this bike is fkin awesome' because i had just finished building it.

This bike is fkin awesome.

I've got about 350kms of hard off road use; i doubt these frames have been abused this much. SOLID frames. I'm 6'7 140kg and have properly hammered it, pair that with the ultra and bingo, this ain't a fatbike, its a muscle bike. Not beach muscle; Mountain muscle.

I'll create a proper post soon to draw together all my conclusions and sum up the journey so far.


That's some nice work there on the paint. Plan on ridin it though?
I would have that thing all marred up after one ride.
She likes it dirty.

Bike resting.jpg
 
Brandx ascend xl fits absolutely perfect, this could also be due to my frame size, think the seat tube is slightly longer, but i wouldn't hesitate to put one on a shorter frame.

View attachment 99605

Dropper post is a must IMHO with this frame, it's transformational, i probably use it almost as much as the brakes.
I would say anybody who hasn't tried a dropper should it can even be handy on a road bike!
 
I noticed after looking at your frame what some differences are and why, it's the frame size. Mines a 21 inch and if you look at the headtube its longer (by 20mm according to the tech drawings) this negates the fork issues some people have had, mine arches down to the bottom cup, smaller sizes are more level, so that 20 mil gives me clearance.
Ah, that makes total sense. Another advantage you have with the larger frame I'm running into now is you have a lot more room to put an extra battery on the downtube if you ever wanted to. It's going to be a tight squeeze for me!
 
That's certainly one option. From the pics it looks like it requires a pretty tall crown race spacer (30mm?) to use. That would depend on your suspension travel, tire size, etc, of course.

I'm working on a dual battery setup myself. I really wish Dengfu had included a third waterbottle mount screw...I think a strap on the front of it may be a good idea as I don't feel like drilling a hole in the frame just yet.
Grin Technologies out of Canada makes a product called a triple bob that reinforces the water bottle mount area. Definitely highly recommended for a carbon frame:


It's an exaform 185x50 with a 1000lb coil, absolutely solid performer. The DNM afterburner will fit, using offset bushings will bring the geometry almost back in line.
Haystacks, have you tried bottoming out the rear suspension to check the clearance with the 185x50?

Melody from Dengfu advised me against using a 184x50mm rear shock as they have had issues with the shock mounting piece breaking.

She also said that they changed the piece from carbon to aluminum, so that might have been the issue all along…

I’d much prefer a coil shock as I’ll be using this bike primarily in winter in temps down to -20C and I trust a coil (even a cheaper overseas one) to hold up better in the cold.
 
Yeah thanks, I had actually picked one of those up before I knew what I was going to do. Now that I'm making my own box and can put the holes where they need to be, it doesn't really solve anything. My concern would be the strength of the top insert that will get the brunt of the load with the battery cantilevered so far forward of it. It would make a much cleaner install with a third fastener to the frame, but until I'm ready to drill a hole and install one I guess I'll just use a strap on the front of the battery to help out.
A large battery can really put alot of stress on the bottle mount screws.

On my other fatbike, which has an aluminum frame, I put a massive 14S6P battery mounted directly to the frame and after a couple of light crashes/tipovers, I had almost ripped both rivets right out of the frame. I installed the triple bob and used three hose clamps with shrink wrap around the clamps to spread out the loading across the frame. Seemed to have helped greatly.

On a carbon frame, even with three mounting points, I’d be very nervous that using the bottle holes with a 6-10lb battery could lead to the frame cracking in the event of a tipover.

If it were me, I’d run the 2nd battery either in a backpack with a long lead wire, or in a padded frame triangle bag.

Just my 2c
 
Luckily the battery I'll be using is only a bit over 4 lbs. The box I'm making will be better than the Triple Bob, really making side loads a non-issue (should reduce pull-out loads on the fasteners to about 30% of what they would be with a triple bob and make the strap many times more effective than a hose clamp on the triple bob would be to a side load).
 
Luckily the battery I'll be using is only a bit over 4 lbs. The box I'm making will be better than the Triple Bob, really making side loads a non-issue (should reduce pull-out loads on the fasteners to about 30% of what they would be with a triple bob and make the strap many times more effective than a hose clamp on the triple bob would be to a side load).
Sounds like a great solution! Attach some pics when it’s completed!
 
Thanks, nothing complete yet but here's a preview of a small prototype chunk for fit check to give an idea what I'm doing:

IMG_20210912_010716247.jpg


IMG_20210912_014211466.jpg


Got the wiring done and it works...but damn it's tight down there! Just a bit more space would have been appreciated, Dengfu! :p

Here's a dumb question for you guys: What are you guys torquing your motor mount bolts to? The only specs I could find were for a Turbo Levo....
 
Yeah thanks, I had actually picked one of those up before I knew what I was going to do. Now that I'm making my own box and can put the holes where they need to be, it doesn't really solve anything. My concern would be the strength of the top insert that will get the brunt of the load with the battery cantilevered so far forward of it. It would make a much cleaner install with a third fastener to the frame, but until I'm ready to drill a hole and install one I guess I'll just use a strap on the front of the battery to help out.
What's the main reason why you're not ready to put a hole in the frame? Is it because you think you might change your mind down the road on the location and/or the setup? Because certainly it's not going to hurt the frame, especially if you epoxy in a a metal insert.
 
As the title suggests this thread is to document the building of a Dengfu E06 carbon fat bike from scratch, including painting and assembly.

The frame and motor were ordered on the 4th of April from 
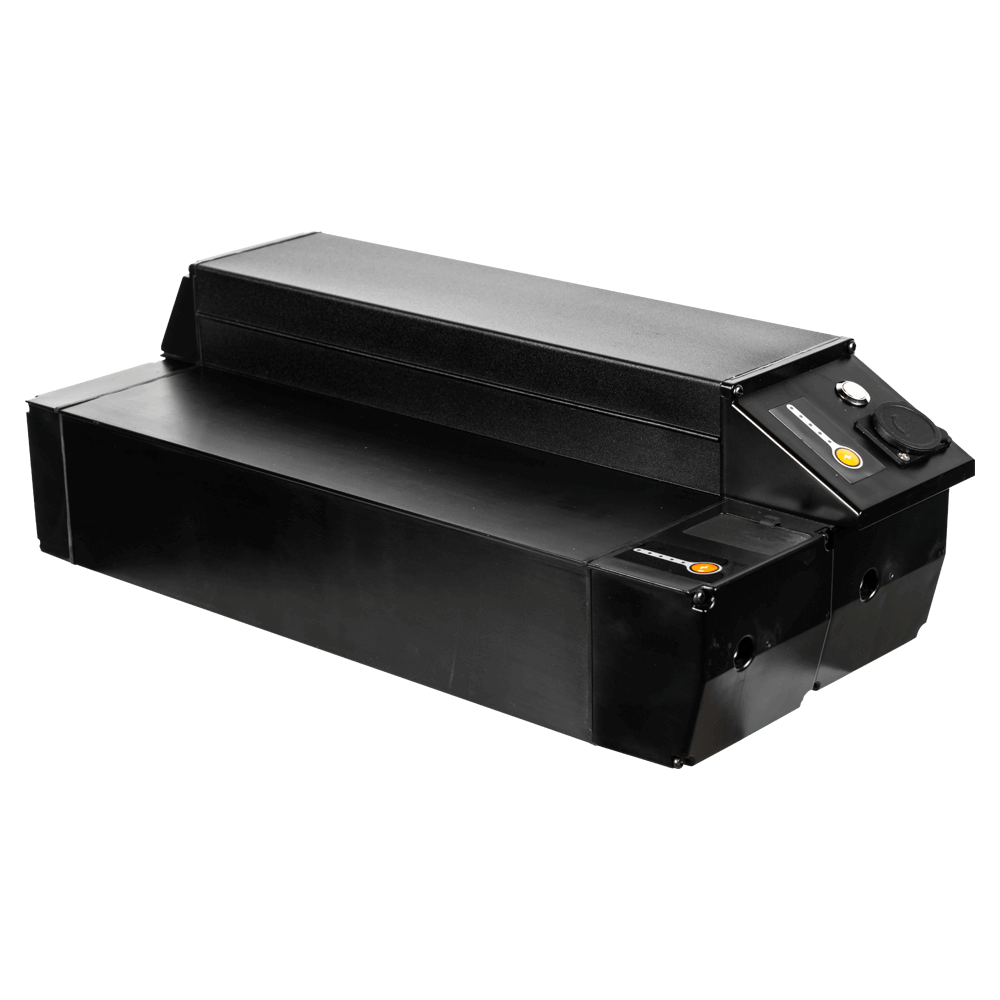
http://www.dengfubikes.com the process requires you email them and begin an order process, bit nerve wracking sending money directly but having observed many people having good interactions with Dengfu over the years, i took the plunge. The motor arrived 3 weeks later, the frame arrived in 4 weeks. The order consisted of frame, Bafang M620 kit, 2 battery CASES, headset, axle, stem (headset, stem and axle will not be used)

View attachment 88745

The frame is well built and finished, this is it in a 'raw' form.

In preparation for spraying the frame was disassembled and wet sanded using P400 sand paper, washed, dried and degreased with Isopropyl.

View attachment 88747

After a couple of weeks messing around ordering a compressor the company finally managed to send one that works properly, so today i have been able to start spraying.

This first coat is a carbon adhesion primer; its purpose is to ensure that whatever is sprayed on the frame, sticks and doesn't flake off.

This was applied using a LVLP spray gun with a 1.4 nozzle.

View attachment 88749

This was left to dry for 3 hours before i applied a 2k primer. I'm using a 2k primer to achieve a very smooth, super high gloss wet look finish as an end product.

This layer was applied using a 1.8 nozzle.

View attachment 88750

View attachment 88751

This layer will be wet sanded tomorrow with a super fine P1200 wet/dry sandpaper until it is glass smooth.

Also tomorrow i'll be having some battery parts 3d printed (i hope) i'll post how they turn out and what my battery plans are then.
What type of carbon adhesion primer did you use? Do you know of something in a rattle can that would work? I talked to a rep at Valspar, which is owned by Sherwin Williams, and he said that their Duplicolor primer would work, but for some reason, and I'm not sure why, the way he said it didn't convey too much confidence, so I want to ask around a little more.
 
Back