Carbon Fat Bike Build: Dengfu E06 With Bafang Ultra.

Haystacks

Well-Known Member
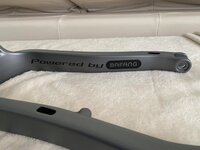
As the title suggests this thread is to document the building of a Dengfu E06 carbon fat bike from scratch, including painting and assembly.

The frame and motor were ordered on the 4th of April from http://www.dengfubikes.com the process requires you email them and begin an order process, bit nerve wracking sending money directly but having observed many people having good interactions with Dengfu over the years, i took the plunge. The motor arrived 3 weeks later, the frame arrived in 4 weeks. The order consisted of frame, Bafang M620 kit, 2 battery CASES, headset, axle, stem (headset, stem and axle will not be used)

20210507_130205.jpg


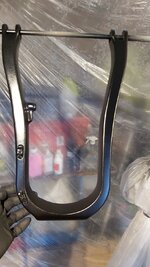
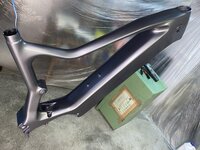
The frame is well built and finished, this is it in a 'raw' form.

In preparation for spraying the frame was disassembled and wet sanded using P400 sand paper, washed, dried and degreased with Isopropyl.

pre primer 1.jpg


After a couple of weeks messing around ordering a compressor the company finally managed to send one that works properly, so today i have been able to start spraying.

This first coat is a carbon adhesion primer; its purpose is to ensure that whatever is sprayed on the frame, sticks and doesn't flake off.

This was applied using a LVLP spray gun with a 1.4 nozzle.

primer 1.jpg


This was left to dry for 3 hours before i applied a 2k primer. I'm using a 2k primer to achieve a very smooth, super high gloss wet look finish as an end product.

This layer was applied using a 1.8 nozzle.

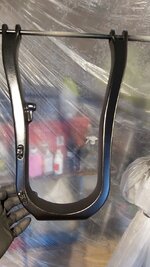
primer 2 both.jpg


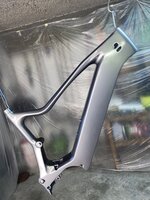
primer 2 frame.jpg


This layer will be wet sanded tomorrow with a super fine P1200 wet/dry sandpaper until it is glass smooth.

Also tomorrow i'll be having some battery parts 3d printed (i hope) i'll post how they turn out and what my battery plans are then.
 
I meant to add this picture as a visualisation of how i expect it to look, certain things are not right, fork steerer tube will be uncut, forks (will be manitou mastodon) dropper post will be installed and i'm not even set on the colour, hypershifts/chameleon paints seem passe, everyman and his dog has matt black/carbon look, not keen on neon/fluorescent colours, sooo....

bike.jpg
 
Thought i should update this thread as progress marches on.

Finished sanding down the primer, think it probably took 16 hoursish, went up to p3000, the thing was suuuuper smooth and shiny, it's very hard to capture on camera as primer is very flat.


20210527_202432.jpg


Today i have started the next phase of the paint job - the base coat. My thinking on the colour has developed since the previous post and i have decided to go for.........black, haha, this will be a high specular paint job hence using p3000 for the primer.

20210605_194455.jpg


20210605_194528.jpg


At this stage most bike manufacturers/sprayers would now clearcoat the frame but in order to achieve the super deep wet look im going for i now have to sand it again, going from p2400 to p3200 to p5000 maybe up to p10000.

I didn't go to the 3d printer last week so i don't have the parts to show the reconfiguring of the battery from 13s4p to 13s5p, i'll get that done next week then share the 3d files with the battery update.

Toodle Pip for now.
 

Attachments

  • 20210605_194528.jpg
    20210605_194528.jpg
    196.3 KB · Views: 294
  • 20210605_194528.jpg
    20210605_194528.jpg
    196.3 KB · Views: 320
Thanks for dropping by, i spotted your builds on another forum, think it might've been ES, good work, some beautiful bikes you've built :D

Sanding......sanding......more sanding. But........ It's definitely all been worth it; I started clearcoating yesterday, WOW, the black is mega deep and the clearcoat looks so wet you think it's going to run off, but its dry and cured, i was going to flow coat a final thin layer of clear but I'm not sure if it's necessary now.

How did you get on fitting the 70 cells in? The next phase for me is getting the battery built, i've just had a missed call from a 3d printing firm who are going to print the new end caps and cell holders, but thats for 65, so i'd be very interested to hear how you got on.

I'm going to hold off on posting pics of the cleared frame till i've put some lipstick on her (top/bottom cup, seat clamp) that will reveal where she's heading stylistically.

All in all it's going really well.

#DengfuFTW
 
#ProTip for anyone thinking of painting their bike when their Malamute is shedding, DON'T. I've more or less had to create decontamination areas and regimens to ensure no hair gets in, easier said than done.
 
It's great to see another E06 build! I can't wait for mine to get here. I won't be going through as much effort as you are though. I was initially planning to get the frame/motor/battery and build it up, but with parts availability issues (like, everything I'd want to put on the bike!) and back surgery scheduled for next week I took the easy way out and ordered the complete bike. I wanted something that was ready to ride quickly as possible--I figure I'll upgrade as parts become available and I feel up to it. Dengfu did send me a couple of paint pics though:

H919ca55aa87d4d9d8c0936b82fc296846.jpg


H56318b29b0344193b9d6191f4dc1e4d4Z.jpg


Going for a more "desert tan" look to blend in with the dry grass during hunting season....

Anyway, would you be able to give me an idea how much seat tube insertion the frame allows? My frame is a medium and I'm hoping I can stuff at least a 150mm dropper all the way down.

Been there done that.

I also found your build (there doesn't seem to be very many of them online compared with some other frames), very nice! It looks like you had a 27.5X4.5" Barbegazi on the rear in one of the pics--how much tire clearance do you have with that tire on there?
 
That's some nice work there on the paint. Plan on ridin it though?
I would have that thing all marred up after one ride.
 
It's great to see another E06 build! I can't wait for mine to get here. I won't be going through as much effort as you are though. I was initially planning to get the frame/motor/battery and build it up, but with parts availability issues (like, everything I'd want to put on the bike!) and back surgery scheduled for next week I took the easy way out and ordered the complete bike. I wanted something that was ready to ride quickly as possible--I figure I'll upgrade as parts become available and I feel up to it. Dengfu did send me a couple of paint pics though:
I'm one of those people who thinks if a jobs worth doing, it's worth doing right, otherwise why bother.

I think the beauty of Dengfu are the options, you've been able to directly purchase a fully built, quality, carbon fibre, Bafang, fat tyre, modern geometry ebike and i've been able to buy the constituent parts and custom build, that's a business model i like and can support, end the tyranny of 'brands', which in bikes is a curious thing when you think of it, every part of a bike is made by a different brand, even the frames aren't made by the 'brand', you pay a premium for a decal essentially.

Which is why i'm self building this bike and posting here. The disdain from certain quarters on this forum for 'fat tyres' 'Bafang' 'DIY' or various other detours 'off brand' is disgraceful, this build is two fingers to those people and a rally for those of us who enjoy self building.

Those pictures of your paint job are interesting, look around in the background, doesn't look like a 'cheap' operation to me, don't see any barefooted ragamuffin types forced into labour or any unsound manufacturing processes, in fact it looks very professional.

The seat tube iirc is about 27cm before the curve (21 inch frame), it'll fit a dropper no problems but it wont go all the way down, this is an area i am yet to decide on.

That's some nice work there on the paint. Plan on ridin it though?
I would have that thing all marred up after one ride.
This will be ridden hard and in bad weather which is why I'm paying attention to the paint job, it is another component on your bike, do it cheap and you'll regret it. It has a ceramic clear coat and graphene treatments, mud and water will just fall off and not scratch it up, the only way you'll marr this is to crash, is that what you mean ;p
 
I'm one of those people who thinks if a jobs worth doing, it's worth doing right, otherwise why bother.
I hear that! Not long ago I built an SN04 from the ground up with the same mindset:

IMG_20210105_171012258.jpg


DSC_3551.JPG


I absolutely love the finished product! I like it so much, that when I decided I "needed" an E-Bike, non-fat wasn't even a consideration. (OK, I promise I'll stop cluttering up your thread with pics now.... :) )

The disdain from certain quarters on this forum for 'fat tyres' 'Bafang' 'DIY' or various other detours 'off brand' is disgraceful, this build is two fingers to those people and a rally for those of us who enjoy self building.

Yes, it seems way too many "highly experienced MTB riders" once went for a 5 minute spin on a really cheap, 80's geometry fatbike with really low quality, heavy wheels and tires and think they know how "fatbikes" ride and handle. I think a ride on something like the SN04 above would change a lot of their minds.


The seat tube iirc is about 27cm before the curve (21 inch frame), it'll fit a dropper no problems but it wont go all the way down, this is an area i am yet to decide on.

Thanks! I know my 18" frame will have less, but if it's within 2-3 inches of that I think it'll be OK for my purposes.
 
She's pretty much finished and today i was going to post some pictures but unfortunately the quality is shocking due to replacing a broken phone with a differently broken phone o_O i'll do some decent ones tomorrow.

As i mentioned in an earlier post i'm using a re-engineered battery pack in order to accommodate 65 cells in a 13s5p configuration, the CAD image below gives an overview.

CAD.jpg


The re-engineered parts are the main endcap which had the charging port and power button moved to the top, new cell holders and a flush BMS plate..

The parts have been printed today.


batt 3.jpg


batt 1.jpg


cell 1.jpg


cell 2.jpg


We are also working on an extended 30ah-ish pack.

Due to the cell shortage i've had to source my own samsung 30q cells these will be sent along with the printed parts and hopefully in the next couple of weeks the pack will be back and the project complete and ready to ride :D
 
Ah, I saw the Dengfu on a Youtube channel and was really intrigued. Lucky you! I'm not really in a position to start a bike build :-(
By the way, are those 3D printed parts ABS?
 
Ah, I saw the Dengfu on a Youtube channel and was really intrigued. Lucky you! I'm not really in a position to start a bike build :-(
By the way, are those 3D printed parts ABS?
No it's some sort of experimental material. I thought i was going to a fairly standard 3d production place turns they're developing new materials for 3d printing including........ batteries. Apparently they will be printing them to fit inside EV chassis.
 
I'm one of those people who thinks if a jobs worth doing, it's worth doing right, otherwise why bother.


This will be ridden hard and in bad weather which is why I'm paying attention to the paint job, it is another component on your bike, do it cheap and you'll regret it. It has a ceramic clear coat and graphene treatments, mud and water will just fall off and not scratch it up, the only way you'll marr this is to crash, is that what you mean ;p
I was just looking yesterday how the paint of my frame is being beat up by the 1/2" SS cable I use to secure the frame to power poles, gas meters, cattle feeding troughs and the like. I coated the previous 3/8" SS cable in polyurethane handle dip, but it didn't prevent scratches all that well. Time to invest $5 in a can of high-viz green rustoleum and do some touch up. WIll look nothing like your black beauty. I suppose your frame will never touch a security device, being never left alone until it is secure in a locked steel door room somewhere safe. Under camera surveillance likely. My bike spends hours a week locked outside various retail stores or my volunteer job at a downtown church.
 
I was just looking yesterday how the paint of my frame is being beat up by the 1/2" SS cable I use to secure the frame to power poles, gas meters, cattle feeding troughs and the like. I coated the previous 3/8" SS cable in polyurethane handle dip, but it didn't prevent scratches all that well. Time to invest $5 in a can of high-viz green rustoleum and do some touch up. WIll look nothing like your black beauty. I suppose your frame will never touch a security device, being never left alone until it is secure in a locked steel door room somewhere safe. Under camera surveillance likely. My bike spends hours a week locked outside various retail stores or my volunteer job at a downtown church.
So naughty @indianajo ;p I'm actually more from your sort of thinking tbh, i've got 2 Heath Robinson builds - a g060 hub and a bbshd, i firmly believe in DIY/Self build which is why i did this bike, i was and am sick to death of how certain groups look down on self building and believe the only way is to go for their brand, in my world whatever you ride your welcome. So i decided to build this to highlight DIY is far more than a cost saving thing; It's innovation and self-reliance. Sell a man a bike he can ride, teach a man to build a bike the whole world rides. ;)

In terms of leaving this thing unattended your absolutely correct, Tikaani - my dog, would drag it around and completely screw it up, if i'm on a bike the dog is with me, in fact wherever i am the dog is with me.
 
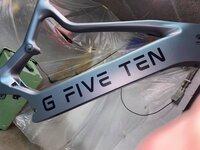
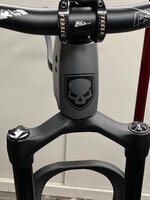
Ladies and Gentlemen, i would like to introduce to you Anarki:Rebel

Albeit unfinished and unwashed i took the glimpse of the sun to take a few pictures. When the battery arrives the cockpit and cables will be tidied.

She's currently in summer mode ie 'Fat front' 4.8 on the front 3.8 back,, this is the fatbike equivalent of the mullet there is also 'Full Fat' 4.8x4.8 and 'Fat Back' 3.8x4.8

Anyway here goes.


20210629_164851.jpg


20210629_165023.jpg


20210629_165122.jpg


20210629_165350.jpg


Very pleased with how it's going, now the last bit - battery o_O
 
Beautiful bike!

Whats the thinking behind the mullet?
It digs in better in good weather, the float is of little use in dry conditions but the added traction and the slightly more nimble feel on the back end is worth it, less so in winter with the slop i deal with, the Surly bud on the front is front specific tread no washouts with those so they're always on smashing over whatever gets thrown at it, i have dillengers for super icy weather.
 
Back