Nick S
New Member
I received my new 2016 Haibike Sduro Trekking RC via UPS yesterday. The bike seem well packed, and as requested, the two accessories I added to my order were already installed on the bike (Ergon GP-1 grips, and a BodyFloat suspension seatpost with the correct springs for my weight).
I assembled the bike about an hour ago, and thought I'd run quickly through the steps in case this helps another member of the forum. Much of this info may apply to other models. The tools I used were a variety of metric allen keys (probably 2.5, 4, and 5mm), a flat head screw driver for the spoke reflectors, and a medium sized Phillips head screwdriver for the fender tab and front light screws.
I had my wife help me with removing the bike from the box (I didn't want to destroy it in case I needed to send the bike off for a warranty repair), mostly just to grab the loose handlebar and make sure I put no strain on the wires. The front wheel was fitted into a cardboard sleeve next to the bike, and had plastic pieces fitted to either side to protect the brake rotor, as did the rear wheel (which also had a plastic piece protecting the derailleur). Unlike many online videos I watched, the stem was attached to the handlebars rather than the headset, and a protective cardboard tube was placed on the headset between the top cap and the spacers.
My order of assembly was to first remove the top cap and cardboard sleeve from headset, then attach the stem and handlebars. Rotate the fork until it's straight, then tighten each of the two bolts on the stem a bit at a time until very snug, then snug down the top cap.
I then inserted the skewer through the front wheel, with the clamp on the disc brake side, inserted the loose spring onto the skewer with the small end towards the wheel, and loosely attached the nut. I then inserted the front wheel into the dropouts. It would have been very helpful to have someone to help steady the bike while doing this, but you can do it alone if you're careful or have a bike repair stand. Note: My bike shipped with a plastic piece inserted into the front disc brake caliper. Remove this before attempting to install the front wheel. After aligning the rotor into the calipers and seating the front wheel, I rotated the nut until snug, backed off a 1/2 turn, and closed the skewer clamp. It should be very firm to close, and leave a mark in your hand after closing. If it closes too easily, open the clamp, snug the nut slightly, and try again.
I then attached the kickstand, after extending the sliding foot 1/2 way and snugging the screw tight to hold it in that length. This uses two stainless machine bolts that were in the same plastic bag that the reflectors were enclosed in, I believe these were 4 or 5mm allen head; just look for the two mounting holes on the rear left of the bike (farther back than you might expect; this kickstand happily is well clear of the cranks. Some force is required to install the bolts, probably because of paint on the frame.
With the kickstand on and deployed, I then attached the front SKS fender; this shipped rubber-banded to the front wheel. This was the one part of assembly I was unsure about, and called the shop for advice on how to mount. The person I spoke to kindly emailed a photo and confirmed that the fender stay connectors just friction fit on the bottom. First, insert the fender from the rear of the wheel forward, and use the wide Phillips head screw to attach the fender tab to the center hole on the back side of the fork arch. The screw was in the same bag with the reflectors. Then, back out the two stainless machine bolts from the braze-ons on either side of the fork about 1/2 way, until you have sufficient clearance to snugly pop the connectors on the end of the stays onto the bolt heads. I did need to loosen the tiny allen key nuts on the stay side of the connectors slightly to pull the stay out maybe 1mm on either side to provide sufficient clearance for the tire to avoid rubbing, then re-tightened. Make sure the tire rotates freely and adjust either the stays or the center tab if necessary.
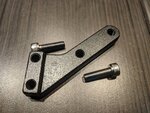
The other slightly confusing bit, because I'm a bit of a dunce, is how to mount the front light. I first thought the Suntour branded panel on the front of the fork arch was just snapped in, but couldn't get it to come off by prying (happily I gave up before snapping it). You need to remove the two Phillips head screws from the rear of the fork, on either side of where the front fender is attached. Save those screws; you'll place the light bracket where the panel you just removed went, and use those screws to attach the front light from the rear. Use an allen wrench to loosen the pivot of the front light, and adjust upward to illuminate the right location.
The rest was very simple; just remember that the left pedal (labeled on the end of the threaded piece that goes into the crank) is reverse threaded. The spoke reflectors use the two white plastic pieces to attach; place the reflector on with a spoke in the vertical groove in the center, then insert one of the white plastic pieces, and rotate clockwise with a flat head screw driver to attach. The coin-cell CR2032 battery inserts into the display with the positive (labeled) side facing you; I found a US quarter worked well to loosen and attach the battery cover.
After carefully checking the bike for any transport protection pieces to remove and making sure the brakes worked, I took it for a spin, without the battery inserted. If I had any trouble shifting, I didn't want the additional torque of the motor to cause damage. Happily, the bike shifts up and down smoothly, with no grinding or clashing noises, and the brakes work smoothly without squealing.
It took me maybe 1.5 hours to finish assembly, but I'm pretty slow and methodical and this was the first bike I've ever "put together". That includes puzzling over the front fender for maybe 20 minutes and a 10 minute phone call to the shop. I hope the info above saves someone a little time and confusion. If I was to do it again, I don't think this would take more than 20-30 minutes. There's no reason you need to pay a bike shop to assemble, I'd save that money and pay for a tune-up / fitting session.
I assembled the bike about an hour ago, and thought I'd run quickly through the steps in case this helps another member of the forum. Much of this info may apply to other models. The tools I used were a variety of metric allen keys (probably 2.5, 4, and 5mm), a flat head screw driver for the spoke reflectors, and a medium sized Phillips head screwdriver for the fender tab and front light screws.
I had my wife help me with removing the bike from the box (I didn't want to destroy it in case I needed to send the bike off for a warranty repair), mostly just to grab the loose handlebar and make sure I put no strain on the wires. The front wheel was fitted into a cardboard sleeve next to the bike, and had plastic pieces fitted to either side to protect the brake rotor, as did the rear wheel (which also had a plastic piece protecting the derailleur). Unlike many online videos I watched, the stem was attached to the handlebars rather than the headset, and a protective cardboard tube was placed on the headset between the top cap and the spacers.
My order of assembly was to first remove the top cap and cardboard sleeve from headset, then attach the stem and handlebars. Rotate the fork until it's straight, then tighten each of the two bolts on the stem a bit at a time until very snug, then snug down the top cap.
I then inserted the skewer through the front wheel, with the clamp on the disc brake side, inserted the loose spring onto the skewer with the small end towards the wheel, and loosely attached the nut. I then inserted the front wheel into the dropouts. It would have been very helpful to have someone to help steady the bike while doing this, but you can do it alone if you're careful or have a bike repair stand. Note: My bike shipped with a plastic piece inserted into the front disc brake caliper. Remove this before attempting to install the front wheel. After aligning the rotor into the calipers and seating the front wheel, I rotated the nut until snug, backed off a 1/2 turn, and closed the skewer clamp. It should be very firm to close, and leave a mark in your hand after closing. If it closes too easily, open the clamp, snug the nut slightly, and try again.
I then attached the kickstand, after extending the sliding foot 1/2 way and snugging the screw tight to hold it in that length. This uses two stainless machine bolts that were in the same plastic bag that the reflectors were enclosed in, I believe these were 4 or 5mm allen head; just look for the two mounting holes on the rear left of the bike (farther back than you might expect; this kickstand happily is well clear of the cranks. Some force is required to install the bolts, probably because of paint on the frame.
With the kickstand on and deployed, I then attached the front SKS fender; this shipped rubber-banded to the front wheel. This was the one part of assembly I was unsure about, and called the shop for advice on how to mount. The person I spoke to kindly emailed a photo and confirmed that the fender stay connectors just friction fit on the bottom. First, insert the fender from the rear of the wheel forward, and use the wide Phillips head screw to attach the fender tab to the center hole on the back side of the fork arch. The screw was in the same bag with the reflectors. Then, back out the two stainless machine bolts from the braze-ons on either side of the fork about 1/2 way, until you have sufficient clearance to snugly pop the connectors on the end of the stays onto the bolt heads. I did need to loosen the tiny allen key nuts on the stay side of the connectors slightly to pull the stay out maybe 1mm on either side to provide sufficient clearance for the tire to avoid rubbing, then re-tightened. Make sure the tire rotates freely and adjust either the stays or the center tab if necessary.
The other slightly confusing bit, because I'm a bit of a dunce, is how to mount the front light. I first thought the Suntour branded panel on the front of the fork arch was just snapped in, but couldn't get it to come off by prying (happily I gave up before snapping it). You need to remove the two Phillips head screws from the rear of the fork, on either side of where the front fender is attached. Save those screws; you'll place the light bracket where the panel you just removed went, and use those screws to attach the front light from the rear. Use an allen wrench to loosen the pivot of the front light, and adjust upward to illuminate the right location.
The rest was very simple; just remember that the left pedal (labeled on the end of the threaded piece that goes into the crank) is reverse threaded. The spoke reflectors use the two white plastic pieces to attach; place the reflector on with a spoke in the vertical groove in the center, then insert one of the white plastic pieces, and rotate clockwise with a flat head screw driver to attach. The coin-cell CR2032 battery inserts into the display with the positive (labeled) side facing you; I found a US quarter worked well to loosen and attach the battery cover.
After carefully checking the bike for any transport protection pieces to remove and making sure the brakes worked, I took it for a spin, without the battery inserted. If I had any trouble shifting, I didn't want the additional torque of the motor to cause damage. Happily, the bike shifts up and down smoothly, with no grinding or clashing noises, and the brakes work smoothly without squealing.
It took me maybe 1.5 hours to finish assembly, but I'm pretty slow and methodical and this was the first bike I've ever "put together". That includes puzzling over the front fender for maybe 20 minutes and a 10 minute phone call to the shop. I hope the info above saves someone a little time and confusion. If I was to do it again, I don't think this would take more than 20-30 minutes. There's no reason you need to pay a bike shop to assemble, I'd save that money and pay for a tune-up / fitting session.


")