BarnBoy’s 24V EVG Battery Improvement Project…

BarnBoy

Well-Known Member
Region
USA
City
Pleasanton, CA
Hello folks,

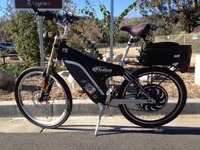
Before you ask “WHY?” or comment negatively understand that this bike and I have done many-many miles, so I do feel rather attached to her. “HER” because of the Cranberry Red color; and my wife allowed me to purchase her back in 1999 to commute to work from the ACE train station in San Jose to Silver Creek Valley Road (>12 miles). I have all of the original tools, bags, pump and Service Manual with schematics. I even found my logbook showing over 8.3K miles ridden on her using x4 different SLA sets. Rain or shine, she never let me down; except those darn SLA batteries would barely last a year. Yes, the 24V EGV is too slow, thus why I have a WW Hydra XL on order. But until the molds for my new frame get done and bike in my hands, I really wanted to see if I could get my Cranberry Girl on the road and running again….

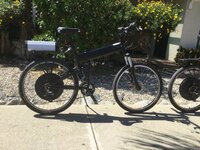
So today I took her out of the barn and removed probably 16 years of cobwebs and dust. She is still filthy and will get a sponge bath soon, but I needed to see if she still “WORKS” before I would consider purchasing another pile of batteries. Attached a 24V bench supply I have, limited current to 3A (supply max!); she fired right up with some WELCOME BEEPS and turned the rear wheel just fine. Horn and lights all work too!!! Time for next step; DA BATTERIES….
EVG at the barn.jpg

Having read every post on this EVG Forum, I know this post is going to be DARK, unread and unloved. But just in case there is some other fool out there like me that wants to get a simple & safe ebike working again, hopefully you will have an answer/solution below. I really appreciate the inspiration from the writings of @kauaikit, @Court and others to motivate me to start this project. I do hope it turns out sucessful…

First step was to open the old EVG 24V battery box and remove the old 12V 12Ah SLA (sealed lead acid) cells. These buggers weigh approx. 7.7lbs (3.5kg) or 15.5lbs (7kg) together. I remembered I would almost run out of battery as I would ride home from the ACE station. So, GOAL#1 – REDUCE BATTERY PACK WEIGHT (half?) & GOAL #2 – IMPROVE AMP-HOUR.

Today was really fun, as I was rummaging in the barn for all the EVG things, I found a receipt for my first purchased EVG battery replacement pack. Sadly, I was told from the dealer in Santa Cruz it was to be a new one. Some $300 w/ shipping and several weeks later, my first replacement battery pack arrived. It was pretty obvious it was a rebuild unit with all the scratches and pry marks. That lesson educated me to buy batteries from the local brick and mortar. I stopped in to the local Batteries Plus Bulbs today and they offered me a $60 unit, where I need x2 and hit with tax, core charges, etc. That would have been approx. $150 and give me the same performance I had over 20 years ago. Giving GOAL#3 – Cost less than $300. I found a 15Ah SLA on Amazon x2 for <$60 and free shipping. Brick & Mortar is truly dead….

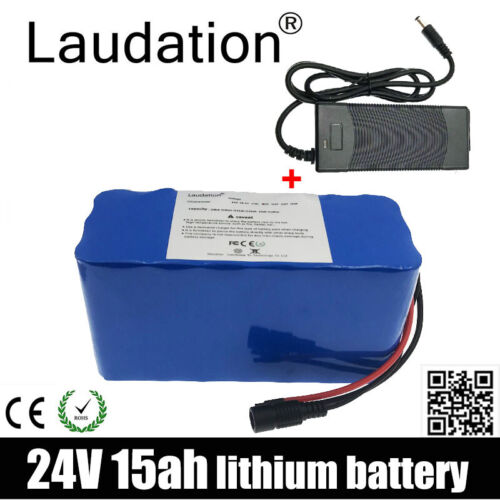
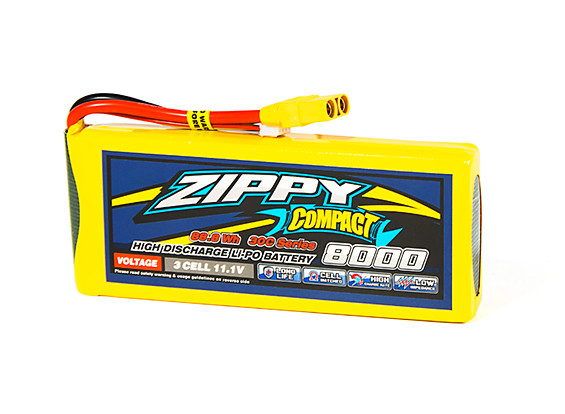
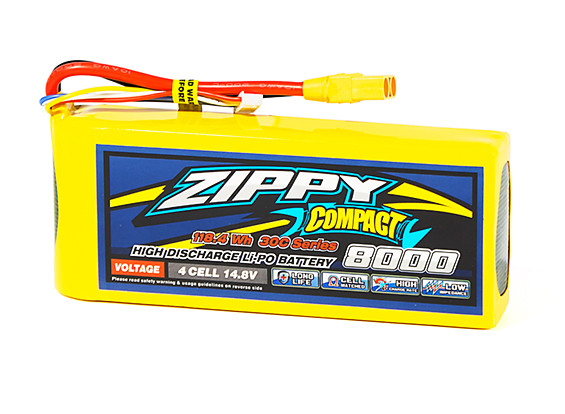
The EVG 24V battery box has two 150x100x100mm compartments for the SLA. I looked at the LiPo RC batteries as per a post in this forum, but they are VERY EXPENSIVE and really need a super special charger to not IGNITE! I saw another forum post where a 36V EVG guy was going to try an array of 18650 cells (15x7), so that gave me an idea to look for maybe a 7s7p or 6s6p pack. I’m taking the sage advice from @kauaikit to do a 6S pack as 7s might be too much voltage (29.4v). To further, I used the bench supply to test the battery warning lights, they seem to match Lithium Ion curves, but I do plan to add a battery measurement display. So today I placed a purchase for x2 6s5p 18650 packs. They measure approx. 110x100x70mm, weigh less than 1.5kg, have integral BPS and come with a small computer brick like AC powered battery charger. Here is my plan, and I would love some advice from battery people like @greeno to make sure I will not be starting fires in the barn as a result of this ½-baked plan! I plan to hard wire parallel both 6s5p packs together with 15A auto blade fuses from the two packs positive terminals. I believe there is enough room in the EVG box to include the two AC powered battery chargers as the EVG pack has a C13 AC port. My question to the forum is, can I just plug in a charger to each battery knowing that the two chargers will be in parallel too. Any issues doing this?? Or do I need to think of paralleling the two packs with x2 current diodes to isolate the chargers??? Also placed on order are new brake pads, tires, and tubes.

So if this works, I will have a new 56Ah, 24V (1.3kWh) battery pack for the Cranberry Girl. That is more than 4 times the range and way less than 1/2 the weight (4kg or 8.8lbs savings!). Including the brake pads, tires & tubes, I am right at $300....

More to come….
-BB
 
Way over my pay grade BB. I think its a fantastic idea and I encourage you to go for it. I hope you have several conversations with greeno though. Or maybe include Mister Roberts if you can find him. You may have thought of this but your bike is a collector's item. Fully restored and electrical system upgraded it may be worth a lot more than you paid for it. Hope you have fun ... and do not burn your barn down. :)

I suppose you would want to keep everything else original equipment but for riding purposes I think I'd put another saddle on it. 🤣 ( don't toss it though )
 
UPDATE!
Thank you for the positive encouragement! I really expected to talk to a wall....

Well something happened and the 6s5p packs I thought I bought yesterday appear to contain unobtainium as the order was not accepted. So off to eBay as I didn’t like the wheel chair packs from Alibaba. Unfortunately I couldn’t find two of the same Ah spec packs so got a 28Ah Okoman with 2A charger and 3 year warranty for $115.30 and a 33Ah NaiLiTe with 2A charger for $107.61. Thus <$215 for batteries and chargers at 61Ah (1.46kWh).

The theoretical max current draw per series cell is practically nothing (2A) and I expect it is actually much less. If I had to do this again, I would consider making my own pack with higher capacity cells and a 6s5p battery build kit & BMS ($23 each) and a bulk pack of 9900mAh cells (<<$100 total). That would have made a 99Ah (2.37kWh) pack! Another Rabbit Hole, another day.... (don’t have @greeno tools!)

With the SLA packs I would start by getting almost 20 miles on a charge. I’m guessing/hoping my new packs will give me almost 100 miles per charge on the Cranberry Girl. Too bad the charge time is going to be 17 hours! 😵

As of now, I’m going to use a bridge rectifier (I have them!) to isolate the two batteries from each other and use the diodes to balance the loads from the two packs. The diode drop will also give a bit safer EVG battery monitor as the actual battery voltage will be higher. I’m also looking at another option from @pushkar that might help in this project.... (TBD!)

Stay tuned!!!
-BB
 
Hello BB......ummm, you want to go with a 7s (7x3.7=25.9v or charged is 7x4.2v=29.4). :)

Personally I've been using the Tesla Mdl 3 21700 cells to have custom battery packs made up.

You will want to "cut-out" the center divider in the battery box.

To go cheap, this 24v3p 15ah battery will fit nicely in the factory battery case. A bit of electrical wire connecting, and use your stock charger (adjustment needed?) with computer cable. What distance do you ride?


Or you can go to a 24v4p 20ah battery by the same manufacturer.


I forget the charge level of the stock charger, but it is slightly adjustable! Well, if you know where the adjustments are.

You are only around 380 miles away, as I'd more than assist you to get this "classic" up and going. Though 11mph is much to slow, for me! :)

Kit
 
Last edited:
Hi @kauaikit - Thank you for the suggestions. Your previous comments about the 25V caps on the controller got to me. I also thought I read where you said anything above 29.2V would more than likely kill it but maybe let the lights and horn work. So a max 7s would be 29.4V @4.2V (too close to danger your zone!). When I connected the bench supply to the Cranberry Girl the other day, I found the EVG meter went from YEL to RED at approx 20V; that is pretty close to a 6s pack 20% point. I could fit x2 7s5p packs (130x100x70mm), but went with x2 6s5p packs (110x100x70mm). Was also afraid that cutting out the center bar would weaken the box...

I would consider a 36V upgrade if you have or know where I can get the controller and stuff. I know she is slow. But slow is better than no go. And the fork doesn’t have disk mounts...

Have you parallel connected battery packs and/or chargers? I rummaged in my lab and found blade fuse holders and a 400A common cathode Schottky diode pack that should share the load to the two cells and not need a heat sink. Will test with a temp sensor on the first few rides and modify if needed....

Will probably use a bag and a can of expanding foam to hold it in the battery box all snug and safe. But only after testing and making chargers visual LED holes...

Day dream plans. Advice welcomed!!!
-BB

PS- will be a bit of time before the next update. Plan to break her down for deep cleaning, inspection and major lube. Tires, tubes and rim tape are a few Amazon days out. All part of a proper restoration...
 
Hey BB...it's safe to cut out the center divider, which was only for the SLA batteries. The 36v version doesn't have this divider. And it would have been safe to go w/7s packs. Voltage is speed. :)

So, why so big a battery (10p)? To parallel batteries, you just need the same voltage, different ah is ok. NO diodes or heat sinks needed. And No need to "foam", as the batteries will not move much, maybe just simple pieces of foam to cushion a bit.

I've collected used/donor complete 36v electronics, including their 36v hubs (spares) to someday upgrade the 24v ebikes, though you can still use your 24v rear hub. The 24v hubs are wound for speed, whereas the 36v for torque. The 24v hubs can take 12s-14s voltage. And speed is increased to around 24mph, though no torque. :cool:

I currently have around 20 EVG ebikes, and been riding them the last 10+ years, in all of their configurations in the collection. With the 36v PE (Police Edition) being the most desirable and rarest. I have 6. I've upgraded two with the Golden Motor MP4 rear hubs/throttles/dash display (internal sine-wave controller), and retained the stock controller to power the front/rear lights, brake light (retained left brake handle) & horn. The original battery case houses either a 12s4p or 13s4p battery pack using Tesla Mdl3 21700 cells. Level speed is 28mph+'ish. I've upgraded the rear freewheels to 11t-30t & the front chainring to a 48t (slight case trimming) to assist in the higher speed PAS. The MP4 hubs are dead silent. The upgraded MP5 would now be the rear hub of choice. Nice.

A fully stock EVG 36v ebike with these batteries are 21-22mph level, though I have tried 14s (52v) for speeds to 26mph, so it appears the stock 36v sealed controller has 60v capacitors. It has torque, though a bit noisy. You too will want to remove the 36v electric motor from hub to micro laser weld the one-way bearing as it is only pressed in. As donut eating cops (PE version) tended to hit the full throttle & then spin the bearing & going nowhere fast. :)
 

Attachments

  • 1:6:14 Padua#2 MP4.JPG
    1:6:14 Padua#2 MP4.JPG
    895.7 KB · Views: 499
Hi Kit (@kauaikit) and THANKS for all the info!! I’m a bit lost with your last comment with the laser micro weld and pressed in bearing bits. I swear I was able to clean and repack the bearings on the rear hub at 5K miles (so says my log book). It was a bitch and took time, but swear the axle was old school threaded rod-axle ends and it took me a bit to get the bearing pre-load all good to smoothly roll.... (TBD soon when I get tubes and rim tape, will check and repack wheels!)

WOW, 20 of these old rides! That is a monster of a hub motor on that PE unit you show. You asked a good question as to why go with a x2 5p setup (10p). With the 12Ah SLA I got maybe 20 miles per charge at first, but by month 7-9 on my commutes, if I didn’t work hard during the ride home, I ran out of juice on the last 1-2 mile stretch (total shut down). Most times would only use thumb assist to get up to speed or go up hills. Thus my desire to go as far as possible and never worry (100 miles?). One test in this project will be an endurance distance test… (one of my listed goals above was more Ah!) and post in the other forum threads of said long rides!!! Plus, I could fit it, not modify the box, and still have room to spare to include the chargers…. (same with x2 7s5p 18650 packs)

With your 7S packs how do you know the battery charge and discharge levels?

I have not looked at the geometry of the 21700 cells and how that might fit. But this last discussion of ours did spark my interest in a battery welder…. (some crazy stuff!)

The diodes will allow me to use both battery pack chargers (2A) to charge the 61Ah (1.46Wh) combined packs. There is concern that paralleling the chargers with direct paralleled packs can be a problem (might let the magic smoke out!). This way the diodes will isolate the batteries and allow the chargers to charge only the pack it came with….

I was originally thinking to cut out foam inserts to protect the battery BMS and packs like you suggested. A buddy of mine has the custom packing foam experience and offered to do it for me. My first tests (charging/use thermals, distance/Wh guesstimates, voltage/distance, plus more!) will be with simple foam cutouts before I would take his offer….

I think I will keep her at 24V. Maybe I could abuse you for your spare 24V parts you do not want! I’m sort of old fashioned and like to keep things as original as I can. Thus, even my 1941 Ford Express ¾ Ton still has the 6V positive ground and flat head V8, all recently rebuilt… (FYI-co-pilot is Brandy!)
Dog of war....jpg

I found while cleaning, the plastic on the battery box is rather brittle so will have to make some small 5-minute epoxy repairs. I removed the charger (PCB thing below), straightened the regulator cooling plate, and again found 22 years of dust and spiderwebs. Because I broke a plastic tab on the charging cover, I decided not to remove the cooling plate from the box to straighten. On the charger cover, you can see the exposed RED/BLK AC wires that will get changed to the pack charger AC line cords. I plan to use the XT60 connectors to tie the batteries, diodes and this box together. Once I get the batteries….
Bat Box.jpg

More to come….
-BB
 
Hi Kit (@kauaikit) and THANKS for all the info!! I’m a bit lost with your last comment with the laser micro weld and pressed in bearing bits. I swear I was able to clean and repack the bearings on the rear hub at 5K miles (so says my log book). It was a bitch and took time, but swear the axle was old school threaded rod-axle ends and it took me a bit to get the bearing pre-load all good to smoothly roll.... (TBD soon when I get tubes and rim tape, will check and repack wheels!)

WOW, 20 of these old rides! That is a monster of a hub motor on that PE unit you show. You asked a good question as to why go with a x2 5p setup (10p). With the 12Ah SLA I got maybe 20 miles per charge at first, but by month 7-9 on my commutes, if I didn’t work hard during the ride home, I ran out of juice on the last 1-2 mile stretch (total shut down). Most times would only use thumb assist to get up to speed or go up hills. Thus my desire to go as far as possible and never worry (100 miles?). One test in this project will be an endurance distance test… (one of my listed goals above was more Ah!) and post in the other forum threads of said long rides!!! Plus, I could fit it, not modify the box, and still have room to spare to include the chargers…. (same with x2 7s5p 18650 packs)

With your 7S packs how do you know the battery charge and discharge levels?

I have not looked at the geometry of the 21700 cells and how that might fit. But this last discussion of ours did spark my interest in a battery welder…. (some crazy stuff!)

The diodes will allow me to use both battery pack chargers (2A) to charge the 61Ah (1.46Wh) combined packs. There is concern that paralleling the chargers with direct paralleled packs can be a problem (might let the magic smoke out!). This way the diodes will isolate the batteries and allow the chargers to charge only the pack it came with….

I was originally thinking to cut out foam inserts to protect the battery BMS and packs like you suggested. A buddy of mine has the custom packing foam experience and offered to do it for me. My first tests (charging/use thermals, distance/Wh guesstimates, voltage/distance, plus more!) will be with simple foam cutouts before I would take his offer….

I think I will keep her at 24V. Maybe I could abuse you for your spare 24V parts you do not want! I’m sort of old fashioned and like to keep things as original as I can. Thus, even my 1941 Ford Express ¾ Ton still has the 6V positive ground and flat head V8, all recently rebuilt… (FYI-co-pilot is Brandy!)
View attachment 85321

I found while cleaning, the plastic on the battery box is rather brittle so will have to make some small 5-minute epoxy repairs. I removed the charger (PCB thing below), straightened the regulator cooling plate, and again found 22 years of dust and spiderwebs. Because I broke a plastic tab on the charging cover, I decided not to remove the cooling plate from the box to straighten. On the charger cover, you can see the exposed RED/BLK AC wires that will get changed to the pack charger AC line cords. I plan to use the XT60 connectors to tie the batteries, diodes and this box together. Once I get the batteries….
View attachment 85322

More to come….
-BB
Nice....I'm too a bit 'ol school myself, and drove a '40 Ford PU when I was 16yo. :)

If you like old trucks, you might enjoy what's in my backyard. As my father had a passion for collecting early trucks, and even had a nice business leasing them to the movie studios....years ago. I'm in fact in a TV commercial for Firestone tires w/Jimmy Stewart driving my pops '13 International PU while wearing a period style vest with a name of some actor Chuck Bronson and a derby hat! :)

I'm 7 miles East of the L.A. Fairgrounds (91763).

So, did you find the "fine tuning" screws on your 24v charger?

I've got 3 red 24v ebikes, with two being the touring models with full fenders, rear rack & bags. I was going to set up a 7s4p (19.2ah) 21700 pack (w/XT90 female spark arrestor connector) & slip it inside a stock 24v battery case, with a male XT90 wired to + & - power and charging wires, and then adjust the charger to go 29.4v. Though it's on the "List to do". You do know what that little capacitor in the corner is for, right?

Once you start using the 21700 cells for your ebike battery packs, there is no turning back! SLA voltage drops to fast, to heavy, and just not enough ah.

The 24v ebikes didn't have an issue with the one-way bearings, just the 36v versions.

I also collect the '05 Wavecrest Labs Tidalforce ebikes, designed and assembled in the USA (BK in '05). I have 12. Level speed @ 28mph, and a slight downhill @ 37+mph & pedaling. Which is what I did today riding a '05 S-750x (11s4p 21700 pack). It's the ebike in the profile photo.

My email is [email protected] which might be a better way to communicate.

Kit
 

Attachments

  • RtSide#1245.JPG
    RtSide#1245.JPG
    782.6 KB · Views: 394
LMAO- So I did a search. I forgot how busy Jimmy was back then for Firestone.... (what one was you?)

So cool, I am not crazy thinking I did a grease job on the rear before. Man you had me scared! Bad enough my kids & wife are telling me I forget stuff just like I did with my dad...:rolleyes:

I do not have the batteries yet, so I don't have the chargers either. But why would I want to adjust them from their factory trim? To charge the packs to 80% -vs- 100%?? Sorry again, I'm easily confused....

So how do you measure/monitor your battery/batteries voltage/percent while riding and having fun? I doubt the EVG monitor works for your 7s packs, and similar for the 36V models on bike monitor. I think that is something I really have not fully resolved in my head (Individual panel meters? The Li-Ion pack tester DVM with alarm? Connector with connections to the batteries? IDK...). I was hoping the EVG monitor would be good enough, but I need to verify what I saw with the bench supply with real battery packs. The adjustment knob on my bench supply was crappy thus the approx. 20V YEL/RED trip point mentioned above.... (have not looked at the service manual to see if this is adjustable!)
-BB
 
Hahahaha....I've never even search for the commercial! I'm behind Jimmy (talking) driving the Red 1913 International. The two guys (Harvey) was edited & added later, as they were never there. The "snow" was FAKE! We filmed @ this location (L.A.) and north of Burbank (farm setting). I remember when the first "take" was filmed, my NIKE shoes where so white you could see them, so they had to spray paint them black! LOL


I vaguely remember the stock charger voltage of the 24v @ around 28.5'ish for the SLA, and even adjusted one for a 7s @ 29.4v range. Though my regular cardio ebike ride was 11 miles, so I never really have to check voltage. Even the 36v, using 10ah (6ah +4ah ) Hobbyking lithium packs, the distance was never an issue for low voltage.

This is an average ebike ride with a stock 36v EVG ebike, though upgraded12s4p (19.2ah) lithium in the stock battery case.

Battery start @ 49.5v (50.2v fully charged)
Battery end @ 45.7v LOT'S of range left!

Distance @14.20
ODO@ not accurate, as I had to put in a new lithium battery in the Cateye. :)
TopSpd @26.50 mph. This is downhill w/pedaling (46t front -11t rear)
Time @42:32
Average @20.0 mph

Level is 21.5-22 mph (210lbs)

What is your normal distance to ride?

Kit
 
Hi @kauaikit - Previously on the SLA batteries, my best distance was 22 miles (RED FAULT and STOP). But I suspect I was in good shape and fresh SLA unit. Typical was 18. I had to change batteries once it went much less than 16 as I didn't like riding w/o any power. Will see what 61Ah will give me.... (stay tuned!)

Well I received the new tires, tubes and rim strips which inspired me to break the girl down and spend three days touching almost each and every piece on this bike. Of the more interesting is the rear hub motor. @kauaikit – I guess I suffer from CRS after all. My notes must have meant it looked like a bugger and my memory of standard old school bearing must have been regarding the front hub. I found an excellent reference/info page on EV Global and the man who founded it. It also shows a nice breakdown on the Heinzmann hub-motor, so I opened it open to check. The reference mentions the torque arm is welded to the magnet assembly. This is a bit misleading and does not mean the lever arm that mounts to the frame to give mechanical reference is actually welded! That assembly can be removed under the nut (careful of wires!). And by removing a split locking ring, the rotating hub cover plate can be removed to then open and inspect the brushes. Stupidly I didn’t take photos of the brushes, but I am impressed how they still looked new after so much use. Added motor brush dressing, real grease and closed it all back up. The rear wheel is >10 pounds w/o rubber!🐖

Primary and secondary internal gearing...
Secondary Gearing.jpgPrimary and secondary gearing.jpg

I am now only missing the batteries, which is what the project was all about. Guess it drifted to a total EVG Touring restoration project. But while cleaning, I found my last ACE Train ticket dated November 25, 2003. That is a month beyond my last log entry. And I still have an unused ticket; curious if it is still valid…. 🤣
Last ACE ticket.jpg

So here she is, my Cranberry Girl in waiting. Now to see if the batteries or @pushkar come first…🙄
-BB
Brandy and EVG left.jpgEVG right.jpg

OOPS: EDIT ALERT!!! Does ANYONE know about this company???
 
Last edited:
Hey BB, you really only need around a 20ah lithium battery to suit your range anxiety. The density of lithium is so much greater than 'ol tech SLA. Besides the ah of a 24v SLA battery is only around 7ah. Whereas even a 10ah lithium pack will simply SMOKE the SLA in weight, voltage drop, life of the battery, and especially range! Not even close to being compatible.

I run my dogs using a EVG mini, which I upgraded the 24v controller using a donor 36v EVG controller/throttle, while keeping the stock original 24v rear hub. Though I'm only using a simple 10s10ah (36v) lithium pouch pack, it goes hard to 21mph. I also upgraded the front chainring to a 48t and the rear freewheel to a 11t-28t to assist a bit in pedaling. And I've even used a 14s (52v) pack and it goes right up to 28mph. I have 6 (3 yellow & 3 red). :)

WHY BB.....WHY? Ha.

BTW, I have 3 of your exact Cranberry girl 24v EVG ebikes, 1 black, & 1 blue. I thought of putting together a 7s4p pack, to fit in the original battery box & even use the stock charger, but why when I have enough 36v parts to upgrade them in performance? Which is the plan. Though the 24v front chainrings are not easily upgraded. I'd suggest you get a 11t-28t rear freewheel for your 24v.

Kit
 

Attachments

  • 5:5:14 Padua.JPG
    5:5:14 Padua.JPG
    760.6 KB · Views: 346
Hi again folks!
Well I received a notification that one of the two batteries is in the USA, and currently in a neighboring city (Union City, CA). This inspired me to take two Drok 200171003 battery capacity/voltage meters with hi/low alarms plus temperature monitor, a Drok 200140 Power meter (50A), a Vishay VS-401CNQ045PBF common cathode power diode (400A, 45V), and some fuse holders to make a safe battery combiner. I ordered the Drok battery meters from Knaro on eBay as he had them in stock, shipped them to me super-fast, and was excellent on communications. I wish he had the 50A power meter as I am waiting again for China. Now I will have the ability to measure the power output of the battery pack(s), and the individual batteries charge status…

So, the concept here is to have a separate each battery and charger into each battery box divider (6s5p). The charger will always be connected to the supplies battery charger port, and get connected to the EVG battery box C13/C14 interface. A BIG diode is being used to attach each battery to the EVG battery box connection and box big capacitor. In the photo below you can see that I used x3 XT60 connectors for the inputs (right) and output (left). I used the old battery box series wire as the Combiner output (BLU). The thin RED/BLK & BLK cables to the right are for the DROK battery meters, and are the power & thermal sensors for battery #1 & #2 respectively. The loose RED/WHT, BLK & GRY wires are for the DROK power meter. The Battery & Meter negative terminals are all combined into a ring lug. The EVG Box (load!) negative is also terminated into a ring lug. Eventually these ring lugs will get attached to the DROK current sensor shunt resistor, but for now are just connected together with a screw and KEP nut. The baggie is full of the SPARE parts I removed from the box harness…
Combiner Uncovered.jpg Combiner Positive Covered.jpg Combiner covered.jpg EVG Battery Box and Combiner.jpg

Once a battery pack comes, I can figure out the batteries, combiner and meters placement & FINALLY go play. First rides will be testing & shakedown rides to make sure the batteries stay cool (charging and usage!), and if the diode combiner gets too hot due to the diode drop and current… (TBD!

More surprises to come. I found a cool handle bar mounted USB charging port w/ DVM and 750lm replacement LED for the 100lm EGV Xenon bulb….
-BB
 
Sorry about this second post in advance! I forgot to talk about the cool Drok battery meters I'm incorporating. They work from the power supply/battery (10-100V), support Lead-Acid (12V & 24V), Lithium, Metal-Hydride, Lithium-Iron-Phosphate batteries and others. You can program how long the display remains on (10/30/60/120s) as well as voltage alarms. The device is really clever as you enter the battery type and the number of series cells (3s-23s?) and the device will calculate the percentage, show the voltage, and display the prob temp. When not under display (standby), consumption goes to approx 10micro-amps. I plan to program the low voltage alarm to 21V (20%) if it doesn't automatically do so. In the photo below, I connected both meters to a 4S Li-Po RC Drone battery. The drone pack meter (behind Drok on the left) agreed with both Drok meters (14.9V). I have both displays on with one showing temp. Both displays were transitioning between 59-60%. A super value for the price!! I have used Drok devices in my past with great success....
-BB

Meters On.jpg
 
OMG folks, I have an update. Some funny, and some pathetically sad. Hang on for an adventure….

I received one of my two 6s5p battery packs with chargers, so started planning, arranging, re-arranging, cursing, repeat. I was able to stuff the charger, battery pack and combiner into one of the SLA slots. Plugged the charger into the battery pack and ISSUE #1 – The battery will back-drive the charger LED so that it is on and vampire the battery at >8mA current. So I decided to test the charger and plugged it into an AC outlet to verify the meters worked (fuses installed), and ran into ISSUE #2 – The small charger that came with the pack gets dang hot >50C (>120F) so went to PLAN B – The chargers will be external and maybe fit in the bottom charge cord compartment near the bottom bracket JUST IN CASE.

I then spent the next couple hours micro drilling out a pattern for the Drok battery gage. Using a pliers, I carefully broke out little nibbles on the panel meter pattern. Then I filed the drill nibble marks smooth until the meter fit perfectly between the EVG battery box handle and lid, aligned to the lid lip edge. You can see the outline of the battery clamp on the box for KEEP-OUT marks in the photos below…
IT FITS!!!.jpg Battery, combiner and meter in EVG box.jpg Plugged in, charging and lid on....jpg Installed.jpg

So I slapped the “NEW” EVG pack in the bike and went for the first ride in over 16 years. I hope you can imagine the smile on my face. At the first stop light, a crossing guard gave me a compliment with dual thumbs up. This was a short 4.6 mile "shakedown cruze" to make sure all was working before my first planned ride; a 20 mile loop. I connected a thermal sensor to the combiner diode to verify temperature was less than 70C (never went above 52C). On mile 18, at almost the same spot I would crap out with the SLA batteries, I blew a 20A fuse from a stalled 100% throttle start; OOPS! Man, pedaling this piggy the last 2.6 miles home uphill really sucked… 😉
Map of first real ride.....jpg


OK so here are some ball-park stats with an assumption until my power meter arrives. I assume 10Ah was used in these 18 miles as that is probably what the 12Ah SLA batteries actually provided. I charged the 6s5p pack to 100% (28Ah). In theory I should have (28-10)/28*100 => or 64% battery left if the pack was 28Ah as advertised. I pressed the battery gage and it said 65%. SWEET!!!! Too bad the other 31Ah battery is still in a warehouse in China….. (not happy!)

The next day I was hurting a bit so went to the local auto store and bought a bunch of spare fuses. Tossed these and a Philips screwdriver in the front pack so a blown fuse will not kill me again. By noon I was ready to try her again. At about mile one, I stood to stretch and felt my right ankle give and the pedaling went all wonky. Stopped bike and was able to pull out the pedal. It has stripped completely from the right crank arm. Battery brought me back home for a 2.6 mile ride (so funny!). Add in story of several panic calls to @kauaikit for NOS cranks, I decided to just buy a new set from scAmazon ($40); they should arrive Friday (tomorrow)….
Stripped out.jpg


And now for something nice. One of the nicer finds in this project was a SMTYOE Rigid Loop Festoon LED bulb at 750lm to replace the 100lm Xenon bulb in the headlamp. The results IMHO are rather amazing as the photos below do not give justice! This LED replacement bulb is only 1.5W, and WAY-WAY brighter. I believe half of the 10W, 100lm bulb was lost in the housing, where this LED bulb is single sided – all light out front. You will have to note +/- polarity (WHT wire is +12V, BLK is GND). NICE LOW COST ADDITION. You determine what is what in the photos below….
100lm.jpg 750lm.jpg

There are a few more things still coming in, so this story is not over yet. I do plan to get out this Saturday to range test this single 28Ah pack and post on the show & tell forums…

Stay tuned!
-BB
 
Friday the scAmazon driver got to laugh at me twice. The first was when I met him in the driveway salivating like Pavlov’s dog for the cranks (was tracking his progress). The second time was a mile down the road as I thanked and sped away from him. I started out the ride just fine and even circled back home to check crank bolt tightness after some hammering. The plan was maybe 30 miles total. Plans change....
0F6D1C54-DD0E-44E1-B16A-98DD8D721C67.jpeg 5745363D-AD16-4B9B-BA1B-470B1051906B.jpeg
I stopped at 5 mile intervals to check the battery; 4.8miles => 84%, 10.2miles => 70%. And as I rounded a busy intersection to stop and check at 15.5miles, all of a sudden the EVG monitor went into rotating LEDs, EVG motor shutdown, and I could hear the battery monitor beeping. Opened up the compartment and the monitor read 0%. WTF!!!!
I made contact with the battery seller and they asked for me to monitor the battery a bit more before we react. I’m laughing as the other battery moved to the shipping bulk container.... Oh happy joy! I hope @pushkar will win this race... 😜
Wife rescued me and is letting me play on her day...
-BB

so question- is this typical of battery packs to suddenly drop once below x%???
 
Well.....that was entertaining & NO, unless of course you purchase your battery packs from CHINA! :)

If you checked your connections, maybe the BSM in the battery took a dive? Did, or can you check the battery voltage of each cell in the pack?

So, maybe an emergency backup battery stored in the front Outback handlebar bag w/phillips & spare fuses? Personally I've used HobbyKing lithium batteries for years. So I'd get a 3s 8ah & 4s 8ah pack to combine for a 7s 8ah pack. No BMS, but it's light & I also use the cheapy battery balance boxes when charging. Range should be 12/15 miles?

3s 8ah $50.82 (largest ah available)


4s 8ah $72.48


Of course if you are skilled enough to install 24v BMS on this pack, the better. Otherwise, you just ride "bareback". Shhhh.

If your stock charger is working, you could wire it into the battery box male XT90.

Using my custom 21700 battery packs I swap a male XT90's in the stock EVG battery box, and I'm using female XT-60's for the charger lead w/a small hole drilled in the top lid of the battery box for it to poke out for charging w/ of course a female XT90s (spark arrester) from the BMS on the battery. A male XT60 on the charger.

Kk
 
Hi @kauaikit - I just got back from my first successful ride. So today she did more miles continuous than she has ever done before ; 26 miles (42km) and still had 59% battery left (62% after resting). I suspect I just turned on the Cruise Control and sucked up the battery without thinking. And I think next time I do a battery, I will get a 7s5p as the EVG monitor turned to RED when the battery was at 84%. So maybe the Okoman 6s5p pack from China is 28Ah. Really will not know until I get the Power Meter installed. Tracking shows in a neighboring town warehouse....

I still want to go further!!!! 😂

To be continued....
-BB

09EF39A2-091D-4CD8-A689-095FBD3DD9A2.jpeg
 
Back