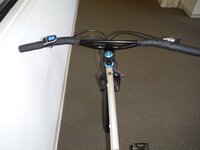
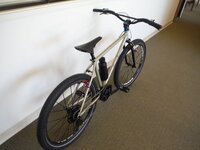
Troubleshooting a BBS02 e bike

If cells are overcharged I like to take them down with a USB fan. Often displays or batteries have a USB port. The little DC fan motor is perfect for this. Messing with the internals of batteries is asking for trouble that I do not need when I can do other things.
 
If cells are overcharged I like to take them down with a USB fan. Often displays or batteries have a USB port. The little DC fan motor is perfect for this. Messing with the internals of batteries is asking for trouble that I do not need when I can do other things.
True... But I don't think that the problem here as it seems he didn't store the battery properly and it probably shut down due to a low voltage safety shutdown.
And really how often is overcharging a problem? Unless you mean doing a full charge and then not being able to ride so you need a way to get it to a storage voltage.
 
I received the proper type battery mounting plate that corresponds to this new battery (r049-2) and managed to hook it up. This new mounting plate has Anderson connectors so I had to retrofit the power leads off the BBS02 with Anderson outlets. I got the new battery plate mounted and wired up, plugged in the fully charged new battery, and the e bike controller fired right up as normal.

Now I just have to figure out what to do with all the extra power lead wire. No way are those Anderson couplers going to tuck back inside the bottom hole in the frame that the previous wires and connectors came out of.

As soon as I get everything zip tied into place, I’ll be taking my first ride of 2021. Just in time, too, as it’s too damn hot for me to continue walking for exercise at this point.

Because of my prior multiple strokes and residual weakness in my left leg, I can only walk 1-2 miles a day, but I rode the e bike 20 miles last August on the lowest assist on rail trails. Time to built back up to that.
 
Last edited:
I received the proper type battery mounting plate that corresponds to this new battery (r049-2) and managed to hook it up. This new mounting plate has Anderson connectors so I had to retrofit the power leads off the BBS02 with Anderson outlets. I got the new battery plate mounted and wired up, plugged in the fully charged new battery, and the e bike controller fired right up as normal.

Now I just have to figure out what to do with all the extra power lead wire. No way are those Anderson couplers going to tuck back inside the bottom hole in the frame that the previous wires and connectors came out of.

As soon as I get everything zip tied into place, I’ll be taking my first ride of 2021. Just in time, too, as it’s too damn hot for me to continue walking for exercise at this point.

Because of my prior multiple strokes and residual weakness in my left leg, I can only walk 1-2 miles a day, but I rode the e bike 20 miles last August on the lowest assist on rail trails. Time to built back up to that.

Congratulations!!!
The threptic value of riding bikes is renown. Have you seen the video of the man with Parkinson's riding in the Netherlands? Einstein had his best ideas while riding. The first thing a physical therapist will do is put you on a stationary bike.
I will take apart the mounting plate. They typically have three screws. And will solder the leads from the motor inside. Automotive crimping connectors can also work. Some will heat shrink. Then replace the cover of the mounting plate. It is a little more work but I think it is worth it. Clean and hygienic.
Thanks!

I had a minor stroke summer 2015 then four major strokes in March of 2016 that left my left leg, left arm and right side of my face paralyzed, as well as deafness in the right ear, complete loss of balance, and difficulty with swallowing and talking.

They put two heart stents in my brain and after several months of intensive physical and occupational therapy I was able to start moving everything again.

Now I just have some residual left leg weakness for which I wear a leg brace for waking, though I don’t need it biking.

My recovery can only be seen as miraculous; even with the stents in my brain the doctors couldn’t believe my recovery.

First I got back on a motorcycle. Priorities!

Then I got on an e bike and it’s been a Godsend.
 
My brother had this shirt made for me while I was in rehab. It’s one of my favorite biking shirts.
6FAADE1F-9F38-4346-83B2-5FAE00A2B77C.jpeg
 
I will take apart the mounting plate. They typically have three screws. And will solder the leads from the motor inside. Automotive crimping connectors can also work. Some will heat shrink. Then replace the cover of the mounting plate. It is a little more work but I think it is worth it. Clean and hygienic
That’s actually an excellent idea, thanks!
 
That’s actually an excellent idea, thanks!
In my 7 years of answering support requests I’ve seen very very few Anderson, Xt60, and XT90 failures. But quite a few failed crimp jobs. Strange but true. Gioni? Splain please?
 
My brother had this shirt made for me while I was in rehab. It’s one of my favorite biking shirts.
A miserable adventure. During recovery I couldn’t ID the shape of a saguaro cactus as a cactus. But I knew the Latin name. carnegiea gigantea. Nuts (now a short trip)
 
In my 7 years of answering support requests I’ve seen very very few Anderson, Xt60, and XT90 failures. But quite a few failed crimp jobs. Strange but true. Gioni? Splain please?
It's all in materials and execution. If you buy cheap crimps and don't use the proper tool it will mostly likely fail as you have experienced. A lot of noobies think it's ok to just squash it with pliers. If you buy a Butt crimp with weather proof heat shrink and glue (one of the few things at Harbor Freight that's very good) ...and use the proper tool... They're pretty much Bullet Proof 😉
 
It's all in materials and execution. If you buy cheap crimps and don't use the proper tool it will mostly likely fail as you have experienced. A lot of noobies think it's ok to just squash it with pliers. If you buy a Butt crimp with weather proof heat shrink and glue (one of the few things at Harbor Freight that's very good) ...and use the proper tool... They're pretty much Bullet Proof 😉
That was exactly what I had been doing, but from O'Reilly. Using the crimp tool with heat shrink connectors, Then I started going the direct route for a cleaner build style. It is a matter of personal preference.

Photos:
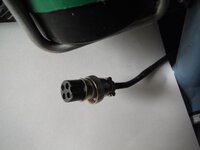
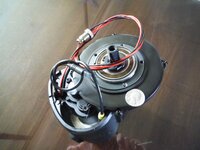
A) Connector to battery from directly inside the motor housing. Solder to solder with mechanical strength to hold each end in place.
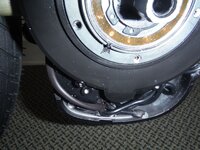
B) Secret compartment for hiding wires under the chainring.
C) Extra wires trimmed and tucked away so all slack is gone, with the cover plate and chainring ready to reinstall.
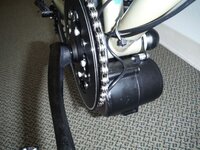
D, E, F) After, with no visible wire connectors on the final build, including the handlebar area.

Sorry about the zip tie. Fail! At least I painted the top of it. On this build the rear shifter had bare, unhoused shift cable running under the bottom bracket, so I needed a zip tie to run the new contiguous shift cable housing over the top of the bottom bracket. My best builds do not have any zip ties. Had to do it.
 

Attachments

  • T.S.Compartment.JPG
    T.S.Compartment.JPG
    140.7 KB · Views: 234
  • TS.Compartment.JPG
    TS.Compartment.JPG
    245.2 KB · Views: 238
  • TS.Compartment2.JPG
    TS.Compartment2.JPG
    306.8 KB · Views: 224
  • StumpjumperFS13.JPG
    StumpjumperFS13.JPG
    296.5 KB · Views: 239
  • StumpjumperFS14.JPG
    StumpjumperFS14.JPG
    254.9 KB · Views: 231
  • StumpjumperFS10.JPG
    StumpjumperFS10.JPG
    226 KB · Views: 230
Back