EriderM
Member
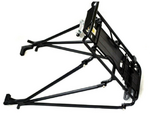
I installed my Topeak Baby II Disc rack system on the Crosscurrent today. I like this rack because I can easily go between my MTX pannier bags, and the baby seat. The items I needed in addition to what came with the rack are:
1- 6 x 1.0 - 50 screw for the disc brake side
1 - 6 x 1.0 - 25 screw for the torque sensor side
2 - 1/2" spacers with 1/4" hole
Blue Loctite
I used the existing hole on top of the brake caliper, as well as the rearmost torque sensor hole. I did not need to bend the rack, but manipulated the rack to line up with the holes. The two spacers seen on the left side were used to level the rack. Instead of trying to bend the rack the spacing naturally leveled the rack. The rack is not "perfectly" level, but good enough that you don't notice it unless you stare.
I measured the screws listed above to ensure that they fit perfectly due to the brake disc having tight clearance with the caliper. These screws also prevented me from needing to drill or tap new holes, so I can restore the bike to its original state. I did need to slightly bore the holes on the rack get the screws to slide through, which can easily be done with a regular drill and 3/16" bit.


Finally, I took it for a test ride with my daughter. She weighs about 40lbs. The interesting thing is that the bike didn't seem to struggle with the additional weight. It felt like it accelerated and maintained close to the same speed as it does without her. I apologize for the long write up, but hope this helps anyone that has been thinking about getting a rack and worried about the install.
1- 6 x 1.0 - 50 screw for the disc brake side
1 - 6 x 1.0 - 25 screw for the torque sensor side
2 - 1/2" spacers with 1/4" hole
Blue Loctite
I used the existing hole on top of the brake caliper, as well as the rearmost torque sensor hole. I did not need to bend the rack, but manipulated the rack to line up with the holes. The two spacers seen on the left side were used to level the rack. Instead of trying to bend the rack the spacing naturally leveled the rack. The rack is not "perfectly" level, but good enough that you don't notice it unless you stare.
I measured the screws listed above to ensure that they fit perfectly due to the brake disc having tight clearance with the caliper. These screws also prevented me from needing to drill or tap new holes, so I can restore the bike to its original state. I did need to slightly bore the holes on the rack get the screws to slide through, which can easily be done with a regular drill and 3/16" bit.
Finally, I took it for a test ride with my daughter. She weighs about 40lbs. The interesting thing is that the bike didn't seem to struggle with the additional weight. It felt like it accelerated and maintained close to the same speed as it does without her. I apologize for the long write up, but hope this helps anyone that has been thinking about getting a rack and worried about the install.

