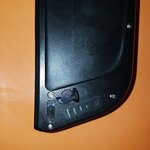
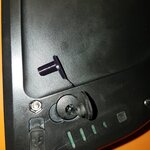
That pesky battery rubber charge port cover.

John49

Member
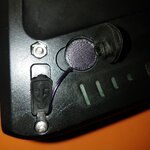
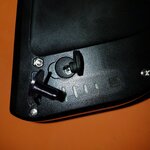
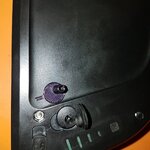
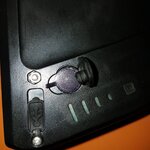
I tried to trim the rubber flap that keeps popping open on the battery charge port multiple times and once in awhile I could get it to stay plugged in but not always. I finally just cut it off and looked for other solutions such as a screw cap cover but could not find any glue strong enough to hold it to the battery case.
(Link Removed - Attachment No Longer Exists) flap2.jpg Flap.jpg
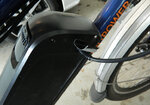

I finally hit on a simple solution. Gorilla Tape. Just a piece of tape with one end folded over to give a sort of grip handle. Seems to be holding up fine and if ever the tape becomes worn, new tape. If anyone has found another good solution please let me know.
 
Both my batteries are the same. I don't even bother trying to secure they. I just make sure the ports are dry before I plug them in. I asked the Rad Power people about it when I was there. They were not helpful.
 
I just got my Rover and also have this issue.

I am going to see if I can design a better "cap" on my 3D printer. For the power and USB ports.
I have some bridge Nylon filament which should make good caps since it is flexible.

I already created a plate to attach to my rack for my taillight. The light only came with a seat clamp which was blocked by the rack bag. So I created and printed a plate that could attach to the back of the light.
 
Last edited:
I just got my Rover and also have this issue.

I am going to see if I can design a better "cap" on my 3D printer. For the power and USB ports.
I have some bridge Nylon filament which should make good caps since it is flexible.

I already created a plate to attach to my rack for my taillight. The light only came with a seat clamp which was blocked by the rack bag. So I created and printed a plate that could attach to the back of the light.
You could try Sugru https://sugru.com/
 
Yeah I am familiar with that. I would rather print them. :)

I should be able to make a plastic version the same length as the charger connector so it stays in. Can't do that easily with Sugru.
 
Last edited:
I did the Luna Cycle Triangle bag for $25: https://lunacycle.com/batteries/battery-bags/luna-cycles-triangle-battery-bag/

I mostly got it to keep dust/dirt off the battery during trail riding and keep the cold wind chilled air off the battery during winter commutes (I can add extra material or microwave gel packs on really cold mornings). I guess an added benefit is I don't have to close the charging port since it is protected in the bag. The only pain in the butt was having to cut 3 holes on the bottom of the bag for the battery tray and another hole near the rear for the battery tray power cable. The bag also does a good job keeping the battery dry during rain.
 
That is indeed a solution if you want a bag over it.

For now at least I like it naked. :)

Anyway my very first attempt was a complete success! I even beveled the tip to make it easier to put in.

Works and fits perfect!
I printed it in black PETG and it is very strong. I am printing it in Nylon for the final.

I am refining it a bit now, adding a small tail so you can grab it easier etc..
I wish there was a screw next to the power port holding it in like the USB one has.

EDIT: Okay done with it, I created a short tail version and a long tail one that can be tucked under the USB cover. I tried to get it under that screw that the USB cover is being held on by but it would not come out enough. I may try later but this works fine. Just wanted it to hang while charging.

I will just use something to pin the rubber cover to the case. I don't want to cut it.

tether-long-cap.jpg tether-long-free.jpg tether-short-bottom.jpg tether-short-cap.jpg tether-short-cap2.jpg tether-short-side.jpg


Next up is the USB connector. :)
Actually I just tried it for the first time and my USB connector is fine, I can remove it and put it back in.

I assume they changed the design, is this needed?
 
Last edited:
That is indeed a solution if you want a bag over it.

For now at least I like it naked. :)

Anyway my very first attempt was a complete success! I even beveled the tip to make it easier to put in.

Works and fits perfect!
I printed it in black PETG and it is very strong. I am printing it in Nylon for the final.

I am refining it a bit now, adding a small tail so you can grab it easier etc..
I wish there was a screw next to the power port holding it in like the USB one has.

EDIT: Okay done with it, I created a short tail version and a long tail one that can be tucked under the USB cover. I tried to get it under that screw that the USB cover is being held on by but it would not come out enough. I may try later but this works fine. Just wanted it to hang while charging.

I will just use something to pin the rubber cover to the case. I don't want to cut it.

View attachment 16838 View attachment 16839 View attachment 16840 View attachment 16841 View attachment 16842 View attachment 16843


Next up is the USB connector. :)
Actually I just tried it for the first time and my USB connector is fine, I can remove it and put it back in.

I assume they changed the design, is this needed?
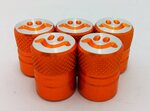
Awesome! I will trade you a couple valve caps for a couple plugs?
 

Attachments

  • 81+4sKtdUVL._SL1500_.jpg
    81+4sKtdUVL._SL1500_.jpg
    189.2 KB · Views: 784
I can print you what you need man. Just PM me your info and what you want, short tail, long tail etc.. The difference is the tail on the short one points to the bottom and the long tail points towards the USB port. Point is I can customize it.

The more I think about it, I may add a short tail on the long tail version.

I am just unsure the best way to ship it. Don't want it it get squished but don't want to have to find boxes. Always something. :)
 
Last edited:
I thought of that. I was unsure it would have a lot of demand.
I want to refine it a bit. I have an idea of making one that has a power port as well as a USB cover that both can attach to the screw. Put a small pad at the end with a hole etc...
Just ideas. ;)

I will see what I can do.
 
Before I got my Triangle bag, I've had a concern of my battery connector getting wet/dusty during transport (always remove my battery when traveling out of town. I would still love to get something to cover the battery tray port when I do travel even with the bag. I would be a paying customer for something like that.
 
Oh sure, use logic and reason and take away my excuse to design and print a cool plug on my 3D printer. ;)
I tried that with mine and it was kind of a pain, I think they could be different in how easy they plug back in. My USB port seems okay but others are not, I also may not have a toothpick handy. ;)

I don't know this just seems more permanent and easy. At least for me. I am not forcing it on anyone.
I also like creating solutions to solve problems. ;)
 
Last edited:
Before I got my Triangle bag, I've had a concern of my battery connector getting wet/dusty during transport (always remove my battery when traveling out of town. I would still love to get something to cover the battery tray port when I do travel even with the bag. I would be a paying customer for something like that.

Sorry I missed this post somehow. Mrgold I will print you a cover if you want. You helped me enough.

I don't mind printing some for you guys. As long as I don't get dozens upon dozens of requests. I can print them and just sell them for just a few bucks to cover time and mailing. Just send me a message. "Donate" what you want, I don't care really. I just want to help.

Should I design a replacement USB cover as well and just make one that replaces both? Or keep them separate?
I think I will start working on that. See where the design goes. I will make it able to be held on by that screw next to the USB connector.
 
I want on two of these badly. I can't stand the port covers, they annoy me every day when I try to put them back in. Seriously frustrating and the design is awful. The rubber is so soft that is just creases and i can see the edges bulge out when I try to get them in.

Problem is, does it void the warranty to not use the factor plugs?
 
I ended up trimming the thick edges a little bit and the putting 2 cuts into the "nipple" vertically and it goes in great now.
 
Back