Specialized Turbo Vado SL: An Incredible E-Bike (User Club)

SL 1 makeover at ~2 yrs and 4,300 mi
More than you ever wanted to know, starting with the LBS work order:
1. Remove stock EQ fenders and rear rack
2. Mount a 40 mm Specialized Tracer TLR tubeless on rear to match front
3. Install Ortlieb Quick Rack
4. Replace existing Clik valve cores with new ones
5. Safety check (re-torque all bolts, etc.)
6. Realign slightly bent derailleur hanger
7. Inspect drivetrain for wear

Cost before taxes
LBS charges: $65 for new rear tire, $250 in labor.
Parts I supplied: $130 for new rack, $110 for new pannier, $18 for new Clik valve cores plus extra pump adapter.
Grand total: $573. Not a word to my wife!

Results
20261004_162648(0).jpg

20261004_161336.jpg

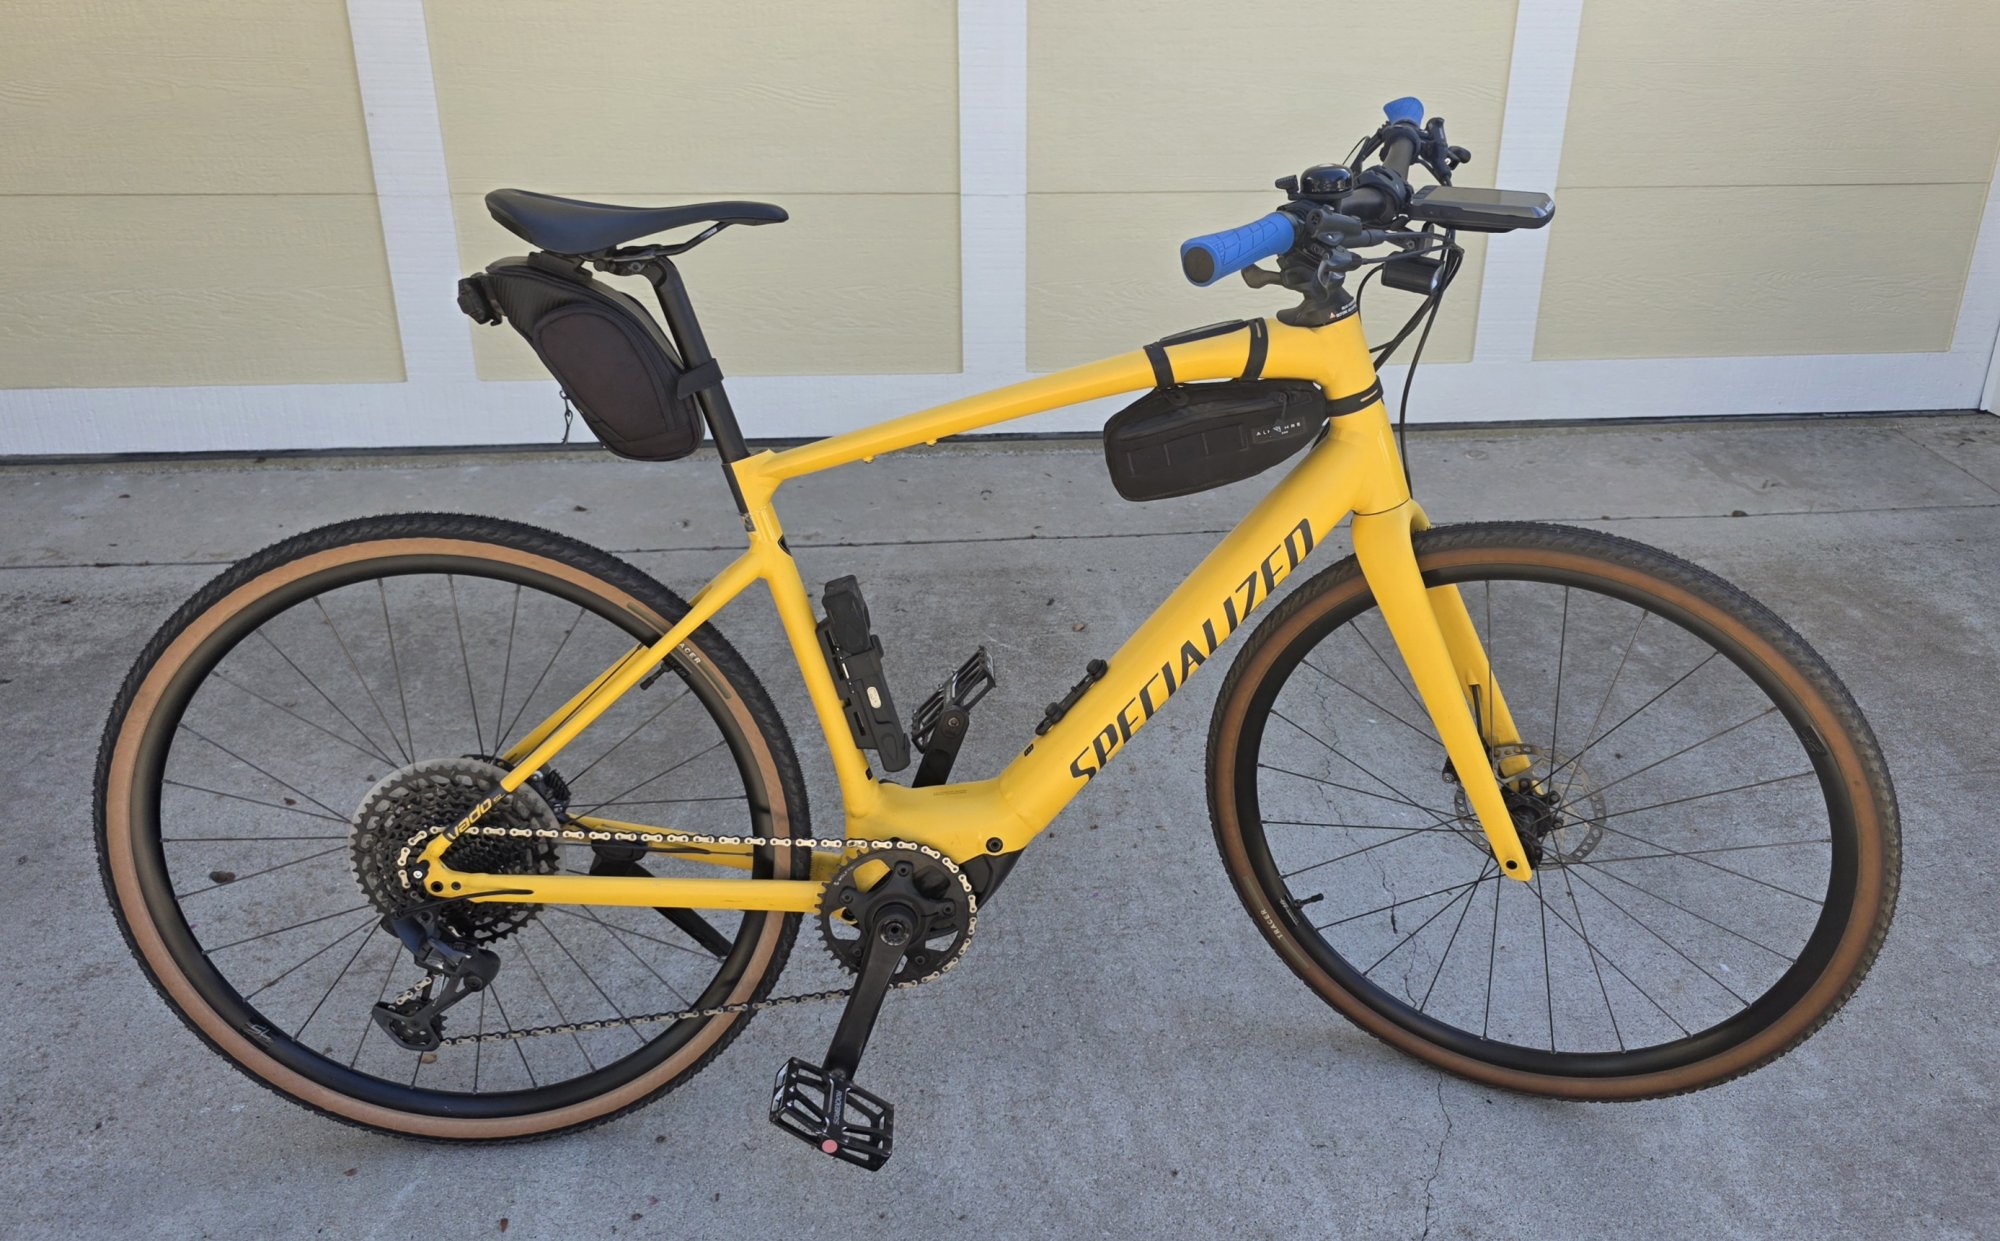
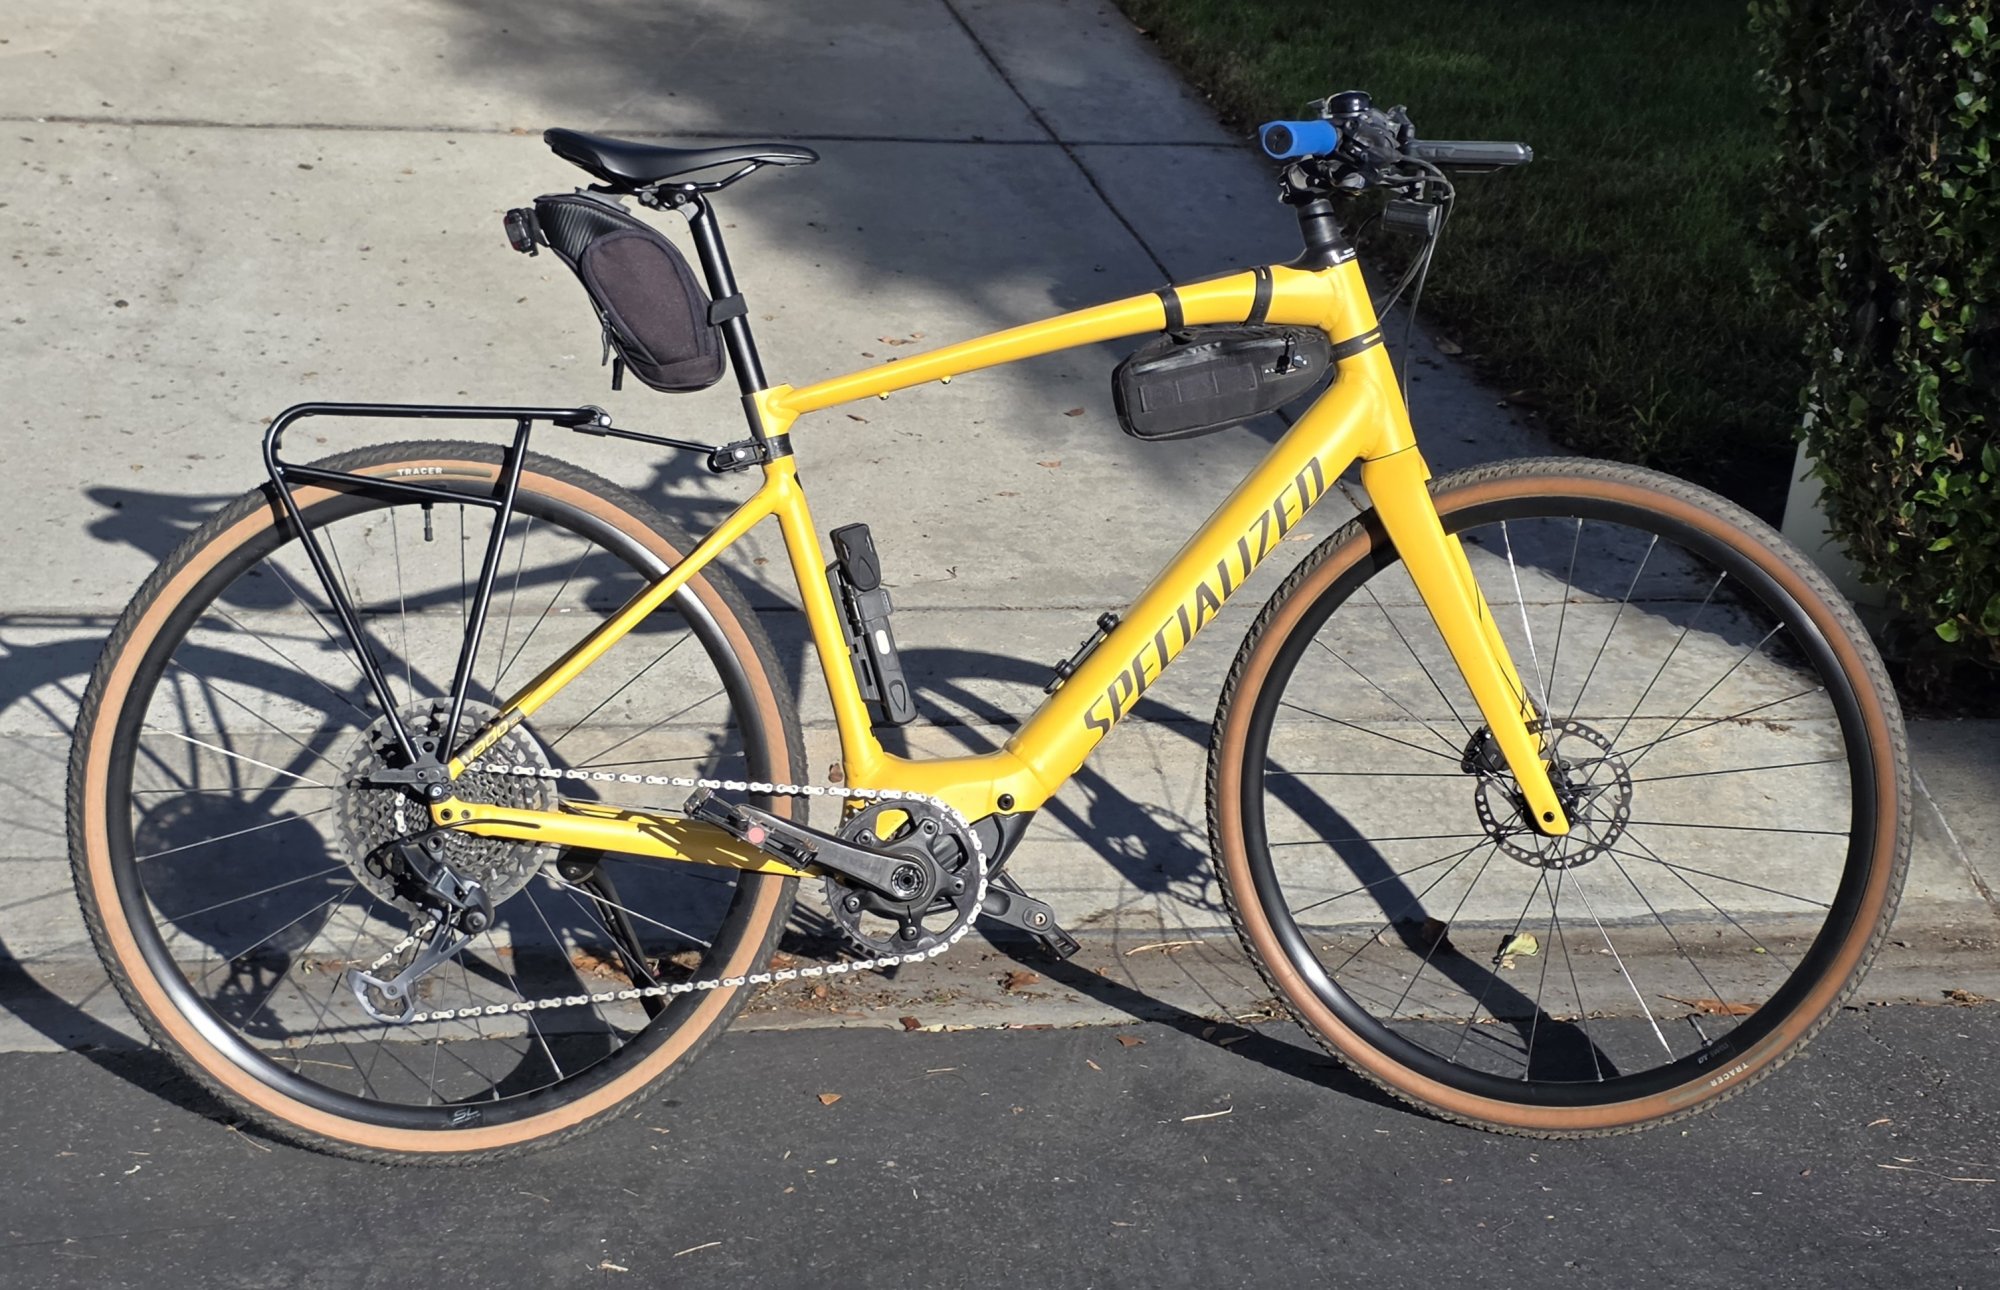
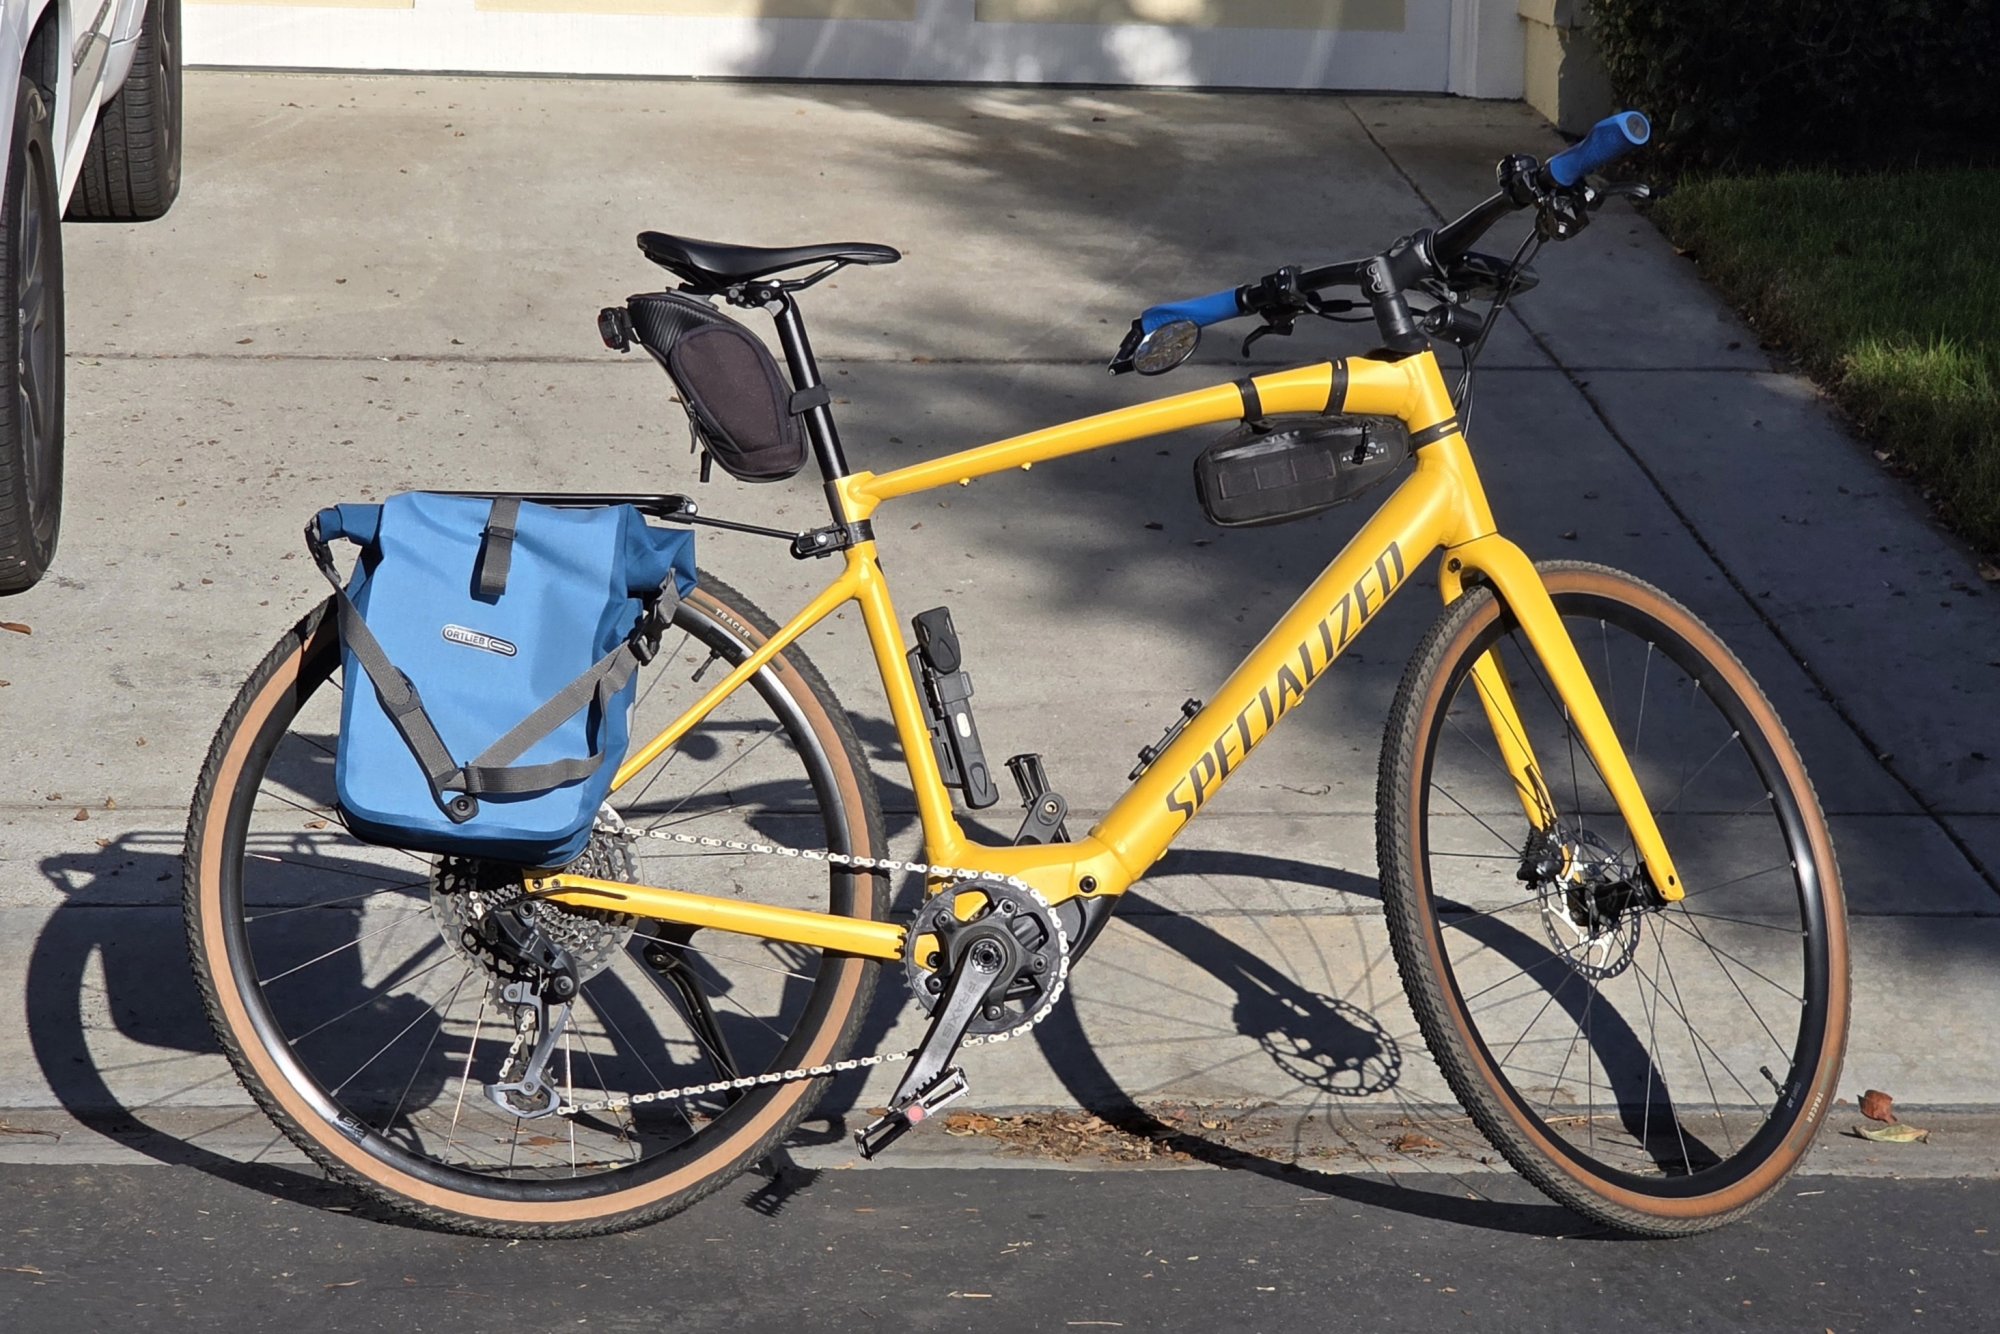
Very happy with the way this makeover turned out on all fronts — greatly improved rear traction, sportier look, much more useful quick-release (QR) rear rack, QR pannier for storage as needed, and maybe 200-300 g of net weight loss in the process.

20261003_131626.jpg

Now that's what I'm talkin' about! Getting a tire like this 40 mm Tracer on back — mainly for safety on steeper offroad descents — drove the whole project. As hoped, had a hard time breaking the rear tire loose on slightly sandy hardpack on the way home.

20261003_131342.jpg


20261003_131414.jpg

No experience with tire fitting, but guessing I could have room for up to a 45 mm tire on back and a 42 up front now. @Rás Cnoic may have quoted similar fenderless SL 1 limits in a recent post.

20261004_165440.jpg

The rear fender's tail light is hard wired on SL 1 EQ models like mine. We agreed to cut the wire somewhere inside the motor housing, as there's no connector there.

Instead, the connector's way up at the display. The 50 cm of wire beyond the fender goes past the motor and battery and through the head tube to get there! "Idiotic design," said the mechanic.

IMG_5346.jpeg

20261004_165546.jpg

Asked for the wire to be cut in the most reversible way possible — meaning to leave a connector at the motor or at least enough of a tail to splice. However, the tech who actually did the work apparently took "most reversible way" to mean dropping the motor and battery and unplugging the intact wire at the display.

Probably added $60 to the labor charge, but I'm OK with that.

20261004_161613.jpg

Used this 400 lumen Lezyne Zecto Drive clip-on tail light as a secondary to the stock light, but it'll be fine as the primary for now. The single on-off-mode button is moody, and battery life could be longer. But the LEDs are very bright at max intensity, and the flash patterns are definitely attention-grabbing.

20261004_161742.jpg

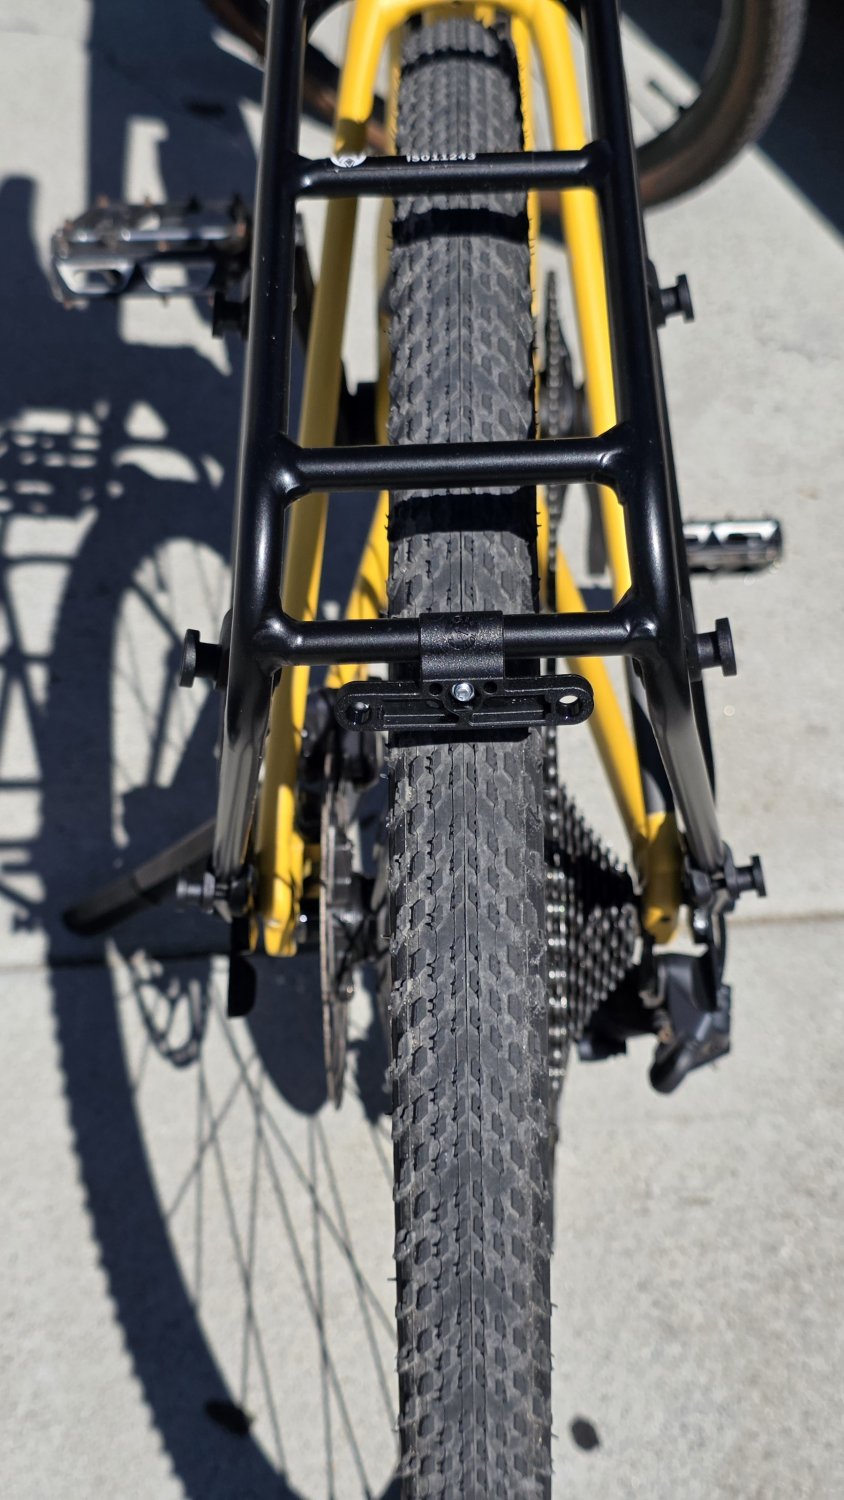
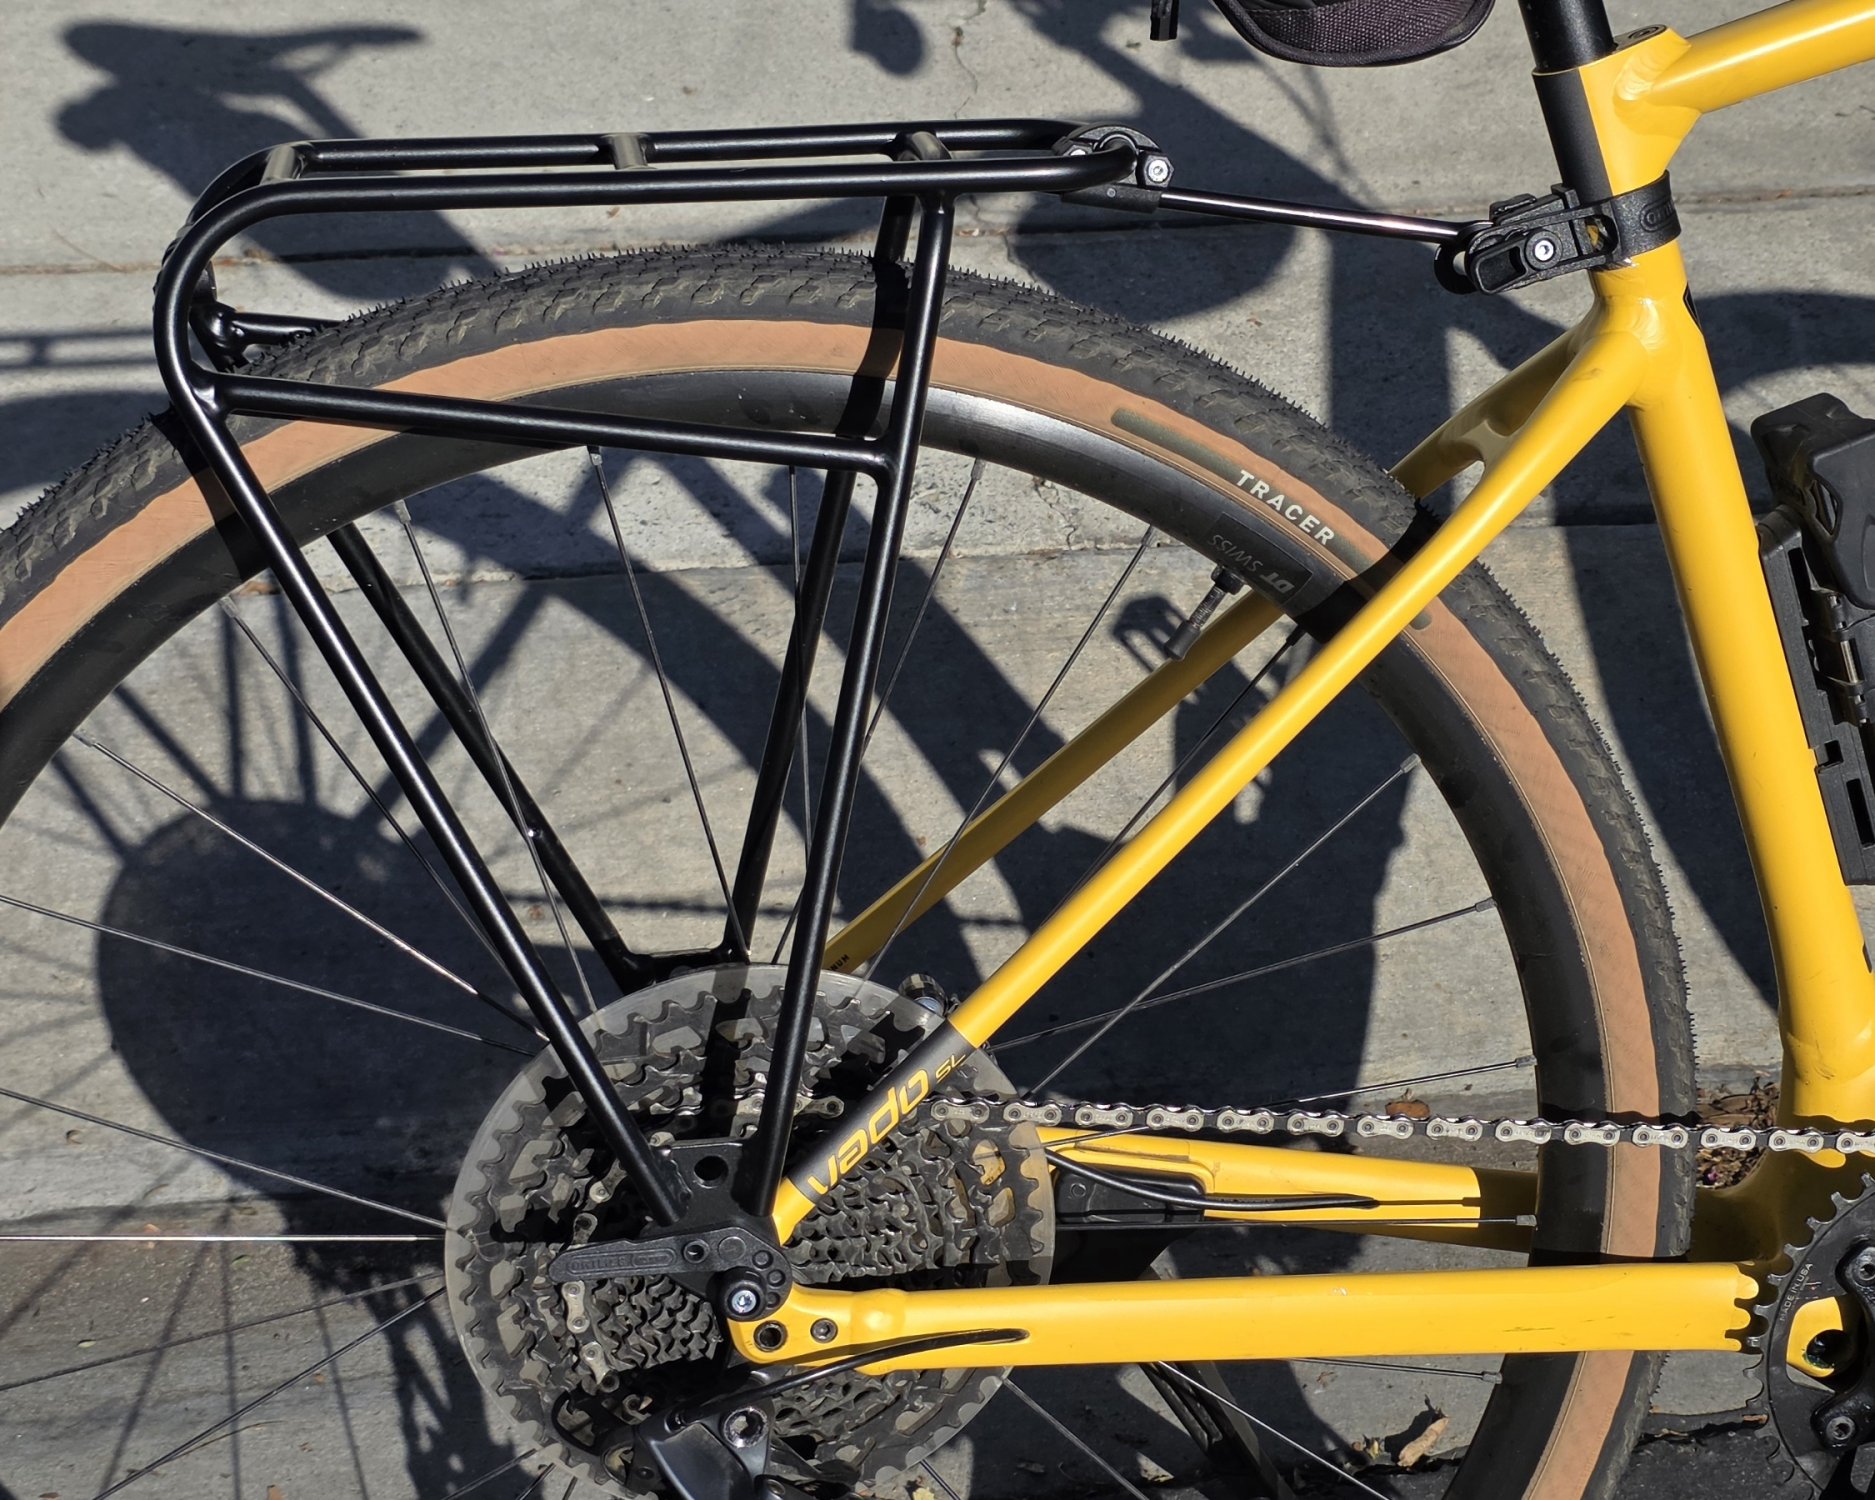
Should I ever want a different tail light or a reflector, the new rack offers an aimable reversible horizontal bracket with screw holes 50 mm apart on center.

20261003_131232.jpg

20261004_161531.jpg

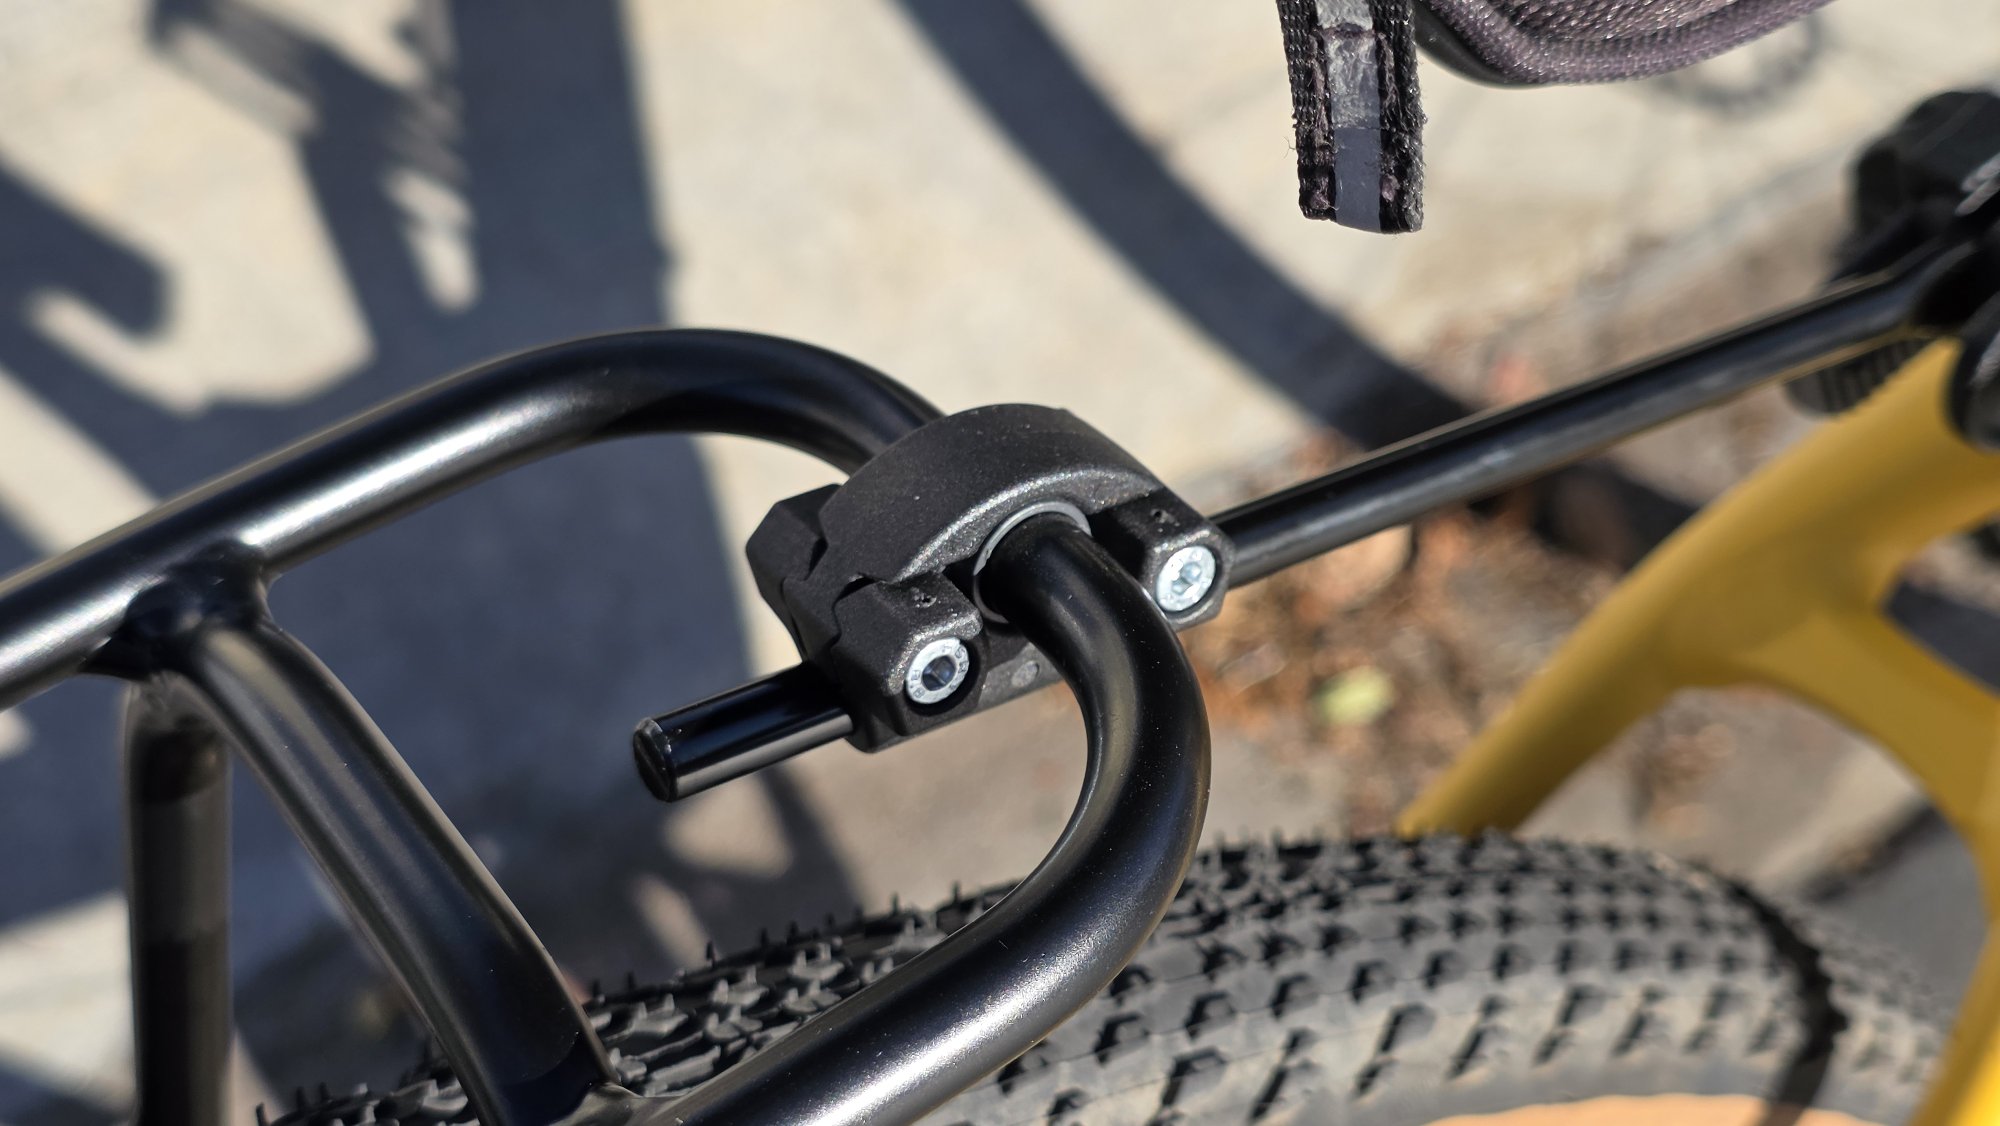
Had to revise the shop's Ortlieb Quick Rack installation (upper photo), but no big deal. @Stefan Mikes provided a very helpful photo of this rack on his SL 1.

20261004_161712.jpg

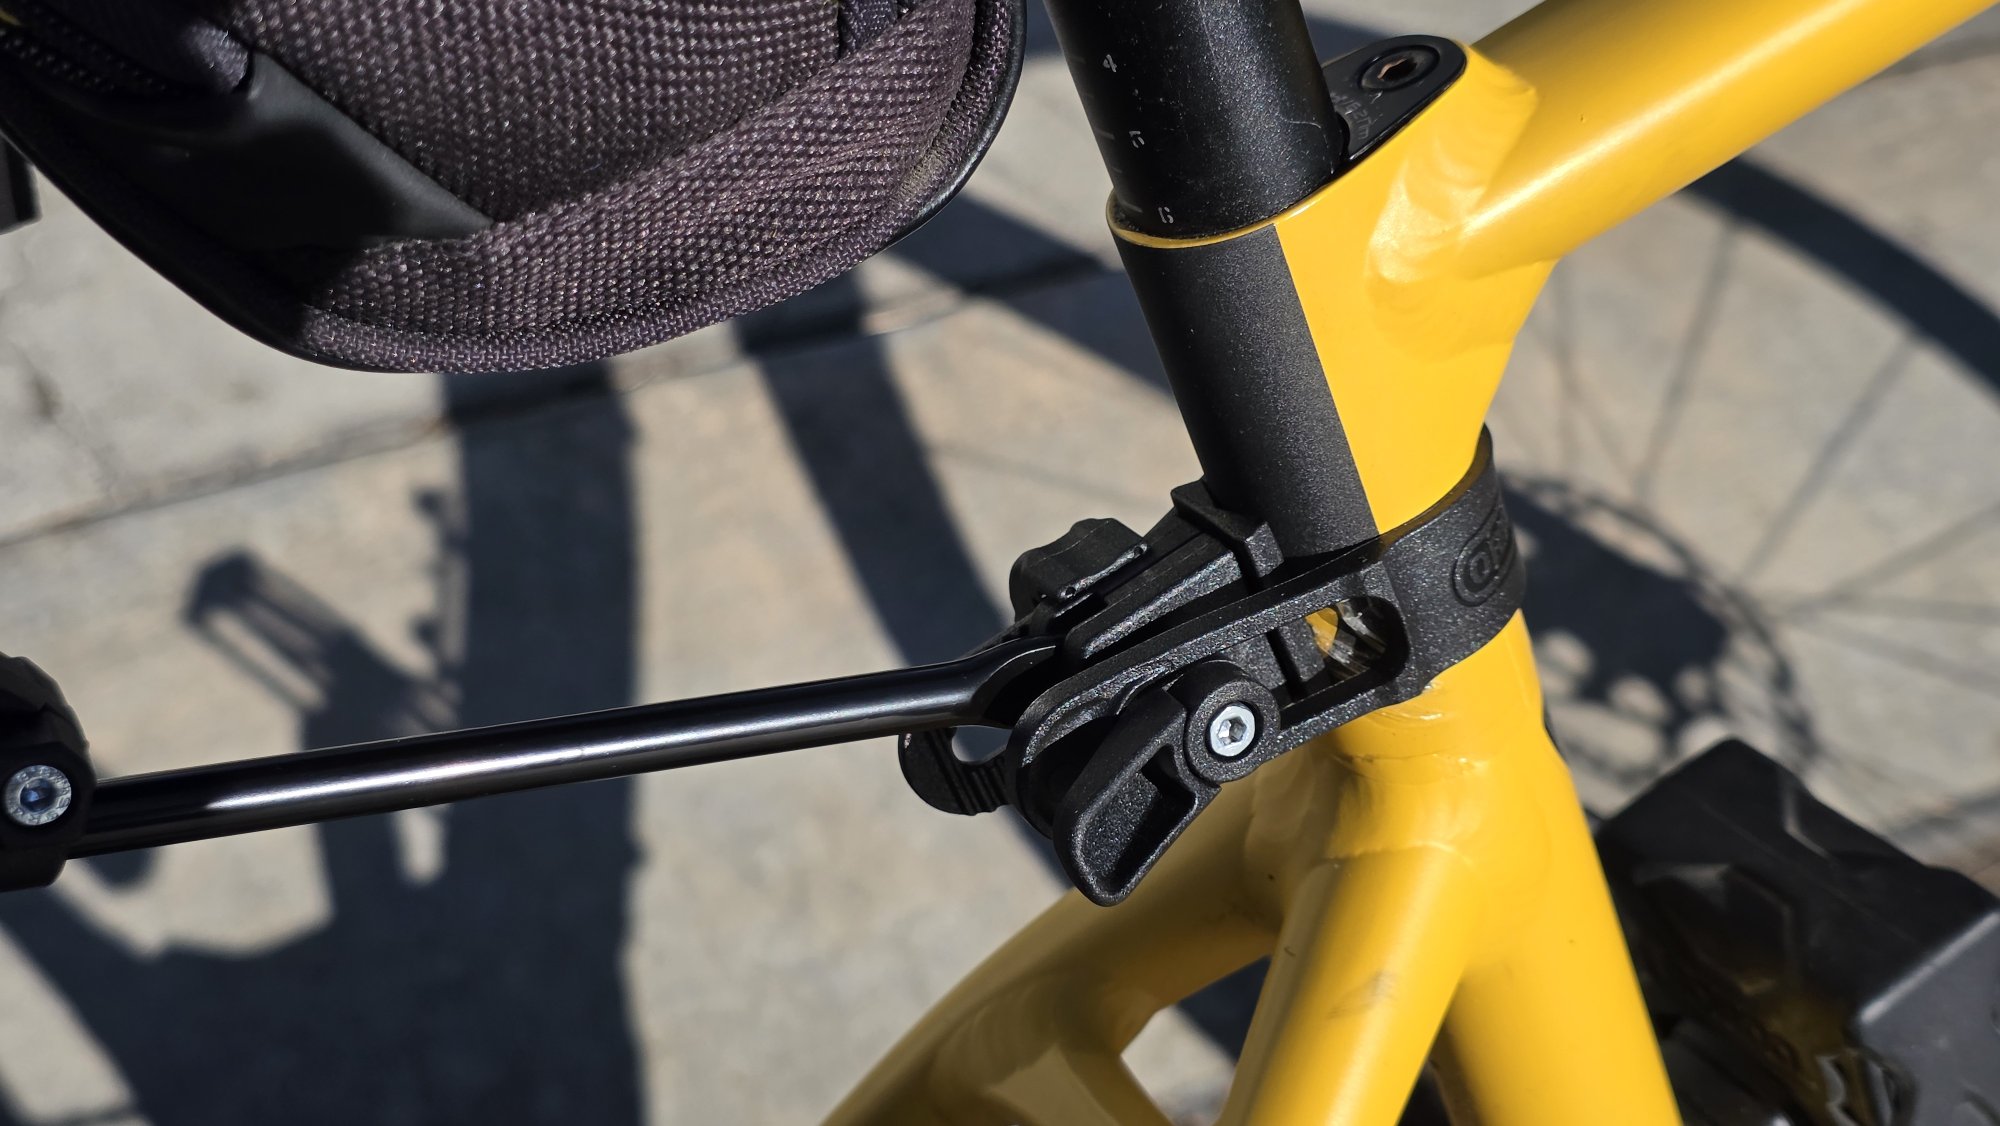
Rack pitch adjusts here. Went for a level rack for now, but level pannier rails might be smarter. Why these structures aren't parallel is beyond me.

20261004_161649.jpg

20261004_161656.jpg

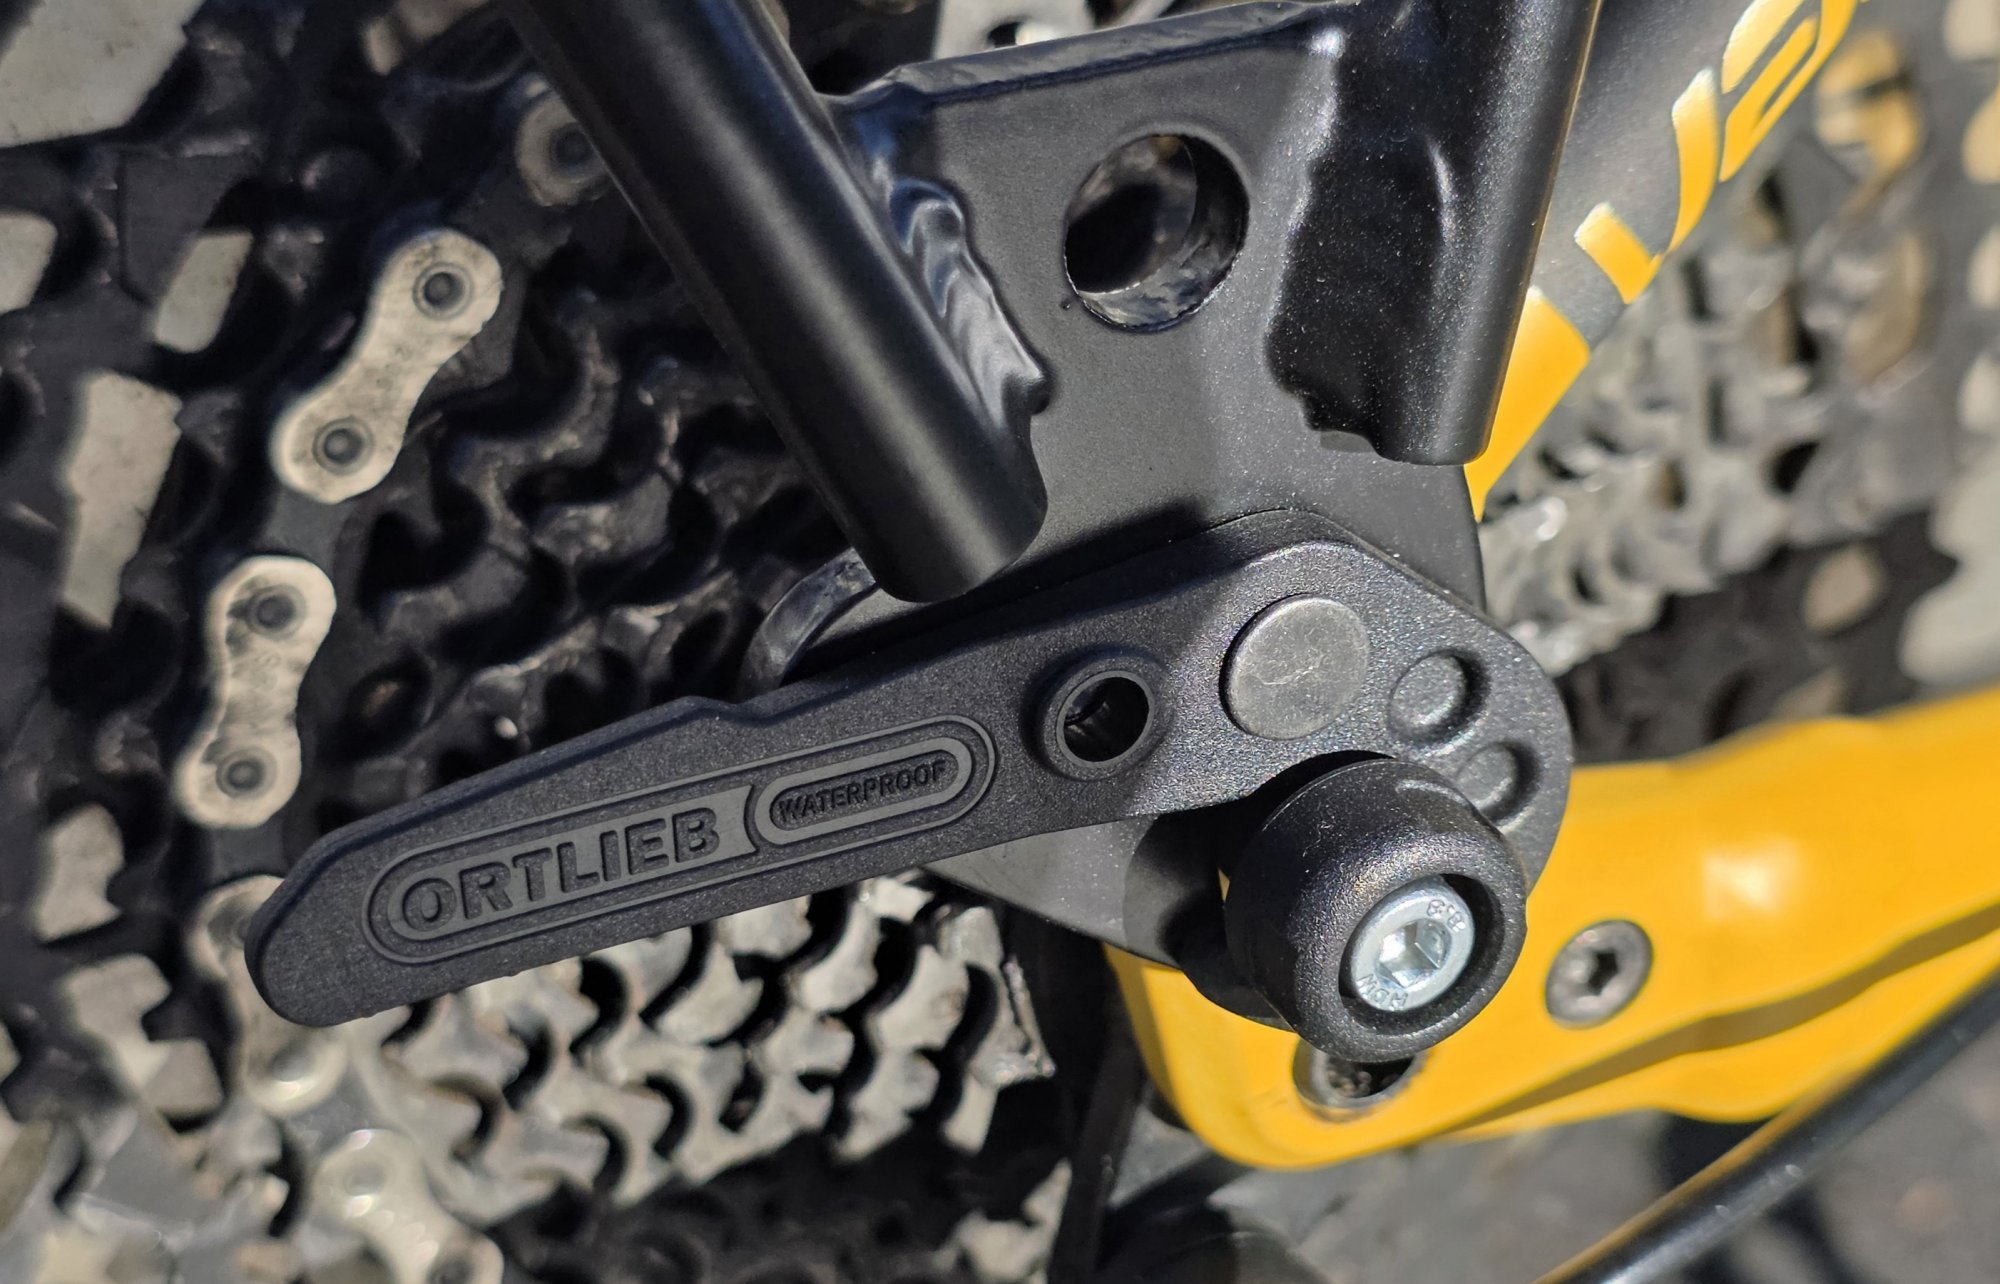
The new rack has 3 QR points. On and off the bike in well under 30 seconds.

20261004_161845.jpg

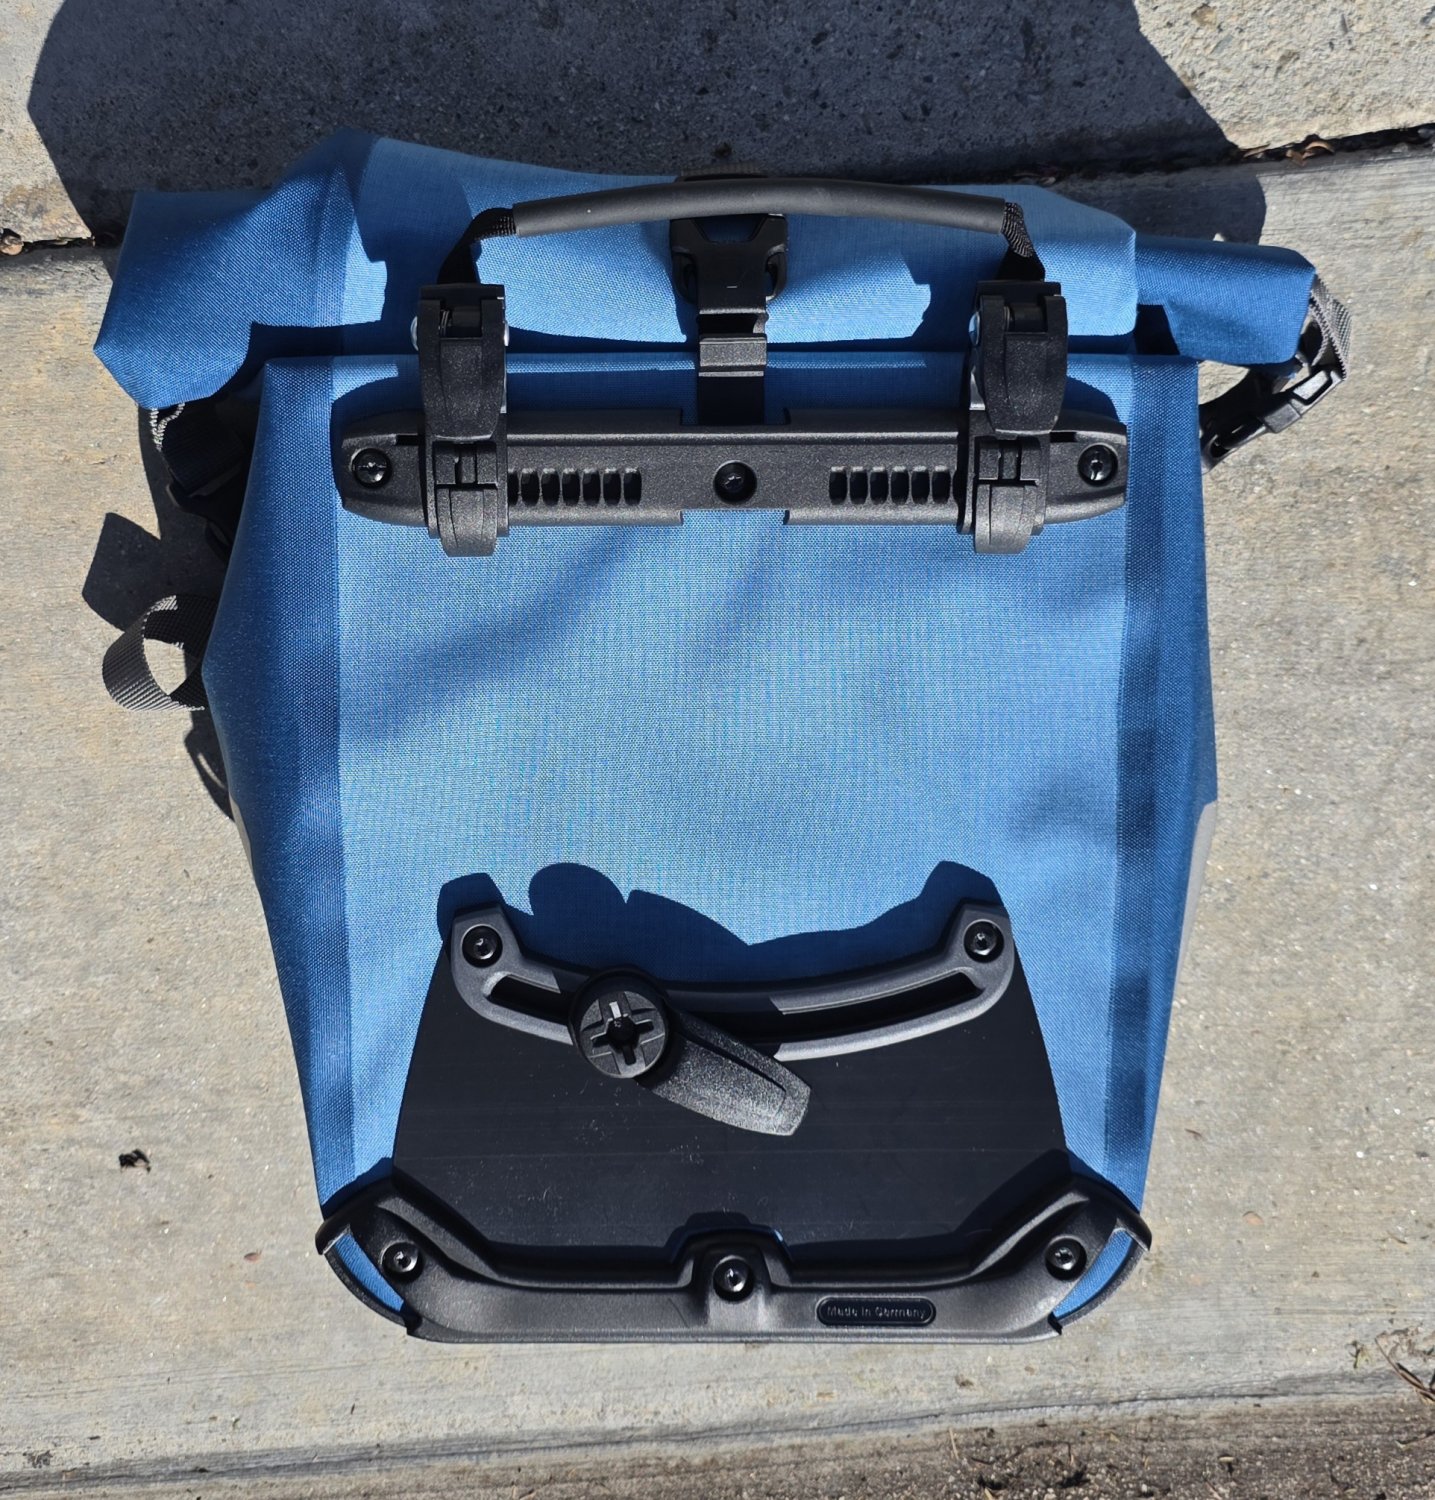
Finally, some easily removed onboard storage on this bike! This Ortlieb Sport-Roller Plus pannier is on and off the bike in under 10 seconds. The 14.5L capacity is right for my needs — mainly extra outerwear in the winter.

Not sure about the blue, but the only other viable alternative is black — maybe too much black.

Other work
To my relief, cassette and chainring wear were found to be fine at 4,300 mi. (This despite less than fastidious chain care on my part.) So OK to keep using them with last month's new chain.

Big, big fan of Schwalbe Clik valve cores, but my originals started to get gummed up with sealant after ~2,000 mi. Will never, ever go back to Presta.

Thanks!
Got lots of help and encouragement on this project on EBR — especially from @Rás Cnoic and @Stefan Mikes . Thanks to all who helped!
 
Last edited:
SL 1 makeover at ~2 yrs and 4,300 mi
More than you ever wanted to know, starting with the LBS work order:
1. Remove stock EQ fenders and rear rack
2. Mount a 40 mm Specialized Tracer TLR tubeless on rear to match front
3. Install Ortlieb Quick Rack
4. Replace existing Clik valve cores with new ones
5. Safety check (re-torque all bolts, etc.)
6. Realign slightly bent derailleur hanger
7. Inspect drivetrain for wear

Cost before taxes
LBS charges: $65 for new rear tire, $250 in labor.
Parts I supplied: $130 for new rack, $110 for new pannier, $18 for new Clik valve cores plus extra pump adapter.
Grand total: $573. Not a word to my wife!

Results
View attachment 216182
View attachment 216176
Very happy with the way this makeover turned out on all fronts — greatly improved rear traction, sportier look, much more useful quick-release (QR) rear rack, QR pannier for storage as needed, and maybe 200-300 g of net weight loss in the process.

View attachment 216191
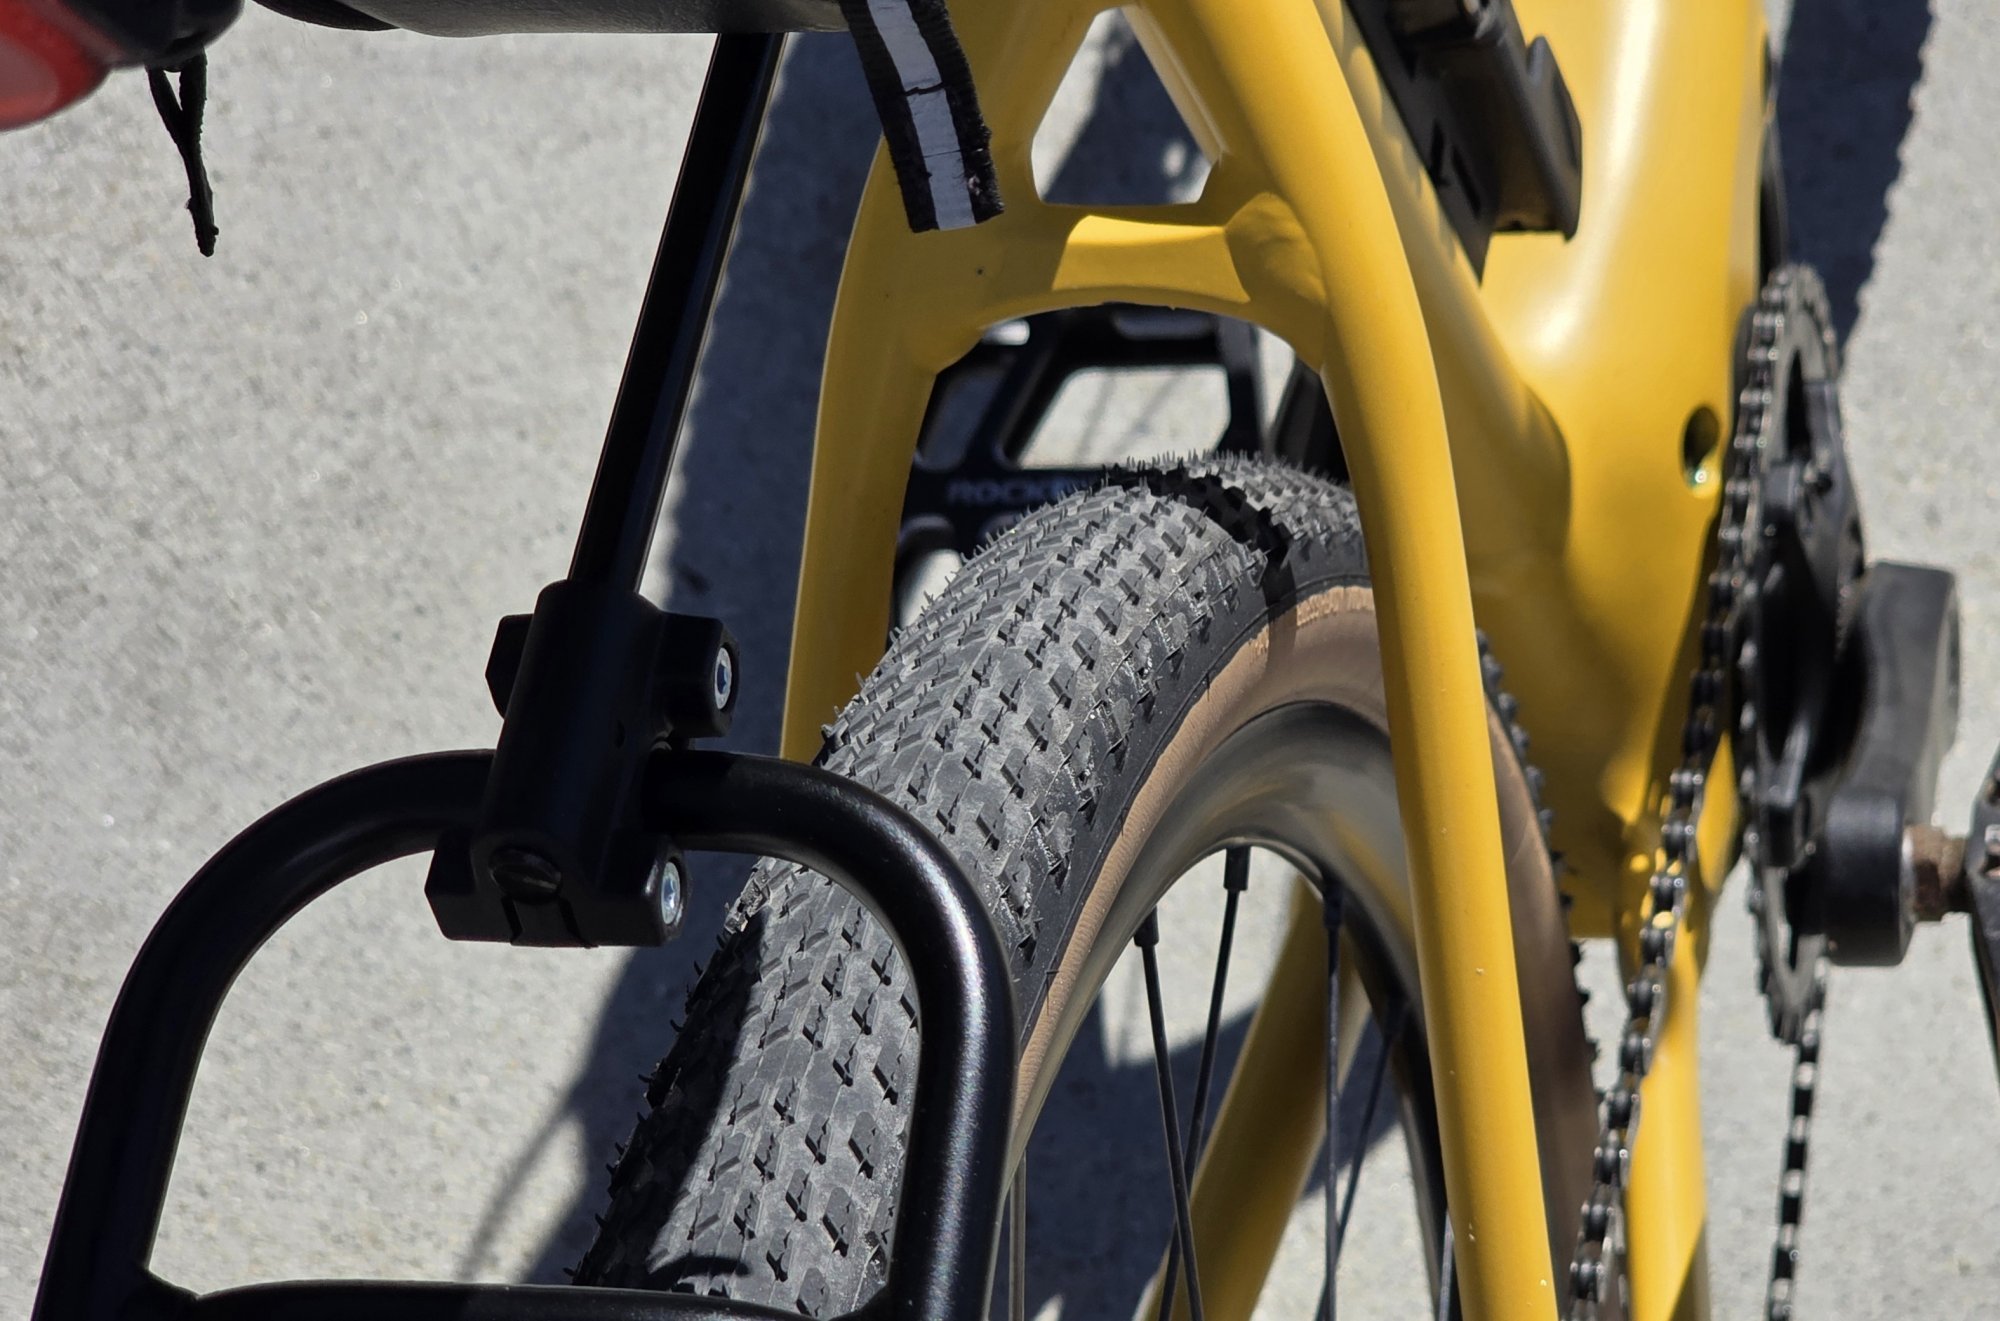
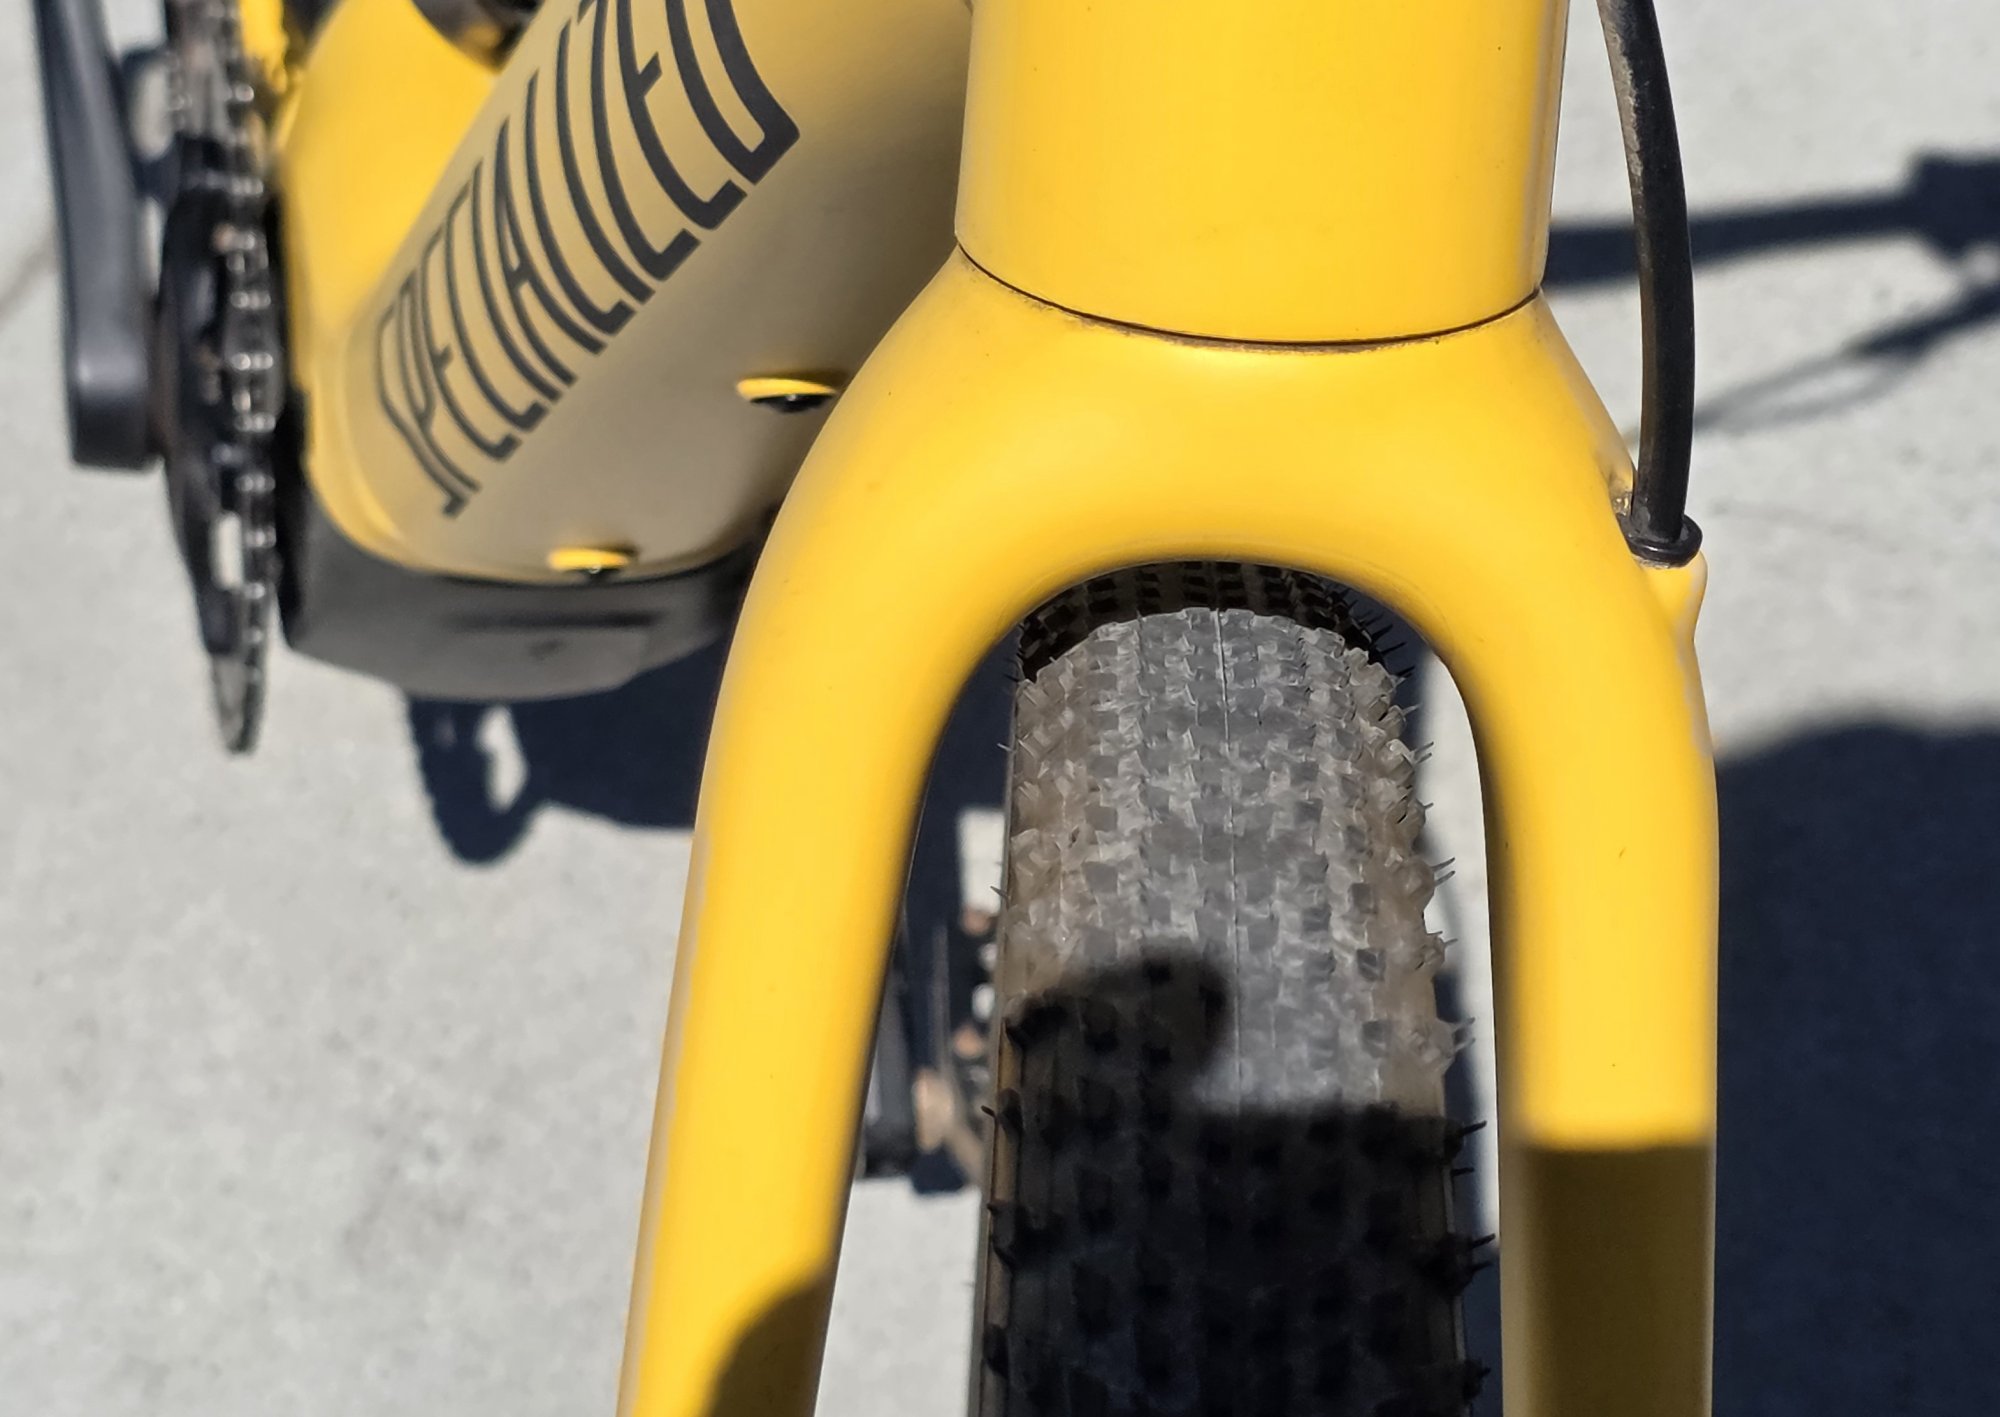
Now that's what I'm talkin' about! Getting a tire like this 40 mm Tracer on back — mainly for safety on steeper offroad descents — drove the whole project. As hoped, had a hard time breaking the rear tire loose on slightly sandy hardpack on the way home.
View attachment 216194

View attachment 216193
No experience with tire fitting, but guessing I could have room for up to a 45 mm tire on back and a 42 up front now. @Rás Cnoic may have quoted similar fenderless SL 1 limits in a recent post.
View attachment 216188
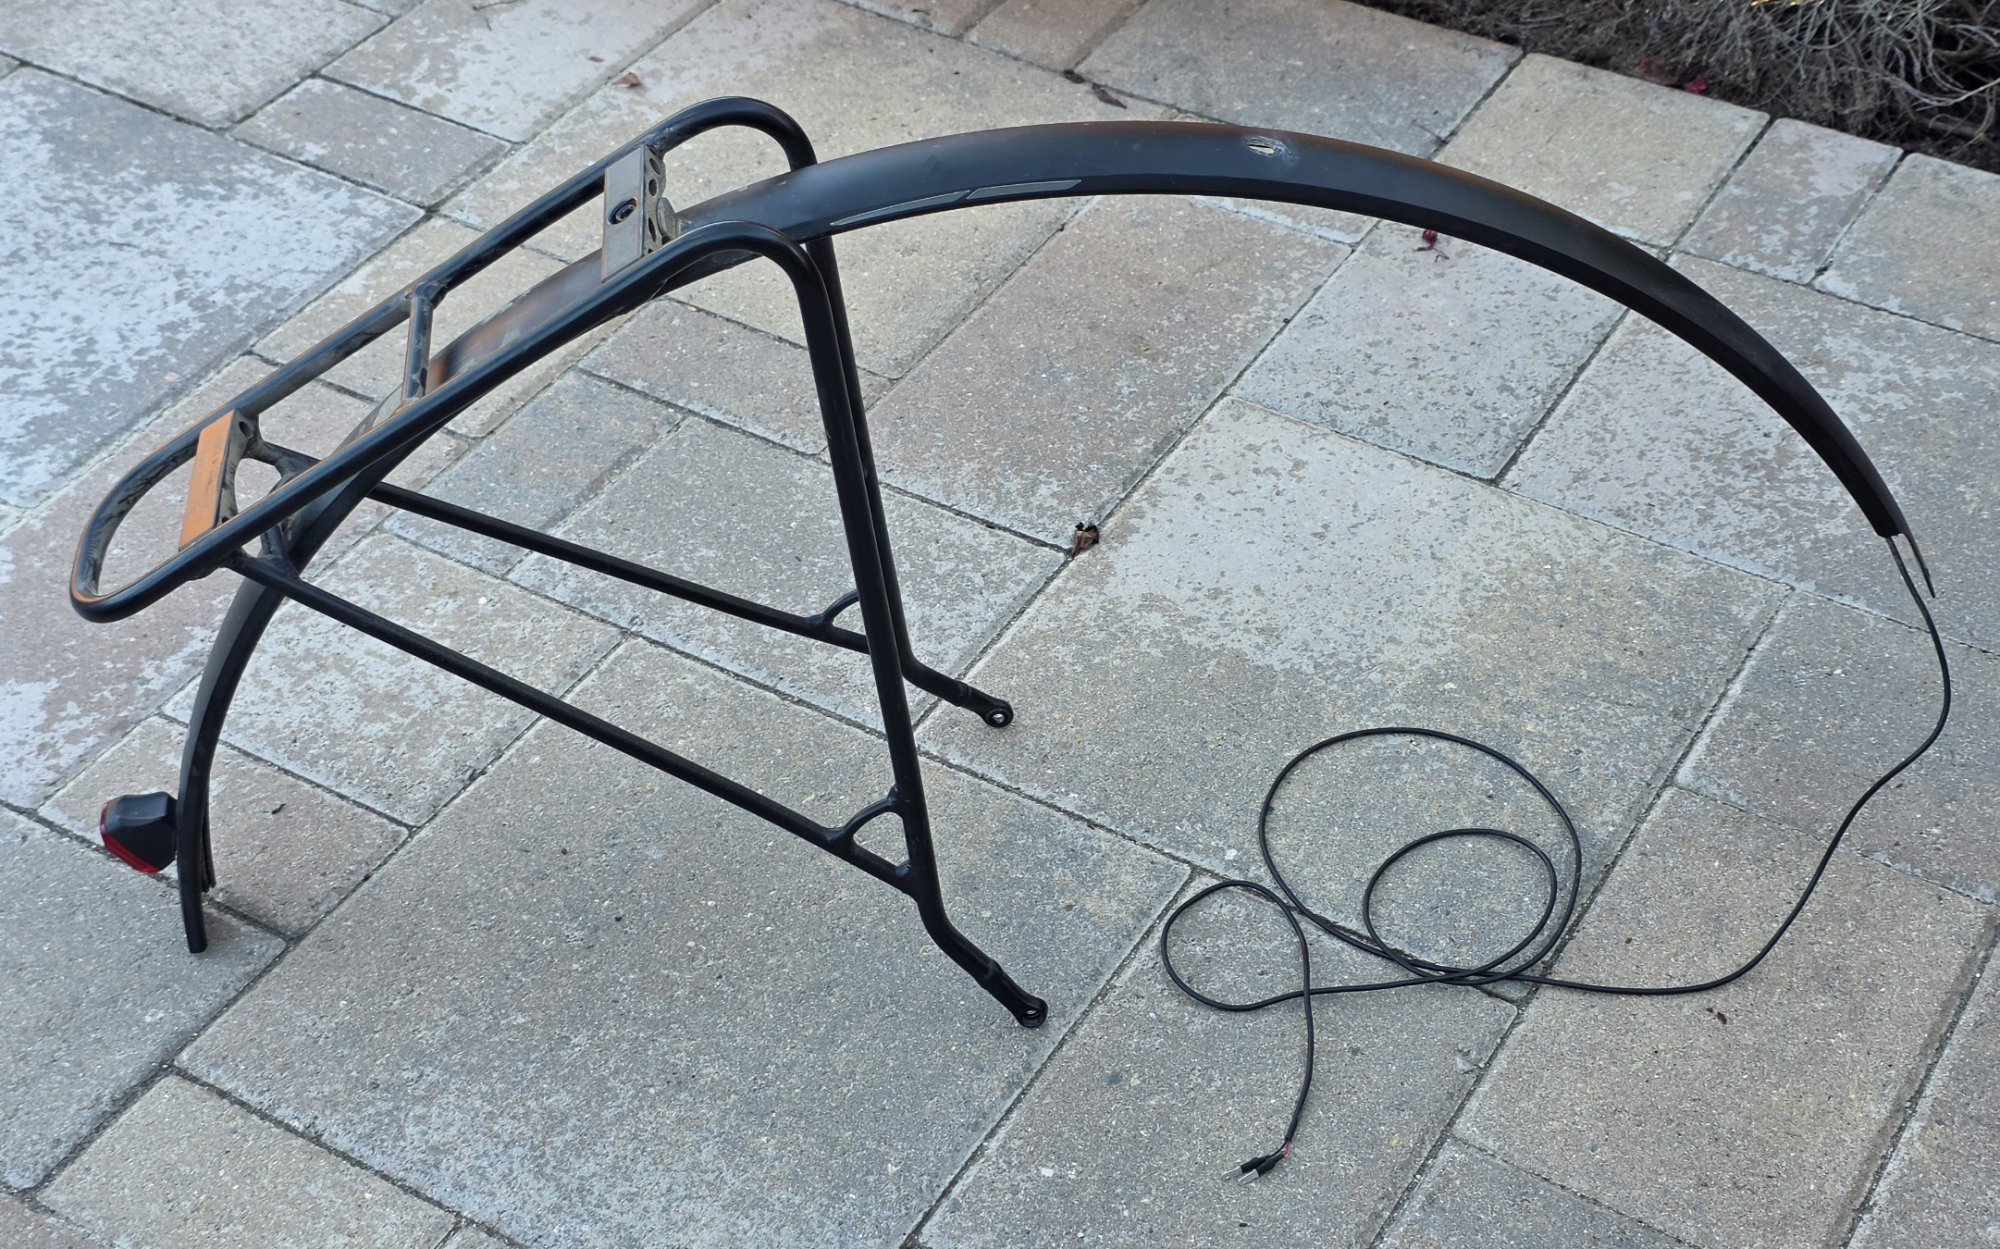
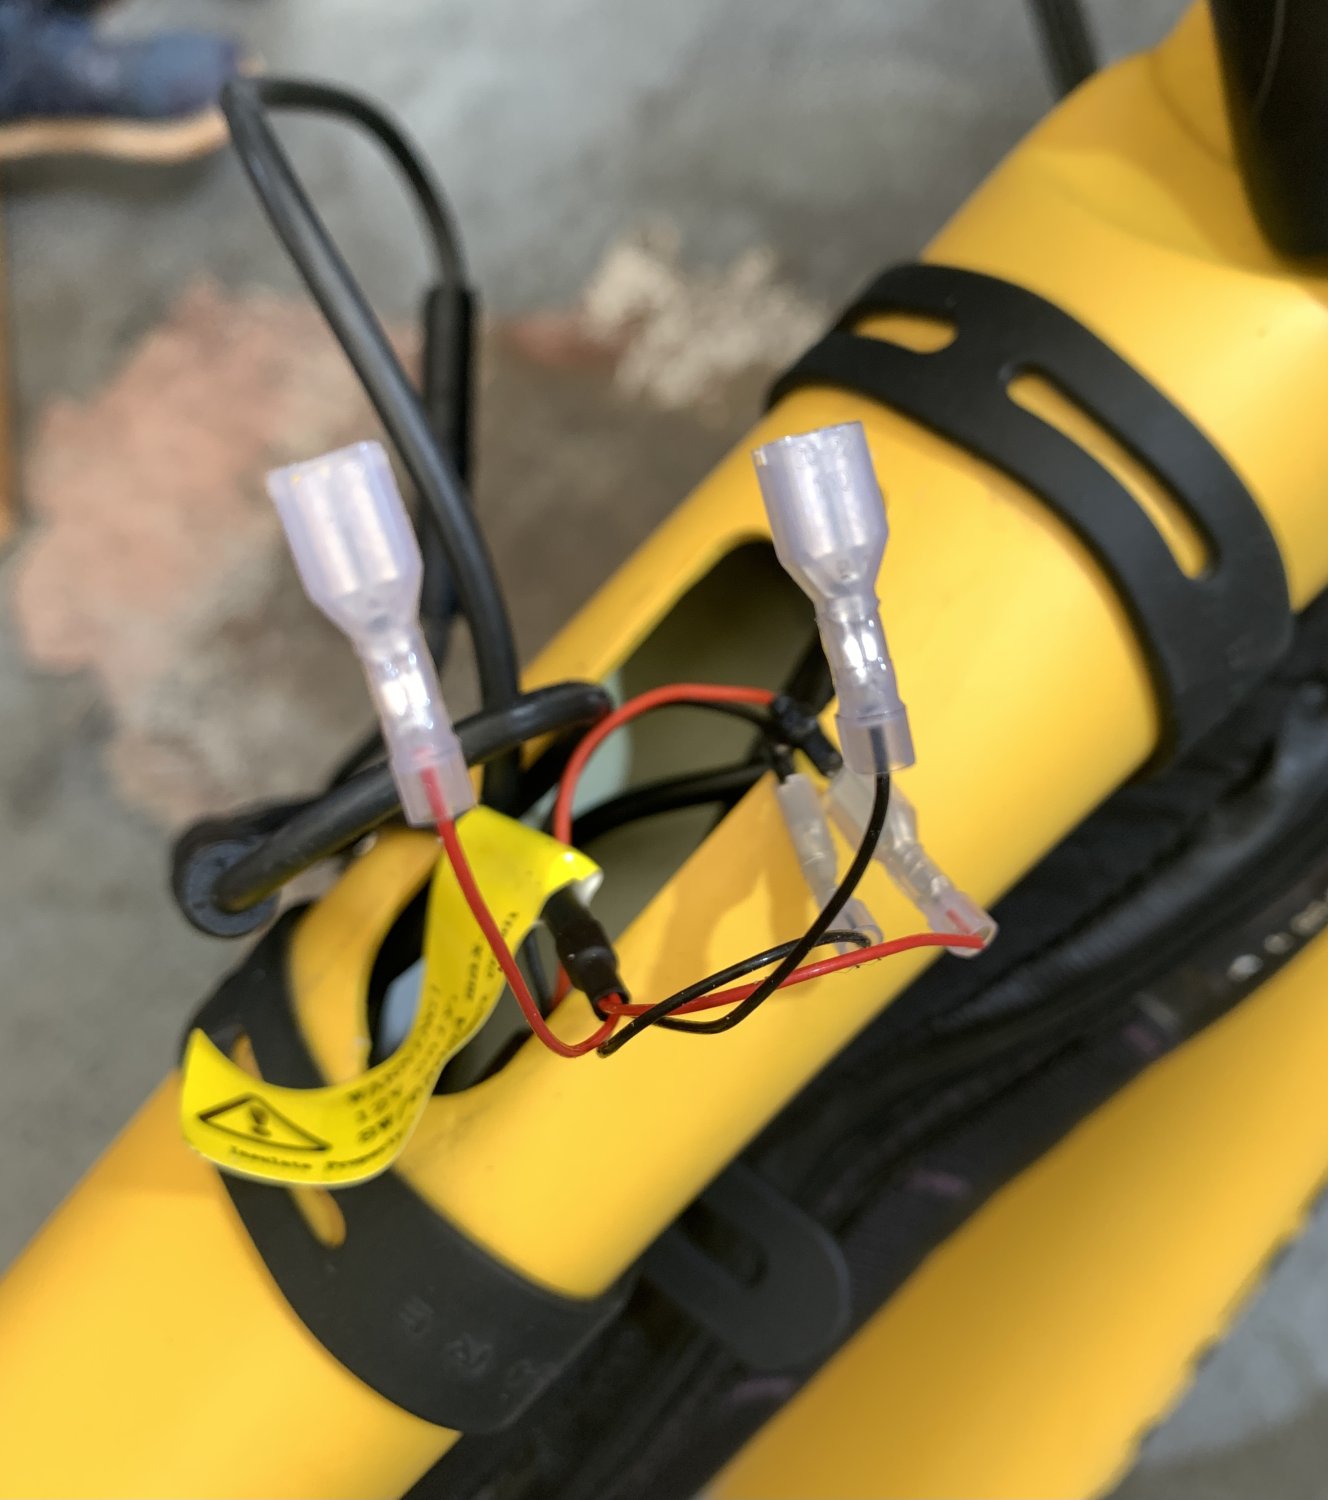
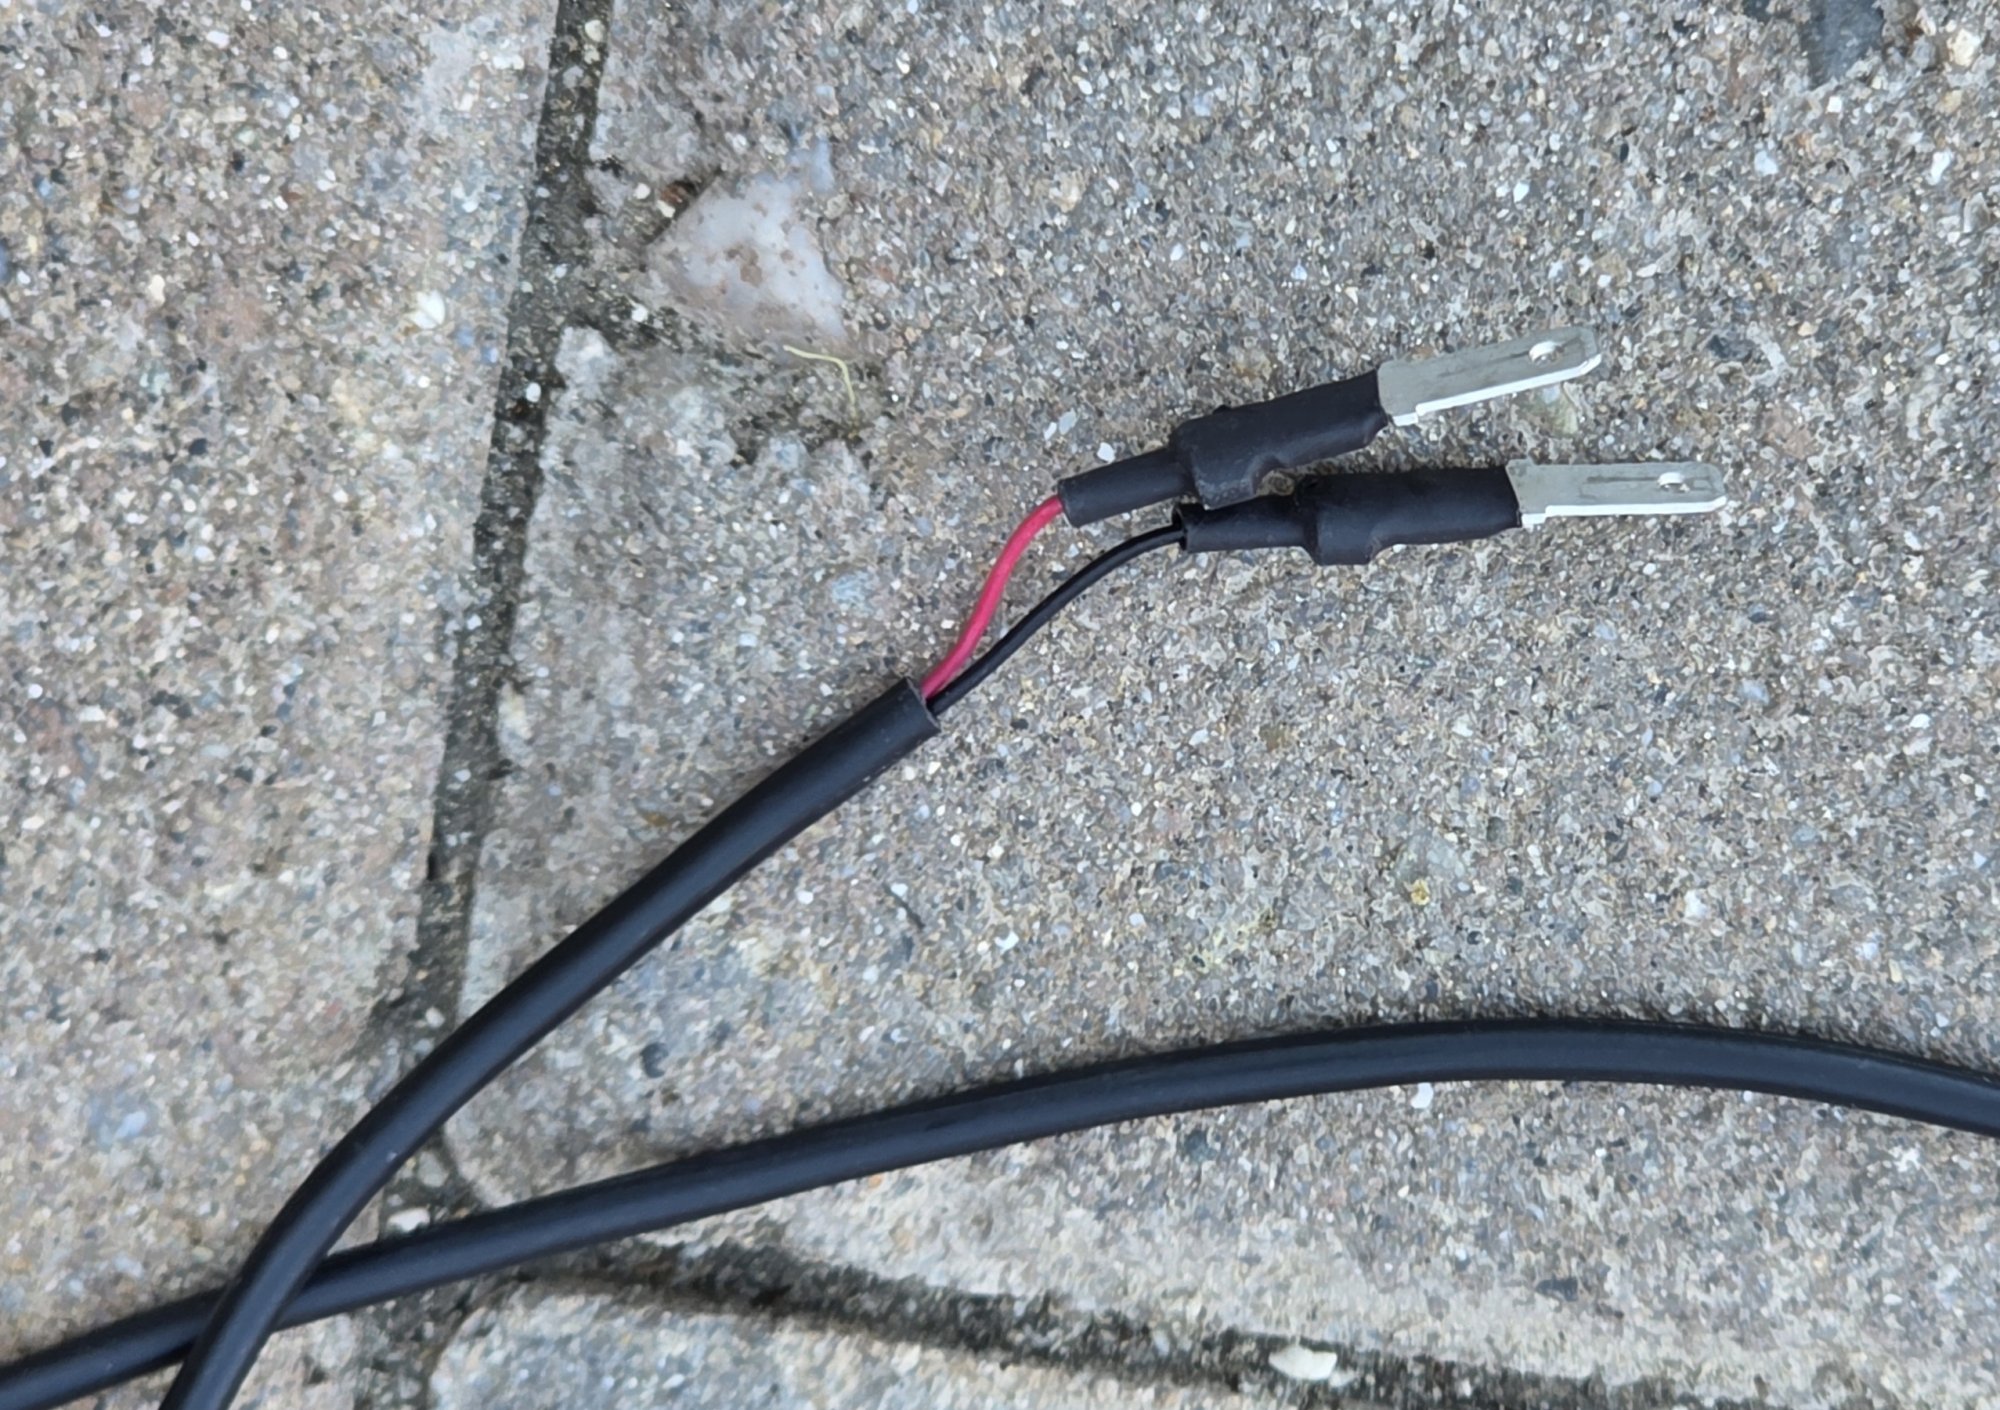
The rear fender's tail light is hard wired on SL 1 EQ models like mine. We agreed to cut the wire somewhere inside the motor housing, as there's no connector there.

Instead, the connector's way up at the display. The 50 cm of wire beyond the fender goes past the motor and battery and through the head tube to get there! "Idiotic design," said the mechanic.
View attachment 216190
View attachment 216183
Asked for the wire to be cut in the most reversible way possible — meaning to leave a connector at the motor or at least enough of a tail to splice. However, the tech who actually did the work apparently took "most reversible way" to mean dropping the motor and battery and unplugging the intact wire at the display.

Probably added $60 to the labor charge, but I'm OK with that.
View attachment 216178
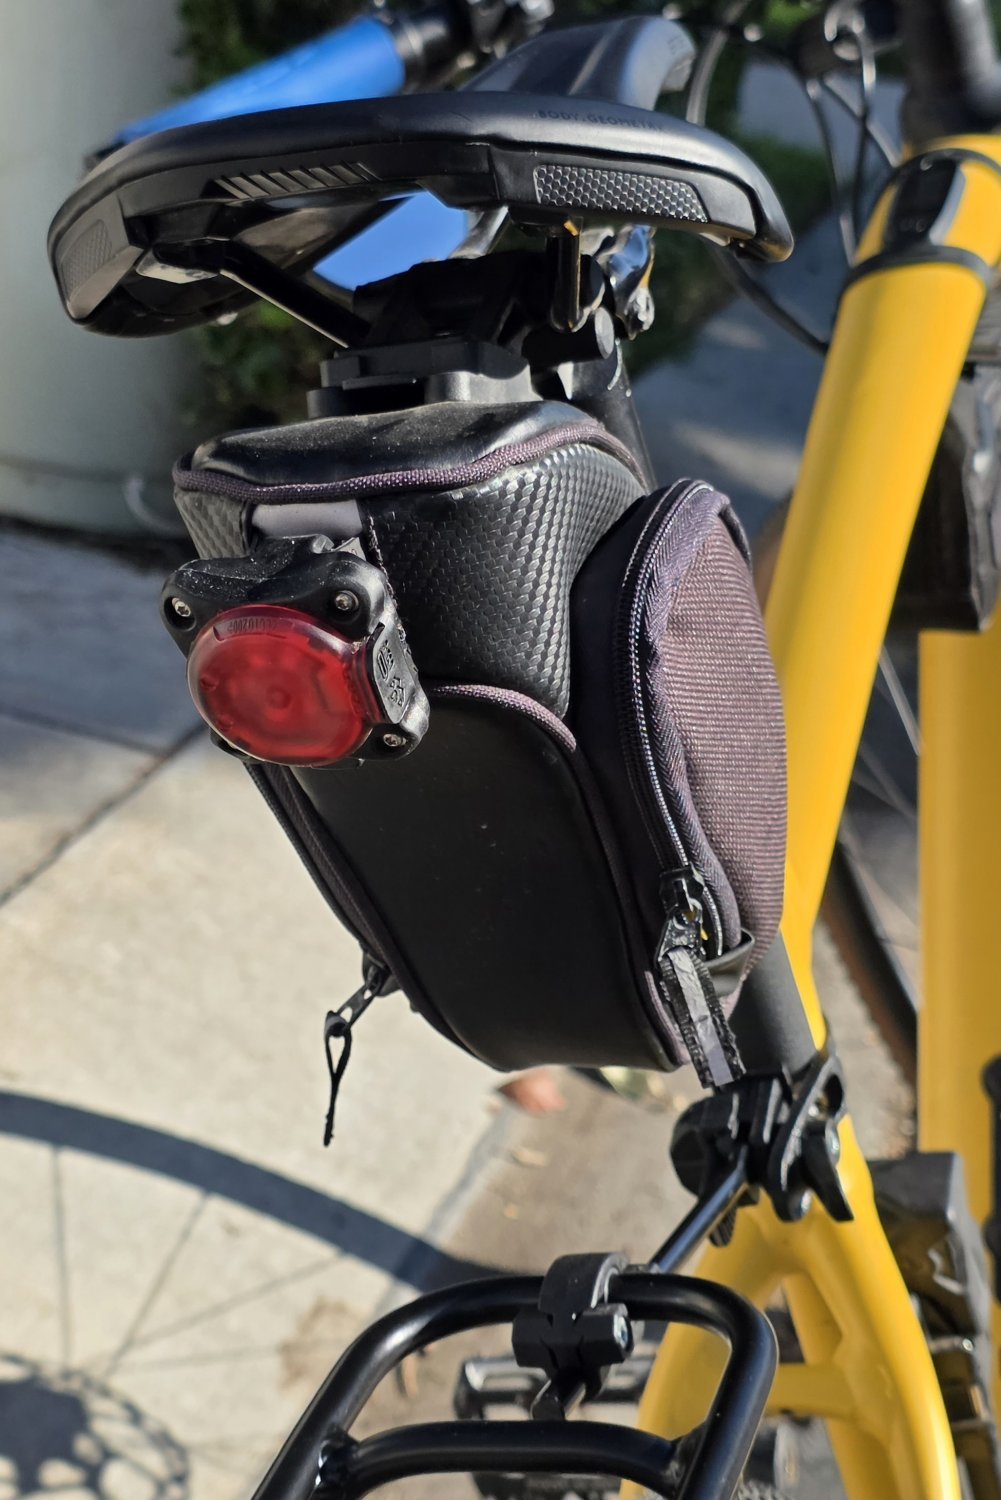
Used this 400 lumen Lezyne Zecto Drive clip-on tail light as a secondary to the stock light, but it'll be fine as the primary for now. The single on-off-mode button is moody, and battery life could be longer. But the LEDs are very bright at max intensity, and the flash patterns are definitely attention-grabbing.
View attachment 216180
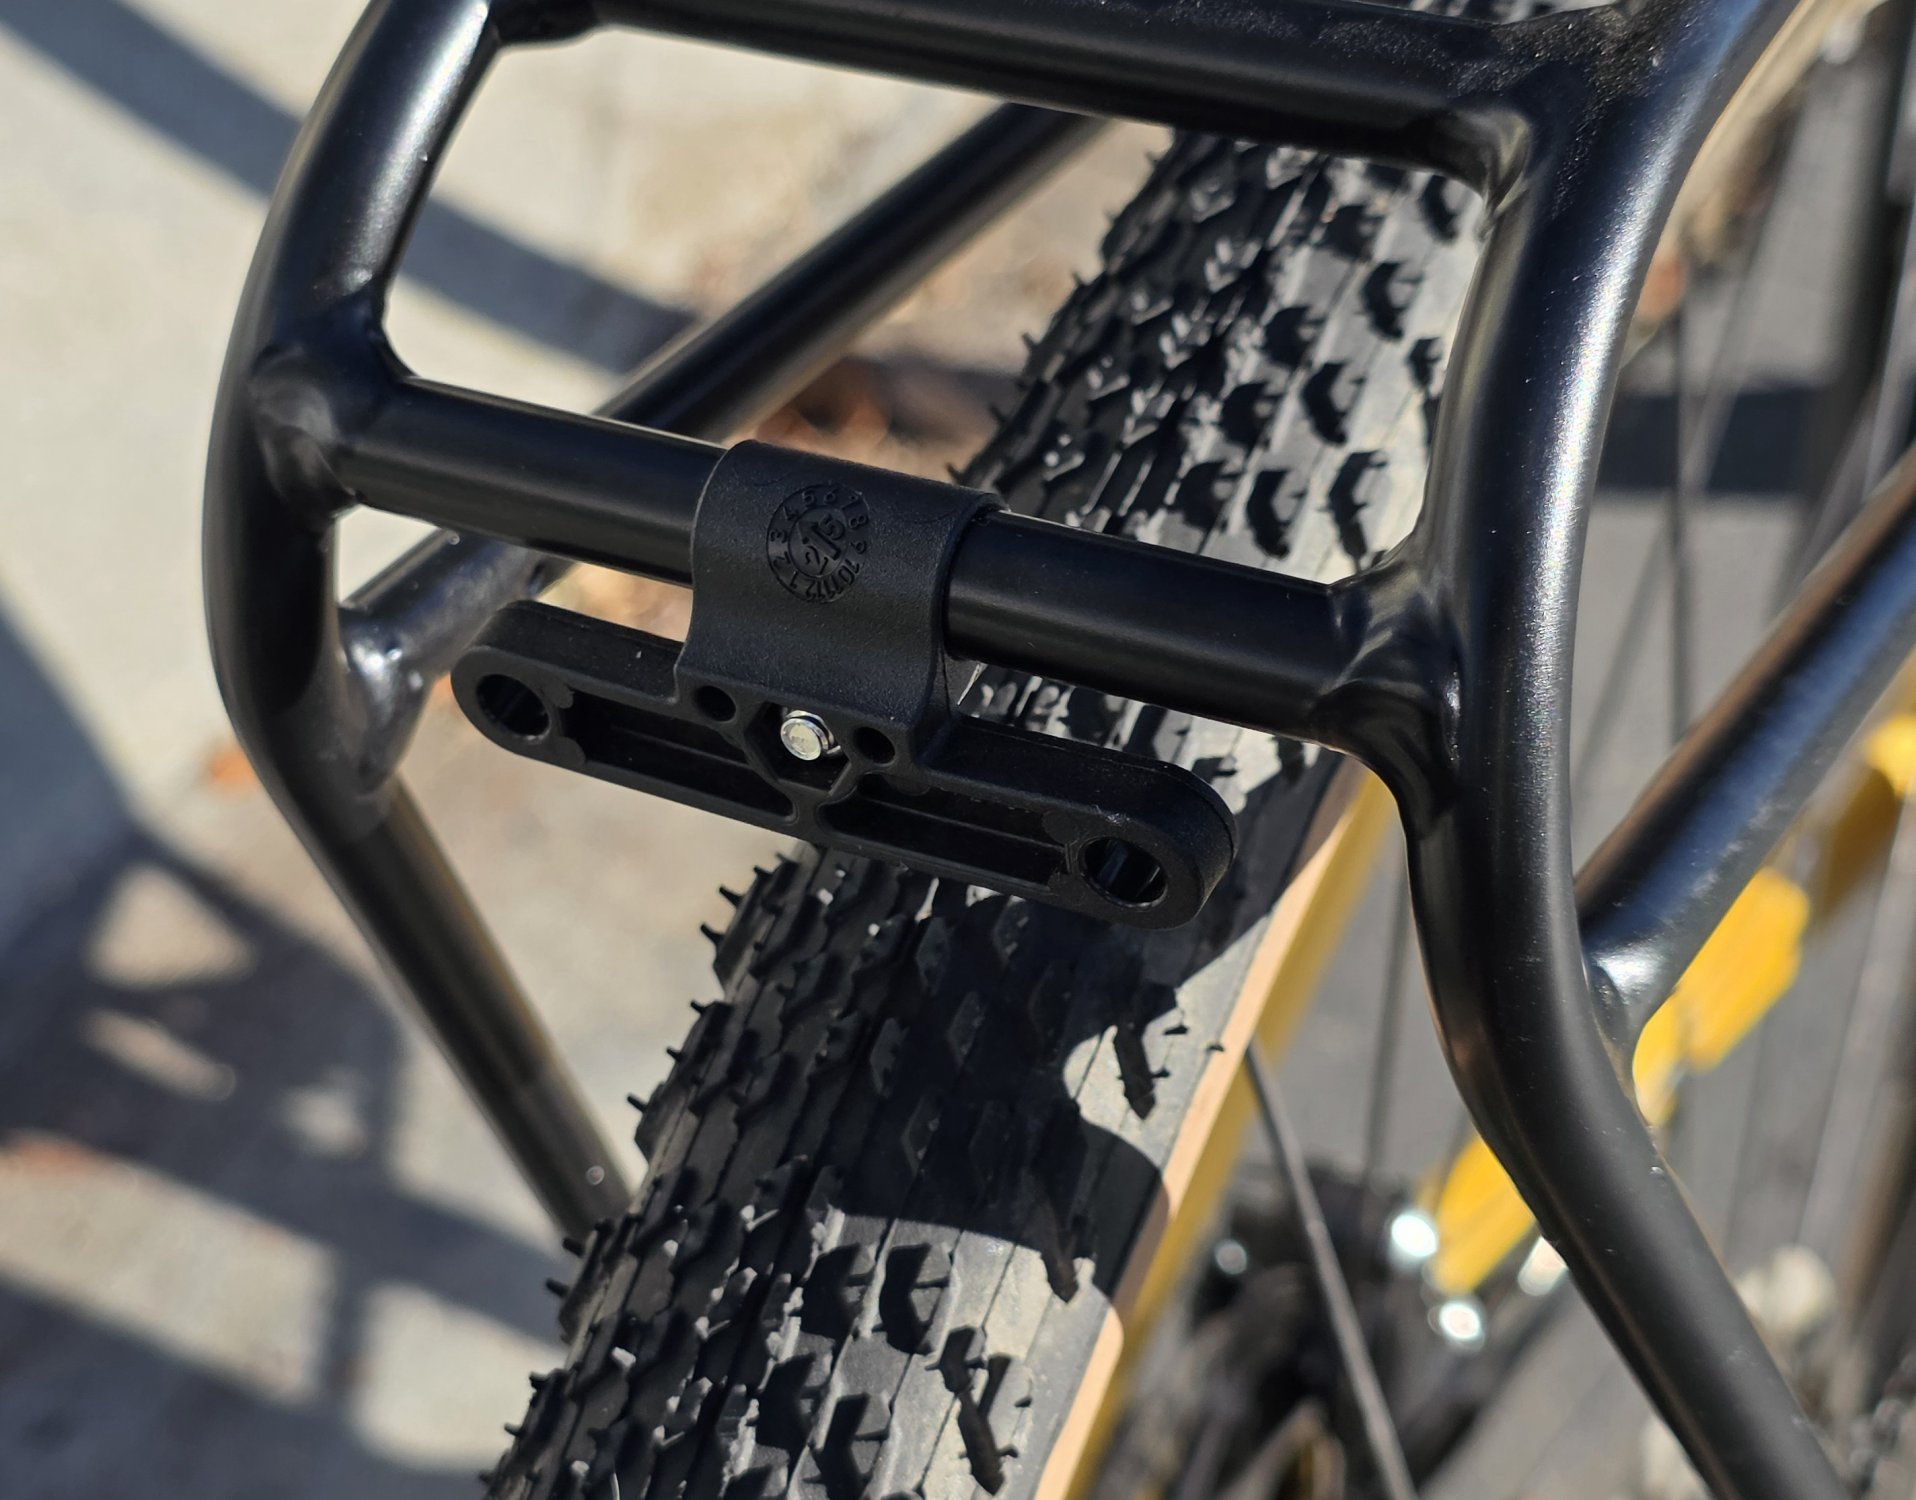
Should I ever want a different tail light or a reflector, the new rack offers an aimable reversible horizontal bracket with screw holes 50 mm apart on center.
View attachment 216192
View attachment 216177
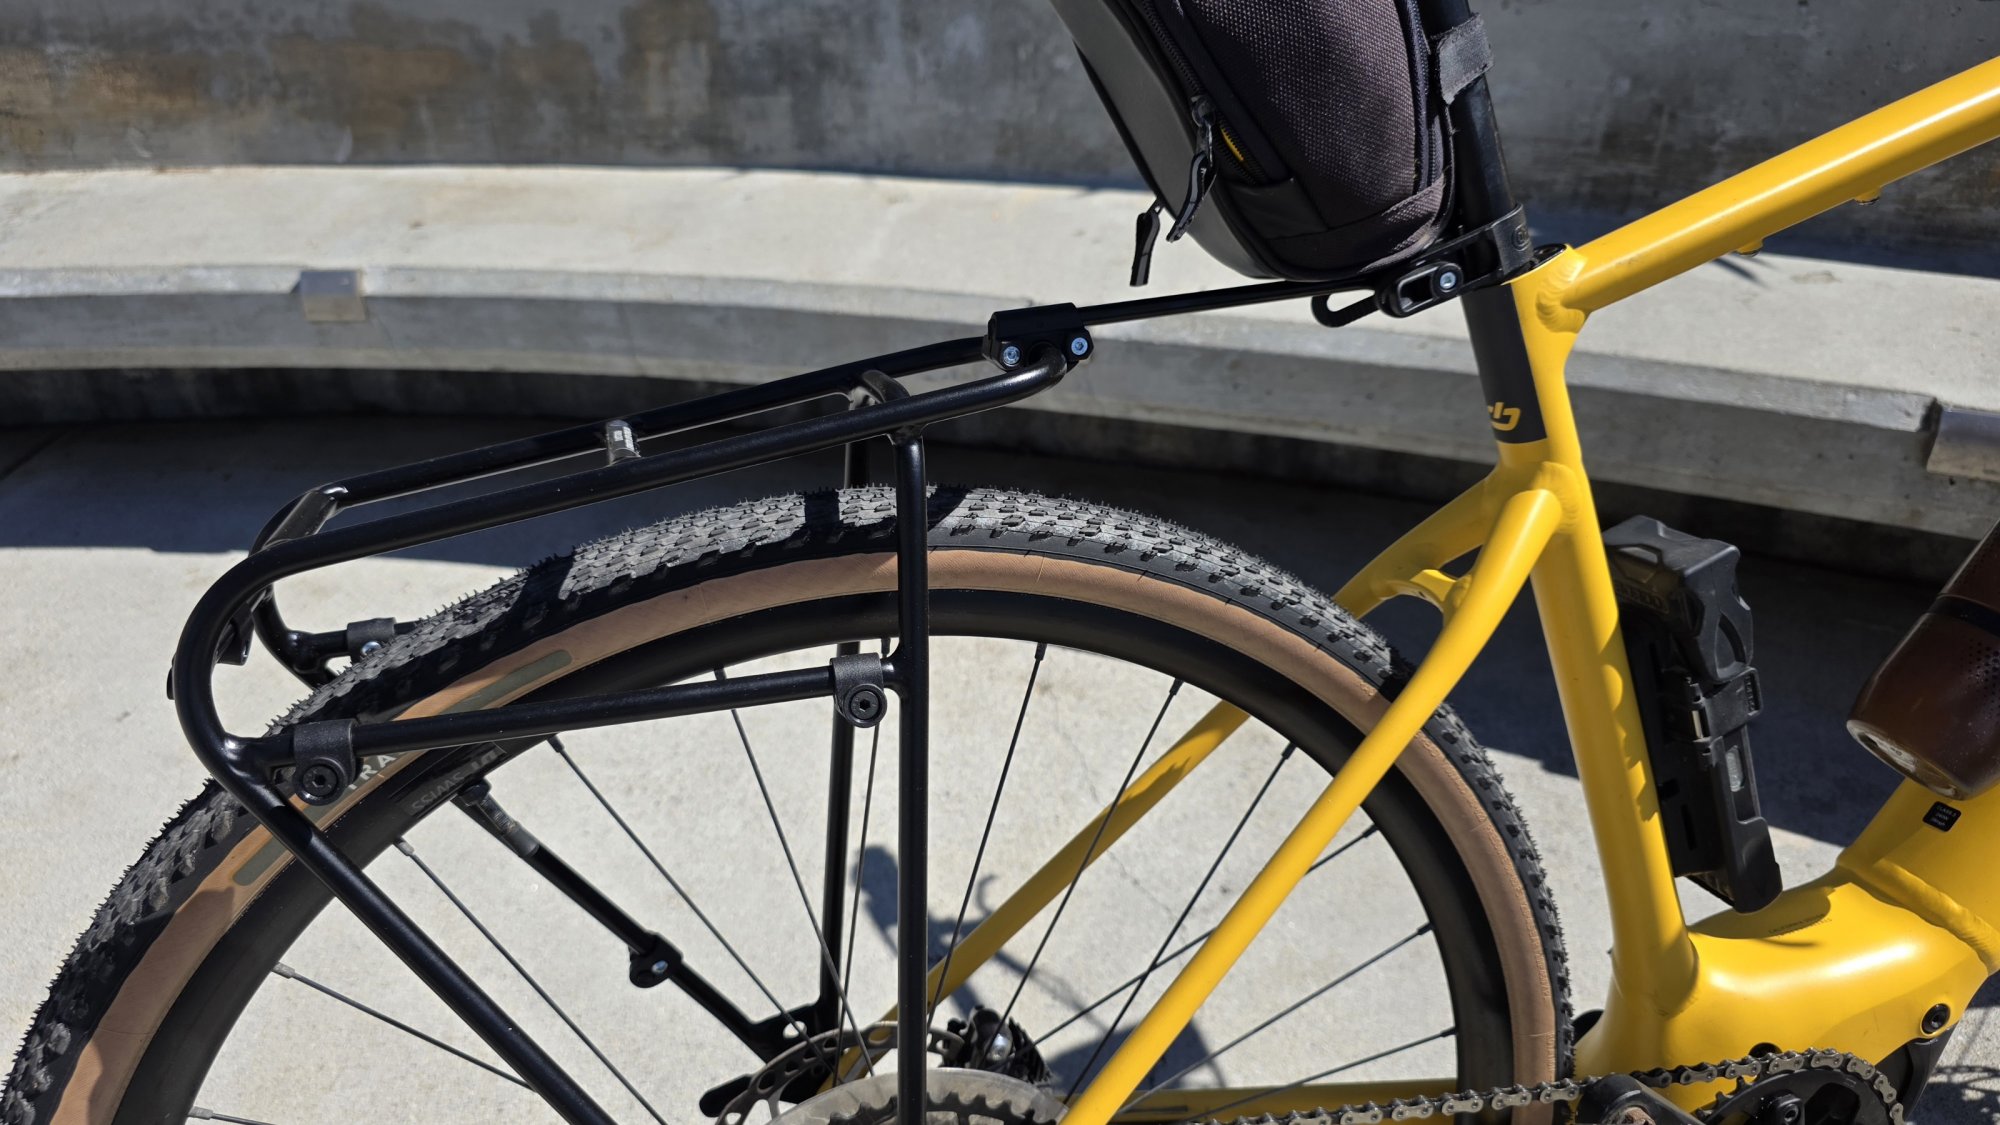
Had to revise the shop's Ortlieb Quick Rack installation (upper photo), but no big deal. @Stefan Mikes provides a very helpful photo of this rack on his SL 1.
View attachment 216186
Rack pitch adjusts here. Went for a level rack for now, but level pannier rails might be smarter. Why these structures aren't parallel is beyond me.
View attachment 216187
View attachment 216189
The new rack has 3 QR points. On and off the bike in well under 30 seconds.
View attachment 216181
Finally, some easily removed onboard storage on this bike! On and off the bike in under 10 seconds. The 14.5L capacity is right for my needs. Not sure about the blue, but the only viable alternative is black — maybe too much black.

Other work
To my relief, cassette and chainring wear were found to be fine at 4,300 mi. (This despite less than fastidious chain care on my part.) So OK to keep using them with last month's new chain.

Big, big fan of Schwalbe Clik valve cores, but my originals started to get gummed up with sealant after ~2,000 mi. Will never, ever go back to Presta.

Thanks!
Got lots of help and encouragement on this project on EBR — especially from @Rás Cnoic and @Stefan Mikes . Thanks to all who helped!
I read about the Clik cores. I asked 4 different bike shops in my area and they said they were a gimmick. Maybe they just haven't used them. I've never had an issue with presta valves, but I was thinking about trying them.
 
Also I got a Garmin Varia RVR315 last week. A local shop was doing 40% off. The mountinh bracket that it came with, was too low with my Kinekt seatpost. So I got a seat bracket. I was skeptical about the usefulness of the radar, but I've found it pretty helpful the last 3 times I rode.

@Jeremy McCreary it would look nice on your updated setup, although you might be better off with the one with the light.
 
SL 1 makeover at ~2 yrs and 4,300 mi
More than you ever wanted to know, starting with the LBS work order:
1. Remove stock EQ fenders and rear rack
2. Mount a 40 mm Specialized Tracer TLR tubeless on rear to match front
3. Install Ortlieb Quick Rack
4. Replace existing Clik valve cores with new ones
5. Safety check (re-torque all bolts, etc.)
6. Realign slightly bent derailleur hanger
7. Inspect drivetrain for wear

Cost before taxes
LBS charges: $65 for new rear tire, $250 in labor.
Parts I supplied: $130 for new rack, $110 for new pannier, $18 for new Clik valve cores plus extra pump adapter.
Grand total: $573. Not a word to my wife!

Results
View attachment 216182
View attachment 216176
Very happy with the way this makeover turned out on all fronts — greatly improved rear traction, sportier look, much more useful quick-release (QR) rear rack, QR pannier for storage as needed, and maybe 200-300 g of net weight loss in the process.

View attachment 216191
Now that's what I'm talkin' about! Getting a tire like this 40 mm Tracer on back — mainly for safety on steeper offroad descents — drove the whole project. As hoped, had a hard time breaking the rear tire loose on slightly sandy hardpack on the way home.

View attachment 216194

View attachment 216193
No experience with tire fitting, but guessing I could have room for up to a 45 mm tire on back and a 42 up front now. @Rás Cnoic may have quoted similar fenderless SL 1 limits in a recent post.

View attachment 216188
The rear fender's tail light is hard wired on SL 1 EQ models like mine. We agreed to cut the wire somewhere inside the motor housing, as there's no connector there.

Instead, the connector's way up at the display. The 50 cm of wire beyond the fender goes past the motor and battery and through the head tube to get there! "Idiotic design," said the mechanic.

View attachment 216190
View attachment 216183
Asked for the wire to be cut in the most reversible way possible — meaning to leave a connector at the motor or at least enough of a tail to splice. However, the tech who actually did the work apparently took "most reversible way" to mean dropping the motor and battery and unplugging the intact wire at the display.

Probably added $60 to the labor charge, but I'm OK with that.

View attachment 216178
Used this 400 lumen Lezyne Zecto Drive clip-on tail light as a secondary to the stock light, but it'll be fine as the primary for now. The single on-off-mode button is moody, and battery life could be longer. But the LEDs are very bright at max intensity, and the flash patterns are definitely attention-grabbing.

View attachment 216180
Should I ever want a different tail light or a reflector, the new rack offers an aimable reversible horizontal bracket with screw holes 50 mm apart on center.

View attachment 216192
View attachment 216177
Had to revise the shop's Ortlieb Quick Rack installation (upper photo), but no big deal. @Stefan Mikes provides a very helpful photo of this rack on his SL 1.

View attachment 216186
Rack pitch adjusts here. Went for a level rack for now, but level pannier rails might be smarter. Why these structures aren't parallel is beyond me.

View attachment 216187
View attachment 216189
The new rack has 3 QR points. On and off the bike in well under 30 seconds.

View attachment 216181
Finally, some easily removed onboard storage on this bike! This Ortlieb Sport-Roller Plus pannier is on and off the bike in under 10 seconds. The 14.5L capacity is right for my needs — mainly extra outerwear in the winter.

Not sure about the blue, but the only other viable alternative is black — maybe too much black.

Other work
To my relief, cassette and chainring wear were found to be fine at 4,300 mi. (This despite less than fastidious chain care on my part.) So OK to keep using them with last month's new chain.

Big, big fan of Schwalbe Clik valve cores, but my originals started to get gummed up with sealant after ~2,000 mi. Will never, ever go back to Presta.

Thanks!
Got lots of help and encouragement on this project on EBR — especially from @Rás Cnoic and @Stefan Mikes . Thanks to all who helped!
Really lookin' good mate.
Nice upgrades and mods. Especially the rear tire. That in addition to the new front must be rather inspiring.
Also, nice mileage out of the drivetrain. Odd about the Cliks though... zero clogging so far for me.
 
I read about the Clik cores. I asked 4 different bike shops in my area and they said they were a gimmick. Maybe they just haven't used them. I've never had an issue with presta valves, but I was thinking about trying them.

Definitely not a gimmick. Remove rubber cap, attach and let go of pump head, read pressure off pump, add air as needed, pull pump head, replace cap — done in well under a minute with no fiddling whatsoever!

So simple and easy now that I do this every 2-3 days to keep my tubeless tire pressures just right.

The standard Presta head on my Topeak Joe Blow floor pump works fine with Cliks. Not so the Presta head on the Cycplus electric pump I carry, but the Shrader head with a small Clik adapter works perfectly.

Two Clik cores and a Shrader adapter for $18 on Amazon now. Well worth it in my book.
 
Also I got a Garmin Varia RVR315 last week. A local shop was doing 40% off. The mountinh bracket that it came with, was too low with my Kinekt seatpost. So I got a seat bracket. I was skeptical about the usefulness of the radar, but I've found it pretty helpful the last 3 times I rode.

@Jeremy McCreary it would look nice on your updated setup, although you might be better off with the one with the light.

Great deal! Considering a radar in the next round of bike spending. Not a big Garmin fan, but like the looks of the Wahoo radar+light, and it would be fully functional with my Wahoo ACE head unit.

Problem is, the Wahoo gets poor reviews on picking up overtaking bicycles — the threat I most want to detect around here.
 
Last edited:
Really lookin' good mate.
Nice upgrades and mods. Especially the rear tire. That in addition to the new front must be rather inspiring.
Also, nice mileage out of the drivetrain. Odd about the Cliks though... zero clogging so far for me.

Between the new 40 mm gravel tires and a recent brake upgrade, the SL 1 is soooo sure-footed now! At this point, I'm calling it a lightweight flat-bar gravel ebike — exactly what I want.
 
Last edited:
How lovely, Jeremy! Excellent work with the attention to any detail! Worth every cent!

Funny to think, my Quick Rack had no rear accessory mount when I bought it (perhaps it is available as a spare part now?). No big deal for me as I'm attaching and removing the Quick Rack as needed so I wouldn't install a radar there myself.

Regarding the Lezyne tail light. 400 lm is a night vision killer for drivers. You might do this experiment. Have your Vado SL outside at night with the tail light on and walk away for some 300 yds. You might be surprised how strong the light is! I have lost my 400 lm Lezyne but when I had it, I learned using it at a low (constant) setting. Perfectly visible and a long battery life! Now, I use my older KTV 75s tail light and even this one on a lower setting!

(I also remind you to have the rear rack tubes protected with a strong tape at all three pannier attachment points or the paint would be rubbed off after only a few rides).

Congratulations!
 
How lovely, Jeremy! Excellent work with the attention to any detail! Worth every cent!

You were a big help with this. Thanks again!

Funny to think, my Quick Rack had no rear accessory mount when I bought it (perhaps it is available as a spare part now?). No big deal for me as I'm attaching and removing the Quick Rack as needed so I wouldn't install a radar there myself.

Good point, as I do intend to ride sans rack most of the time. The Wahoo radar would have to mount on the saddle rails to coexist with my saddle bag, but there's an adapter for that. If Wahoo fixes the bike detection problem, I'll definitely get one.

Regarding the Lezyne tail light. 400 lm is a night vision killer for drivers. You might do this experiment. Have your Vado SL outside at night with the tail light on and walk away for some 300 yds. You might be surprised how strong the light is! I have lost my 400 lm Lezyne but when I had it, I learned using it at a low (constant) setting. Perfectly visible and a long battery life! Now, I use my older KTV 75s tail light and even this one on a lower setting!

Rarely ride at night and select the dimmest tail light setting when I do for this very reason. But that 400 lm is just what I want during the day.

(I also remind you to have the rear rack tubes protected with a strong tape at all three pannier attachment points or the paint would be rubbed off after only a few rides).

Already put helicopter tape on the seat tube. The rack instructions recommended taping the pannier rails as well, but I balked at that step. At your suggestion, will tape the rack tomorrow.

Does it bother anyone else that helicopters use tape?
;^}
 
The last thing. Ortlieb panniers have had a single design glitch from the beginning, a glitch that is very well described in the documentation (but who reads it?)

1791177216940.png

All these bolts are held in place by big plastic nuts inside. As far as I can remember, Ortlieb has never used a threadlocker for those bolts. The fine print somewhere reads you need to inspect the bolts for every 200 miles ridden and possibly re-tighten them. My observation is you need to do it for several times over the lifetime of the pannier (later, the bolts hold on tightly). I haven't put the threadlocker myself and had some issues with several older bags of mine. Just be aware and check the bolts once in a while!aaaaaa

Or, perhaps I have threadlocked my most used pannier bolts? It would solve the problem forever!
 
Last edited:
Back