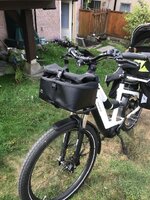
Riese and Müller front bag

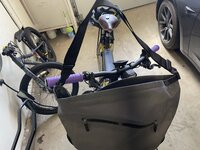
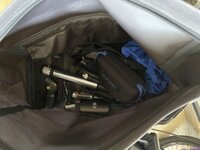
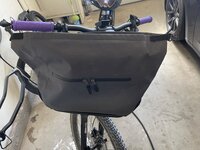
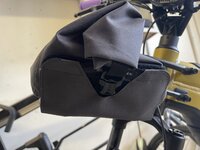
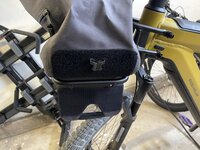
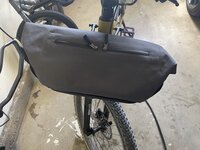
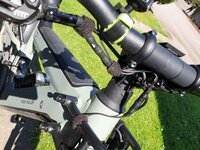
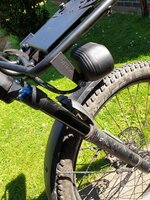
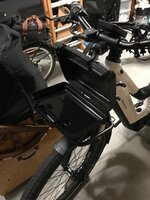
This is what I found and attached to my front rack. Just the right size for small objects such as my wallet and phone. Attached with some larger sized zip ties and anchored to the rack. Easy and a simple waterproof solution. You can also attach a lock.

So before I get asked where to get such a thing...I don't know. I had this sitting in my pile of astronomy gear for a couple of years.
 

Attachments

  • IMG_3042.jpg
    IMG_3042.jpg
    70.8 KB · Views: 488
  • IMG_3043.jpg
    IMG_3043.jpg
    68.8 KB · Views: 485
I received the R&M front bag and am a bit luke warm on it.

Pros:
  • It looks nice and fits the rack perfectly.
  • Made with thick, sturdy material.
  • It's large, haven't measured volume but I could fit a change of shoes, clothes and some essentials for a trip to the climbing gym, or could hold a half bag of groceries from the market.
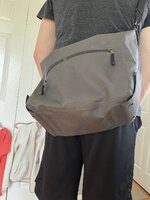
  • Easy on and off with a couple velcro straps on the side and comes with a shoulder strap so you can carry it around easily.
  • Top rolls down for a bit of extra water proofing or to get it out of the way with smaller loads.

Cons:
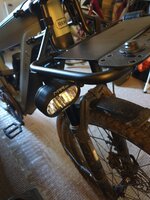
  • You'll want to relocate your headlight to be under the cage but this is probably true for any bag or basket you put up front.
  • No internal storage or dividers. There are two small zipper pockets accessible from the outside, big enough to hold the carry strap and maybe a small phone or a mini all in one tool kit or something.
  • Rolling the top and snapping it down is frustrating as the velcro that goes over the snap interferes. You need to half snap it closed, pull on the velcro and then you can fully snap the fastener closed.

I'll keep using it for a bit and see how my use of it changes. Primarily I was looking at it as the carry bag for stuff that normally goes into a backpack. Toolkit, pump, tube, chain lock, etc. Will need some smaller organization bags to hold those items, keep them secure and from rattling around. Hope this helps others that have been looking at this bag as an option.
 

Attachments

  • bagcarry.JPEG
    bagcarry.JPEG
    512.1 KB · Views: 452
  • bagopen.JPEG
    bagopen.JPEG
    364.4 KB · Views: 456
  • bagsize.JPEG
    bagsize.JPEG
    477.8 KB · Views: 433
  • bagsnap.JPEG
    bagsnap.JPEG
    428.5 KB · Views: 442
  • bagvelcro.JPEG
    bagvelcro.JPEG
    494.3 KB · Views: 434
  • bagfolded.JPEG
    bagfolded.JPEG
    500.4 KB · Views: 440
Last edited:
Coincidentally, I obtained my front carrier bag today as well. I've just screwed it on to the carrier, for extra security, and now wish I hadn't. It's going to be a real faff to unscrew it every time I want to use the carrying strap!
 
I received the R&M front bag and am a bit luke warm on it.

Pros:
  • It looks nice and fits the rack perfectly.
  • Made with thick, sturdy material.
  • It's large, haven't measured volume but I could fit a change of shoes, clothes and some essentials for a trip to the climbing gym, or could hold a half bag of groceries from the market.
  • Easy on and off with a couple velcro straps on the side and comes with a shoulder strap so you can carry it around easily.
  • Top rolls down for a bit of extra water proofing or to get it out of the way with smaller loads.

Cons:
  • You'll want to relocate your headlight to be under the cage but this is probably true for any bag or basket you put up front.
  • No internal storage or dividers. There are two small zipper pockets accessible from the outside, big enough to hold the carry strap and maybe a small phone or a mini all in one tool kit or something.
  • Rolling the top and snapping it down is frustrating as the velcro that goes over the snap interferes. You need to half snap it closed, pull on the velcro and then you can fully snap the fastener closed.

I'll keep using it for a bit and see how my use of it changes. Primarily I was looking at it as the carry bag for stuff that normally goes into a backpack. Toolkit, pump, tube, chain lock, etc. Will need some smaller organization bags to hold those items, keep them secure and from rattling around. Hope this helps others that have been looking at this bag as an option.
Murse?
 
Relocating the headlight's going to be fun for anyone who bought their bike more than 6mo ago...
 
I'm curious too. Did you splice in more length? Do you have high-beams?
 
Last edited:
I'm curious too. Did you splice in more length? Do you have high-beams?
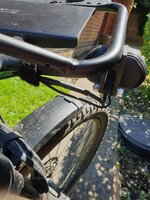
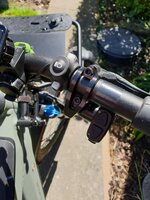
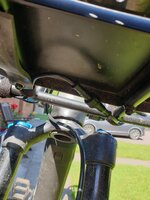
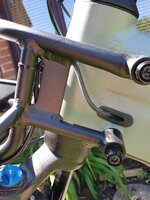
Yes I spliced a 2 pin waterproof connector into the power cable. It's neatly hidden under the rack. I routed the cable through the hole that used to have the dropper post cable before soldering the connector on. The splices were sealed with adhesive lined shrink tube.
I found the high beam switch cable to be long enough but did move the switch in a little to be sure. Note I already have a modified arrangement for the E14 controller where the headlight switch is not fixed to the brake.
I 3D printed the bracket (which I'm going to change). Hopefully the pictures will be useful.
Oh and I should mention that my bars are 20mm narrower than stock as that helps a bit with the headlight high beam cable length.
 
Sorry I don't seem to be able to attach any pictures Sorted
 

Attachments

  • 20210718_131451.jpg
    20210718_131451.jpg
    304.5 KB · Views: 386
  • 20210718_131349.jpg
    20210718_131349.jpg
    259.4 KB · Views: 382
  • 20210718_131320.jpg
    20210718_131320.jpg
    258.6 KB · Views: 390
  • 20210718_131307.jpg
    20210718_131307.jpg
    228.1 KB · Views: 377
  • 20210718_131235.jpg
    20210718_131235.jpg
    578.4 KB · Views: 362
  • 20210718_131212.jpg
    20210718_131212.jpg
    500.9 KB · Views: 386
Last edited:
Relocating the headlight's going to be fun for anyone who bought their bike more than 6mo ago...
Is that when the supernova lights got the fancy plug and play connector? I didn’t see an extension for the power connector on their site, just for the high beam switch. I’ve asked if they have one available, waiting to hear back. For sure will make relocating the light much easier.
 
Is that when the supernova lights got the fancy plug and play connector? I didn’t see an extension for the power connector on their site, just for the high beam switch. I’ve asked if they have one available, waiting to hear back. For sure will make relocating the light much easier.
Yeah, they switched the headlight to one with a U connector. The power cable extension and high beams extension are the same part; you just use two for a HS bike. There's a step-by-step here.
 
Ah so you confirmed it works, great. I was worried about the wire gauge being smaller and heating up the cable too much though not a lot of amperage going through so probably not too big of a concern. I’m going to try rerouting the cable from the headset to the side port first, that might give me enough slack to not need the extension. Also saw the bracket for the front carrier, probably better than what I came up with. I rooted around the spares bin and found some rubber handlebar shims that fit perfectly and give a nice tight fit. I declared it “good enough”. I’ll get some photos posted once it’s all wrapped up, it’s all part of a whole cockpit redesign and cleanup.
 
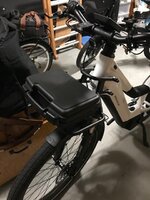
This is the bag that I just got from my local RAD dealership. The R&M bag was too much trouble to get as if I had ordered it after the delivery of my Multicharger, the LBS would have to charge me for the shipping costs from Germany. But as of my most recent information, the bags are not available because they are allocated to new bike shipments. So I found this and after riding to my local RAD dealer, I tried it and bought it right then and there.
 

Attachments

  • IMG_3212.jpg
    IMG_3212.jpg
    114.5 KB · Views: 408
Back