Haibike SDuro (Yamaha) Trekking RC -- Tips on replacing display mount?

Nick S

New Member
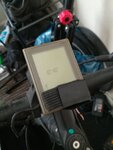
Per my other thread, I received the replacement display mount today. I'm planning to try to replace the mount myself.

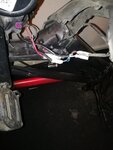
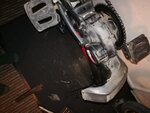
Has anyone else replaced the Yamaha display mount on one of these bikes, or a similar bike? If so, any tips on how to do so? Haibike support indicated that I will want to remove two of three motor mounting bolts and allow the motor to pivot out of the way to get access to where the display connection plugs into the motor / controller.

It'd be awesome to see a diagram of which bolts / parts to remove, as well as any tips people may have on how to thread the cable through the frame to handlebars. Seems like I could tape a strong line to the old display mount cable before threading it out of the frame, then tape the line to the new cable and pull it back the other direction to the motor.

Thanks in advance for any tips!

This is how you do it. Just make sure you tighten those bolts to the correct torque spec once done.

 
This is how you do it. Just make sure you tighten those bolts to the correct torque spec once done.

Thanks so much, Ravi! I assume it's the 3 6mm hex head motor bolts where the torque (22Nm) is more important, rather than the 4 3mm motor cover bolts? I do have a torque wrench, but I don't have a 3mm hex socket. I'll just make sure they're nice and snug.

For any reading this before watching the video, the bolt you loosen but leave in to pivot the motor is the rearmost 6mm bolt (around the 6 minute mark). It's a little unclear if you even need to remove the motor cover bolts, but I'll find out. The display cable connector has 4 wires; at least in the video, they are orange, red, brown, and black.

I am actually planning to autopsy the old display mount before I remove it, on the off chance I may find an easy fix (bad solder joint, etc.). It may turn out I don't need to replace the mount after all, but we'll see.
 
I assume it's the 3 6mm hex head motor bolts where the torque (22Nm) is more important, rather than the 4 3mm motor cover bolts? I

That's right, Nick.
As you suggested troubleshooting the display before opening the motor is a good idea.
 
Just a quick update -- I received the replacement display mount / button pad from Raleigh support, and had time over the long Memorial Day weekend to replace it. I took a 4-5 mile test ride, and did not see the error re-appear, so fingers crossed, the issue is resolved. I did open the old display mount before swapping in the new one, but found no obvious problems / loose wires.

One problem I ran into during the replacement was that two of the three 6mm cap head motor bolts (that have a ring marked 22 NM around the head) were hard to remove, one in particular. After removing it, I found that the last 1/2" of threads were damaged. It seems likely that it was crossthreaded or heavily over-torqued during assembly. I'll need to replace the bolt, and I'm hoping that the threading on the frame isn't damaged.
 
Could any of you post any tips on doing this?

Is this as simple as the video linked above shows? A straight forward disconnect the old part then feed the new part into the motor and reconnect?

I've ordered a new display holder and it should arrive later today. I hope to do this Monday and am a little apprehensive.

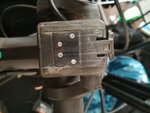
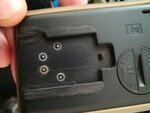
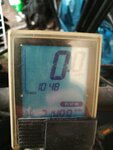
I've used some heavy duty Velcro to keep it going the last 9+ months but it does have a tendency to cut in and out over rough ground and goes a bit mental in the rain. The broken display holder ends up chewing through new LCD displays after a few months. The back of LCD display is only 4 months old and it's my 3rd one I've had. Bought 2 last year alone and one more this week.
 

Attachments

  • IMG_20200222_104004.jpg
    IMG_20200222_104004.jpg
    130.7 KB · Views: 777
  • IMG_20200222_104022.jpg
    IMG_20200222_104022.jpg
    300.8 KB · Views: 811
  • IMG_20200222_104031.jpg
    IMG_20200222_104031.jpg
    268.1 KB · Views: 839
  • 15823684571541556307625.jpg
    15823684571541556307625.jpg
    189.1 KB · Views: 827
Well I barely got to work today. My LCD just kept coming loose uphill, downhill, on the flat, over speed bumps. Loads of wind too.

I've given up working.

Time to go home and pull an all nighter to install parts.
 
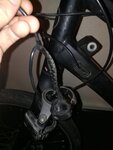
Just got started and 3 of the Allen key bolts came out no problems but one of them the head stripped. So now I'm stuck with the bash guard on.

I've watched some YouTube video on getting out stripped Allen bolts but nothing works because of where the bolt is deep in the "bash guard".

Only possible solution I can think of is to somehow cut or break the bash guard and then use a grip to twist the bolt out. So new bolt at a minimum + a new bash guard too??!

What a day ey..?

Any ideas?
 

Attachments

  • IMG_20200222_201715.jpg
    IMG_20200222_201715.jpg
    139.6 KB · Views: 755
  • IMG_20200222_203638.jpg
    IMG_20200222_203638.jpg
    289.6 KB · Views: 737
Last edited:
Well I got it done in the end.

The bash guard is quite stiff but also flexible in a very tough way. It took some fiddling and trial and error but I managed to twist it around and bend it out the way so I could lift the motor as shown in the video linked above.

What JayVee mentioned about getting the cables back in the downtube and out of the way was very useful. I tried a few times but could not get the 2 large bolts to fit - until I remembered what JayVee mentioned.

Thank you very Much: Nick S, Ravi Kempaiah & JayVee!

Just took my ebike for a little test run and it all works. Tomorrow I'll work and give it a proper testing.
 

Attachments

  • IMG_20200222_223207.jpg
    IMG_20200222_223207.jpg
    272.1 KB · Views: 819
  • IMG_20200222_223150.jpg
    IMG_20200222_223150.jpg
    227.4 KB · Views: 951
  • IMG_20200222_210827.jpg
    IMG_20200222_210827.jpg
    231.7 KB · Views: 745
  • IMG_20200222_210754.jpg
    IMG_20200222_210754.jpg
    186.6 KB · Views: 925
  • IMG_20200222_205551.jpg
    IMG_20200222_205551.jpg
    303.6 KB · Views: 747
Yeah it was well messy!

The bright side of being forced to do this last night is that I've now seen how I can do this & now I'm considering taking the motor off completely to open it and inspect the motor bearings and inners (as per the links on here for performancelinebearings.com).

I was considering taking it into performancelinebearings.com for a full service at some point but the distance to travel + travel costs + time off work + lost earnings meant that it was a low priority. Now I feel slightly confident that I can possibly service grease and bearings myself. Be a whole day job I'd guess, being methodical and careful, but a lot cheaper.
 
Last edited:
Yeah it was well messy!

The bright side of being forced to do this last night is that I've now seen how I can do this & now I'm considering taking the motor off completely to open it and inspect the motor bearings and inners (as per the links on here for performancelinebearings.com).

I was considering taking it into performancelinebearings.com for a full service at some point but the distance to travel + travel costs + time off work + lost earnings meant that it was a low priority. Now I feel slightly confident that I can possibly service grease and bearings myself. Be a whole day job I'd guess, being methodical and careful, but a lot cheaper.
I have been getting the dreaded er15 code on my Yamaha display. Seems Ok for first 30 seconds then up it comes. I have ordered a new display mount, but a temporary fix using a zip tie to hold the display screen firmly in place on the unit is working really well. Will let you know how I get on with replacing the mount, the information above will be really helpful.
 
I have been getting the dreaded er15 code on my Yamaha display. Seems Ok for first 30 seconds then up it comes. I have ordered a new display mount, but a temporary fix using a zip tie to hold the display screen firmly in place on the unit is working really well. Will let you know how I get on with replacing the mount, the information above will be really helpful.

I'm on my 4th display and 2nd display holder & done nearly 23 000 miles.

My experience of er15 is that the actual LCD display is worn out at the 2 slots that mounts the display holder. The LCD display is made from a softer plastic so wears out much faster than the display holder.

Tip: I buy parts from ridewill for LCD display etc as they're much cheaper than from UK (sometimes 40% the cost).[/QUOTE]
 
Just a quick update -- I received the replacement display mount / button pad from Raleigh support, and had time over the long Memorial Day weekend to replace it. I took a 4-5 mile test ride, and did not see the error re-appear, so fingers crossed, the issue is resolved. I did open the old display mount before swapping in the new one, but found no obvious problems / loose wires.

One problem I ran into during the replacement was that two of the three 6mm cap head motor bolts (that have a ring marked 22 NM around the head) were hard to remove, one in particular. After removing it, I found that the last 1/2" of threads were damaged. It seems likely that it was crossthreaded or heavily over-torqued during assembly. I'll need to replace the bolt, and I'm hoping that the threading on the frame isn't damaged.

Well done. Did you replace the display with the same LCD type or upgrade to the Type X?

1587964202852.png
 
Ah, so you replaced the 2016 LCD display/mount with the LED version shown in the left hand picture? If so does it have compatible electrical connector next to the motor?

ps can you share a link to that information as I can't find it
Thanks
 
Last edited:
Well done. Did you replace the display with the same LCD type or upgrade to the Type X?

View attachment 50903
I have a similar question to "mcgrit" that I'm hoping you can answer. I have a 2018 Haibike Sduro Hardnine 1.0 and would like to know if it’s possible to change/convert my LED display to an LCD display or maybe even to the Sideswitch display?
 
Ah, so you replaced the 2016 LCD display/mount with the LED version shown in the left hand picture? If so does it have compatible electrical connector next to the motor?
ps can you share a link to that information as I can't find it
Thanks

I have a similar question to "mcgrit" that I'm hoping you can answer. I have a 2018 Haibike Sduro Hardnine 1.0 and would like to know if it’s possible to change/convert my LED display to an LCD display or maybe even to the Sideswitch display?

Just to clarify... I have 2 EBikes outfitted with the new Yamaha motor/display/battery systems.
One PW-SE and one PW-X: both have the upgraded CANBUS LCD display on the right diagram.

If you have the original PW motor, then only the LED or original LCD display are compatible... left diagram.
Hope this helps. ;)

1588530313780.png
 
Last edited:
New mount arrived, so set about fitting yesterday to my 2016 Haibike All-Mountain SL. Took about 25 mins and was fairly straight-forward. I attached a wire to the old cable before I puled it out and then used that wire to pull through the new cable - couldn't have been easier. A 15 mile test ride was good and the err15 message did not reappear. Think I will leave the display in situ from now on in the hope that will lessen the wear between the mount and display, as from all I have read this seems to be the cause of this error. Thanks for the tips above as they helped.
 
Back