WilliamT
Active Member
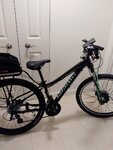
So this is another build I did for someone that recently had to give up her eBike (the Specialized I built earlier for someone else) because it was on loan. I purchased a 2017 Marin Wildcat Trail 3 to fit her size and then added the kit similar to the Specialized.
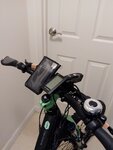
This time is that I had to work with a bike with hydraulic disc brakes instead of v-brakes. The kit I received is a v5.0 kit which uses the same display C965 as the Bafang mid-drive kits they sell. On the previous kit (v4.0) there were 5 levels of assist. With the new kit there are 9 levels of assist. I think the older one is nicer.
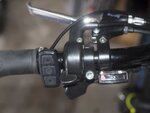
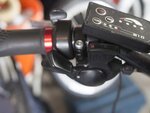
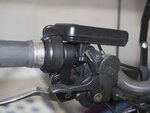
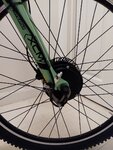
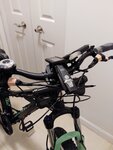
On this bike, the pedal assist was much easier to install as the crank axle was a perfect fit; no clipping of the PAS disc needed. The hydraulic brake cutoff sensors are clunky and the tape it comes with just doesn't hold. I plan to wrap it with black plumbers tape so it looks better. I also replaced the 720 mm flat bars with a 640 mm bar with a 50 mm rise to make for a more comfortable ride. Its going to be used as a weekend bike. I also replaced the seat with a comfort seat and had a carbon fiber seat post lying around so I just threw that on there too. Also added a Niterider 750 light and a classic bell.
Overall very easy to put together.
With this bike (and the Specialized), I added a Grin v3 Torque arm to the front and loctite the threads. Before each ride and after each ride I check the bolts. So far, it has lug nuts have stayed very tight and haven't loosened at all. I'm impressed.
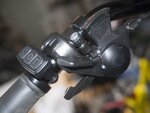
One thing that I've noticed with these kits is the thumb throttle is bulky and can get in the way of the shifters. When you click back, the lever can hit the throttle when placed adjacent to the shifter and brakes. Because the shifter is separate from the brakes on this bike, I added a bar extender and moved the shifters there.
I would say 95% of the time, this gears never get shifted. It usually on the largest at the front and in the middle towards the smallest at the end.
This bike is used mainly with the pedal assist sensor. On occasion the throttle is used to provide a bit more assist without have to change the PAS setting. So you can still get a decent workout on it. Total weight remains under 50 lbs with everything including the super tourist rack that holds the battery in the bag with bars on the side for panniers. Bought the same topeak ex mtx rack because it works well.
With the rack, I had to return the disc version and get the non-disc rack. These mountain bikes have a 6 inch wide dropout at the rear and the disc racks are for 4 inch dropouts. The non-disc racks work perfect on mountain bikes regardless of the brake system. Something to keep in mind.


Last edited:

