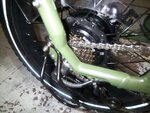
I have been hinting and posting about my ongoing modifications to my RadRunner. Unfortunately, there is not that much out there on modifying the RadRunner, so much of this was trial and error. Many have said some of these things cant be done . Wrong! First off, I took my first ride last night, after installing my new true 750w Bafang (1000+watt) hub motor. The stock motor is 500w, with 750 peak ability. Apparently the Canadian model motor is even smaller from what I can tell. I had already installed the new 35a controller, and the new color display. I had ridden with new controller and display, but this was the first time with the new motor included. HOLY COW! I was SHOCKED how much more powerful it was. I literally nearly lost the bike as it popped a full wheelie the first time I twisted the throttle. The torque and power is no less than incredible. I have some adjusting to do with the controller settings, because the thing want's to pull a wheelie every time I start off, and even most times I add throttle from a slow roll! Trust me, I am NOT exaggerating.
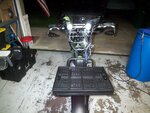
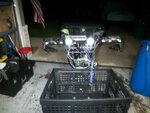
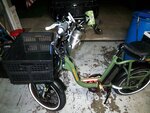
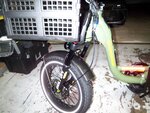
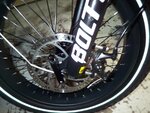
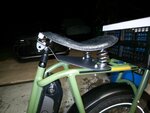
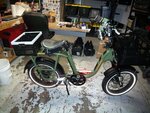
My other upgrades include adding a Bolton suspension front end (huge improvement). It took a small amount of finagling, a few custom spacers (simply cut from stainless tubing), and the disk brake mount mounts directly to the suspension leg into the pre existing mounting holes. I did have to fabricate a longer axle, which was basically a piect of metric threaded rod, as the original was too short). Very clean. Then I added a 2000w headlamp, but I don't think the controller liked it, plus there was only about 18v coming from the headlamp wires. So I made a custom cable which runs from the charging input on the battery discreetly to a switch and the headlamp, and it SHINES bright! I like night riding on the beach and golf course, so I added 2 more headlamps to a handlebar extension with a separate switch, and I can adjust them up, down, and side to side, and I can illuminate things REAL GOOD (make your light is rated for at least 52v!) Great addition! Then I ordered a bunch of parts like seat pans and seats from Amazon, along with several types of springs and a suspension seat post, and concocted a REALLY cool and VERY comfortable seat setup. At first I moved the bench seat forward, and supported the front with a PVC pipe into the seat post. It worked great, but that bench seat (an add on from Rad) is foam rubber, and my rear end got real sore after 15 min or so. My new seat looks really cool (I think), and it super comfortable even on long rides. It is sprung with 2 coil springs in rear, and the suspension seat post in front, for a very nice, smooth ride, if not just a bit bouncy over big bumps (which is WAY better than the harsh solid frame non suspension it came with). It is very reminiscent of a Harley solo saddle!
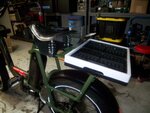
Other changes include adding a cup holder, i-phone holder, bluetooth amplified speaker, a handlebar extension bar, a fully adjustable handlebar riser/extender for perfect placement of the handlebars. I added a couple of rear view mirrors, hanging low, which are actually quite useful. I mounted the new controller into a waterproof controller box, and was able to mount the new controller (in the sealed box) in the same place as the old one, and even incorporated the metal protection plate under it as was originally set up. I had some concerns about cooling, but no issues to date... I have the Rad front rack, and mounted to it a collapsible milk crate type crate. I added a second larger collapsible milk crate type crate in rear, where the bench seat used to mount. These hold my cooler, flip flops, towel and whatever. I installed some less aggressive "barefoot" pedals, which I really like! It all mounted up in the original threaded mounting points. I did not have to drill a single hole anywhere for ANY of these modifications! That and the fenders and the headlamp all mount up perfectly with little modification. I added some stick on reflectors, which look a bit dorky, but again I ride a lot at night and want to be seen!
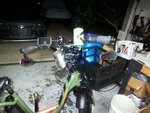
And now, the photos. They are terrible, but it will give you an idea! My next project (just got the parts in except a tire) is to add an independently controlled front hub motor/wheel, for extra "umph" in soft sand on the beach. I got a true 500w hub motor, and a handlebar mount twist throttle. Yes, I know I am reinventing the wheel here, and probably could have bought a better bike for what I have invested, but for me, the fabrication is as much fun (or more) than the actual riding!
Attachments
-
 100_3202.JPG287.8 KB · Views: 4,090
 -
 100_3201.JPG355.9 KB · Views: 2,698
 -
 100_3199.JPG285 KB · Views: 2,783
 -
 100_3197.JPG290.3 KB · Views: 2,844
 -
 100_3195.JPG341 KB · Views: 2,579
 -
 100_3194.JPG440.3 KB · Views: 4,408
 -
 100_3193.JPG355.5 KB · Views: 3,546
 -
 100_3192.JPG314.1 KB · Views: 2,610
 -
 100_3188.JPG241.5 KB · Views: 4,593
 -
 100_3186.JPG483.7 KB · Views: 5,799
Last edited:
