Dengfu E06

The bike was a bit over $3K, but taxes/customs fees, etc + shipping added a bit over $900 so the bike as delivered was right at $4K.


If you say you want a custom color they can send a paint chart so you can pick the color you like.
Not bad, considering, but I´m a bit over the hill for a technical MTB. What I have serves well my needs.
 
The next big upgrade...wheels and tires!

DSC_3577.JPG


DSC_3590.JPG


DSC_3587.JPG


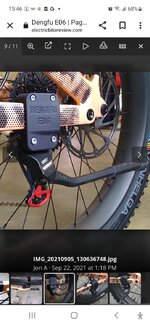
27.5x80mm Carbon wheels with 27.5X4" Vanhelgas.

I've been a big cheerleader for this tire size ever since I first tried it, but even I was shocked, and I mean shocked at the difference it made. I guess I had put enough miles on the 26x4.8's that I really got used to them on this bike. And granted, I was going from one extreme to the other--the 4.8's with tubes on very heavy wheels, these tubeless on very light wheels--so one would expect it to make a significant difference.

But even I was shocked at the difference it made. It feels like a completely different bike. It feels like a "mountain bike" now, very light on its feet, quick, easy handling. The ride over bumps/small jumps is much better, it feels much faster.... This change was a bigger improvement to the overall feel of the bike than the fork upgrade was. Now the fork upgrade was pretty huge, but mainly noticeable over rough ground and higher speeds. This change is in effect in a big way all the time--even on smooth pavement.

The weight savings was substantial:

IMG_20210818_041232016.jpg


IMG_20210820_145516079.jpg


That also includes the weight difference of a GX cassette instead of an NX cassette, so the wheel/tire change alone is around 6 lbs. It may not sound like much, but with that weight all being unsprung and rotating mass, it has an outsized impact--it really makes the bike feel about 20 lbs lighter. The weight change + the tire size change is simply transformative. Given the 65 lbs I weighed the bike at before, you can see it is possible to get one of these bikes below 60 lbs.

For all those who think they don't like how Fatbikes feel/handle, etc, if you haven't tried one with this tire size on a light set of wheels, you don't know what you don't know. A huge step away from "fatbike handling," putting it much closer to "Plus bike" handling but with most of the "fatbike capabilities" intact--snow, sand, deep loose dirt, smooth ride dramatically reducing vibrations/"trail chatter," etc.

I originally wasn't going to do this right away as I think I spent around $1400 for the Nexties for my other fat bike...until I found these:


Cheap carbon 26" fatbike wheels have been around for a while from lots of brands including Ican, etc. But this is the first time I had seen "cheap" carbon wheels available in 27.5." I figured for $600 I was willing to take a chance on them. I can't recommend them 100% because I felt the packaging wasn't as good as it should have been, but other than that I have to say I'm pretty happy with what I got for the money.

They're double wall and rated for a rider weight of 330 lbs, so they should be quite durable. Obviously they come with Novatec hubs which I wouldn't expect to last forever under ebike use, so I'm already budgeting for an Onyx to replace the rear when the time comes, but they're probably better than the hubs that came with my stock wheels. Other than the hubs (I paid extra for Hydras on my Nexties for the other bike), I honestly can't tell any quality difference between these and the Nexties. They spin extremely true, the tire fits very tightly (should lessen the worry of burping out air/sealant at low pressures)....

They set up tubeless extremely easily:

IMG_20210817_171624796.jpg


Overall, to be up and running on carbon 27.5's for that price I have to say is a pretty good value. Obviously I haven't had them long enough to vouch for their durability, so take that FWIW.
 
All camoed up!

DSC_3598.JPG


DSC_3602.JPG


I chickened out on painting it...I hate painting things and I'm bad at it. I figured throwing some stickers on was the better choice for me--if I don't like it I can just peel them off! I used two sets (lots of acreage to cover on this bike) of these: https://groundkeepercustom.com/coll...amo-frame-keeper-mmf2k?variant=35537522983071 . Not cheap, but worth it to eliminate the hassle of painting. If I had to do it over again I'd do it differently and do a better job...but it's good enough for the ranch.

Now for a very significant "quality of life with the bike" upgrade.... Kickstand!

IMG_20210905_130037226.jpg


DSC_3648.JPG


DSC_3646.JPG


DSC_3650.JPG


DSC_3644.JPG


At this point I consider the wisdom of adding a kickstand to a carbon fiber chainstay an open question. Most OEM's don't do it, but some do (Trek Rail):


TrekRailCarbonKickstand.jpg


There's no doubt it adds some risk, but after weighing the pros vs the risk I gave it a go. With much of the use this bike is going to get--as a "transportation device," utility vehicle, etc, having to lay the bike down every time I need to open/close a gate or get off for any reason was a bit ridiculous. I can handle that on a "fun ride" with a mountain bike, but when my purpose is doing something else that's a different matter. When I'm hauling stuff and the ground is all mucky, that would be no fun at all. And when I'm hunting and laying the bike down means pointing a rifle in a potentially unsafe direction, that would really be no good.

So I figured I'm not going to live with that hassle for the next 5-10 years (or however long this thing lasts) on a daily basis just to avoid a bit of risk of something that probably won't happen. And if I do break it, I break it. I'll get a new rear triangle and drive on.

My goal was to attach the adapter to the chainstay securely and yet as "gently" as possible. I figured the best way to do this was to get as perfect a fit as possible. It wasn't as easy as it looks, as there are complex tapers and radii you don't see at a quick glance. I think I got pretty darn close.

The next thing was a layer of padding and isolation between them. For this I used nylon reinforced adhesive rubber:

IMG_20210904_175341009.jpg


This provides a cushion against any fitment error that would cause a sharp pressure point, it provides isolation against vibration and it also provides tons of friction. The clamp bolts on the top of the adapter are tightened just barely light finger-tight, and yet it's solid as a rock and doesn't move on the chainstay at all. So I think I did it about as well as possible.

I designed it to tuck in pretty well, pointing straight back to minimize the chances of hitting it on stuff:

IMG_20210904_180429516.jpg


IMG_20210905_130636748.jpg


DSC_3649.JPG


DSC_3645.JPG


For the kickstand itself, I went with this one: https://northwestbicycle.com/produc...ount-e-bike-kickstand-40mm-spacing-blk-ki5007

Having not used a bike with a kickstand extensively in about 30 years, I didn't really know which ones were good or bad.... I wanted something decent quality, offroad-worthy, sturdy enough to handle a heavy ebike, etc. I found this one, gave it a try and I have to say, so far so good. I've noticed none of the downsides I remember from the past--obviously due to its location there's no interference with your feet or pedals, so far have have yet to hear any rattling at all (much less a "spontaneous extension") over rough ground or even small jumps. And I haven't hit or snagged it on anything yet--I'm sure that'll happen eventually, but it's tucked in well enough hopefully that won't happen often.

It's the first bike I've ridden with a kickstand where as soon as I get on the bike I completely forget it's even there. It doesn't affect the ride experience at all, at least so far. And the bike is so much nicer to live with.
 
Jon
Thank you for this info, very nice,
and I love the kick stand info, gives me an Idea,
I am thinking about that same kick stand on the right side to provide better protection for the derailleur from the sage brush on my Wart Hog etc.

Last week I snagged a piece of sage brush, and I wasn't happy,
no damage done that I could find and everything shifted as normal etc,
Thanks,
Don
 
Fantastic. Closest thing I've seen to a legitimate fat full squish MTB. I think I want to build one from Dengfu's kit.
 
I want this Dengfu kicking stand E06.
 

Attachments

  • Screenshot_20221216-154613_Chrome.jpg
    Screenshot_20221216-154613_Chrome.jpg
    171.7 KB · Views: 98
Kickstand link cannot be found. I like that Kickstand.
Rome, I believe Jon A has access to a 3D printer and he had the mount bracket custom made. He did the same thing elsewhere with a small battery case in another post.

 
I enlarged the photo of Jon's post and found this information,
using the information off the kick stand, I found this KS and the spec's match,
Comp 40 Flex

The 40mm spacing is the screw width?
It does appear that Jon did print up the main frame attachment piece.


i purchased a few for our website sales but ended up giving all but one away as gifts. One left.

corki MTB Cycling Bike Bicycle Adjustable Anti-Skid Kickstand Parking Rack Stand Fit for 26’’-27.5’’ 700C Road/Mountain Bike - Stainless Steel


Condition: New
$20.99
1671364711792.png

E9CFF768-445D-4AA5-AD9E-B7EE36B4C837.jpeg
 
Back