BarnBoy's Hydra Adventures...

@BarnBoy
Maybe you could repost the controller programming bit in the dedicated thread below for easier future reference.
 
Hi folks and sorry for not writing or responding for a long bit here. My life got very complicated and I had some bike things that needed to be resolved too. The combination had me down for over a month now. BUT I’M BACK!!!! So put on you’re a$$-chaps folks, it is going to be a ride…

Before we go, I need to answer some questions from the above. @rtp - the blue handle bar tool is a Park HBH-3 to keep the bars in place and not banging your head or slapping your face when you manipulate the bike….


CHAPTER 10 – Yet more toolz….. (OH MY!)
OK, where to begin here. The first place is to assume you may need to remove your Bafang for whatever reason; what will you need? So, most things like a 13mm socket and metric hex wrenches should be standard equipment. But what about the following as you will need them…

  • ¼ Inch Flat Pin Punch - Sometimes the Bafang bolts are a bugger to remove. Dry or non-greased bolts are probably the man reason this can happen. To nudge them out, I suggest getting a pin punch and using a rubber mallet to help…
  • ISIS Crank Puller – I have my old and trusted Park Tools CCP-4.
  • Chan Link Tool – My Hydra came with a Taya e-NOVE-91 chain. I almost used my old chain breaker tool (pin popper!) and noticed a quick link. Immediately went to my favorite LBS and got a tool from Wolftooth. Man it is nice and easy…
  • Splined BAFANG Spyder Lock-Nut Remover Tool – Ok, this search dang near drove me crazy trying to find a tool. BAFANG, Luna and many others are either rather expensive or unobtainium. So, I am very happy to report that Bike Hand has a tool that is good, worked really well, can adapt to a torque wrench and will not break the bank. I got my YC-29BB-2A on Amazon. You can use that verbiage to find one that may meet your tastes if you don’t appreciate Bike Hand tools… (I am super impressed!)
  • Though not needed for the BAFANG, the Kindernay will need an oil change. Just a note of caution, the oil drain plug is a slotted screw that was ground in with a stationary disk cutter. The result is a rounded bottom slot that is very easy to break if you do not take care with your screw driver. Therefore, I bought a 5/16 slotted screw driver and then ground down the tip to thicken the blade and reduce the gap between the drain plug slot and the driver blade. No damage was done… (Thanks @Acme and @Merle Nelson!!!)
  • One more Kindernay tool would be a bleed kit. The shifting for Kindernay does not use the same hub oil. So if you want a bleed kit, I would recommend this one from RSN Sports available on Amazon. Then get a bottle of Magura (or ??) fluid when you need to do the brakes….
  • Another tool that I find very useful is the Xiaoxang BMS program in Apple or Android formats. The free version is nice to see the basic status, but the PRO version allows you to turn the battery ON/off and thus insert without sparks. I have had no issues turning it off or on. All kinds of cool feature open up. See the programs DEMO mode for more info….

TIPS:
  • You may be tempted to put the lock nut back on the BAFANG without a Chain Ring Spyder to protect the threads; DON’T DO IT!!!! You need the Spyder mounted to get the nut off…
  • You may want to verify that your battery pack outputs are not tied to the battery case (ISOLATED!).
  • You may want to verify that your battery input terminals inside the down tube are isolated from the frame/motor (use the cable bracket, the frame is rather conducive…).


CHAPTER 11 – Kindernay Oil Change…..
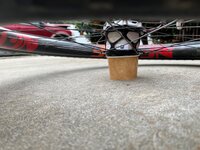
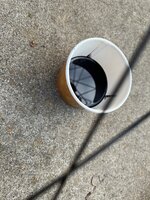
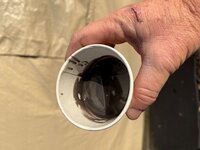
There is a great series of videos from Kindernay on how to change the oil, remove the rear wheel, etc. Before you try to change your oil, watch the video(s)! The Kindernay is a beautiful work of art. The oil change really made me appreciate how complex and beautiful this thing is. Way easier to remove than I ever feared, think I may have Rohloff to thank for that anxiety twitch. So I used a used soup cup from the local deli that fit nicely and allowed the hub to drain without spilling. I have approximately 330 miles and was rather shocked at how dark and metallic looking the oil was (see below). So I flushed it twice (approx. 20ml) before the 40ml fill. I recommend when filling that you move the cog so that the fill port is not being blocked by internals, to fill REAL slow and angle the wheel at 45 degrees. I found this angle gave best drain drip rates….
Oil Change 1.jpg Oil Change 2.jpg Oil Change 3.jpg


Enough adventures for today, and still more to come….
-BB


A side note! Motors are now being upgraded in Germany, and the default programming is now WAY different. ECO is 50%, Sport is 100% and changing Torque parameter with mode number; all others saturated. That stated, get your Innotrace/WW account activated ASAP to change it to how you will want it…
 
Hi folks and sorry for not writing or responding for a long bit here. My life got very complicated and I had some bike things that needed to be resolved too. The combination had me down for over a month now. BUT I’M BACK!!!! So put on you’re a$$-chaps folks, it is going to be a ride…
Good stuff!
That cup of oil had me thinking 'coffee' for a minute.. ;)
I doubt the color is worth worrying about - most mechanical stuff has a level of break-in/early oil change, plus who knows what color/viscosity came shipped in it new.. ? Any filings or anything?

Before we go, I need to answer some questions from the above. @rtp - the blue handle bar tool is a Park HBH-3 to keep the bars in place and not banging your head or slapping your face when you manipulate the bike….
Omg - lol...yes, I bought one to replace my OTHER Park tool handlebar holder (HBH-2, sigh) - the HBH3 i much nicer. :)

Great tools list. I need to check but think I have the same tool, or a different one from Bikehand for my M600. Like you said - unobtanium elsewhere. I think Aliexpress also has them if you can find one.

People with Kindernays should just bookmark this now honestly.
Surprised on the screw slot 'cut with a die grinder' but clever solution to regrind a flathead to make it fit better. Might be worth gauging the threads and length next time you do a change to pick up a backup screw?
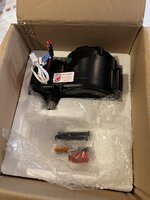
A side note! Motors are now being upgraded in Germany, and the default programming is now WAY different. ECO is 50%, Sport is 100% and changing Torque parameter with mode number; all others saturated. That stated, get your Innotrace/WW account activated ASAP to change it to how you will want it…
By upgraded, meaning the default programming for the Archon/Innotrace is changing, the firmware version as well, or ?

Weather has been crazy weird here - New Years Eve was in the 70s, snowed a few days later. Just got out in 50-something for the only likely ride day here for at least a week (will be 20s overnight) - hope you got some riding in after the oil change!
 
Awesome questions @rtp , hopefully I get them all. If not, flog me again please!!!

Oil was just dark black with a metallic sheen in the sun and as it sloshed. No real metal bits, just sludge like. The reason to question the dark color is the color of the oil in the Kindernay video after 3000 miles (5000km). I could still see red in their fluid, none in mine until flush. I only had approximately 330 miles on that change….

Yes I have backup screws on order with @Acme….

So a bit of clarification on the MOTOR. Innotrace Germany is now doing the controller upgrades with lubrication (seem quieter!). They even slap on a warantee void if broke sticker on the seams. So previously the configuration was 100% power, a Torque Sensitivity setting that matched mode number and all other parameters at max (throttle at 40%). The new one has ECO at 50% power and Sport at 100%. The Torque sensitivity is 4-8 for modes 1-5 and repeated again for 6-10. Throttle is still 40% and Motor Torque is maxed. Still WAY TOO MANLY for me….

Did I get em???
-BB

Edit- found a photo….
5B4C46B3-D11E-48D3-A88B-16BC1D48058E.jpeg
 
Last edited:
You got ‘em; thx! ;)

A good number of engines use special oils and/or added ‘assembly lube’ when putting them together. Considering the Kindernay engineering and tolerances, perhaps it does as well, thus the color and consistency difference? Not saying as anything definitive, just a possibility. How often do you do oil changes on the Kindernay/recommended schedule?

Oh yes, I saw that! Motors coming from Innotrace had an ‘upgrade option’ to have them (properly) lube the motor for a few $… Worth it IMO, but didnt know WW was sourcing motor and controller from them both? Either way, all good. LOL on too manly but hey, that’s why you get the software to adjus until happy, right? :)
 
Last edited:
Hi folks and sorry for not writing or responding for a long bit here. My life got very complicated and I had some bike things that needed to be resolved too. The combination had me down for over a month now. BUT I’M BACK!!!! So put on you’re a$$-chaps folks, it is going to be a ride…

Before we go, I need to answer some questions from the above. @rtp - the blue handle bar tool is a Park HBH-3 to keep the bars in place and not banging your head or slapping your face when you manipulate the bike….


CHAPTER 10 – Yet more toolz….. (OH MY!)
OK, where to begin here. The first place is to assume you may need to remove your Bafang for whatever reason; what will you need? So, most things like a 13mm socket and metric hex wrenches should be standard equipment. But what about the following as you will need them…

  • ¼ Inch Flat Pin Punch - Sometimes the Bafang bolts are a bugger to remove. Dry or non-greased bolts are probably the man reason this can happen. To nudge them out, I suggest getting a pin punch and using a rubber mallet to help…
  • ISIS Crank Puller – I have my old and trusted Park Tools CCP-4.
  • Chan Link Tool – My Hydra came with a Taya e-NOVE-91 chain. I almost used my old chain breaker tool (pin popper!) and noticed a quick link. Immediately went to my favorite LBS and got a tool from Wolftooth. Man it is nice and easy…
  • Splined BAFANG Spyder Lock-Nut Remover Tool – Ok, this search dang near drove me crazy trying to find a tool. BAFANG, Luna and many others are either rather expensive or unobtainium. So, I am very happy to report that Bike Hand has a tool that is good, worked really well, can adapt to a torque wrench and will not break the bank. I got my YC-29BB-2A on Amazon. You can use that verbiage to find one that may meet your tastes if you don’t appreciate Bike Hand tools… (I am super impressed!)
  • Though not needed for the BAFANG, the Kindernay will need an oil change. Just a note of caution, the oil drain plug is a slotted screw that was ground in with a stationary disk cutter. The result is a rounded bottom slot that is very easy to break if you do not take care with your screw driver. Therefore, I bought a 5/16 slotted screw driver and then ground down the tip to thicken the blade and reduce the gap between the drain plug slot and the driver blade. No damage was done… (Thanks @Acme and @Merle Nelson!!!)
  • One more Kindernay tool would be a bleed kit. The shifting for Kindernay does not use the same hub oil. So if you want a bleed kit, I would recommend this one from RSN Sports available on Amazon. Then get a bottle of Magura (or ??) fluid when you need to do the brakes….
  • Another tool that I find very useful is the Xiaoxang BMS program in Apple or Android formats. The free version is nice to see the basic status, but the PRO version allows you to turn the battery ON/off and thus insert without sparks. I have had no issues turning it off or on. All kinds of cool feature open up. See the programs DEMO mode for more info….

TIPS:
  • You may be tempted to put the lock nut back on the BAFANG without a Chain Ring Spyder to protect the threads; DON’T DO IT!!!! You need the Spyder mounted to get the nut off…
  • You may want to verify that your battery pack outputs are not tied to the battery case (ISOLATED!).
  • You may want to verify that your battery input terminals inside the down tube are isolated from the frame/motor (use the cable bracket, the frame is rather conducive…).


CHAPTER 11 – Kindernay Oil Change…..
There is a great series of videos from Kindernay on how to change the oil, remove the rear wheel, etc. Before you try to change your oil, watch the video(s)! The Kindernay is a beautiful work of art. The oil change really made me appreciate how complex and beautiful this thing is. Way easier to remove than I ever feared, think I may have Rohloff to thank for that anxiety twitch. So I used a used soup cup from the local deli that fit nicely and allowed the hub to drain without spilling. I have approximately 330 miles and was rather shocked at how dark and metallic looking the oil was (see below). So I flushed it twice (approx. 20ml) before the 40ml fill. I recommend when filling that you move the cog so that the fill port is not being blocked by internals, to fill REAL slow and angle the wheel at 45 degrees. I found this angle gave best drain drip rates….
View attachment 111439 View attachment 111440 View attachment 111441


Enough adventures for today, and still more to come….
-BB


A side note! Motors are now being upgraded in Germany, and the default programming is now WAY different. ECO is 50%, Sport is 100% and changing Torque parameter with mode number; all others saturated. That stated, get your Innotrace/WW account activated ASAP to change it to how you will want it…
A lot of great information there. Thanks for taking the time to post it all.
 
Thanks @Merle Nelson!

Ok Folks, what happens if you have too many pedal strikes and why are you having them?? If this is of interest, then continue reading….

CHAPTER 12 – Suspension Tuning…..
If you are a BIG BOY/GIRL, then you probably have been having pedal strikes or bottoming out your suspension. This is because most suspensions are tuned for a 160-180 pound (70-80Kg) rider. You need to tune your suspension immediately or you risk damage to your crank arms, pedals and possibly motor. Plus, that sudden push to the opposite side of the pedal strike can be quite dangerous (push you off the hill/cliff). Get this done today…

Start by getting the tuning guide/manual for your specific fork and/or rear shock and follow the instructions for initial settings; then go from there. For my FOX shocks, I used the www.ridefox.com, entered the 4 digit codes found on them to get the correct manuals and tuning guides. DO NOT JUST USE GOOGLE; total waste of time!!! So with that, you will need more tools…

  • High Pressure Shock Pump – Get a good one! Suggest one that can do 300PSI or more…
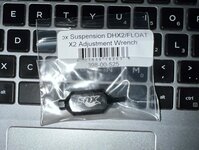
  • Fox 3/6mm Combo Hex Wrench – though totally unnecessary, I really liked the look of the tool so I splurged…
  • Notebook to write down settings and take notes– There are too many parameters to remember. So write them down and take good notes!
Fox Tool.jpg

Typically, you will need to first set the SAG. This might be 25-30% or 15-20% of the shock/fork travel. This is accomplished by adding/removing air to the shock. Your shock tuning guide will give you ballpark air pressures based on your weight. DO NOT EXCEED MAX PRESSURE! You may have to add/subtract pressure from the ballpark point to get the desired sag. The proper sag will prevent your pedal strikes!!!

The next step is to set the damper adjustments. Again, the tuning guide will have ballpark settings for High/Low Speed & Rebound(red)/Compression(blue) damping settings based on your weight. Having the small FOX adjustment tool made it easy for me to set then fine tune the damper adjustments to fit my riding style. But I’m still playing, and it is actually fun…

If you still are bottoming out or not using the full shock stroke (use the rubber o-ring indicator!), you can then add/remove the clip-on volume air spacers to change how progressive the air spring can be. THIS IS SO COOL, and can be done quite easily, but not on the fly like the damper adjustments. This stuff has definitely improved over the years…


CHAPTER 13 – BarnBoy In Frame Wheel Dishing Method…

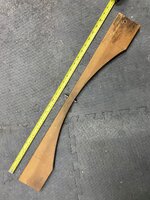
When I removed my rear wheel to change the Kindernay oil above, I spotted a scratch on the inside Non-Drive Side (NDS) swing arm chain stay. This is because of the red stripe, else I don’t think I would have noticed it. I eventually used a friend’s home-made dishing tool pictured below and found the wheel was dished by approx. 2.5mm (5mm tool gap). This verified the ballpark 5mm difference between NDS and Drive Side (DS) chain/seat stays and proved to me the swing arm could be used as a truing stand…

Shif Toolz.jpg

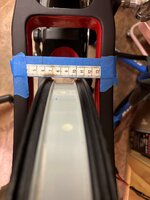
Now you have to be careful with the Kindernay, using the SHIFTER mechanism to set the dish and somehow clamp the two together in a truing stand. So, unless you have a blank shifter, the best truing stand will be your swing arm. The picture below shows how I set it up using a seamstress tape measure in the 90mm swing arm arch. The blue painters tape shows two black lines where the rim was until centered.

TOOLS:

  • Spoke Wrench – My wheels needed the SW-2 (RED) from Park Tools
  • Tape Wrapped Vice Grip – used to grip spoke and not wind up nor damage spokes!
  • WD40 – lube nipple/rim eyelets!
  • Dishing Tool – I was able to use a friends, but Park Tool has them too (WAG-5 for example)…

I then used the following recipe to bring the wheel toward the DS by 2.5mm.
  • Remove tire and tubes. Reference to the rim, not the tire!!!
  • Loosen all NDS nipples ½ turn. Be sure to use the vise grip to prevent spoke wind up in all steps…
  • Tighten all DS nipples ¼ turn.
  • Repeat tighten all DS nipples ¼ turn.
  • Now tighten and true all NDS nipples approx. 1/8 turn or more/less to obtain wheel true.
  • Verify proper tension in all spokes. Just use your hands, no need for a special tool (all the same?)….
  • Verify dish with dishing tool. (was scary close!)

Rim In Frame.jpg

Replacement cranks are in route, along with new SPD pedals as I think I bent the SPD axle too. Should be back riding again this Saturday….

Still more to come…
-BB
 
Wow, I'm impressed. How do you know spoke tension to stop at? I've read on EBR about people breaking spokes while riding. (Often referencing cheap spokes though.)

When I started into ebiking almost a year ago I had two "handicaps" one was I thought a good eMTB should cost $2K or less. :) Another was, I just want to ride. :)

Along the path studying the benefits of bikes and components over $2K I did notice that shocks may need to be serviced/rebuilt at fairly short intervals - in the hundreds of miles. And I did see that I'm going to have to learn the shock set up and tuning procedures. Your write up gives me the inspiration to get going and do that.

My Hydra felt so plush suspension wise right out of the box that I felt satisfied with that for initial use. But I have noticed I'm starting to take the shocks closer to the end of their travel, and too, I suspect I'm leaving a lot on the table by not knowing what each of the shocks dials and bits does specifically.

Again thanks for taking the time to do such an amazing write up.
 
Hi @Merle Nelson ,
The WD40 and taped up vise grips are hidden keys to the “technique”. After a while I fell in to what can only be described as a “Wheel Builders Zen”. I could feel the spokes that were too loose after the “Dish” was set and while working on the final true. The Nextie rims are probably the other key element in that the damn things are perfect from the start and just added to the zen to get it as true as I have ever done in my Park Wheel stand and alloy rims…. (Was strange and hard to describe! Was magical….)

FYI- I have a good bike mechanic and ski builder buddy that has pushed me past my fears. I suspected others are like me, thus the way/style I write these Adventures….

@rtp - thanks for that link mate. Exactly what I was hoping!!!
 
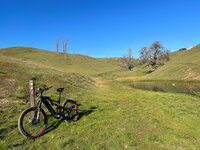
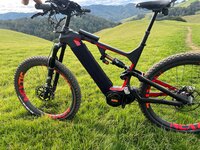
Hi folks, hope you all are doing well and having fun in your adventures!! The weather in the SF Bay has been incredible allowing me to go have fun. I am surprised that despite the lack of rain, the ground moisture seems to have trickled up causing some of the more shady areas to have a bunch of mud and other cow derived muck. Let’s just call it MUCK….
Hydra at Pond.jpg


CHAPTER 14 – DO NOT SPRAY WASH!!!
OK, your bike is caked in muck from the days ride. What do you do? Go to the local car wash? Lightly hit it with a garden hose or hose connected to your hot water tank?? Well if you have been doing any of the above, please stop immediately, open up your battery compartment, remove your battery, and check for corrosion/moisture on the battery and terminals…

As mentioned in Chapter 7, the Cerakote is super simple to clean up with a moist microfiber cloth. Or my personal favorite, disposable baby wipes. IMHO- a liquid bike polish finish rom the LBS makes the dirt almost fall off and keeps the matte finish perfect. DO NOT use a solid wax like carnauba wax; it will take the matte finish and make it look flat. This bike is ridiculously easy to clean compared to my painted bikes and the finish will not scratch. And as well advised by @rtp , make sure you spray on your rub-in cloth not on your bike directly, over-spraying onto brakes or other mechanical parts…..

What to do if you ride in rain soaked areas like @Prairie Dog & @Stefan Mikes ride (asking them and all others too!)? Many on the forum have suggested using neoprene leg braces as battery compartment protectors. They are good, but I sure like my Fahrer Akku cover more. I tried to order it direct, but for us A’Merkins, Amazon is far easier. It is a pain to manipulate the velcro as should be (two tube sizes), but has kept my battery compartment dry, dirt/dust and muck free…

Akku Cover.jpg


CHAPTER 15 – A revisit to CHAPTER 9, programming….
So back in Chapter 9 I mention a very simple Innotrace configuration where MODE # = Percent/10. Thus Mode 1 was 10% power (Mode 2=20%, etc.), and the Pedal and Motor sensitivity were set to 2 & 3 respectively on all modes (I like this POWER FEEL best!). I have had an itch to try to expand modes 1-3 a bit more, as I have almost no need for powers greater than 30% when riding sanely (don’t use Mode 4&5!). SPORT is my insane mode. My current plan is to change my programming so that Mode 1 is still 10% (same), Mode 2 is 15%, Mode 3 is 20% (was Mode 2), Mode 4 is 25% and Mode 5 is 30% (was Mode 3). This moved my previous Mode 2 and Mode 3 to Mode 3 and Mode 5, allowing me to add in in-between modes between my previous primary use modes. I just did the configuration and will let you know my thoughts. But in the meantime, I offer my previous perfection settings to help others tame the monster in the Hydra… (sorry @Merle Nelson – always improving!)
(save the following to a textfile.x1c)

Code:
 "bafang": {
    "Table1": [
      {
        "assist": 0,
        "torqueWatt": "0",
        "trottleWatt": "0",
        "sense": "0",
        "maxSpeedTorque": "0",
        "maxSpeedTrottle": "0",
        "motorTorque": "1"
      },
      {
        "assist": 1,
        "torqueWatt": "7",
        "trottleWatt": "40",
        "sense": "2",
        "maxSpeedTorque": "100",
        "maxSpeedTrottle": "100",
        "motorTorque": "2"
      },
      {
        "assist": 2,
        "torqueWatt": "13",
        "trottleWatt": "40",
        "sense": "2",
        "maxSpeedTorque": "100",
        "maxSpeedTrottle": "100",
        "motorTorque": "2"
      },
      {
        "assist": 3,
        "torqueWatt": "20",
        "trottleWatt": "40",
        "sense": "2",
        "maxSpeedTorque": "100",
        "maxSpeedTrottle": "100",
        "motorTorque": "2"
      },
      {
        "assist": 4,
        "torqueWatt": "26",
        "trottleWatt": "40",
        "sense": "2",
        "maxSpeedTorque": "100",
        "maxSpeedTrottle": "100",
        "motorTorque": "2"
      },
      {
        "assist": 5,
        "torqueWatt": "33",
        "trottleWatt": "40",
        "sense": "2",
        "maxSpeedTorque": "100",
        "maxSpeedTrottle": "100",
        "motorTorque": "2"
      },
      {
        "assist": 6,
        "torqueWatt": "46",
        "trottleWatt": "40",
        "sense": "2",
        "maxSpeedTorque": "100",
        "maxSpeedTrottle": "100",
        "motorTorque": "2"
      },
      {
        "assist": 7,
        "torqueWatt": "60",
        "trottleWatt": "40",
        "sense": "2",
        "maxSpeedTorque": "100",
        "maxSpeedTrottle": "100",
        "motorTorque": "2"
      },
      {
        "assist": 8,
        "torqueWatt": "73",
        "trottleWatt": "40",
        "sense": "2",
        "maxSpeedTorque": "100",
        "maxSpeedTrottle": "100",
        "motorTorque": "2"
      },
      {
        "assist": 9,
        "torqueWatt": "87",
        "trottleWatt": "40",
        "sense": "2",
        "maxSpeedTorque": "100",
        "maxSpeedTrottle": "100",
        "motorTorque": "2"
      },
      {
        "assist": 10,
        "torqueWatt": "100",
        "trottleWatt": "40",
        "sense": "2",
        "maxSpeedTorque": "100",
        "maxSpeedTrottle": "100",
        "motorTorque": "2"
      }
    ]
  }
}


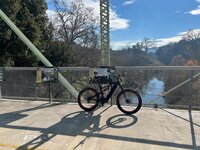
Hydra at bridge.jpg


CHAPTER 16 – Yet more on the Kindernay….
Have I mentioned, I LOVE MY KNDERNAY?!?!?! It is so sexy-scary, it is hard to describe until you actually HOLD ONE in your hands. Or better SHIFT ON ONE! It is easy to remove that rear wheel. But I noticed something and hoping others might comment on this too. I can’t tighten the axle lever super tight else I am unable to shift up or down. But if the lever is left just snug, all is OK with super awesome shifting, even at a total stop on that hill from hell….


CHAPTER 16 – Cranks….
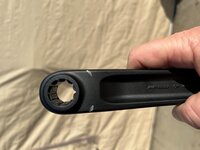
So I did a stupid thing and ordered some FSA cold forged ISIS cranks on eBay thinking because they fit Yamaha, Polini & BROSE motors, it should work for the Bafang Ultra. Well that would be WRONG! I even asked the seller and was assured they would fit Bafang Ultra motors too, but was pretty disappointed when the crank arm hit the Bafang motor cover screws and the arm was still approx. 2mm from the bottom out flange. BUMMER!! So, unless others know more, only the Bafang and Miranda cranks from WW will work due to the extreme offset needed for the Ultra motor. One benefit from the FSA cranks are that the bolts provide are WAY better than the Miranda units. The Miranda bolts will have the flat washer wedge in the crank arm assembly when tightened to spec torque. If this happens, use a flat blade screw driver to get the washer and rubber o-ring out before you try to remove your cranks with a puller….. (voice of shamed experience!)
Crank Arm.jpg

Be good, stay safe, and GO RIDE!!!!!
-BB

Edited Amazon link for cover thanks to @Merle Nelson
 
Last edited:
Folks, I see my verbal recipe for the programming is totally incorrect. What you see in the code for all setting is what I converged on but FORGOT. I tamed this beast even more than I thought and now tamed it further in ECO mode and have tweaked SPORT modes too....
Will explain better in a future post; sorry sorry!!!!!
-BB
 
Last edited:
What to do if you ride in rain soaked areas like @Prairie Dog & @Stefan Mikes ride (asking them and all others too!)?
BarnBoy: I don't know very much about your WW Hydra but my Specialized and Giant e-bikes all worked without any trouble even when riding through deep water... And Specialized e-bikes are even more waterproof than the Giant ones. (I rode through puddles that covered the motor of my Vado 5.0 on last Sunday!)

1643587191370.png

On the Sunday ride.

1643587271713.png

My e-bikes have been waterproof right out of the factory :)
 
On the point of corrosion BarnBoy is being kind to not point out that MERLE NELSON corroded his terminals. :) For anyone wondering how important of a point this is I had only used a garden hose to wash mud off the battery cover and bike. And I had only done it 3 or 4 times after rides since I took possession of Hydra on the day before Xmas. It looks to have leaked in at top of battery cover when sprayed and have a perfect path on down to terminals.

I was very surprised it had done so much in so little time and very thankful BB caught it rather than me finding worse damage months down the road.

On the point of programming, I am just weak when it comes to tech things and so appreciated it very much that BarnBoy would alter my stock programming to what he was using. It feels great. Smooth transitions of power when starting to use PAS and smoother steps from one level of assist to the next.

It greatly aided in extending my battery life on initial ride and I thoroughly enjoyed it riding my normal haunts again today. I will continue to enjoy these settings and can't quite imagine what might have me want to change them in the future.
Good Dealer Service there @BarnBoy ...
 
This is a super-enjoyable, informative write-up!

Does anyone have any thoughts on using dielectric grease on the battery contacts with/instead of the neoprene covers? It generally seems like a good idea, but I'm mindful that there's likely no seal on the battery compartment, meaning that water may affect other components too.
 
Thanks @WaxedWookie - I will take that compliment and hope the others that contribute here do too….

It is very difficult to make a non-water resistant bike suddenly water resistant. It has to be designed in! As @Stefan Mikes pointed out, his bikes are clearly IP65 or IP67 rated. If you don’t know about IP water resistance ratings, please Google an education…

The Bafang motors are IP65 rated. They use dielectric grease and I have had my LUNAtic buddies fry their motors and electronics by washing their bikes or going through the raging creek…. (Yes I know it has worked for others!!)

The Hydra frame has far too many openings (internal cable routing!!), especially near the battery compartment opening that any lightly sprayed water will get trapped in the compartment and guaranteed to collect and corrode the terminals. So if you are one that insists on using a hose, suggest you remove the battery (no power to fry the electronics!) and make sure you stay dry (not a bike for rain!!)…

More to come! Have programming updates and a cautionary note for the Kindernay clan - check your brake pads often!!!
-BB
 
Back